Installation Guidelines for a Built-in Gas Grill: Why is it so Important to Check the Device?
A built-in grill will come in handy if you like fried meat, fish or seafood, and you have the opportunity to go out of town to cook food on coals, as well as a garden plot (for example, you live in an apartment).
Then a built-in grill for the kitchen may be a suitable solution. It is smaller than its stationary brother and does not take up much space. This is what we will talk about below.
Features of the built-in gas grill
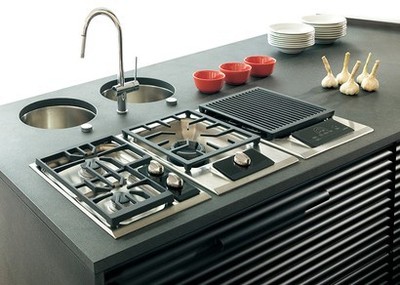
In principle built-in grill is no different from its larger brotherThis is the same grate located above the gas burner. Externally so they may differ.
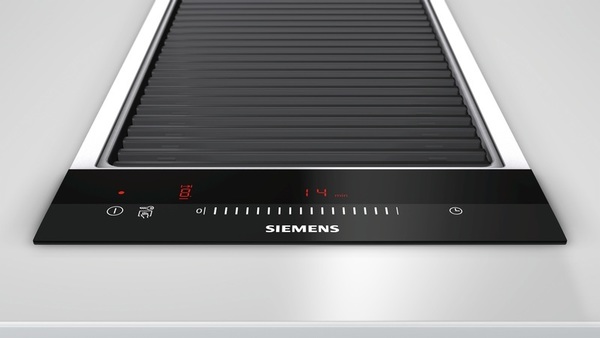
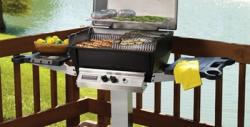
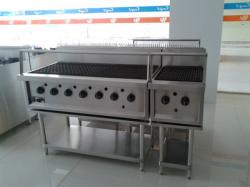
Photo 1. Built-in gas grill model ET375FUB1E, power - 2400 W, manufacturer - "Siemens".
The built-in version, like the stationary one, has one or more cooking zones. Their size varies. from 47x42 cm to 85x46 cm. The width of built-in grills varies from 71 to 140 cm, length - from 54 to about 70, height - from 56 to 76 cm. The main material for built-in grills is stainless steel. Most often, the device can be equipped with five or nine burners with a power 23-34 kW.
Recommendations for selection
In general, the recommendations for choosing a built-in grill are the same as for a freestanding one. The only additional restrictions may be dimensions grill and the place where you are going to build it.
It is also necessary to take into account the possibility of embedding - the device should not touch with flammable materials, so the furniture into which it is built must be non-flammable, for example, stone, brick or metal.
Preparation for use
The main stage before operation is gas leak test. To do this:
- Make sure the device off - close the access to the gas source and check whether the control handles are in the “off” position.
- Take it off control Panel.
- Turn the valve of the cylinder or the pipe leading to the grill counterclockwise, move the regulator lever to the position "on".
- Lubricate the following connections with soapy water: regulator - stand, manifold hose - stand, hose - manifold.
- If a leak is detected in these connections, you should tighten the reinforcement and repeat the check. If this does not help, then you need to call a technician.
- Check the connections of the regulator - cylinder, hose - regulator, taps - manifold. If a leak is detected in these places, you need to seek help from a specialist.
- After checking it is necessary turn off the gas supply and rinse all connections with clean water, as soapy water has a weak corrosive effect.
- Install control Panel into place.
Installation of the device
Installation must be carried out specialist in accordance with the regulations in force in the region of use.
Important! The gas grill must be installed in furniture made of non-flammable materials.
Installation is carried out as follows:
- Attach with screws side corners on each side of the device.
- Install across the back of the niche back barFor better fixation, lubricate the side projections with silicone.
- Place the device in the niche so that the projections of the rear rail are under the mounting brackets. Connect the flexible hose to with a nipple at the end of the comb.
- Check the device for tightness.
- Install battery power supply. Connect the wire from the LEDs and the wire from the power supply. The wires should not touch the bottom of the device. The batteries are installed inside at least, than 20 cm from the pallet. The wires should not interfere with its removal.
Connection
Connection to gas source:
- Connect eyeliner, included in the kit with a fitting on the end of the comb.
- Attach the other end to pipeline. Make sure the wiring is protected from damage and does not pass through the floor, ceiling or partition.
- The hose can only be used for connection pressure to the pipe system. Other connections require rigid or copper pipe or flexible hose.
- To connect to the pipeline, the supplied pressure must correspond to that specified in the device characteristics. In case of excess pressure, it is necessary regulator.
- When using a gas cylinder, the compartment with the cylinder must be isolated away from the grill compartment, have ventilation. The cylinder should not be stored under the grill.
Attention! The smell of gas attracts insects and spiders. Burners should be checked periodically for the presence of cobwebs in them, otherwise the flame may be yellow or even cause backfire. thermal shock.
Useful video
Check out the video showing the design of the Fulgor Milano grill.
Grill as a built-in part of the oven
A gas grill can also be built into an oven. Usually, the upper part of the device is allocated for it. The main disadvantage here is uneven roasting, because some parts of the interior space become hotter than others.

The way out of this situation may be spit, however, in this case you will have to spend additional time cleaning the oven.
It's good if the oven is equipped convection mode — then the fan will mix the air, which will help it heat evenly.
Otherwise, the food will need to be constantly turned over.
Function grill in the oven Also will help if you don't have space, where to install a built-in grill, for example, if the furniture is made of flammable materials or there is no place to install a cylinder. Such ovens are also useful if it is not possible to install a non-flammable base on the grill (for example, brick).
Comments