How to install and repair bimetallic heating radiators yourself? Step-by-step instructions

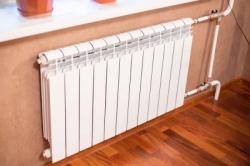
The advantage of bimetallic radiators over cast iron ones is increased heat transfer.
It is conditioned better thermal conductivity of aluminum, rather than cast iron, with an increased area of contact with air due to straight and shaped ribs.
Content
Basic rules for installing bimetallic heating radiators
In order for the radiator to effectively heat the room, but not take excess heat from the system, the optimal number of sections is calculated. Based on building codes and practice, for heating 1 square meter required 100 watts of power, the calculation formula looks like this:
number of sections radiator = square heated room x 100W / rated power one section, as specified by the manufacturer.
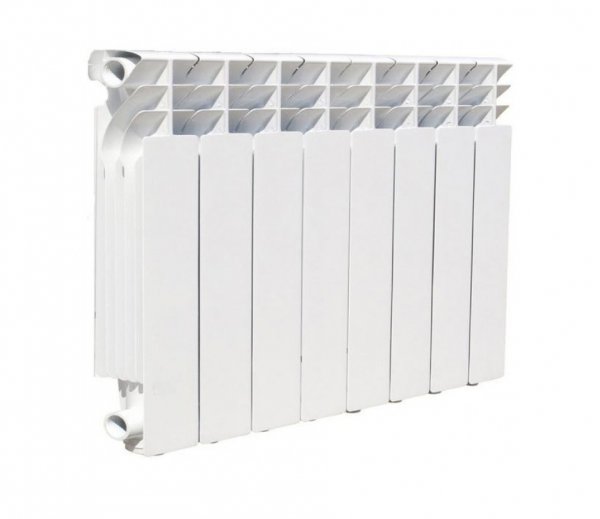
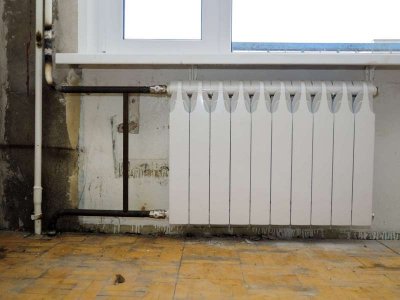
Photo 1. Bimetallic radiator model 300/85, thermal power 139 W, manufacturer - "Rens", Ukraine.
The calculations are valid for the standard room height - 270 centimeters. If the number of sections is not an integer, round up, but without good reason you shouldn't combine them more than ten sections in one battery, it is much more efficient to separate them into two separate ones.
When purchasing and then installing radiators, the optimal, most effective gaps and distances for convection are taken into account:
- It is advisable to place the radiator center window opening.
- Distance from the window sill 5-10 cm.
- Distance to the floor 8-10 cm.
- The distance from the radiator to the wall depends on the length of the brackets and is from 2 to 5 cm.
How to install batteries yourself: main steps
The main stages of installation of bimetallic heating radiators:
- Preparation systems, its flushing, prevention.
- Preparation radiator: assembly of the required number of sections, screwing on nuts, taps, and drain valves.
- Marking, installation of brackets.
- Installation radiator, filling it coolant.
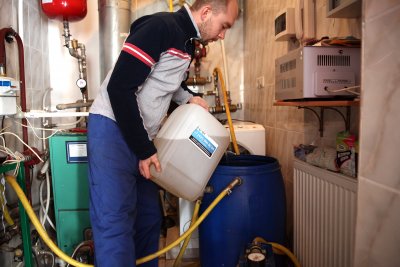
Flushing the heating system
Correct, efficient operation of the heating system is supported by timely maintenance, this is: inspection, cleaning, repair, maintenance.
It is known that without flushing, scale and rust gradually accumulate in the system, and the circulation of the coolant deteriorates - as a result, its efficiency decreases. by 10% or more, however, it is impossible to determine “by eye” whether the system needs flushing; there are several reliable signs for this:
- Pay for energy resources has increased, while heating efficiency has not changed or has worsened.
- The system has become more inert - warms up slowly.
- Radiators significantly colder pipes, and are heated unevenly.
If symptoms are present, the system needs to be flushed. There are several ways to do this:
- Chemical flushing method, it is already clear from the name that chemically active reagents are added to the coolant, special ones: caustic, acids, cleaning agents or “improvised” ones: vinegar, soda, citric acidUpon completion, the coolant is drained and the system is flushed with water until completely clean.
- Dispersion washing - similar to chemical, but more gentle, the reagents interact only with dirt and scale, and a stable coating is formed on the internal surfaces of the system.
- Hydropneumatic flushing - deposits, scale, rust are washed out with water and air under pressure, is carried out by a special installation.
- Pneumatic hydropulse flushing — similar to hydropneumatic. For local cleaning of pipes and radiators.
- Electrohydropulse cleaning. It is performed with special equipment, and the contamination is additionally affected electrical discharges.
Although most methods require special equipment, you can clean the heating system yourself. To ensure quality work, after cleaning with chemical reagents, you should partially disassemble the system - remove the radiators and clean them. separately once again.
Cleaning heating in apartment buildings is a responsibility Housing and communal services, this happens during preparation for the heating season. In your own home, everything falls on the shoulders of the owners - you should not wait for serious breakdowns, once a season it is necessary to carry out preventive maintenance and make sure that the heating system is in good working order.
Important! If the radiator heats up unevenly - partly hot, warm or cold, perhaps it is not clogged, but air-filled, and the air needs to be released.

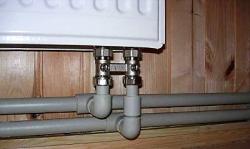
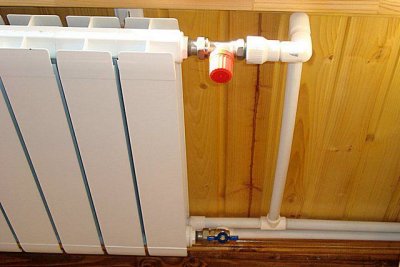
Valve installation
Of course, you can do without them, but the presence of balancing valves gives the system an advantage - the ability adjustments, separate “fine” adjustment of the temperature regime in a specific room.
These are regular valves, but for some, the ability to connect measuring devices and automatic control is implemented, so there are varieties:
- Manual flow regulation, if this is sufficient, ordinary taps are installed.
- WITH automatic mechanical thermostat.
- WITH servo drive, for joint operation with the control system, where the throughput is regulated by control commands.
The valves are installed in the radiator piping, but in such a way as to eliminate or minimize the effect of heat from the radiator on the thermoelement.
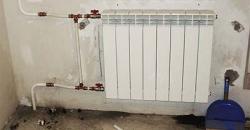
Installation of filters
In any coolant, aging processes occur, formation scale, rust, sediment. This has a negative impact on the condition of all components of the heating system. If the coolant is water, and the feed from the water supply is implemented, filtering the coolant in the system is not desirable, but necessary. According to their purpose, filters are divided into types:
- Rough cleaning. Simple threaded tee with mesh filter, in branch pipe 45 degrees A plug for cleaning the mesh is screwed in.
- Coarse filter - sump. A mesh filter, supplemented by a transparent settling tank. Some models have a function for removing air from the system.
- Fine filter, recommended for autonomous systems, but incompatible with some coolants-antifreezes due to their density.
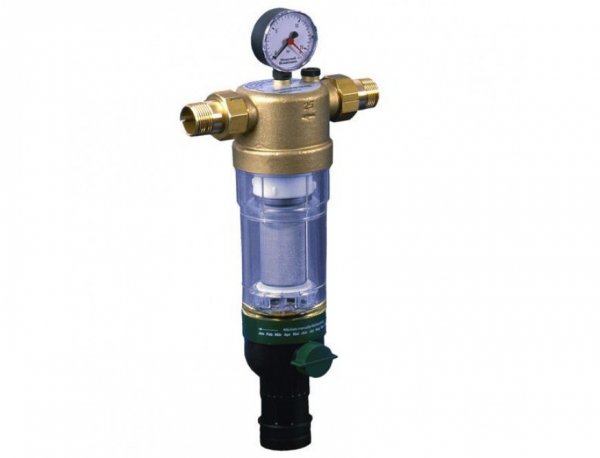
Photo 2. DE-HW Fine filter model F76S, connection size - 1/2'', manufacturer - "Honeywell".
- Magnetic filters, from the name it is clear that for metal deposits and rust there are removable models - are mounted on top of the pipe, preferably at some detachable connection, to allow for disassembly and removal of accumulated metal debris. Non-removable filter - a pipe made of ferromagnetic alloy, its magnetic field is stronger, and the filter resource is longer.
The logical placement of the filter is on the return line before the circulation pump, although this is not critical; if for some reason the filter is installed in a different place, the operation of the heating system will not change.
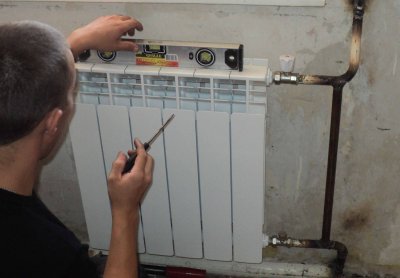
Marking the Place for Brackets: How to Hang a Radiator on the Wall
The installation location has been selected - the next task is to mark and install the brackets. If it is just a place on the wall, then there will be no difficulties, the main thing is to withstand common horizontal level.
However, radiators are often placed under the window and the task is added - to maintain symmetry. The order of actions:
- It is marked under the window vertical axis line.
- The radiator is placed “in place” on a stand of the required height and is used as a template – between two extreme sections under the upper radiator pipe and in the center under the lower pipe, marks are placed on the wall.
- Radiator aside. If it consists of even number of sections, then the lower mark will be on the center line, for odd quantity, the lower bracket will shift from the axis by half the width of the section. It remains to check the horizontal of the marks of the upper brackets and their equidistance from the center line with a level.
- Holes are drilled, plugs are inserted, screwed in brackets.
The radiator is tried on, if necessary brackets bend a little with a hammer. Marking and installation begin when the battery is assembled and fully prepared.
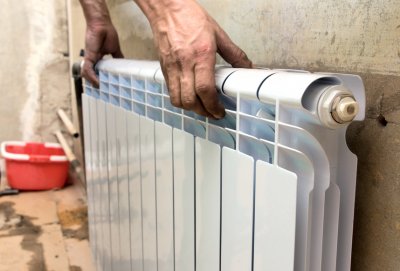
Assembling sections
When purchasing heating radiators, you may encounter a problem - there are no batteries available with a certain number of sections that calculated individually in advance in each room. However, their design allows solving this problem, significantly saving the budget:
- Having turned it inside out beforehand end nuts, The radiator and additional section are placed next to each other.
- They are baited with threads both nipples with paronite or silicone gaskets.
- Alternately, no more than one turn, without applying much force, evenly tightening the nipples, the sections are pulled together until they are completely closed.
After that, nuts and piping elements are screwed onto the radiator, and the assembled radiator is installed on brackets.
Installing an air vent
Air locks significantly reduce the efficiency and even completely paralyze the heating system, therefore air vents are mandatory components, classified by the control method:
- Automatic drain valve.
- Manual control valve - Mayevsky crane.
It is advisable to install air vents in each radiator and at the highest points of the pipeline, with the exception of systems with an open expansion tank. Of course, Automatic devices are preferable, but to save the budget, they are usually installed in problem areas, and radiators are equipped with Mayevsky taps.
How to disassemble a battery for repair
Nothing lasts forever, and the heating radiator may require repair, and right in the heating seasonTo dismantle it correctly and not cause even more damage, it is better to follow the recommendations.
Disconnection from the heating system

The radiator is disconnected sequentially:
- Inspect and identify malfunction.
- Close valves on the "feed" and "return".
- Open Mayevsky crane.
- Wait until the radiator will cool down.
Placing the pallet
Place a tray under the radiator that will hold the volume of coolant in the battery. It is easy to make yourself - knock together a wooden frame from bars, cover with plastic wrap.
Checking the gasket
After dismantling, the radiator is washed and repaired, the condition of all gaskets is checked, replacement if necessary.
Installing a new seal
The condition of the radiator piping is checked; if any faults are detected, it will be necessary partially or even completely drain the coolant.
Attention! The moving parts of cranes suffer the most - they require replacement or repair: installation of a new seal or crane box.
Turning on the water supply
Connect the radiator to the system it is necessary with the Mayevsky tap open. Smoothly open the "return" valve, excluding water hammer, fill the battery with coolant. After releasing the air, close the Mayevsky valve and smoothly open the "feed" valve.
Useful video
Watch the video to learn how to choose the right bimetallic radiator.
Professionals will help you assemble it
Having behind us a small amount of knowledge and a minimal set of tools You can install a heating system yourself or carry out quality repairs. However, it would not be a bad idea to play it safe and constantly consult with specialists, this will dispel many doubts.
But if you don’t have confidence in your abilities, It is better to contact professionals, especially in apartment buildings, where other people or other people’s property may suffer as a result of incorrect actions.