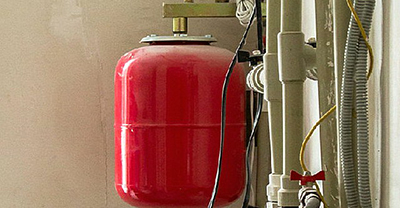
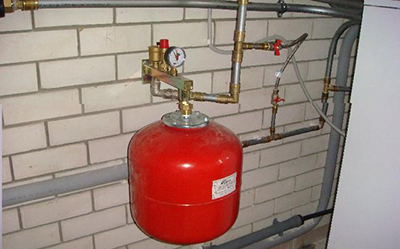
Ensures safe operation of the system: closed-type expansion tank for heating, its installation

Expansion tank - metal tank, having a diaphragm inside which divides it into two compartments: air and filled with coolant.
The main task of such a device is to control the increase in pressure in pipelines, which occurs due to the expansion of the circulating coolant in the heating system.
Content
Advantages of a closed heating system
This type has many more positive aspects than the open type:
- Almost any location is suitable for placing an expansion tank. The most suitable place is considered to be the return pipeline before entering the boiler.
Thus, the components of the expansion tank will not suffer from overheating due to the increase in the coolant temperature. In addition, it is permissible to place the device in such a way as not to violate the interior integrity of the room.
- Savings on purchasing consumables. For a closed heating system, small diameter pipes are used.
- There is no need to control the coolant level.
- Contact of liquid with air is excluded.
- Long service life of equipment, used in the heating system due to the absence of the corrosion process.
- The difference in temperature readings in the supply and return pipes, fixed to the boiler, a lower coefficient than in an open heating system.
- Possibility of using different types of coolant. Both water and antifreeze are acceptable for use.
- High degree of heat transfer.
- A closed heating system is capable of operating at high pressure.
- Easy installation process, there is no need to form clear angles of rotation of pipes.
- The versatility of a closed heating system.
With this type, any type of radiator can be used.
Description of the calculation formula
The main characteristic of the expansion tank, by which it is selected, is volume. It has a dependence on certain indicators:
- for a large amount (volume) of coolant you will need a larger device;
- the capacity factor of the device is greater in the case when the temperature of the circulating liquid is higher;
- At higher coolant pressure levels, a smaller tank will be required.
Important! The calculation of the main indicators must be carried out extremely carefully in order to avoid even the slightest errors that may subsequently negatively affect the final result.
Volume
The calculation of this indicator is made according to three formulas:
Method 1
Vб=(Vc*K)/D, Where:
- Vб — volume of the expansion tank.
- Vc — the amount of liquid circulating in the heating system.
- TO — coefficient of thermal expansion of the coolant.
- D — an indicator of the efficiency of expansion of the tank itself due to temperature changes.
Method 2
There is another formula that can be used to calculate the volume of the device:
Vб=С*ßt/(1-Pαmin/ Pαmax), Where:
- WITH — an indicator of the total volume of coolant circulating in the heating system.
- Pαmin — initial pressure in the expansion tank.
- Pαmax — the maximum possible pressure of the device.
Attention! When using this formula, it is important to take into account all constituent elements heating system: boiler, radiators, pipelines, heated floors.
Method 3
The calculation can also be carried out using the following method:
Ov*Vk*(Dk+1)/Dk-Db, Where:
- Ov is the volume of water. It is important to take into account that when heated, it increases. by 5%.
- VK — the amount of water in the circuit. If antifreeze is used as a coolant, then Ow will be greater than Bk.
- Dk — the maximum possible boiler pressure level.
- DB — the pressure indicator inside the expansion tank of the tank itself (this value is specified among other technical characteristics of the device).
Ov and Vk are determined at the design stage.
The final result obtained should be rounded up without criticality.
Many websites on the Internet offer such a service as "Online calculator". With its help, you can calculate all the necessary values by substituting the original data into the required lines.

Coefficient of thermal expansion
This indicator is tabular. So, if water is used as a heat carrier, it is equal to 4%, and for 10 and 20% ethylene glycol solution - 4.4% and 4.8% respectively.
Efficiency for membrane expansion tank
This indicator is calculated using the following formula:
D=(Pmax-Pinit)/(Pmax+1), Where:
- Pmax — maximum value of heating system pressure.
As a rule, it coincides with the maximum pressure of the safety valve (2.5–3 atmospheres).
- Pнач — the pressure in the expansion tank set by the manufacturer. Determined based on calculation 0.5 atmospheres for every 5 meters of height heating circuit.
DIY installation
Installation is in progress in several stages.
Preparing the necessary tools
To carry out the work directly, the following elements will be needed:
- step key;
- tow;
- adjustable wrench;
- Unipak paste;
- Key for mounting plastic pipes.
Before you begin installing the device, you must complete the following steps: 3 steps:
- on the site that will be involved in the process, the circulating fluid is drained;
- close the valve responsible for the movement of the coolant;
- disconnecting the boiler from gas, water and electricity supplies.
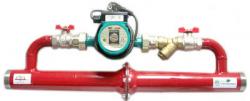
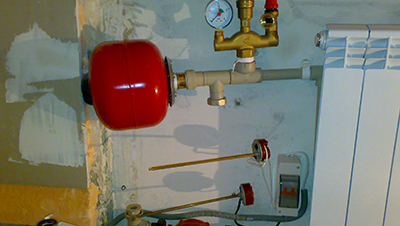
Section in front of the pump
On the return pipeline, a place is selected that is as close as possible to the entrance to the heating boiler, and an incision is made in it, where the tee is fixed.
It is recommended to cut the return line directly before the circulation pump.
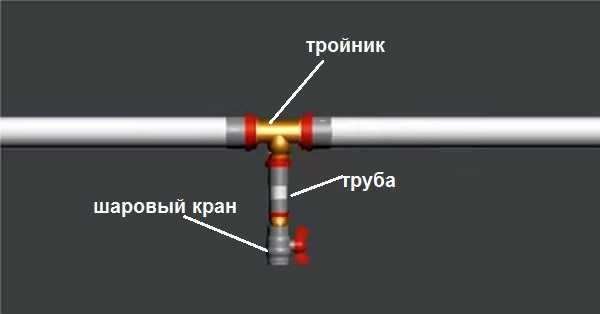
Photo 1. The diagram shows the place where the tee is installed after the pipeline is cut.
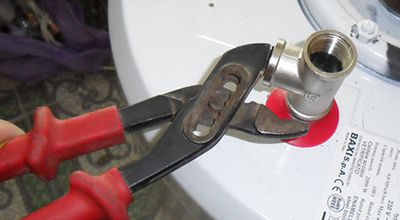
Packing of ball valve
It is produced on the branch pipe of the expansion tank. A measure in case there is a need to carry out in the house preventive or repair work.
Reference! For this same case, a connection is installed between the ball valve and the expansion tank, using the "American".
If the tap is open, then its position is working.
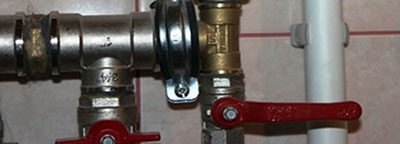
Connection of pipe and tee
A section of pipeline is used for this purpose, the configuration and length of which do not play a big role.
It is most rational to choose a short trajectory for its passage from the selected location of the expansion tank to the return pipeline.
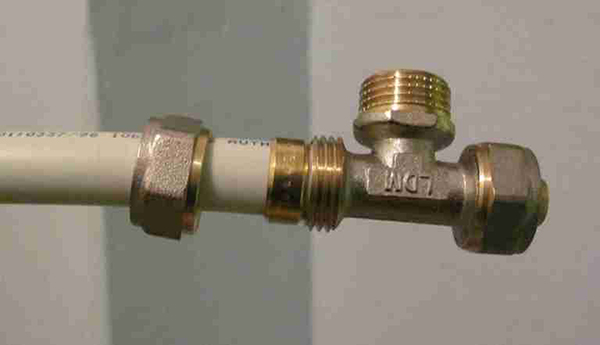
Photo 2. The tee is connected to the polypropylene pipe, this must be done when the location of the expansion tank is determined.
Packing the adapter
It is produced on the threaded branch pipe of the device being installed.
Important! The only way to ensure complete tightness of the connection is with the help of UNIPAK tow and pasteFor this purpose, a special cord (thread) for sealing the thread is widely used, onto which a sealing impregnation is initially applied.
How to install a faucet
It is used for packaging special fixing thread.
After this, the crane must be installed in place and is hermetically sealed. The expansion tank on the wall should be positioned so that the “lamb” is convenient to use in the future.
Transition to the pipe
The configuration is determined according to the installation diagram of the expansion tank. Such The transition is made from the tap.
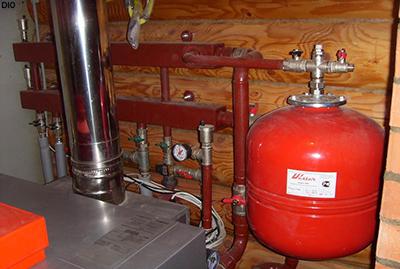
Checking the pressure in the air chamber
On the opposite side of the expansion membrane tank there is a nipple. In most types of models it is put on plastic cover in the form of a cap. If access to the nipple is required, the cap is unscrewed.
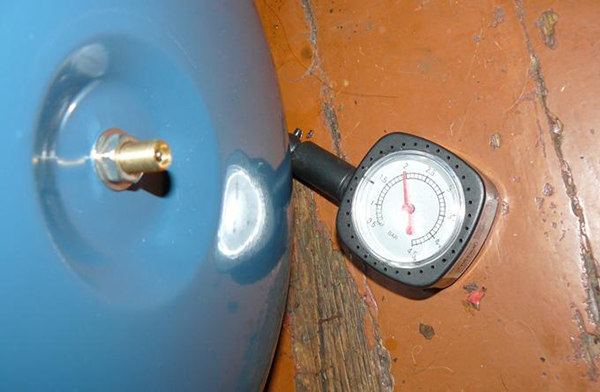
Photo 3. The procedure for checking the pressure in the system using a car pressure gauge, it is connected to the nipple.
A regular car pressure gauge will do to monitor the pressure.
Attention! If a deviation from the norm established at the preliminary stage of the system calculation is detected, the pressure is released by pressing the valve stem. When the indicator drops, a car pump.
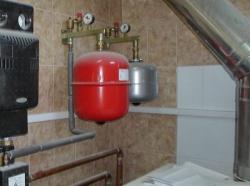
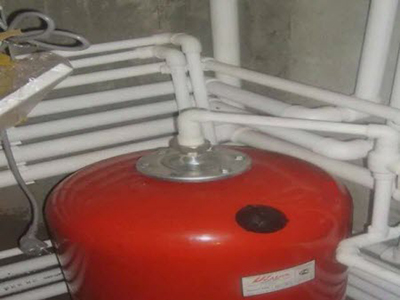
Installation with strapping
This process can be done in two ways depending on the presence of components included with the expansion tank:
- if there are legs for horizontal installation of the structure or a mounting panel for fixing it to the wall, then the device is installed in the selected location and then connected by a pipeline to a tee mounted in the return line;
- if there are no fasteners on the tank structure itself, then It always comes with a mounting bracket and a strap clamp.
The last of the above elements is straightened and inserted into the holes of the platform.
The side of the expansion tank should fit into the groove of the bracket-mounting platform, and the band clamp should be slightly above its (side) level.
After this, the ends of the clamp are connected and fixed first manually, and then finally with a screwdriver. Expansion The tank is attached to the wall.
Filling the system with coolant
This stage is the final one after the device is installed. If during the opening of the tap and the complete flow of circulating liquid through the heating system no leaks were detected in the connection nodes, then the process of installing the expansion tank is considered complete.
In the event that failures in the system are detected, it is imperative to find the cause and then eliminate it.
Useful video
After watching the video, you can learn how to properly fill a closed heating system.
The need for a security group
In a closed heating system where an expansion tank is installed, a pressure gauge must be installed for continuous monitoring of its operation. The safety group is especially relevant if the location chosen for installing the expansion tank is does not allow for constant visual monitoring of its operation.
Also, to regulate the pressure, it is necessary to have a safety valve with a "breakaway" (self-opening) function. It will allow you to periodically check the functionality of this element, eliminating the possibility of it sticking.