It's not difficult at all: step-by-step instructions for installing heating batteries in a private house with connection

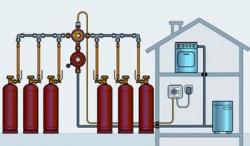
The house's own boiler room provides year-round coziness and comfort: You can turn on the heat supply at any time during the cold summer and turn it off when the warm weather arrives in the spring.
Independence from the whims of utility companies and heating supply schedules with a thermal power plant is an undeniable advantage of an autonomous system for a private home.
Content
- Requirements for the location of the radiator in a private house
- Connection diagrams
- Accessories for installation of heating batteries
- Marking the wall for brackets
- The process of assembling the radiator
- Correct installation of the battery
- Calculation of the required power
- Pressure testing
- Useful video
- The master's work is afraid
- Comments (6 opinions)
Requirements for the location of the radiator in a private house
Radiators need to be installed in places of greatest heat loss in the house (window openings and entrance doors).
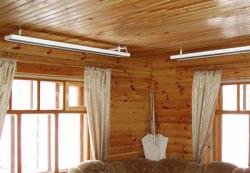
As a rule, heating devices are installed under each window of the house and in the hallway on the wall, next to the front door of the house, as a thermal curtain and dryer for wet clothes.
For maximum heat output from the heating appliance, the following optimal distances from the radiator are recommended:
- To the floor 8-12 cm;
- to the window sill 9-11 cm;
- 5-6 cm to the wall;
- the radiator protrudes beyond the window sill by 3-5 cm (so that the heat from the radiator warms the window unit).
Requirements for wall and floor construction:
- Wall, on which the heating device will be mounted, must be plastered.
- When attaching to a plasterboard wall in it previously a reinforcing frame made of timber is installed.
- Floor Mounts for radiator are installed on the finished floor.
Installation tool:
- Drill or hammer drill,
- Drill 10 mm,
- Hammer,
- Screwdriver for screwing in screws when using corner brackets,
- Building level with a spirit level or laser,
- Pencil,
- Roulette,
- Radiator spanner made of plastic,
- Key for the American.
Connection diagrams
The radiator has holes on the ends for connecting pipes with the supply of coolant to the radiator and its removal (return). There are the following connection diagrams:
Side
The pipe with the coolant supply is connected to the upper opening on the end of the radiatorThe coolant passes through all sections from top to bottom and is discharged through the return line connected to the lower opening on the same end.
It is installed in the upper hole on the other end Mayevsky tap for bleeding excess airA plug is placed in the remaining lower hole.
- It is used in apartments with a single-pipe heating medium supply system.
- The length of the radiator is no more than 1 m (heat loss increases with the number of sections).
Diagonal
The coolant is supplied through the upper opening on one side, and the return flow is through the lower opening on the other side of the radiator. The coolant flows diagonally from top to bottom.
- Efficient heat transfer with any number of sections.
- Allows connect several radiators in series.
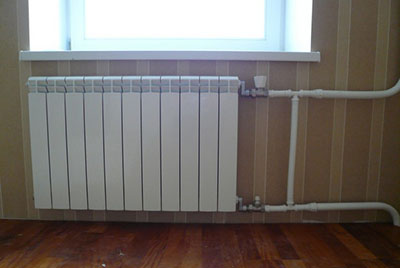
Lower and saddle
The supply pipe enters through the bottom hole on one side, the return pipe exits through the bottom hole on the other side of the heating appliance.
Photo 1. Lower diagram of the heating radiator connection: the pipes run between the floor and the battery.
- Used for hidden pipe installation in the floor.
- Thermal efficiency is 30% lower than diagonal (stagnation of coolant in the upper part of the radiator).
Reference! Most often in private houses heating pipes They are laid along the wall between the radiator and the floor. Next to the radiator, upward bends are made with a diagonal connection.
Accessories for installation of heating batteries
To install the battery, you need a number of components.
Installation kit
Consists of two right-hand threaded bushings, two left-hand threaded bushings, plugs, Mayevsky tap, three brackets and three dowels.
Futorki (adapters 1 - ½ inch) are screwed into the radiator holes, into which the direct branch and return are supplied. On the right side of the radiator there is a right-hand thread (screwing the coupling clockwise), on the left - a left-hand thread (counterclockwise). A Mayevsky tap is installed in the upper right hole, and a plug is installed in the remaining hole.
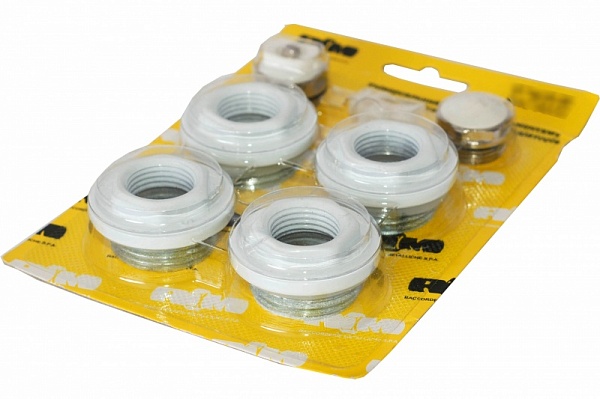
Photo 2. A set of four fittings with right and left threads is required for mounting the radiator.
Plumbing flax and sealant paste
Flax is used for thread packing. When exposed to water, it swells and seals gaps in threaded connections.
Unipak sealant paste seals flax in threads, protects it from rotting, makes it easier to screw in the bushings.
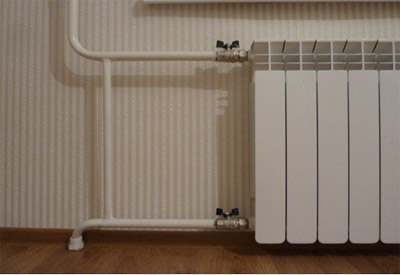
Shut-off valves
Ball valves are used to shut off pipes and are installed on the supply pipe. A control valve is installed on the return pipe. The connecting part of the tap or valve is an American - a detachable connection with a union nut. Consists of two parts. Part of the American with external thread 1/2” screwed into the inner hole of the radiator sleeve.
The union nut allows you to easily connect the radiator to the tap and remove it.
Marking the wall for brackets
Marking algorithm for radiators up to 10 sections. Two brackets at the top edges, one at the bottom in the middle.
- Measure the length of the window opening, mark on the wall midpoint (under the windowsill).
- Draw from the marked point vertical line down to the floor.
- Mark point (A) on a vertical line at a distance of 10 cm from the windowsill.
- Conduct horizontal line through the marked point (A).
- Measure the distance on the radiator between the mounting points of the upper brackets.
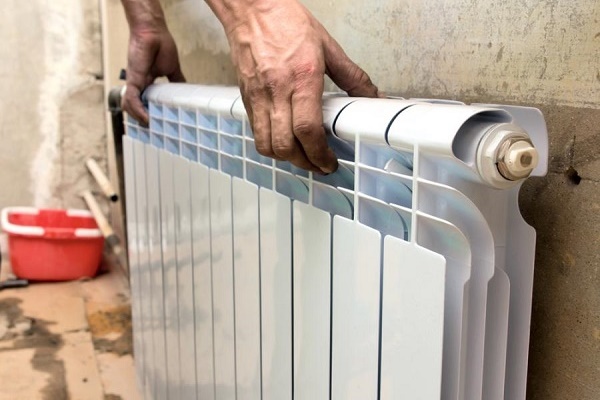
Photo 3. Selecting a location on the wall where the radiator will be located, determining the method of fastening the upper brackets.
- Put aside on both sides of point (A) on a horizontal line segments of length, equal to half the distance on the radiator.
- Set aside on the central vertical line segment from point (A) down 50 cm long - place installation of the lower bracket.
- Drill holes for the brackets. Keep the drill strictly horizontal so that the drill does not go sideways in the wall.
- Hammer in the dowels and screw in the brackets at the required distance from the wall.
The process of assembling the radiator
- Clean the threads in the radiator holes. Check the screw-on fitting, plug, and Mayevsky tap.
- Remove the rubber gaskets from each fitting, plug, and Mayevsky tap.. It is advisable to use linen packing instead (gaskets that are skewed or over-tightened can cause leaks).
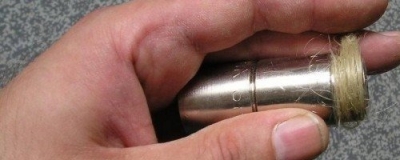
- Braid a braid or cord from a strand of flax, 30-40 cm long, with a diameter of approximately 1 mm.
- Wind a braid of flax onto the place on the sleeve where the gasket was located (to form a semblance of a gasket from flax). Wind the braid clockwise for a right-hand threaded bushing and counterclockwise for a left-hand thread. Winding direction - from the end of the bushing towards the thread. The flax should completely fill the entire space from the end of the bushing to the thread (thread groove).
- Use your fingers to tighten the wound braid (form a neat ring), grease with Unipak.
- Screw the parts into the corresponding holes of the radiator by hand, then tighten it with a spanner until it stops. The flax gasket should be compacted and completely fill the entire space between the ends of the part and the radiator.
- Use a napkin to remove excess paste from the installation site.
Important! Do not wrap flax around the thread of the bushing itself! The flax acts as a gasket between the bushing and the end of the battery. Do not use silicone to lubricate flax. Silicone prevents the flax from swelling in water and seals the joint.
Correct installation of the battery
Installation of the heating radiator is in progress in several stages.
Packing of the American bushing
- Check the union nut bushing with the ferrule for looseness.
- If there are no notches on the threads of the bushing, make them with the sharp edge of a file. The notches are needed to prevent the flax from shifting when screwing.
- Braid a braid or cord from a strand of flax, 30-40 cm long, with a diameter of approximately 2 mm.
- Wind the flax onto the thread, laying the bundle along the turns. Start winding from the third turn of the thread from the edge of the sleeve, in the direction of the thread runout.
- Having reached the thread runout, wind in the opposite direction over the thread turns with overlap, with a pitch 1-2 mm.
- Press the flax with your fingers and lubricate with Unipak.
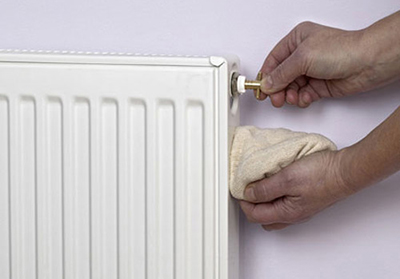
Installation
- Install the union nut into the hole in the bushing, tighten by hand until it stops, without allowing it to become skewed.
- Insert the socket wrench and begin to carefully tighten the sleeve. The sleeve should tighten with a noticeable force, but without jamming.
- After fully tightening the sleeve to the full length of the thread Use a napkin to clean the installation site from excess paste.
How to install the device on brackets?
- Visit the radiator on the installed brackets.
- Adjust the position of the brackets, bending them vertically, achieving a tight fit of the radiator on the upper and lower brackets without play.
Harness
- Place the counter part on the tap or valve strictly along the axis of the union nut sleeve.
- Tighten the union nut by hand until it stops.
- Perform installation of pipe bend piping and shut-off and control valves at the location of the radiator.
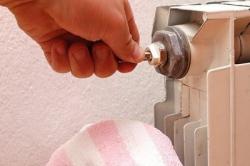
Important! Do not put flax under the union nut! The sealing of the union nut is achieved by means of a rubber ring on the end of the sleeve. Do not overtighten the union nut! It would be a good idea to leave some room to allow for tightening the nut.
Calculation of the required power
The rated power of one section is given based on the calculation of standard values of the coolant temperatures at the inlet and outlet of the heating device, and the air temperature in the room.
In a private house, these values differ from the standard ones. Therefore, when calculating the passport value reduce by 15%.
An accurate calculation is carried out in any online calculator, taking into account all heat losses through the elements of the house structure.
Roughly speaking, it can be assumed that:
- for the room with one external wall and a window 100 W/m² is required;
- for the room with two external walls and one window 120 W/m² is required;
- for the room with two external walls and two windows 130 W/m² is required.
Pressure testing
Pressure testing is carried out after installation of the entire heating system. to check for leaks. When pressure testing with water, a pressure tester is required (which can be rented). The heating circuit is filled with water, the pressure tester is connected and increased pressure is created 2 atm. for three hours.
The result of the pressure test is positive if no leaks are observed from the connections.
Useful video
In the video you can see how a heating system with hidden connections is installed.
The master's work is afraid
It is entirely possible to carry out work on connecting heating devices in a house on your own. The most important in editing - pack connectionsIf you have a pressure tester, you can learn this in a day on a prototype.


Comments
When installing the battery, it should be securely fastened and not dangle. In the connections, it is not necessary to use flax as a sealant, fumka will probably be even better, since it seals the threads better and it is easier to connect parts with fumka, when using hemp from flax, it is sometimes possible to leak at the beginning, until it gets wet, which will leave streaks.
I installed heating radiators under the windows and with bottom connection in my house, so fewer pipes need to be brought in. And installing a radiator under the window warms the air coming from the window. since the temperature near the window is lower. And I also put a reflective foil film under each battery on the wall, it reflects heat from the wall into the room and the heat is not absorbed by the wall, it gives a very good effect.