How to fix a breakdown in minutes? DIY repair of aluminum heating radiators
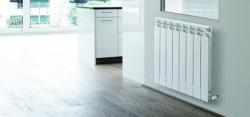
Aluminum radiators are widely used in heating systems, have an acceptable cost, are easy to install and have good heat dissipation.
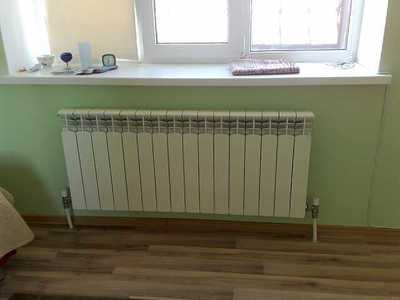
The stylish look and the ability to install radiators even under low window sills make them one of the best options for most homes and apartments.
But, like any other objects, radiators can break. Some reasons for breakdowns can be easily fixed at home without involving outside specialists.
Content
The battery is leaking and does not heat: why such a breakdown occurs
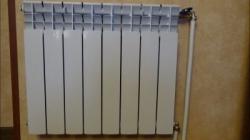
It is not difficult to recognize a malfunction of the heating system - a leak will appear, at the joints plaque forms, during the heating season the rooms are getting colder, than usual.
However reasons for breakdowns radiators are not so easy to identify at first glance:
- Incorrect connection batteries (assembly of sections or installation to heating system pipes).
- Sudden changes in pressure, increased acidity of water, due to which corrosion appears on the sections.
- Limescale, which occurs as a result of using a bad coolant. It also becomes the cause of severe clogging of the sections.
- Wear nipples and gaskets between compartments.
- Incorrectly selected model radiator, incompatible with the heating system.
In apartment buildings it is often carried out scheduled inspection and preventive maintenance heating equipment by specialists (subject to agreement with the utility provider).
DIY Aluminum Radiator Repair Tools
The radiator is repaired on the floor, and washed in the bathtub. In the first case, you need to cover the floor with polyethylene film or waterproof fabric. When washing, the bathtub is covered with a material that will protect the surface from scratches.
To clean, disassemble and repair the radiator you will need the following tools:
- a set of wrenches with different heads or an adjustable wrench;
- nipple wrench;
- soft-tipped hammer;
- sandpaper;
- neutral lubricant is required to repair sections;
- silicone gaskets.
It happens that during the installation process wear of nuts and nipples is detected, buy as needed.
Reference. Start your radiator repair on weekdays when you have the opportunity to visit plumbing or hardware store.
Additionally, prepare a basin or other container for collecting dirty water, which flows out of the radiator during the cleaning process.
Dismantling the heating radiator
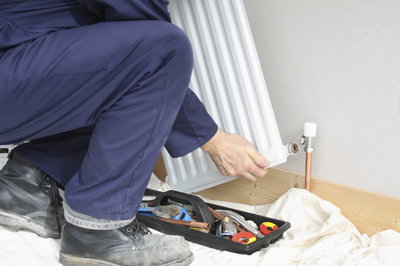
Battery testing, cleaning and repair are possible only after removing the product from the wall.
The light weight of aluminum radiators allows even one person to easily but carefully detach the structure from the pipes and remove it from the brackets. But this needs to be done in stages:
- They stop the circulation of the coolant and release the pressure.
- During the heating season, wait until the radiator has cooled completely. The structure is disconnected from the pipe system by removing the couplings at the inlet and outlet.
- The coupling is moved away from the section along the pipe, and the battery is removed from the holders.
- The water remaining inside is completely drained. The structure is placed on the prepared fabric with the outer side facing up.
- Remove the filter and wash it with water and soap solution.
The next stage of installation will be disassembly radiator into components. The most important point is - correct nipple disconnection. When you unscrew a part, the section it is responsible for begins to smoothly move apart.
Often the manufacturer specifies the direction of the thread - D (right side) or S (left side). You need to start unscrewing it with a key carefully and slowly. If you twist it too hard or incorrectly, it is easy to strip the thread not only on the nipple, but also on the battery itself.
Attention! As soon as the nipple turns half a turn, need to move to the nut on the other side sections. Gradual weakening on both sides will protect the section from breaking and possible mechanical damage.
After analyzing the sections you need to remove and wash the metal gaskets. In case of severe damage, it is recommended to buy spare parts. Silicone gaskets must be changed after disassembling the battery.
Cleaning at home
Clean the radiator from accumulated dirt after the end of the heating season.
Professional cleaning equipment is not easy to obtain and is also expensive.
In the bath, the structure is washed as follows:
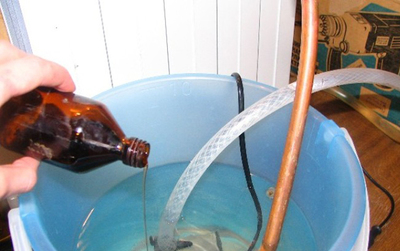
- Using hot water. On one side, pour water using a funnel or by unscrewing the nozzle from the shower hose. When the battery is full, shake it. If it is too heavy, then the structure is slowly turned over. Both plugs should be open so that dirty water can flow out freely. The procedure should be repeated several times.
- Using a cleaning agent. The radiator is filled with a solution of cleaning agent, after installing the plugs. For the procedure, use citric acid, diluted in water. Leave the device for several hours so that the cleaning solution removes all dirt. If there is no citric acid, use a universal cleaning agent or liquids for removing rust and heavy dirt.
- Final rinse. Through 2 - 3 hours Tap the radiator with a plastic or rubber hammer to remove large pieces of rust and other dirt from the inner walls. After this, wash out the cleaning agent until all traces of it are removed (if a soap composition is used, wash until all traces of foam disappear).
When choosing a cleaning agent, remember that aluminum "does not tolerate" alkaline compounds, but reacts well to acids.
What to do during assembly
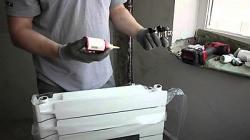
Assembling the radiator starting with checking all the details. This is something that needs special attention, as missing one small element can lead to the failure of the entire structure.
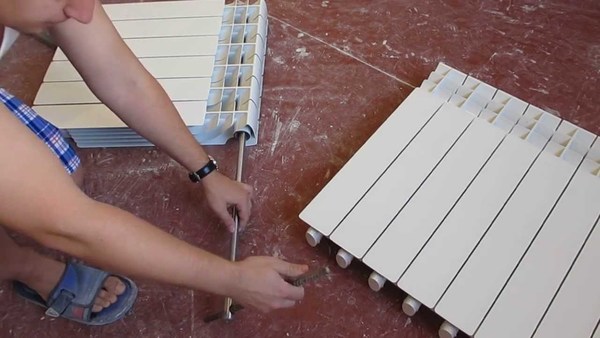
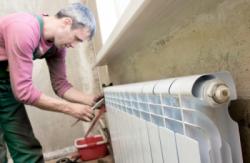
Photo 1. The process of assembling an aluminum radiator. A special key is required to assemble the device.
The exact plan for assembling the battery:
- At first check the condition of all connecting elementsThey should not have any chips, cracks or other damage.
- Before assembly the nipple is screwed in and out several times.
- Checking section joints. If there is paint present, remove it with medium-grit sandpaper.
- Glued silicone The gaskets are removed with a sharp knife (they become visible after removing the paint).
- Metal gaskets wash with soapy water.
- Then put the nipple on the section, but without twisting. After that, the silicone gaskets are pulled.
- On the other side of the nipple attach the next section so that it fits snugly into the joint.
- With the key turn the nipple 2 times. The part is screwed on the other side in the same way.
- Nipples they pull it up with a lever, but without unnecessary force so as not to damage the threads.
- Repeat the steps with other sections.
Sometimes during the repair process, leaks are discovered, which are sealed with a special agent.
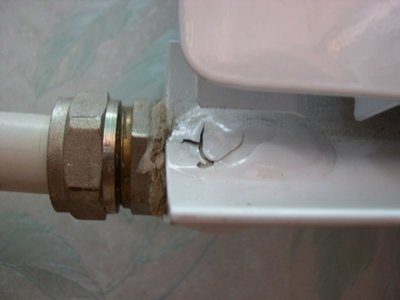
Fighting holes: how to seal them
When replacing the gasket, in some cases cracks and holes are found that need to be sealed. For this purpose, epoxy glue. First, the leak site should be cleaned of plaque and paint.
Important! To clean the pipe from the inside in the damaged area, use metal cable.
Epoxy glue is applied to the damaged area on top and a thin strip of fiberglass. The second layer of material is glued on top. The procedure is completed by installing a metal clamp.
Photo 2. Epoxy glue Moment from the manufacturer Henkel. It can be used to seal holes in a heating radiator.
How to repair severe damage
In case of severe damage to an aluminum radiator, a complete replacement of the section is required, even if the following were used for the repair: professional devices and methods:
- cold welding;
- aluminum solder (for minor damage);
- argon welding.
These methods can only temporarily delay the final breakdown of the product, but as a result, repairs will still be required. complete section replacement.
Useful video
Watch the video, which tells how to repair and extend aluminum heating radiators.
Professional help in battery repair
At home, you can only eliminate it yourself some types of damage to aluminum radiators - small holes, dirt. However, if there are significant defects in the equipment or if you have doubts about your abilities, it is better to contact specialists for help.

Comments