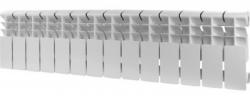
Replacing sections is elementary: how to disassemble an aluminum heating radiator with your own hands
The reason why disassembling and assembling aluminum sections becomes a necessity is does not always arise spontaneously.
The most unpleasant reason forces the owner to involve a qualified specialist urgent repairs your heating equipment.
Appearance cracks, obvious leaks or sweating weakened rib, directly on the section itself, lead to the idea of its inevitable replacement. Another reason is increase or decrease the number of sections radiator to change the heat transfer coefficient.
A tool to help
A basic set of tools that you can’t do without:
- radiator, nipple key;
- open-end wrenches;
- mount;
- Bulgarian for trimming operations;
- kit paronite gaskets and plugs;
- adjustable, plumbing, wrench;
- construction hair dryer;
- Gas wrench No. 2.
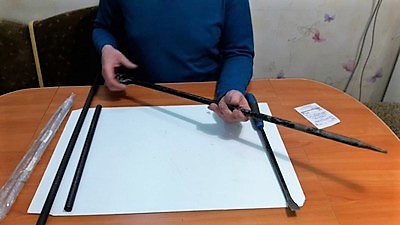
The role of the main tool in the upcoming work is assigned to the nipple key.
The key is a thick-walled pipe with notches along its length and a flat spatula tip. Instead of a radiator key, some plumbers use a metal wrench that is flattened at one end. round rod, diameter 18-20 mmThe tool is calibrated with a series of notches, the pitch between which corresponds to the width of one section.
An adjustable or open-end wrench is needed to carefully loosen galvanized couplings and enamel-coated end caps. A crowbar, grinder, and heat gun may be needed if problems arise with dismantling stuck connections.
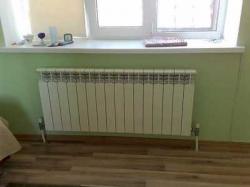
Disassembling and assembling an aluminum radiator with your own hands
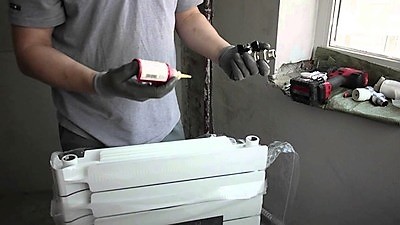
The area where the radiator restoration will be carried out, covered with thick fabric. If it is a table surface, then the main work will not be done in the air. The prepared place will protect the soft aluminum from unnecessary deformations and scratches.
Important! Before removing the union couplings a rag is spread under the radiator, to protect the floor from dirty liquid that may leak out during dismantling. You need to have a rag on hand to absorb any remaining moisture inside the sections.
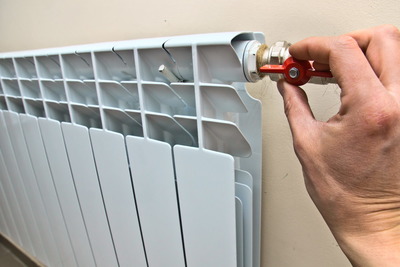
Disconnection from the heating network
Before disassembling, disconnect the radiator from the heating network. shut-off valvesIf the radiator does not have shut-off valves, then invite a housing and communal services workerso that he could turn off the heating riser to carry out repair work.
During the heating season, after the radiator is closed, a pause is taken. Since the water in it is still hot, wait for a while until the liquid cools down, and then disconnect the radiator from the heating pipes.
Coolant, remaining in the battery, pour into a pre-prepared bucket and proceed to separate the sections. Immediately after dismantling, the inner surface of the battery is washed with running water.
How to disassemble and assemble a battery
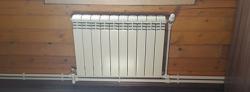
Aluminum sections, connected nipple nuts. The inner part of such a connector has projections, by which the nipple key grabs the nut and unscrews it. The nut is similar to a coupling, only it has external threads. One nipple nut has both right and left threads. They are made in pairs for the upper and lower connections. When the nipple is unscrewed, the sections diverge, and when screwed, they are pulled together.
Preliminary all plugs and adapters are screwed off from the ends. Access to the connector must be open for the nipple key from all sides.
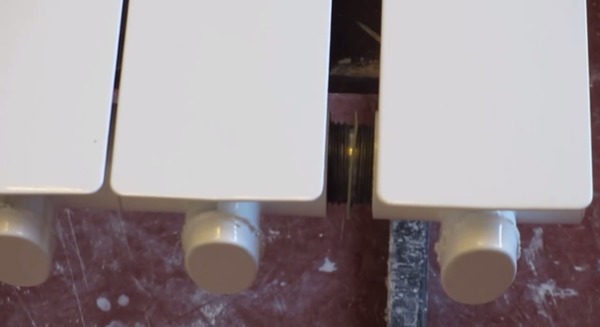
Photo 1. Fastening sections of an aluminum radiator to each other: nipple nuts are unscrewed when disconnected.
To disassemble the battery, the tool blade is placed through the open end of the radiator into the grooves of the unscrewed top nipple nuts and with some pressure make a test scroll counterclockwise, to move the joint. If the key turns the nut normally, then it is inserted into the grooves lower nipple nut and, as in the first case, try to turn it a couple of turns.
Important! When unscrewing the connectors, you should follow the sequence of actionsto avoid skewing.
After disconnection, the thread is exposed carefully examined for cracks and chips, on thread integrityIf necessary, the joints are cleaned with fine sandpaper.
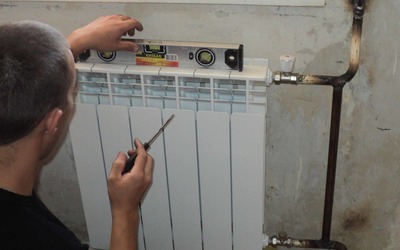
Starting to assemble the radiator sections, on the upper and lower nipple nuts put on sealing rings made of paronite, placed between the sections. The sections are lightly pressed against each other and screwed together alternately. Turning the nuts, to avoid distortion, it is limited two turns of the key.
If something went wrong
During operation the joints between sections and steel nuts stick to each other. This is due to the quality of the coolant supplied to the heating system. Sometimes even significant physical efforts are useless.
Although the sticking needs to be dealt with, aluminum is easily deformed, because it is a soft metal.
Heating the joints with a hair dryer can help overcome this problem. rust that has stuck onIf this doesn’t help either, the corrosion is too strong, then a trimming machine gets to work.
Advice. If the nipple nut does not unscrew under great pressure, then there is no need to increase the applied force by excessive leverageIn the worst case, not only the nut itself will break, but both sections that fit tightly on this nut will crack.
It is cut with a grinder leaky section, and from the reverse side and stepping back from the edge of the connection by at least half the length of the coupling. This protects the working section from destruction and does not cut the connecting nut. During cutting, the rust bounces off, and thus simplifies the unscrewing of the surviving section.
During assembly it is advisable replace old gaskets with new ones and clean the joints, paying attention to defects and irregularities. Sealed connection prevents premature leaks.
Useful video
Watch the video to see how to assemble an aluminum radiator.
Conclusion
The work is considered complete after pressure testing assembled radiator.
Assembly and disassembly of sections to be repaired It's more convenient to do it with a partner. Simplifies the process of removing the heating device from the wall and prevents its deformation. A partner of any qualification, even non-construction, is welcome.