From purchasing elements and accessories to launch: rules for installing aluminum heating radiators
The uninterrupted operation of the heating system can be guaranteed well-done installation radiators made of aluminum. It is important to select all components and determine the connection diagram.
Content
Possibilities of installing aluminum heating radiators
The features of such sources of room heating are the low limited pressure of the liquid circulating in them and high heat transfer rate.
Thus, the installation of aluminum heating devices is often carried out in private houses with a small number of floors or when forming an autonomous system.
This is done to prevent the occurrence of water hammer and obtaining high-quality heating of rooms.
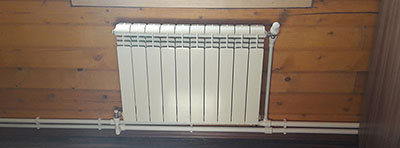
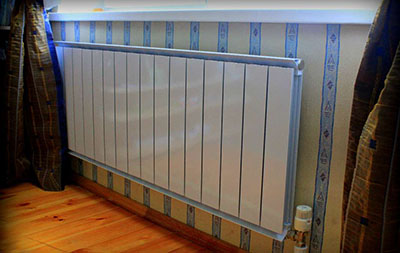
Aluminum radiators are mainly mounted under window sills or in any free area of the room, including on racks near the wall. The latter option provides supply of pipelines from both sides.
Important! when choosing a location for installing aluminum batteries, it is imperative to take into account heat loss index on objects located near it.
Accessories for installation
Installation of an aluminum radiator involves availability of all necessary elements process.
Pipes
A competent choice of such a component, taking into account all the nuances, will ensure long-term and reliable operation of aluminum room heating sources. Moments that are worth considering Please note:
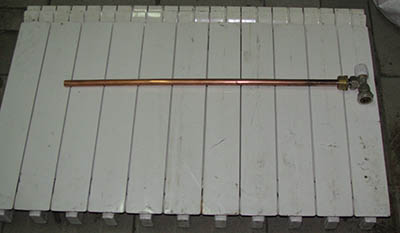
- The use of copper pipes for aluminum radiators is prohibited. Such a connection may lead to gas accumulation and subsequent rupture of the battery.
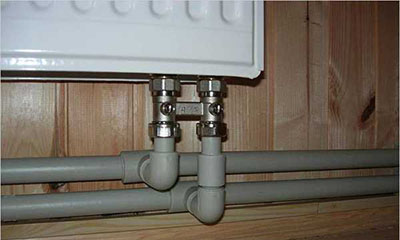
- For supplying heat carrier in individual heating system conditions pipes made of polypropylene and metal-plastic are used, and with central heating - made of metal.
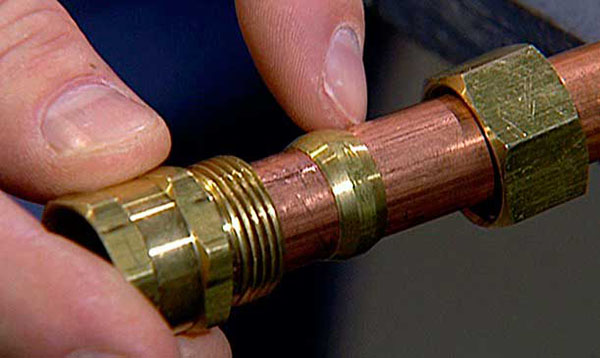
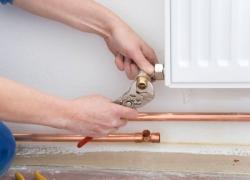
Photo 1. Copper pipe with fittings, this type is not recommended for connection to aluminum radiators to avoid gas explosion due to its accumulation.
- Contact of aluminum alloy with steel or cast iron is not allowed., not treated against corrosion.
Regardless of the type of pipes used when installing aluminum radiators the use of automatic valves is mandatory to remove excess air masses.
Accessories
Additionally, the following are supplied with aluminum heating devices:
- end caps for sections located at the edges;
- Brackets for fixing the radiator. Mountings can be floor or wall mounted;
- sealing gaskets, which eliminate the possibility of leakage;
- air release valves.
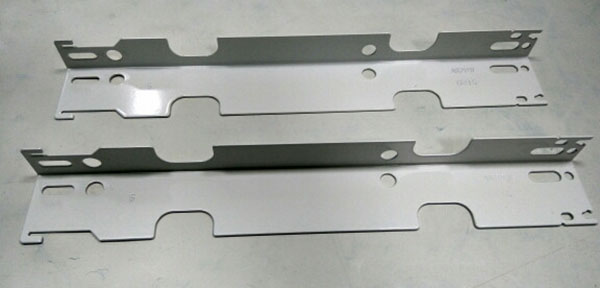
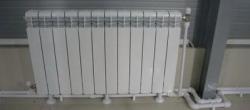
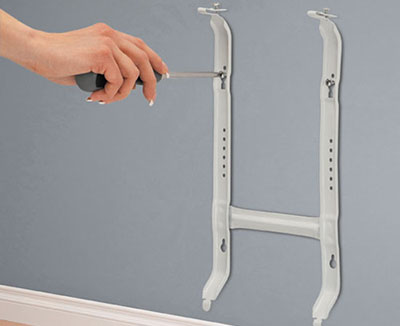
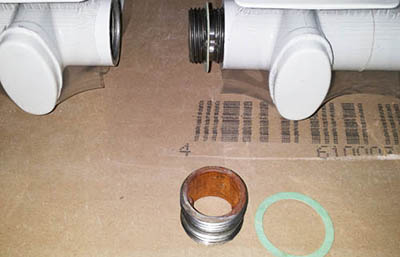
Photo 2. Wall brackets for aluminum radiators Kermi 500 mm, needed for reliable fastening.
And also included with aluminum radiators shut-off valves. Its installation at the input and output of the battery will allow you to control the temperature in the room and isolate the operation of the heating device if there is a need to replace it.
How to install an aluminum battery with your own hands?
This process is going on step by step.
Preparatory work
They begin with determining the location of the future installation of the radiator and the brackets are fixed.
For a proper calculation of the installation of a battery, the following construction indicators of indentations must be taken into account:
- from 10 cm and more - from the window sill;
- 3-5 cm from the wall;
- approximately 12 cm from the floor level.
The bracket is fixed to the wall using dowelsThe holes left by the drill are filled with cement.
If the battery is a floor type, then it is placed on a special stand and is lightly attached to the wall, only for installation. sustainable balance.
Assembling the radiator
Before starting the battery, it is necessary to carry out the installation step by step:
- screw in plugs and radiator plugs;
- connection with shut-off valves;
- collection of thermostats;
- nipple stability control;
- fixing the air bleed valves.
Attention! For further correct operation of the valves, it is necessary to install their outlet heads in such a way that they are facing upwards.
After completing all steps The radiator is fixed on brackets.

The hooks are located between the sections. Detailed instructions for assembling an aluminum room heating source, it should come with it.
Connection diagrams
Installation of aluminum radiators is carried out in the following ways.
Diagonal
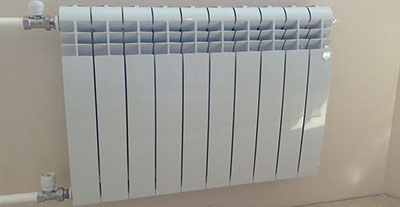
Counts optimal among the rest. With this connection solution, the inlet pipe is fixed to the upper inlet, and the return pipe is fixed to the lower one, located on the opposite edge. Such a scheme will be most efficient for the radiator, consisting of a large number of sections. All manufacturers specify the parameters of the equipment they produce based on the diagonal connection diagram.
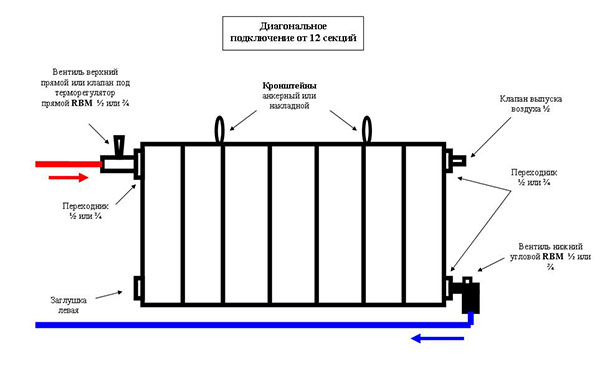
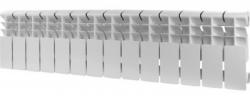
Photo 3. Standard diagonal connection diagram for a heating battery consisting of twelve sections.
The coolant moving along this route will cover most of the surface of the aluminum batteries.
Flaws:
- inconvenient installation;
- difficulties with the wiring method;
- it is impossible to hide communications;
- high pipeline flow rate.
Due to the complex layout, this scheme not relevant for high-rise buildings. It is also not suitable if the aesthetics of the interior are above all else.
Lateral
This method of installation Suitable for apartment buildings. The main idea of this connection is supply of both main lines on one side to the radiator.
The advantages of this scheme:
- easy installation;
- low consumption of pipes;
- high efficiency;
- fixing a bypass in the section between main lines for installation of control valves.
Drawing parallels between the two types of connections already considered, the second option will have priority, since it is not inferior to the first one in terms of efficiency, but significantly wins in terms of financial costs.
Bottom
Helps make the battery almost invisible, but at the same time does not add efficiency to the heating system.
Another name for this connection method is "Leningradka". The coolant, moving from the inlet to the outlet manifold, reduces efficiency the whole system by 11–15%.
Losses become especially large when the main lines are fairly long in high-rise buildings.
Important! If a situation arises where there is clogging or excessive air content in the batteries, it is necessary to clean them and release excess air masses, using the Mayevsky crane.
Connecting to each other: how to connect two batteries?
Batteries can be connected to each other in three main ways:
- Parallel. This scheme uses two pipes. The radiators are fixed using the upper and lower bends.
- Consistently. The scheme assumes the use of one pipe.
- Through connection. Here the coolant moves through the heating system without lingering in the radiators.
Second option connections the most reliable and does not require additional financial costs.
Connection
Next is the battery is fixed to the heating system. Sequence of procedure:
- the absence of liquid in the system is checked, overlapping installation points;
- joining sections together using a tightening device on fluoroplastic sealing tape;
- use the clamps to fix it batteries to pipelines;
- conducting pressure testing systems.
How to extend sections?
He's passing by in several stages.
Dismantling
The sequence of actions to properly build up the radiator is as follows:
- release of pressure in the system and cessation of fluid movement;
- control of device cooling;
- using a wrench of the required size disconnect the hose from the radiator pipe;
- removal through the pipeline, coupling type fastening and placing it on a polyethylene film located on the floor;
- removing the filter and quickly washing it. Slowing down may result in the filter not being able to be reused.
Removing the gasket
It is produced by cutting with a thin knife in succession surface cleaning. The gaskets are placed in a soap solution for washing. They must be degreased if the coolant used is not water, but antifreeze.
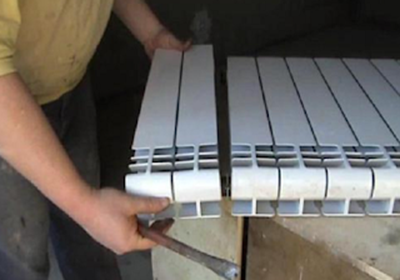
Inserting and screwing in the nipple
The design features of the nipple are such that it has on both sides carving, cut in opposite directions.
If it is necessary to add sections on the left, then the nipple is inserted right side.
The left one will fit into the hole of the existing radiator.
Tightening the nipple
After applying the pads, you must be extremely careful tighten the nipple thread, to prevent damage to the threads. At the connection point of the battery and the heating system, it is necessary use a cable or other options to improve waterproofing.
How to set up?
High heat output from batteries can cause overheating of the room.
It is not difficult to adjust the radiator yourself if you follow the rules. Temperature regulation is allowed to be carried out independently by using taps to open and close the radiator. It is important that they should not be spherical!
Suitable for controlling the temperature in the room valve taps.
In this case, the supply of coolant is closed, but the return line remains open.
Reference! When blocking the battery with taps during connection, it is required first open the return line, and only then - the submission.
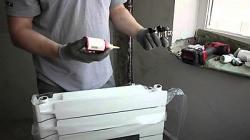
Useful video
The video shows an example of assembling an aluminum battery and connecting it using a diagonal scheme.
Self-connection
Aluminum radiators can be installed independently, but It is better to seek help from specialists.