Twice as much benefit! Laying a stove with a water heating boiler: features, diagram
A boiler for organizing central heating can be purchased in a specialized store.
Industrial boilers are made of steel or cast iron, have different efficiency and combustion duration characteristics, take up little space.
The disadvantage is the high cost.
Content
Features of a wood-fired heating boiler with a water circuit
The right boiler has the following characteristics:
- Safety. The walls and door of the boiler should not heat up. above 150 °C.
- Ease of operation. The boiler design does not allow for “tricky” systems or a large number of valves.
- Durability. The stove should serve for a long time without repairs.
- Controllability. The intensity of the flame is regulated not only by the amount of wood.
- Efficiency. Make maximum use of the heat from fuel combustion.
In order to build a boiler there are two ways — construction of a new or installation of a heat exchanger into an existing furnace.
The brick stove-boiler consists of:
- Fuel tanker — wood is burned in it, which heats the coolant.
- Heat exchanger — where the coolant circulates, which transfers heat from the combustion chamber to the batteries.
- Smoke channels - they serve to remove combustion products.
- Accessories - doors, ash pit, grate, dampers or valves.
In practice, there are various types of organization solid fuel boiler stoves.
- A firebox around which a heat exchanger is mounted. The combustion products go straight into the pipe. The advantages of this scheme are simplicity and cheapness. A person who does not have the skills of a mason can build such a boiler. The temperature of the coolant quickly increases and decreases depending on the intensity of the flame, so you have to constantly be on duty near the boiler.
- The heat exchanger is also mounted in the boiler furnace, but combustion products move further along the smoke channels. This device works not only as a boiler, but also as a regular heating wood stove. This increases the efficiency.
- Fuel tank and heat exchanger in the oven separated. The heat exchanger is located on the path of hot gases and effectively takes away their temperature. This scheme is implemented in bell-type furnaces. I.V. Kuznetsov developed the theory of the "hot core", placing the heat exchanger at this point increases the efficiency of the boiler.
Which stove to choose
Each type of furnace-boiler appropriate for solving certain problems.
When heating utility rooms or greenhouses, there is no need to build a multi-ton brick structure. In this case, most consumers choose the simplest boiler.
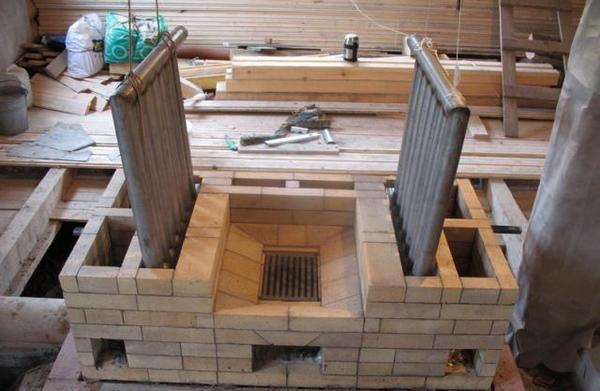
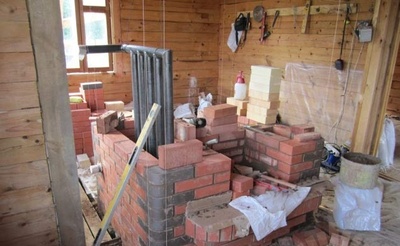
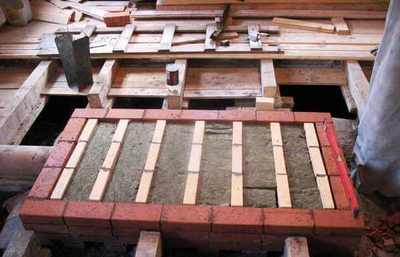
Photo 1. The process of building a heating stove with a boiler. A heat exchanger made of pipes is mounted in the firebox.
If the house already has a working Dutch brick oven, a heat exchanger can be inserted into its firebox, welded from pipes or metal sheets. To do this, you will have to remove the door, widen the mouth of the fuel chamber, insert the heat exchanger and assemble everything in place.
When constructing a new furnace, the optimal solution is considered to be Kuznetsov boiler diagram. High heating efficiency is achieved by installing a heat exchanger in the hot cap, where the temperature is higher. The firewood in the stove firebox burns in the optimal mode, and the hot gases heat the stove cap with the heat exchanger. The temperature increases gradually and is maintained for a long time without additional firing.
DIY brick oven with water heating boiler. Scheme
Before construction, study the order of execution of works and fire safety rules.
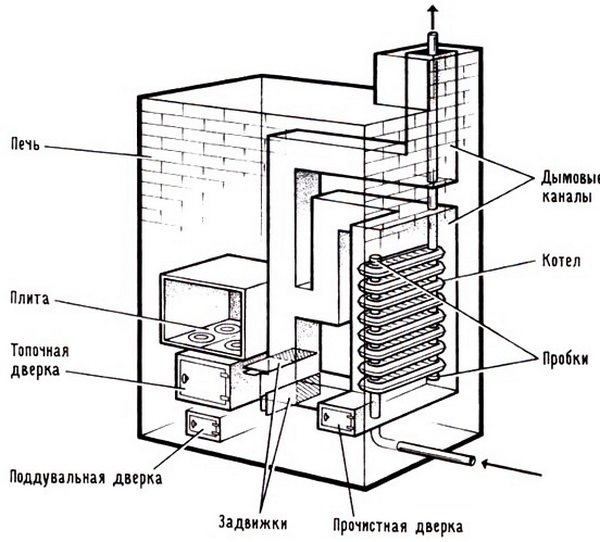
Photo 2. Diagram of a brick stove-boiler with a cooking surface. The arrows indicate the main components.
Materials
For construction they use plastic molded clay brick (hyperpressed or hollow are not suitable). Firing gives the brick compressive strength M250. If this parameter is lower, the oven will not last long. In Vitebsk (workshop No. 2), specialized bricks for furnaces are produced, which have excellent geometry.
For lining the firebox in bell furnaces and coal-fired boilers, it is used fireclay brick Sha-5, or fireclay slabs SHA-8, differing in size. Before designing, calculate the dimensions of the firebox to avoid unnecessary trimming (fireclay bricks are expensive).
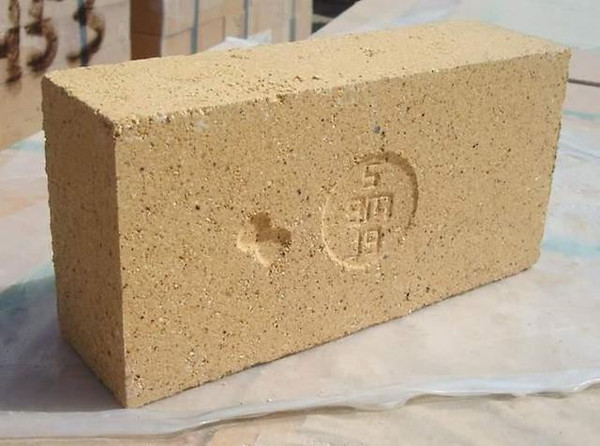
Photo 3. Fireclay brick brand Sha-5. Used for laying the firebox of the furnace with the boiler.
To make the operation of the stove simple and convenient, you need the right fittings that match the size of the brick. Grate it is better to choose cast iron, 1/3 of the firebox area, it is durable and can withstand even the temperature of coal.
Doors for the stove it is better to choose cast, thick-walled. Before installation, knock on it - clean casting gives a uniform ringing, rattling means the presence of cracks (replace it). Doors equipped with heat-resistant glass are popular.
Valves and dampers should be selected based on the dimensions of the furnace channels (in brick and half-brick). When installing, it is important to remember about safety - the damper must have holes or a sawn edge for constant draft.
Cleanout doors will make the stove easier to service. When choosing, pay attention to the dimensions in the project and the locking density. Steel doors with a spring-loaded flap have proven themselves to be excellent - it ensures tightness and does not heat up.
Clay is used as a binder for masonry mortar. You can't put the stove on cement - it burns out and crumbles. Ready-made clay mixtures are sold in specialized stores, you can dig up the clay yourself and make a solution. To do this, soak the clay in water until it has the consistency of kefir. Add sand, measure the fat content of the solution by eye. The ideal solution is when it stays on a shovel turned upside down and slides off without leaving any residue if turned vertically.
Tools
You can build a stove either with your bare hands or using expensive electrical tools and machines.
We will need:
- Trowels of different sizes and shapes — long and narrow, small square, wide. Many stove-makers coat the bricks with bare hands, because the clay does not corrode the skin.
- Measuring tool — plumb line, water level, threads, tape measures, square and ruler.
- For brick processing - hammers, angle grinder with cutting and grinding discs. It is better to seat the bricks with a rubber hammer or mallet - they do not leave marks.
- Welding machine and metalworking tools — for adjusting the heat exchanger to the site, welding or cutting plumbing threads.
A little about the heat exchanger
Depending on the budget and skill of the craftsman, the heat exchanger for the stove can be made by hand, purchased in a store, or ordered from a welder you know. The simplest and cheapest way would be application of cast iron radiatorIt is necessary to replace all rubber gaskets with asbestos ones.
If you have welding skills, a heat exchanger of any shape can be made from a thick-walled iron pipe or sheet iron. 5-8 millimeters thick. When installing, the hot water outlet is positioned higher than the cold water inlet.
The laying process, installation of the draft regulator
Before building a brick boiler, think carefully about the project. Chimneys should not be located close to wooden floors, doors should be accessible.
- Preparing the foundation. It has dimensions wider than the oven 15 centimeters, deepening to the level of soil freezing. The upper plane should be below the floor level by two rows of bricks with seams. We lay two layers of bitumen waterproofing on the foundation.
- Laying the first rows ovens. First — without mortar, to check the conformity of dimensions and determine the location. The dimensions of each brick are checked, the seams between them are exactly 3 millimeters.
- Starting from the third row, we lay out the bottom of the ash pan and the beginning of the passages. We leave space for the cleaning doors and ash pan. We install the blower door - it is a regulator of draft and combustion intensity.
- After two rows we cover the ash pan and begin to lay the fireclay firebox. We choose a place for the grate. When heated, it will expand, so we make a gap in the brick around it 7-10 mm.
- Fireclay brick we lay it on measuring clay.
- We close the firebox, the mouth comes out into the hood. We install our heat exchanger in the cap, and lead the pipes outside the stove. We insulate the joint between the pipes and the brick with a homemade coupling made of basalt wool or cardboard.
- We lay out the cap overlap, and then we lay out another one on top of it.The gases must move like this: from the firebox into the first cap, where they cool down, and through the under-flow channels they enter the second cap, where they finally give off heat.
- The stove roof consists of two layers of bricks., thus we eliminate the possibility of smoking or overheating.
- When the chimney passes through the ceilings, the masonry is widened — fluff. It is advisable to line the chimney with a stainless steel pipe and insulate it with perlite or basalt wool.
Attention! Neglect of fire safety will lead to a fire! Invite specialists for consultation, Follow the instructions strictly!
In the classic version, this design is complicated by a dry seam in the fireclay masonry, a fireclay catalyst for complete combustion of soot and pyrolysis gases in the first cap, a course and a damper for summer kindling. These elements are optional, but are capable of increasing the boiler efficiency by several percent.
We put the structure into “combat” mode
Once the oven is ready, it needs to be washed with water and left to dry. two weeks - a month with all doors open.
They start heating with a few chips, gradually increasing the amount of fuel so that the seams do not crack.
Before the test firing, the water circuit must be connected install the heating system and fill it with water. To avoid accidents, either an open expansion tank or a good pressure relief valve should be provided.
Possible difficulties and their solutions
Every brick in the stove must be controlled by level. When laying a stove, first the corner bricks are laid out, followed by the perimeter, and then the channels and all the internal contents.
Doors should be hung on hinges after the solution has dried, otherwise it will be quite capable of "tearing" the box out of the firebox mouth. The door is tied to the bricks with embedded plates.
When laying fireclay bricks It is not worth tying with clay. They have different coefficients of thermal expansion and the seam will “tear” over time.
Important! It is not allowed to use metal corners or fasteners inside the oven. Everything must be made of brick!
When laying bricks, make sure that the joints of the bricks are aligned correctly.
If you bake flood until dry, it will crack.
How to use the unit
The stove-boiler is quite unpretentious, but requires some knowledge for proper use.
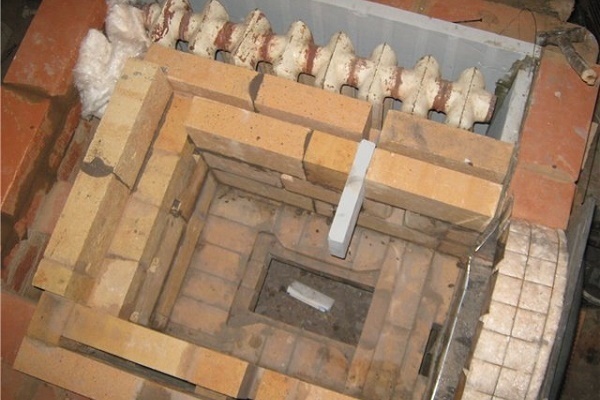
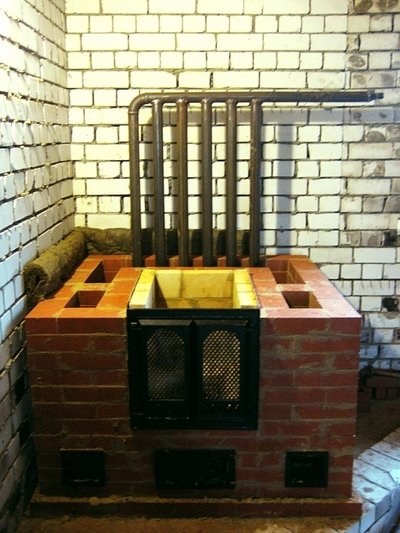
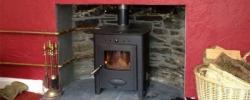
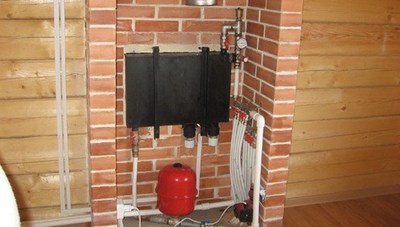
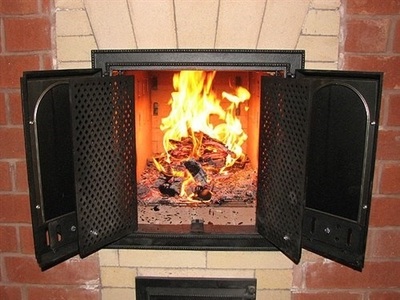
Photo 4. Furnace with a heating boiler. A cast iron battery is used as a heat exchanger.
You can heat it only with dry firewood. Otherwise, the moisture in the pipe will turn into condensate (a black liquid with a creosote smell). This will lead to leaks and dampness of the seams.
The heat exchanger in a bell furnace first receives heat from the hot gases, then from the walls of the bell.
Useful video
Watch the video, which demonstrates the process of designing a brick oven with a heating boiler.
Safety rules
The main rule is do not close the stove damper prematurely. Kuznetsov's boiler works on the principle of a gas damper - cold gases do not mix with hot ones, so the stove does not cool down much. If you close the damper too early, carbon monoxide can enter the room, causing poisoning
The boiler is especially afraid of overheating — the boiling coolant will rupture the heat exchanger. Therefore, in severe frosts, if the power is insufficient, resort to additional heating of the room with electric heaters.
When installing a water pump in a heating system, work efficiency increases.
When firing, some parts of the stove become very hot. Keep small children away from doors, do not entrust teenagers with heating the house.
Keep the door open while heating either closed or slightly open, because a flying ember can cause a fire.
A place is organized in front of the stove "apron" from ceramic tiles or sheet iron.
The soot is removed twice per heating seasonIts accumulation in the chimney can lead to a fire.
Brick oven - great option home heating. The rules for safe use are simple and intuitive.
Comments