Instead of an unsightly structure, an interior decoration! Decorative box for heating pipes
Uncovered pipes placed along the walls can spoil the appearance of any room.
If closed installation of communications is not possible, then to improve the interior they are hidden in special structures - decorative boxes for pipes.
This method allows you to make them aesthetically pleasing with minimal costs without changing the configuration of the outline and violating the integrity of the walls.
When using the box, free access to the heating pipes is maintained for safe operation, the design parameters of the heating circuit remain unchanged.
Content
Making a plasterboard box to cover heating pipes
This material is easy to process, compatible with various finishing methods, is distinguished by its affordable cost and good performance qualities.
Materials and tools

To perform the work you will need:
- for the frame - metal profile (wall, main) or timber beam;
- gypsum plasterboard sheets thickness from 12 mm;
- finishing products — primers, putties, sockets, skirting boards, overlays;
- fasteners - dowels, self-tapping screws 25 mm with fine pitch;
- edge plane, cutter for plasterboard;
- scissors or a metal file — for profiles, hacksaw — for timber;
- screwdriver;
- marking tools.
Important! For decorating heating circuits in bathrooms and kitchens, choose moisture-resistant gypsum board (GKLV), for other rooms standard gypsum board is suitable.
Stages
The production takes place in several stages.
Step 1. Preparatory work
Mark the installation site, which will help you to correctly place the guides and support posts.
When calculating the parameters, take into account that the heating pipes should not touch the elements of the box.
The minimum gap between them is 5 mm.
Cut the metal profile (wooden planks) according to measurements.
Cut the drywall, trying to keep the seams to a minimum.
Reference. To avoid errors when cutting and cutting the material, first make a rough sketch, on which you apply all the necessary dimensions.
Step 2. Assembling the box for heating pipes
Using dowels and self-tapping screws, attach the profile to the floor and wall.. Attach the remaining parts to the guides in the form of a lathing. Plane the edges of the plasterboard sheets, then attach them to the frame and secure with screws.
Step 3. Finishing
Use putty to smooth out the joints between the plasterboard elements., then cover the surface of the box with primer. After this, the structure is ready for finishing. The final touch is fixing the baseboard in the area where the box meets the floor and wall surfaces.
How to make a plastic box to cover pipes
Plastic structures are not affected by moisture, do not produce toxic substances when heated, and are wear-resistant and durable.
Such boxes suitable for home bathrooms, kitchens, hallways, suitable for public spaces with high traffic.
Tools and materials
- Sheet plastic — solid (not foamed) sheets of PVC, polypropylene, polystyrene, ABS. For a particularly strong structure on a serious frame, monolithic polycarbonate is suitable.
Attention! Polyvinyl chloride when heated over 60º C deforms, therefore it is not used for the production of heating boxes intended for rooms with high heating - baths, saunas.
- Cutting tool. For thin (up to 3 mm) sheets - assembly knife. For a more solid construction, prepare a grinder or jigsaw with a saw blade for plastic, which will also be useful for obtaining curved elements.
- Sandpaper, sanding block - for a smooth edge.
- For the frame — metal profile or wooden bars 40x40 mm.
- Starting bar — a starting profile with a recess into which a side plastic element is inserted.
- Fasteners. For guides - plastic dowels, self-tapping screws. The panels are fixed with staples of a construction stapler, small nails, special adhesive mixtures.
- Screwdriver, level, metal shears (wood saw), hammer drill, tape measure, assembly knife, pencil.

Stages of assembly of a plastic product
The device can close both vertical and horizontal pipelines. The installation algorithm does not change and is carried out in the following sequence:
- Marking the mounting locations support and horizontal guides, taking into account the gap between the walls of the box and the pipes.
- Cutting and cutting of materials. In this case, it is desirable that the long side of the plastic is located along the wall of the box.
- Fastening the frame to the base using dowels and screws.
- Securing the lathing — jumpers are placed at the joints of polymer panels.
- Installation of plastic. First, the side planes are installed vertically - inserted into the starting strip or fixed with staples, glue, nails. Then, the long horizontal sections are attached.
To make the heating pipe box look aesthetically pleasing, the joints and The edges are decorated with a special plinth. It can be glued using special adhesives and sanitary sealant that is resistant to mold.
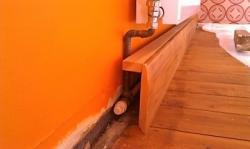
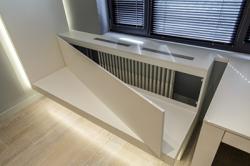
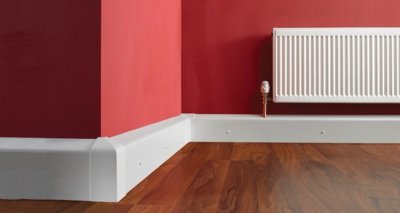
Making a skirting board box
The design helps to hide the heating pipes located in the lower part of the wall above the floor.
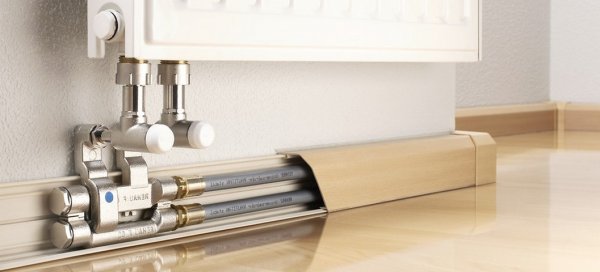
Photo 1. A box-plinth for hiding heating system pipes that run from the heating device to the radiator.
Accessories
- Guide profiles, support posts made of wood or metal. It is advisable to treat wooden planks with protective primers and antiseptics to increase their service life.
- Sheathing material: sheet plastic, plasterboard sheets. Less popular but acceptable options are laminated plywood, chipboard, and MDF.
- Self-tapping screws of different types Depending on the materials chosen, dowels with a plastic sleeve.
- A hammer drill, tape measure, construction knife, hacksaw, level, metal shears.
- Finishing products — putty, primer, decorative elements.
Markup
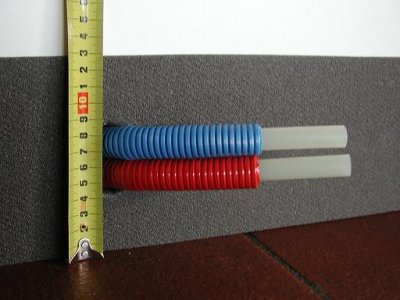
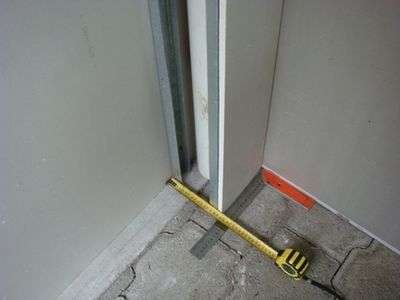
Despite the fact that many people want the box to take up a minimum of space, the gap between the walls and pipes should not be less than 3-5 mm.
Optimal clearance - 20—50 mm.
Vertical posts are located at the joints of the sheathing elements.
Based on the markings, the consumption of materials is calculated and cutting is performed.
Guide installation algorithm
- In the wall and floor, according to the markings, drill mounting holes.
- Into the prepared holes place the dowels.
- Install the guides, check the horizontal and vertical alignment with a level. Secure them with self-tapping screws.
Reference. If wooden planks are used for the frame base, the rigidity of the structure can be increased using metal corners.
Sheathing of the product
Drywall, plywood, laminated chipboard are fastened with special self-tapping screws, thin plastic sheets can be fixed with small nails or staples of a construction stapler. The interval between fasteners is not less than 20-25 cmTo simplify finishing of a plasterboard or plywood box, it is recommended to countersink the screw heads.
Decorative finishing

Plastic products do not require additional finishing, except for covering the joints and edges with a special skirting board.
The plasterboard paneling has an unfinished appearance, so it is additionally decorated. The work is carried out in several stages:
- Sanding sharp corners.
- Primer and putty. Particular attention is paid to joints and screw heads.
- Final priming before applying decorative coating.
After complete drying It is advisable to sand down any uneven areas that may ariseAfter priming, the box is painted, covered with wallpaper, finished with plastic and decorative plaster.
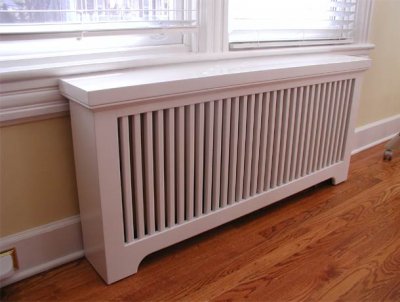
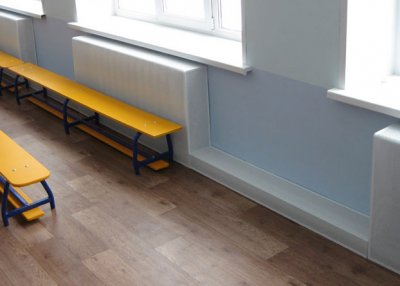
Photos of finished boxes
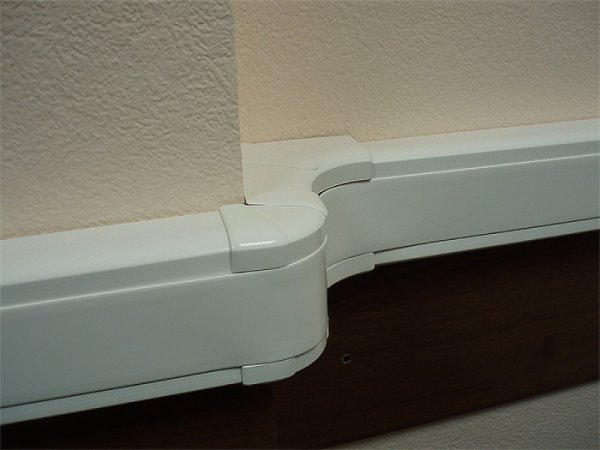
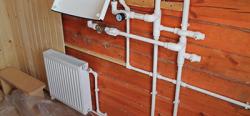
Photo 2. A box used to cover heating pipes. The product is made of plastic.
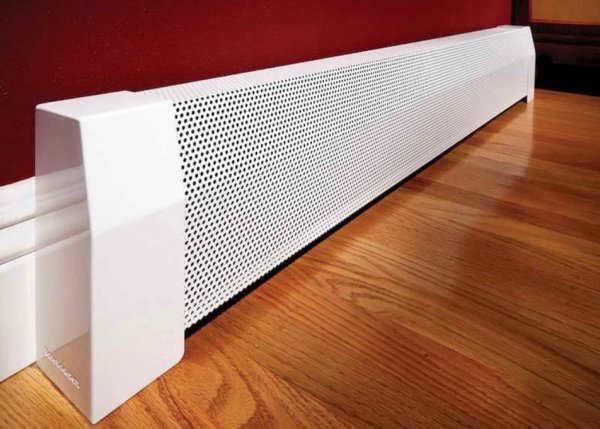
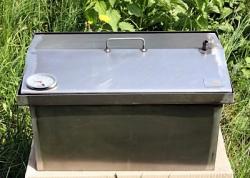
Photo 3. Metal box for covering heating pipes. It has holes for warm air to escape.
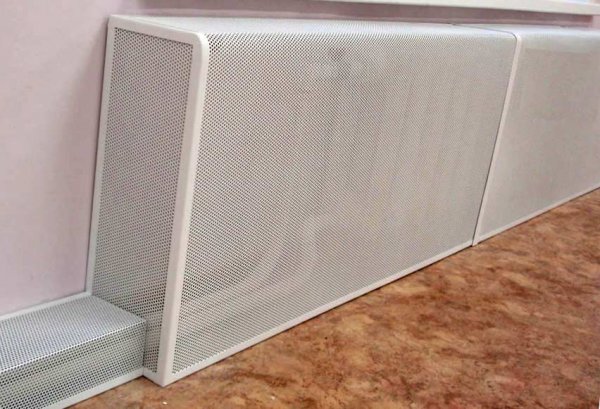
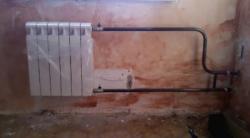
Photo 4. Box for heating pipes, made of metal. The structure also covers the heating radiator.
Useful video
Watch the video, which tells how to install a box on heating pipes in an apartment.
Make it yourself or buy ready-made
There are many types of heating boxes in the retail network, but the price exceeds the cost of materials if purchased separately. Making your own heating pipe casing allows you to save money and create an exclusive design that no one else has.
To ensure that the product pleases the eye and serves as long as possible, try to take accurate measurements, because it will not be possible to glue the cut off part. The fewer seams, the stronger and more attractive the product. In addition, an accurate calculation is needed for reasonable savings: you will not buy less than you need and will not think about what to do with the leftovers.