We improve the stove in the house: its finishing with your own hands, photos of finished projects
You are viewing the section Finishing, located in the large section Bake.
The stove's finish gives it aesthetic appearance, allows retain more heat, serves additional protection against external damage.
Various materials can be used as cladding: from plaster to artificial stone. The owner of the house makes a choice based on personal preferences and financial capabilities.
Content
How to improve stoves and fireplaces in a private house with your own hands? Finishing methods
Folded stove doesn't always look finished and in almost all cases, requires additional intervention with finishing materials. If for one owner the functionality of the device is enough, and he does not want to cover it with anything except plaster, then for another, it is important that the guests of his house are amazed by the elegance of artificial stone or correctly selected tiles.
Plaster
This type of finishing involves covering the stove with the same solution, which was used for masonry.
Not only is it inferior to other materials in terms of external components, but also reduces efficiency by 5-10%, reducing the thermal conductivity of the furnace.
The time it takes to heat the walls increases by 20-30%.
Therefore, before applying plaster, you need to think about whether it is worth saving or whether additional investments are possible.
Reference. Plaster without the use of a top material looks dull, but significantly will save money, if the task is only the practical use of the stove, that is, heating the room.
Whitewash
Our ancestors also whitewashed the stove for each season, since expensive materials were not available to all people. In order to whitewash the stove, you do not need to have great skill. This the easiest way to finish: applied to the stove lime or chalk mortarIt is important to remember that this type of covering requires careful handling on the part of residents, as white is a dirty color.
Coloring
Modern manufacturers produce various heat resistant paints. It is this type of material that is necessary when covering the surface of a folded stove, since its wall will often be exposed to thermal effects during ignition. If desired, a painted surface can be coated with a special varnish.
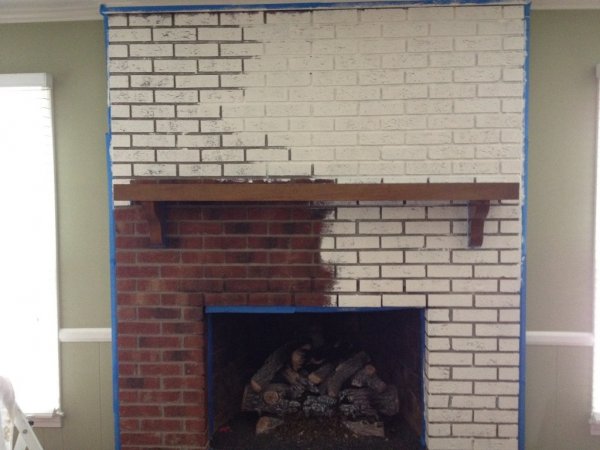
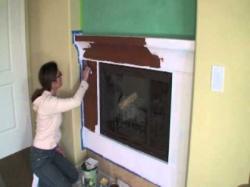
Photo 1. Painting the stove with white paint. When facing such products, heat-resistant materials must be selected.
Is it possible to coat with clay?
The use of clay mortar to strengthen the stove is justified by the fact that it contains sand, strengthening the surface of walls And providing additional protection from chips and other cracks. This type of finishing is not original and is used mainly for practical purposes that do not imply giving the house individuality and the embodiment of design ideas.
Decorative artificial stone: gypsum, acrylic. Photo
Many homeowners want to see their stove with a stone laid on it. But not everyone can afford to buy expensive materials. For these purposes, they use artificial stone for decoration, which in many properties is not only not inferior to natural, but also has additional positive characteristics:
- simple masonry, which even a novice craftsman can handle;
- the laid out stove will not be bulky, because the material light in structure;
- saving money when choosing a finish;
- wide choice of shapes And color schemes;
- opportunity to realize various creative fantasies, when decorating the interior.
In addition, the material also differs in structural diversity:
- Plaster dough. Externally it resembles natural sandstone and has good strength characteristics.
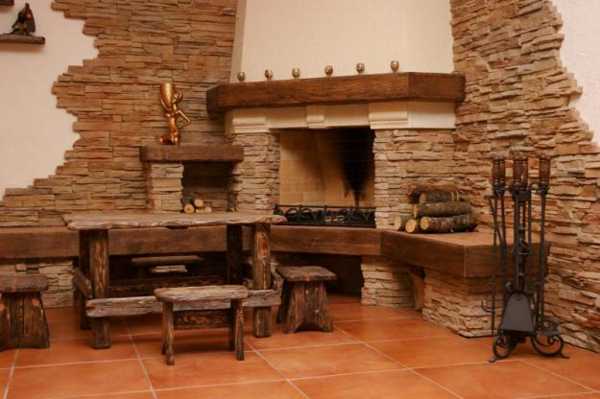
Photo 2. Finishing the fireplace and the walls next to it with artificial stone based on gypsum dough.
- Acrylic stone. Even more durable than the previous version.
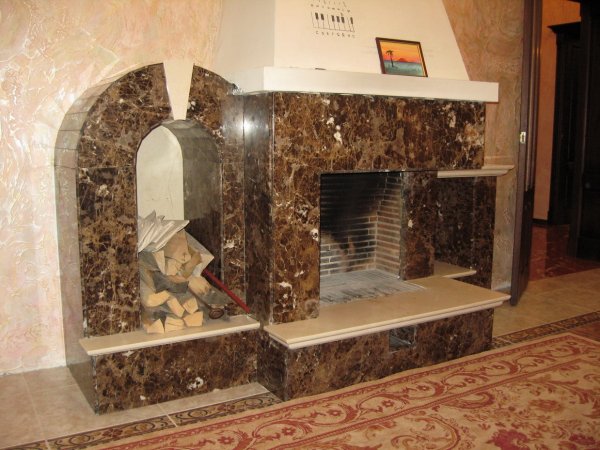
Photo 3. Fireplace with acrylic stone cladding, the color of which resembles natural marble.
- Artificial stone with the presence of natural stone chips.
- Porcelain stoneware. Consists of several types of clay, mineral salts, marble chips and pigments. High resistance to mechanical damage and high temperatures.
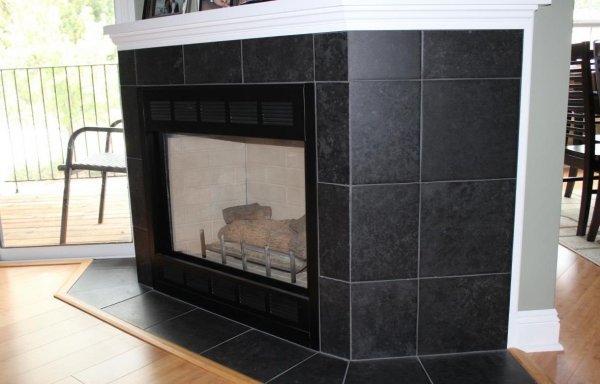
Photo 4. Fireplace with black porcelain stoneware tiles facing it.
- Heat-resistant composite. The material is made on the basis of concrete, quartz or minerals. In terms of strength, it can be compared to granite.

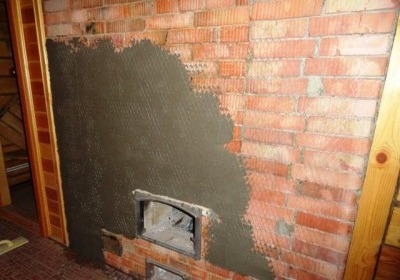
The process of lining a brick oven
A novice craftsman needs to remember the basic rule: the wall must be completely dry after the masonry work has been completed, there should be no chips or other defects.
The whole process is several stages:
- Preparing the tools And waiting for complete drying surfaces.
- Checking the wall for defects and eliminating them with grout.
- Before carrying out plastering work, you should set up beacons for precise application of material on the walls.
- To provide additional stability to the walls of the oven We fix the reinforcing material and additionally apply the solution on top.
- After complete drying, you can begin the cladding process. selected material.
Tools for work
Before carrying out facing works, the master must stock up on tools. These include:

- Several types of spatula from the small one, whose scars do not exceed 6 millimeters, to large ones, as well as rubber and corner ones, designed to eliminate the sealing of seams.
- Building level.
- Grinding machine And tile cutterThey are necessary if the choice was made to use artificial stone.
- Metal scissors. They can be useful if there is a need to trim material.
- Container for glue.
- Metal ruler.
- Electric mixer for mixing the sticky mass.
Preparation and calculation of materials
Materials are selected in accordance with the complexity of the work being performed. If the choice was made on clay solution, then you need to follow the following instructions for preparing the material:
- Clay placed in a container made of iron or plastic.
- Material pour water over it and leave it for three days.
- In the container the clay liquid needs to be kneaded so that there are no lumps left on its surface.
When calculating the clay, you need to follow the advice of experienced craftsmen, who note that each 30 kg of solution they can smear approximately 100 bricks. Therefore, first you need to count the bricks in the masonry. The number of tiles used will depend from its sizeIf the parameters of the finishing material match the brick on the wall, then the owner will need to purchase the same number of slabs as there are bricks in the completed masonry.
When facing with tiles or artificial stone, you will need glue, prepared according to a special recipe specifically for stoves and fireplaces. For convenience, it is recommended to purchase packages by 25 kg.
The choice of stone must be approached responsibly, since the color and texture will have significant significance after application to the wall surface.
Excess fragments must be separated and polished on an abrasive stone.
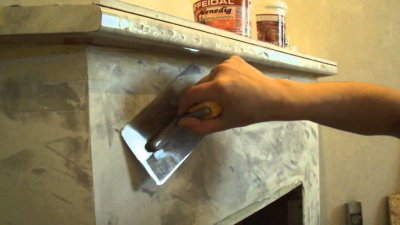
Preparing the furnace for work
Before finishing, preparatory work cannot be avoided. It is necessary for smooth application of plaster and high-quality wall cladding. The first step is removing old plaster, if the oven has already been used before.
This process is carried out with a spatula and waterIf the old plaster contains cement, then you will have to use chisel or hammerIf the old material has been successfully removed, the wall should be cleaned down to the brickwork.
The next step is to walk on the surface of the oven with an iron brush or grinding machine.
Important! For high-quality plaster fixing you will need: sprinkle the walls with water And clean the seams between the bricks.
New masonry is necessary dry and clean from dust and other defects.
After cleaning the walls need measurementsUsing a building level, assess the correctness of the angles and, if necessary, plaster them to align them.
Rules for cladding
After the wall is prepared and plaster is applied to it, you can begin to cover the stove with artificial stone. To do this, you need to follow a certain sequence of actions:
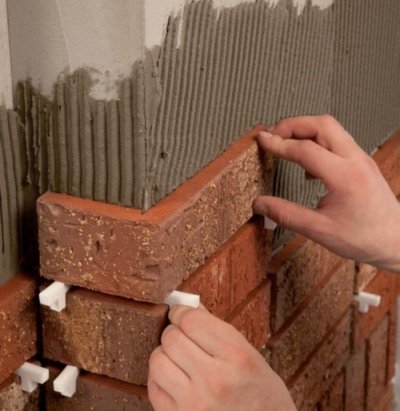
- Laying always starts from the bottom. They use a painted cord, stretch it horizontally and release it, and a trace remains on the wall, which will serve as a guide for the master.
- Corners need to be installed at the corners, which ideally should be the same thickness as the tile that will be reinforced.
- After the glue is mixed, it is applied to the wall.
- Check the correct gluing of tiles you need to use a level, and fill the seams with a special grout.
- Every 5 rows you need to take a break.
- After complete gluing from 24-36 hours wait for the surface to dry.
Difficulties
When it comes to tiles, those new to the field of renovation should pay attention to: difficulties in laying the first row. It is fundamental for the entire finish. Therefore, it is necessary carefully check the specified height with a level.
Incorrect selection of corners can lead to their deformation, if, for example, they are made of plastic and not metal. Before buying, it is recommended to consult with a hardware store.
The main thing is to watch the corners and thoroughly clean the surface of the stove before lining.
Quality and safety
Before finishing, a craftsman, especially a beginner, needs to remember not only about the necessary materials and tools, but also about personal safety. It is important to protect your face and hands from mixtures that can harm your skin and eyes. Therefore construction gloves And protective glasses will be mandatory for work.
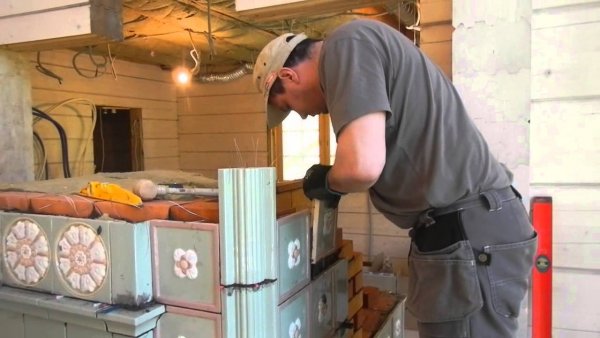
Photo 5. A man is covering a stove at his dacha with decorative patterned tiles. He is wearing gloves while working.
If you take into account all the recommendations for preparation, safety and execution of work, lining the stove will not take much time and will bring only pleasure.
Useful video
Watch the video to learn how to cover a fireplace with artificial gypsum stone.