Asian cuisine at any time: how to build a home tandoor?
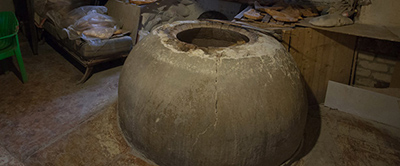
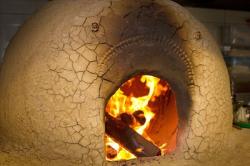
Tandoor - thick-walled clay stove egg-shaped, with a lid and a blower hole at the bottom.
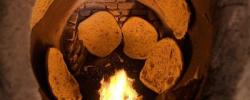
Cooking does not occur over a fire, but due to the heat accumulated by the walls of the oven.
Tandoor in the house for the kitchen
A traditional tandoor cannot be placed indoors - it has no chimney, so all the smoke will be in the house. In the kitchen, you can use stoves:
- Powered by electricity. An easy-to-use stove. An electric coil is placed inside the vessel, heating the walls. It does not produce smoke, heats perfectly, the stove goes into operation in a matter of minutes.
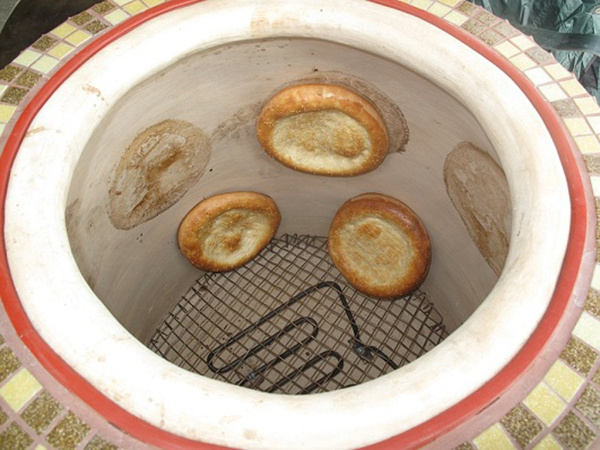
Photo 1. An electric tandoor with a heating coil on the bottom does not create smoke in the room and heats perfectly.
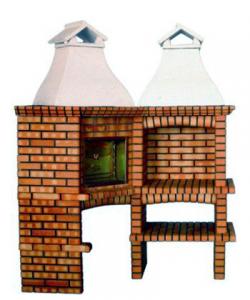
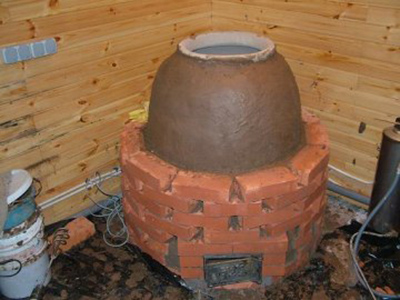
- On coals with a chimney. The coals produce little smoke, and the chimney can be vented outside or into the ventilation. In apartment buildings, this version of the tandoor will not work - the smoke will definitely bother the neighbors. In a private house, if there is ventilation, you can build a capital stationary massive tandoor, which will become part of the kitchen and will be used constantly.
- On natural gas. In such tandoors, a special torch burner is used, which evenly distributes the temperature along the walls. Such a stove also needs a chimney, since the resulting carbon monoxide is dangerous to life.
We design the structure
Let's consider two options tandoor suitable for installation in the kitchen of the house:
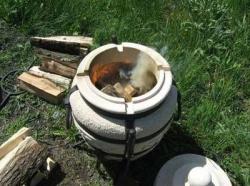
- Small mobile electric vehicle. Convenient, cooks small portions well. Ideal for occasional use, heats up quickly. A significant disadvantage is the small size, which means it will be more difficult to feed a large group of guests.
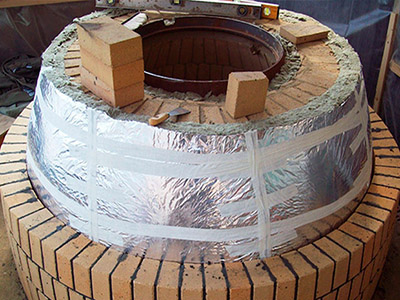
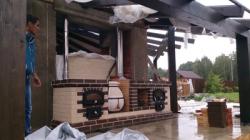
- Massive stationary gas or wood fired. Suitable for lovers of Asian cuisine for frequent use. Has minimum 60 cm in diameter, perfectly insulated. You shouldn't build this device into a regular kitchen, as even insulated walls heat up and there is a risk of fire. The tandoor should be separate, with a gas pipe and a kitchen hood nearby. The downside is that it takes up a lot of space, and if you don't cook on it often, it will only get in the way.
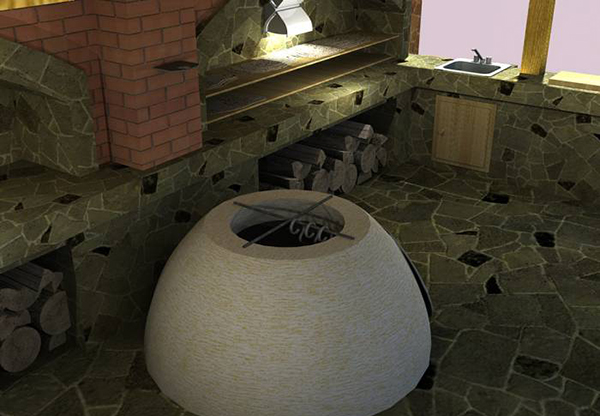
Photo 2. A large tandoor in the house, runs on wood and has good thermal insulation.
What do you need to make a tandoor?
Materials for manufacturing:
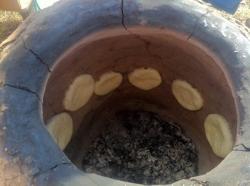
- Capacity for internal walls. You can use fireproof ceramic pots. Material: fireclay, terracotta. Using a firebox "sleeve" will allow you to mold flat cakes onto the walls. Plain clay is not suitable - it will crumble from the temperature. Fireclay bricks are only suitable for making shashlik, which reduces the functionality of the stove.
- Fireclay backfill or lining. Acts as a heat accumulator. Calorific clay can be used as a binder.
- Insulation. To prevent the oven walls from heating up and to allow cooking to continue for longer, it is provided 5–10 cm of basalt wool.
- Frame. Gives a finished appearance and strength to the entire structure.
- Heater. A power supply and a nichrome spiral in one case, and a powerful gas burner-ejector in the other.
Reference! It is better to buy factory-made heaters, this is reduces the risk of injury and accidents.
Necessary equipment and tools:
- hammer;
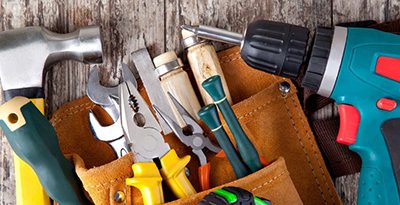
- punch;
- metal saw;
- vice;
- angle grinder with discs for stone and metal;
- drill with drills with carbide tips;
- roulette;
- ruler;
- square;
- glasses and gloves.
Important! When cutting stone, protect your respiratory system. Inhaling stone dust can cause serious illness - pulmonary silicosis.
How to build it yourself at home?
To build a stove, you need to follow the order of work:
- We connect the mouths of ceramic vessels together using metallized tape.
- We make the body out of tin. It should be wider than the vessel. by 10 cm.
- We place basalt wool insulation inside the body.
- Carefully wind the nichrome heater onto the connected ceramic vessels., wrapped in a paper tube.
- We insert the sleeve into the body. We fill the free space with a mixture of crushed fireclay bricks and measuring clay. We tamp it down and let it dry for several days.
- Let's start the oven. This is a long stage - the oven needs to be started with short heatings with increasing temperature.
- From clay we do pallet to collect dripping fat and juices.
We make a stove for regular use
A massive tandoor requires the presence of a solid foundation. If the premises are located in a private house, it is better to pour a monolithic foundation deeper than the level of soil freezing.
Work execution procedure:
- On the foundation is being laid a layer of waterproofing, on top of which is thermal insulation made of 3 cm of asbestos.
- The podium-base is laid out of ordinary clay bricksThe brick acts as a thermal buffer.
- A platform of fireclay slabs is laid out on the brick — the bottom of the stove.
- A metal case is installed - guide.
- Wedge-shaped fireclay bricks are placed inside the case. halves of bricks on the poke. This is necessary for bandaging the seams.
- The masonry is carried out with a minimum layer of mortar clay. When laying, be sure to fill all seams with mortar - the wall should be smooth and monolithic.
- The remaining rows are laid out. The last row of the cylindrical part also consists of whole and half bricks.
- With a large diameter drill in the walls tandoors are being made openings for air supply and flue.
- The chimney can be connected to either a stationary sleeve or a flexible corrugated steel one. The tandoor cannot be called an economical stove - the temperature of the outgoing gases is quite high, and the chimney outlet gets very hot.
- At the bottom, the firebox cover and grate are laid out from fireclay bricks. The ceiling has a gap from the walls of the stove, otherwise thermal expansion can rupture the stove.
- The use of a grate is optional, as in traditional tandoors air is supplied through a special hole. The grate increases the intensity of fuel combustion and accelerates heating.
- The top row is laid out from trimmed fireclay slabs. There should be a hole in the center of the ceiling for loading products and firewood. The hole in the tandoor has side slots for attaching skewers.
- As a lid can be used ceramic pot, metal part from a barbecue.
Difficulties in manufacturing

It is not difficult to make a good and safe tandoor yourself at home, but you must take into account the following technological nuances, so that there are no consequences:
- Different thermal expansion of fireclay backfill and ceramic vessel. Cracks may occur during heating and cooling.
- Incorrectly selected radii of wedge-shaped firebricks.
Attention! Loosely laid bricks will expand and crumble.
- Low quality bonding solution. It is better to use measuring clay or ready-made heat-resistant masonry mixtures.
- Poor quality of ceramic vessels - they will crumble when heated.
- Poor quality or weak burner, which does not heat the walls of the oven.
- Lid leaks, narrow mouth will reduce the convenience of using the stove.
Useful video
The video presents one of the technologies for creating a small clay tandoor.
How to use the structure indoors?
When cooking in a tandoor there are three stages:
- Heating of walls. Wood-fired tandoors are considered ready when the soot on the walls burns out — the walls no longer absorb heat. It is better if a temperature sensor is built into the fireclay jacket.
- Bookmarking a portion. A metal stand is installed, on which skewers with products strung on them are hung. The lid is closed so that the heat does not escape.
- Extraction of finished products. Use potholders, tongs or hooks to avoid getting burned.
Even with high-quality thermal insulation, the walls can heat up to dangerous temperatures. This can lead to a fire.
Comments