Quality, tested for centuries: Russian mini-oven for home with your own hands
Russian stove - unique invention of our people. More than one generation has used this device and how cooking area, and how bed, and how heating device.
Progress does not stand still, and modern interior design solutions are very different from the colors of distant times.
But the love for the Russian stove has not passed even after several centuries. More and more often we see a new version of a familiar device in private homes – a mini-stove.
Content
Pros of a Russian mini-oven
Each stove-maker has his own proven and unique scheme for building a mini brick oven.
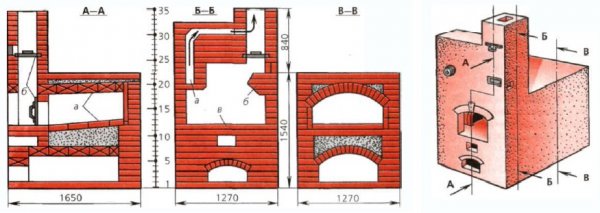
Photo 1. Scheme of Russian mini-oven made of brick. The device provides the possibility of cooking.
The advantages of using it:
- high level of heat transfer;
- safety;
- durability;
- minimal energy consumption;
- multifunctionality;
- compactness.
Schemes, product dimensions
There are two main types of devices, which every master is guided by.
- The first type of stove is suitable for heating small spaces. It has the following dimensions: 51 by 51 cm — area of the base, 175 cm — length. Fireclay bricks are required for laying out the firebox. They are fireproof and very durable, which helps to avoid cracks. Red bricks are perfect for facing the product. The design has a pipe and an oven for cooking. For greater strength and good efficiency, the oven is usually made of sheet steel.
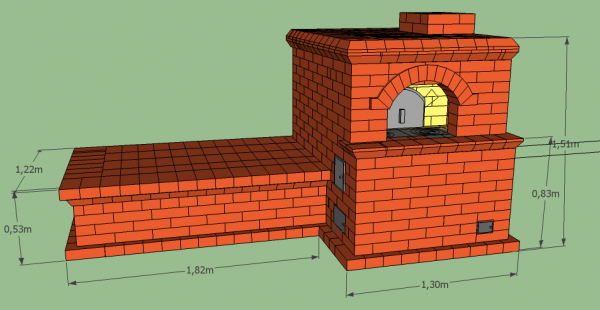
Photo 2. Diagram of a Russian mini-oven made of brick with a bench and a place for cooking.
- The second version of the mini-oven copes well with the task of heating small rooms, the device is also equipped with a hob, so this design is more often chosen for summer cottages and private houses. The chimney is laid out in one brick. This is done so that the exhaust fumes and gases enter the chimney correctly, bypassing the oven on the right and left sides. In terms of area, this design is 51 by 51 cm, its length is 215 cmFirebricks are used to line the firebox.
Attention! When laying out the firebox, you cannot use several types of brick. Each type has a different expansion temperature, so such a joint will lead to cracks.
Making the device yourself
You can make a mini oven yourself, the main thing is to follow the instructions carefully.
Selecting a stove project: with or without a stove. Drawings
When choosing a heating structure and materials for its manufacture, take into account location of the future device. If you decide to build it in the country, in a house with low ceilings, a stove with a stove will be perfect. Few people live in a country house in winter, so this option is optimal for maintaining normal temperature and cooking.
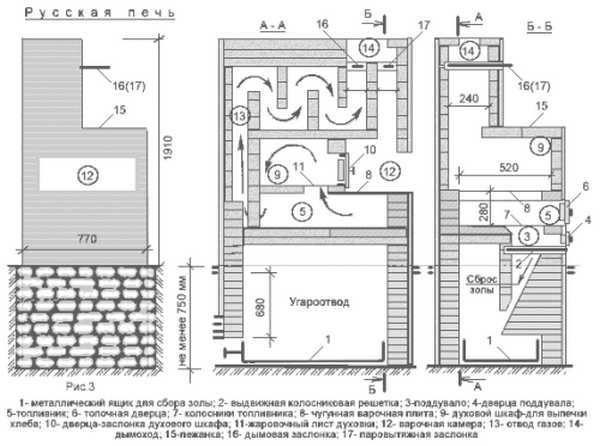
Photo 3. Drawing of a Russian mini-oven made of bricks with indication of the parts of the device and its dimensions.
A mini-oven for heating is perfect for a private home, equipped with an oven. Each home usually has electric or gas appliances to cook all kinds of dishes. But there is a third version of a mini-oven, which, due to its special layout, both heats and replaces the kitchen. Quite often, housewives use such structures as dryers for fruits and berries.
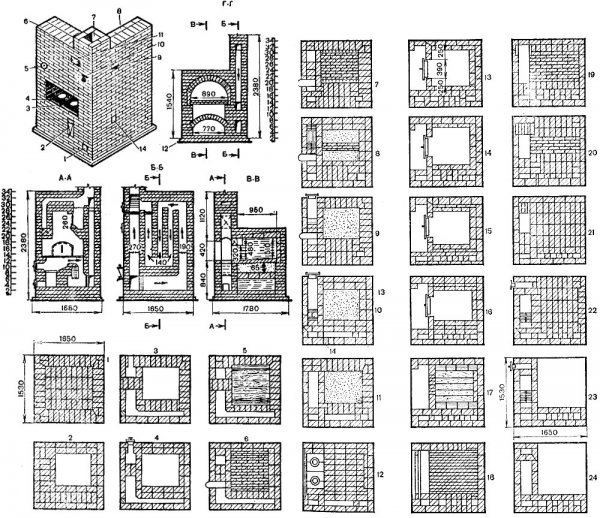
Photo 4. Drawing of a Russian mini-oven made of brick with a hob. Also shown is a 24-stage stove layout.
Materials
To make a classic mini-stove (popularly known as an “economka”) you will need:
- red brick for cladding - 265 pieces;
- fireclay brick for the interior of the structure - 135 pieces;
- a grate in the form of a grid measuring 250 x 400 mm;
- firebox door size 200 x 300 mm;
- two valves;
- blower and cleanout door 140 x 200 mm;
- steel sheet 500 x 700 mm;
- roofing felt 600 x 1000 mm;
- 9 buckets clays;
- 19 buckets sand.
The brick of the future building deserves special attention. Its main parameters are quality and solidity. The usual sizes of working bricks are 250x120x65 mm. It is best to buy a special stove brick. It costs a little more than the usual one, but there will be no doubt about the quality of the resulting product.
Important! It is impossible to use adobe for building a stove, because its structure is hygroscopic even in a dry room. will become soggy and unusable. It is also not recommended to use a silicate product because it is not heat-resistant.
Fireclay bricks for lining the firebox can be replaced quartz. But it is worth remembering that the latter does not come into contact with alkaline substances (lime). High-quality fireclay building material has a brown-yellow color, without any inclusions.
To prepare the solution, take 6 buckets of regular clay, 3 buckets of fireproof clayIt is very flexible in work, more pliable and can withstand quite high temperatures.
Necessary tools
To build a fuel-saving stove you will need:
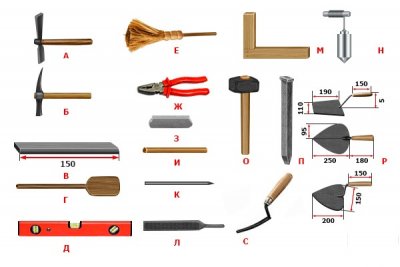
- pick;
- stove hammer (useful for removing dried mortar);
- clay mixing shovel;
- building level;
- pliers for installing iron elements;
- chalk for marking;
- plumb line;
- mortar trowel;
- sieve for clay and sand;
- two deep containers: one for the solution and the other for water.
Preparing the site and building the foundation
Before starting work, you need to choose a place where the future mini-oven will be located. There should be no flammable materials, such as wood, near it.
The housekeeper is built on a solid foundation, not on the floor of your house.
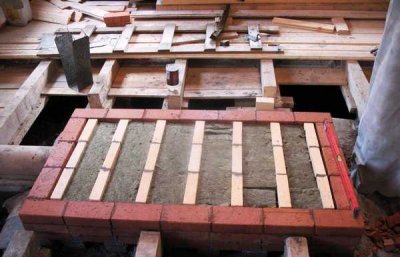
The distance from the foundation of the house to the stove is maintained not less than 15 cm.
At the construction site, part of the floor covering is dismantled and a brick foundation is laid, which concreted and thoroughly dried.
Only after making sure that the base is completely dry and has no cracks, you can put a piece of roofing felt on it for waterproofing and pour a layer of sifted sand. It is on this layer that the first row of masonry will be installed.
Step-by-step manufacturing of a Russian stove-economizer, row by row
Mix the solution: Part 1 water+4 parts clay+8 parts sand. In order for the product to look aesthetically pleasing, sand and clay are sifted.
1st row The oven usually consists of 12 bricks. Using a level, we check the strictly horizontal position of the row. We apply a thin layer of mortar to it and install the blower door.
3rd row is responsible for the heating function of the furnace, so it would be advisable to use fireclay bricks.
In the 4th row — place the bricks on their edges.
When laying the 5th row it is necessary to use refractory raw materials and form a place for the grate. Here the grate is placed on the solution (at a distance 4-5 mm).
From here (up to row 15), the formation of the firebox channel occurs, therefore the masonry is made of fireclay bricks. The firebox door is installed on the 6th row.
On the 16th row For greater strength, we make a “cushion” from a solution of clay and cement.
Row 17 — a base for the pipe is created.
Row 18-19 — the beginning of the chimney.
Rows 20-25 — construction of the chimney. The bricks are laid with a gradual decrease in clearance. At the end, only one brick remains.
Rows 27-29 are connected horizontally on both sides and covered with a metal sheet.
Rows 28 and 32 — installation of valves.
Row 33-35 - section on half a brick and formation of a pipe.
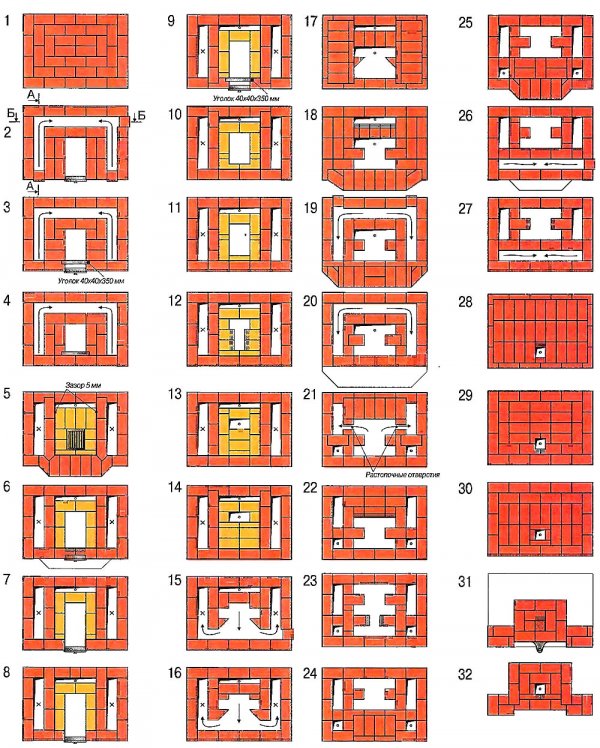
Photo 5. Option for laying out the order of the stove of the housekeeper made of brick. Provides for the use of several types of brick, contains 32 stages.
Possible difficulties during manufacturing
When building a stove, difficulties and unclear moments very rarely arise. Quite a few questions arise for novice stove makers at the preparatory stage, during the preparation of the product drawing.
For adequate heat transfer, the ceiling height must be taken into account, but ceilings in each house are different, so when working with a preliminary drawing of the building I.V. Kuznetsov proposed the following calculation scheme: per 1 sq. m. is released in warm weather 0.5 kW, and in frosty conditions - 0.76 kW. The material from which the firebox is made is taken into account. Steel sheets burn out quickly; for long-term use, it is better to purchase cast iron material.
When purchasing material, many questions also arise. There are special formulas that allow you to calculate the number of bricks in a row. But unfortunately, the error in them is as much as 15%, so it’s easier to count the bricks in one row manually and multiply by the number of rows.
Photos of finished projects
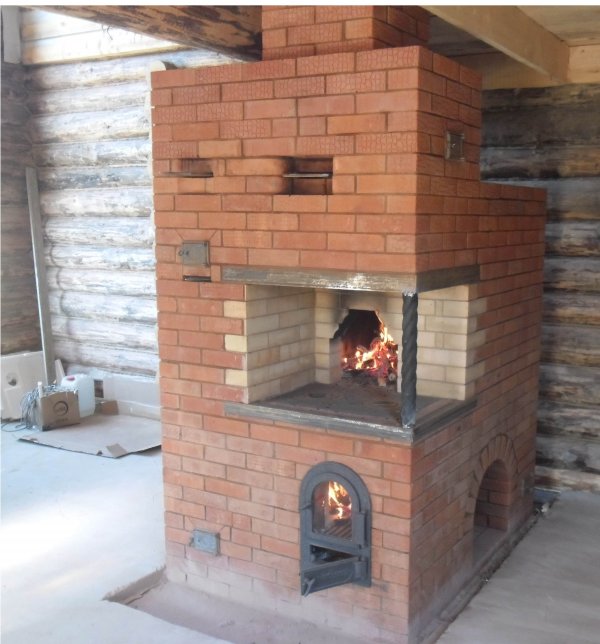
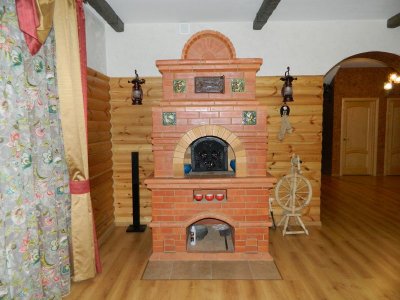
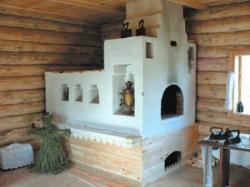
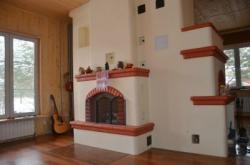
Photo 6. Russian mini-oven made of brick, equipped with a hob. Suitable for heating the house and cooking.
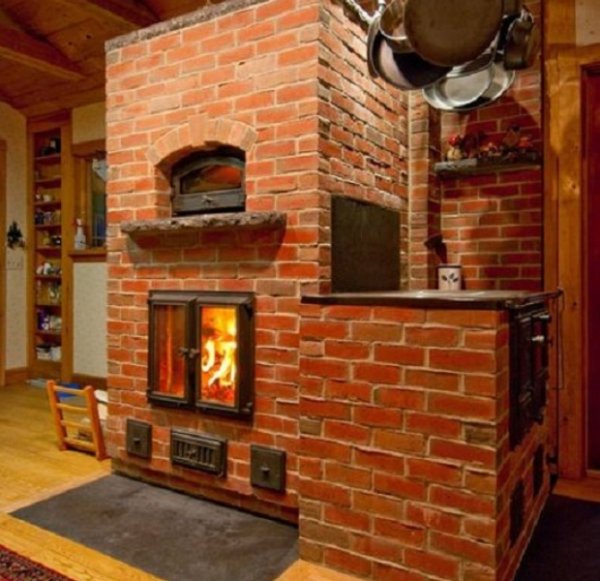
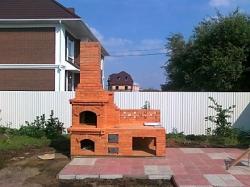
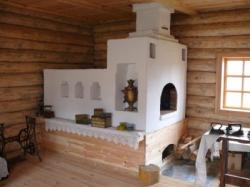
Photo 7. Brick stove "Ekonomka": equipped with an oven, a door made of heat-resistant glass is built into the firebox, which allows you to admire the flames.
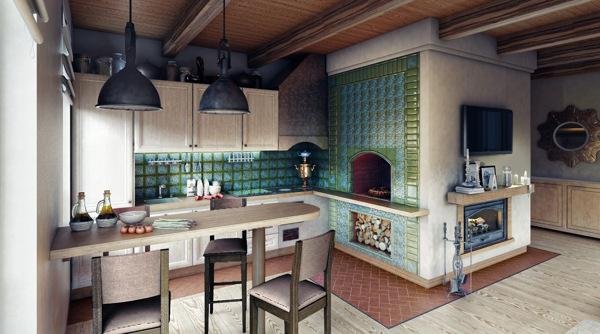
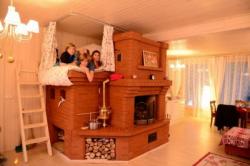
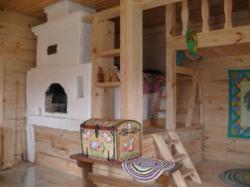
Photo 8. Russian mini-oven in the kitchen interior. The product is covered with decorative tiles and plaster.
Useful video
Watch the video, which uses computer graphics to model a Russian mini-stove and demonstrates its layout step by step.
Recommendations for using a small stove
In order for the stove to be useful and save money, it is necessary to monitor its condition. Even a minor crack increases the loss of efficiency. For better heating, use only dry firewood for kindling. The damper must be closed.
Major soot cleaning is carried out once - in summer, in winter they get by with minor cleaning, but at least 3-4 times per season. Accumulated soot reduces the heat output of the device. If the damper, valves or door are faulty, the stove must not be fired, since they control the draft and help the carbon monoxide evaporate.
Despite all the nuances in the construction and operation of the mini-oven, it acts as excellent heating device, and can compete with modern gadgets in the speed and delicacy of cooking many dishes. It is not for nothing that our ancestors considered the stove to be the soul of the house and placed the structure in the middle of the hut.
It hasn't been several centuries since it returned to us, only in a slightly different form. But its small size is not the main thing, because in terms of functions and the wonderful atmosphere that is created in every home, the device very similar to the good old Russian stove.
Comments
The room begins to warm up after about three to four hours of firing the Russian stove. The heat is retained for almost a day if fired for at least 5 hours.