Proper installation is required for quality work! Installation of an expansion tank in a heating system
When the temperature in the heating system increases, the pressure in the boiler and circuit increases significantly. This is due to the property of the liquid to increase in volume when heated.
Since the heating system is sealed, this an increase in volume leads to pipeline ruptures or boiler failure.
Unfortunately, installing a valve to drain excess liquid does not solve this problem, because when cooling, the volume of the coolant will decrease, and air will enter the system.
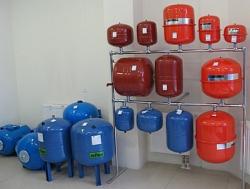
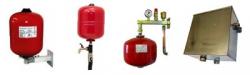
Air locks disrupt the circulation in the network, and regularly refilling the system with new liquid is inconvenient and expensive, since it is much easier to maintain the temperature than to reheat the newly received cold water. Expansion tanks became the solution to such problems. These tanks are connected to the heating system by one pipe, and stabilize the operation of the circuit due to excess pressure in the tank and volume. Such devices vary in size depending on the type of heating system. Their shapes are very diverse, from classic cylinders to modern tablets.
Content
- Where is the expansion tank installed?
- Installation Features
- How to properly install and secure a tank in different types of heating systems
- Wall Mounts
- Connection methods
- How to connect a membrane tank: diagram. Setting up the device
- Errors that occur during installation
- Useful video
- General recommendations
Where is the expansion tank installed?
Choosing a location for the expansion tank depends on both the type of heating circuit and the functions of the tank itself. The reservoir is positioned so that it effectively compensates for the expansion of the liquid.
It is even possible to install several tanks, this applies to private houses, to stabilize the network operation.
In addition to compensating for expansion due to increased temperature (in both closed and open heating circuits), expansion tanks also supplement the standard expansion tanks of gas boilers and accept excess liquid in the network.
In open heating systems, where there is direct contact between the coolant and the air, the tank is installed at the highest point of the house's heating circuit. The volume of the tank should be not less than 10% of liquid. Most often, such structures are gravity-fed with a large volume of circulating liquid, so it is more convenient to place them in the attic.
If this is not possible, some mount tanks under the ceiling, not far from the floor gas boiler. This is convenient, since easier access to the tank makes it possible to constantly monitor its functionality, but such a device also has a negative side, since it spoils the interior of the room.
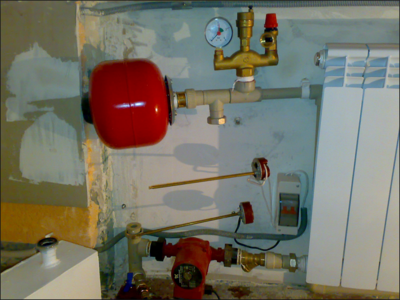
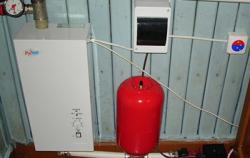
As for closed type systems — the location of the expansion tank does not matter at all. Most often, tanks are installed in the boiler room or another room where the rest of the heating elements are located. In small houses, where space is limited, tanks are mounted directly in the kitchens, next to the boiler.
Installation Features
-
Preparatory activities. Before starting work, the boiler is disconnected from the power grid. They also shut off the water supply and drain all liquid from the system.
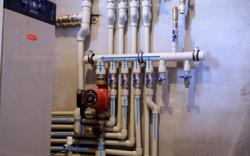
Typically, polypropylene pipes are used to connect parts of the system; they are welded with a special soldering iron with additional fittings in the form of couplings and corners for fittings.
It is preferable to take the “American” one, its advantage is that you can easily remove the tank if necessary. "American" consists of two parts: one is attached to the thread on the expansion tank, the second to the first. Then the pipe is soldered to the second part. To ensure the reliability of the connection of the fitting to the tank, a sealant in the form of paste or flax is applied to the thread, the fitting is secured to the thread with a gas wrench.
- Installation of pipes. After removing water from the network, the pipes are soldered and laid, be sure to add a shut-off valve, which will allow you to carry out preventive or other work on the tank in the future without completely draining the liquid.
- Connecting the tank. After connecting the union nut to the tank, it is placed in a pre-selected location so that so that the expansion tank is always freely accessible.
- Before starting the system, be sure to check the water filter, wash it, and replace it if necessary. The main filter cartridge is being changed.
- LaunchAfter fixing all the elements, try to start the system, for this purpose fill it with water and turn on the boiler.
When installing, you should follow some rules:
- do not install the tank close to walls or in hard to reach places;
- the height of the mount is such, so that you can easily reach the valve or shut-off valve;
- on the tank branch pipe pipes or fittings should not press;
- it is not allowed to place the supply pipe in the aisle on the floor or overhead;
- if the tank is located in the attic, It is recommended to wrap it with insulation;
- organize the overflow, otherwise water may flood the ceiling in case of a breakdown.

How to properly install and secure a tank in different types of heating systems
There are specific principles for installing expansion tanks for different types of heating systems.
How to put in open
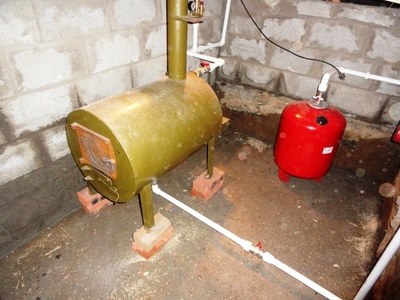
An open heating system is a single vessel of complex shape in which natural circulation of liquid occurs. Contact with air occurs through an expansion tank, which is an open container of large volume with a lid, it is only needed to prevent debris from getting in. Such tanks are installed in the attic and water is periodically added as it evaporates.
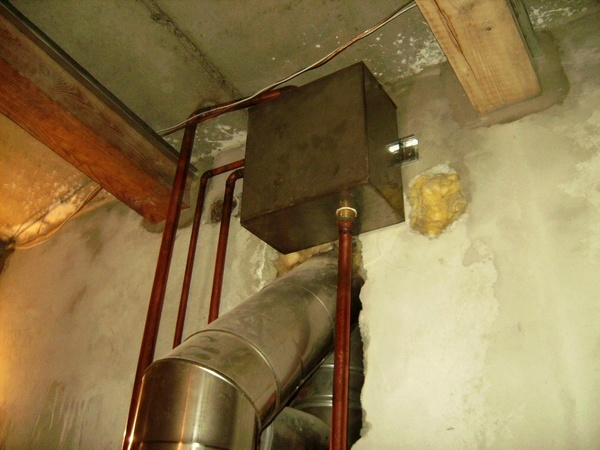
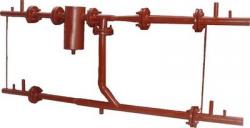
Photo 1. Expansion tank installed in an open heating system. The product is located at the highest point of the heating circuit.
The expansion tank is mounted at the highest point of the circuit., because hot water, like air bubbles, tends to rise, and the cooling liquid drains by gravity. In the absence of an attic, this is the highest point of the acceleration manifold of a one-pipe system. The tanks are not equipped with membranes or shut-off valves, so their installation will not require large financial costs.
How to install in a closed
Selecting a capacity for a closed system is somewhat more difficult, because here you will have to rely on calculations and the volume of the heating circuit. In this case, the right place is chosen relative to the section of the calmest flow of liquid inside the circuit, without mixing of flows or turbulence. The optimal area for this is in front of the circulation pump. Here the tank functions as a compensator for thermal expansion and dampens water hammer.
When installing an expansion tank in a closed circuit, it is necessary to mount safety valve, which will release excess pressure. If the boiler was supplied with an expansion tank when purchased, but after installation it turned out that its volume was insufficient (it should be not less than 10% total volume of water), this is usually indicated by too frequent operation of the pressure relief valve, you can purchase an additional tank and connect it in parallel to the first one.
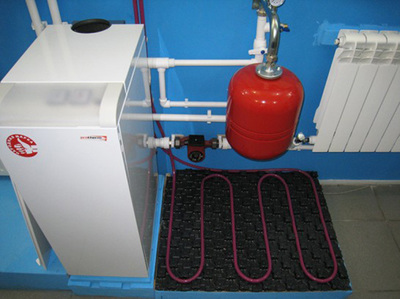
For a closed system they are intended membrane expansion tanks, which are best placed vertically. In this case, the coolant enters the tank from above, displacing all the air from the water compartment.
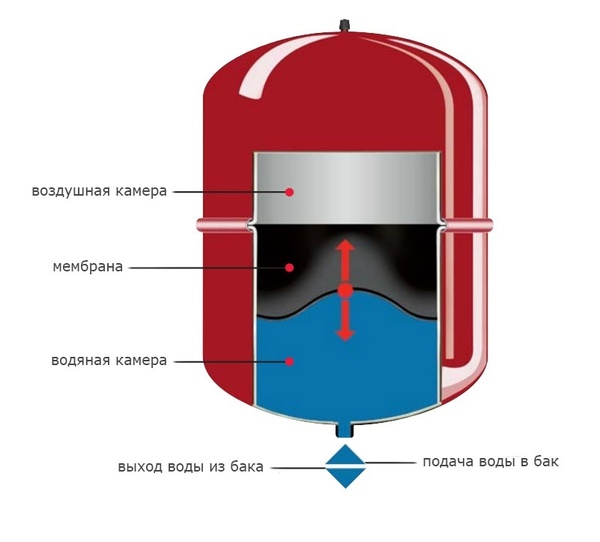
Photo 2. Diagram of the membrane expansion tank. The arrows show the components of the structure.
The structure of the membrane tank is as follows: The space inside is divided into two sections separated by an elastic membrane. When liquid accumulates in the tank and the pressure increases, the water presses on the membrane and the air in the upper section is compressed. The vertical position in this case is considered optimal, it allows for easier compensation of excess pressure and extends the service life of the membrane.
Wall Mounts
Standard sets for fixing expansion tanks to the wall can withstand weight up to 50 kg. They include a bracket or clamp, steel clamps, plastic dowels and steel screws. If it is not possible to purchase a ready-made kit, the parts for installation are purchased separately.
Having decided on the location and making sure that the wall can support the weight of the device, proceed to fastening. First, mark the future holes for the bracket with a pencil. Then take a drill (8 mm) and drill recesses for dowels. Dowels are driven into the holes and the bracket is secured with screws. Steel clamps are threaded through special holes in the bracket and the tank is secured.
Connection methods
The expansion device is connected both to the return and supply parts of the main line.
Connection on the return is considered more reliable, allows the expander to function in optimal mode, and also to operate the membrane tank longer.
When connecting on the feed part the liquid entering the tank will have a higher temperature, and in some situations it will not be possible to avoid steam entering the tank, which will significantly reduce the operating time of the membrane tanks and will not allow the pressure to be compensated properly.
Attention! The correct connection is considered to be the tank to the circuit through an "American" with a shut-off valve, which allows you to isolate and disconnect the expander at any time for replacement or repair, without waiting for the liquid to cool down. By installing a second tap and tee, it is possible to drain the water from the tank without touching the rest of the system.
How to connect a membrane tank: diagram. Setting up the device
After installation work on cutting the tank into the general network, its adjustment is carried out. The main task is to achieve the required pressure corresponding to the heating system. Such adjustment applies to closed-type tanks and is carried out as follows:
- After installing the expander, the system is filled with water;
- air is bled from radiators and pipes, for this purpose Mayevsky valves and taps are used;
- measure the pressure (with a pressure gauge) in the air compartment of the tank and in the rest of the system;
- According to the rules, the pressure in the tank should be 0.2 Bar lower, than in the rest of the circuit, this difference is achieved by bleeding and pumping up the pressure in the chamber with a compressor.
If, as a result of calculations, the pressure in the system should be 1.3 Bar then in the air compartment of the tank it must be lowered to the value 1 Bar. This is necessary so that sufficient pressure is exerted on the rubber "bulb" from the water side, and when the coolant cools down, air is not drawn in. After such a system adjustment, the boiler is turned on, now the pressure in the expander will increase smoothly, regardless of whether the liquid is cooling or heating up.
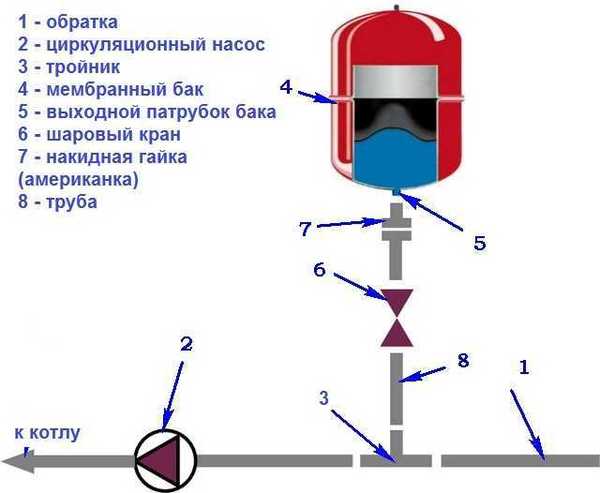
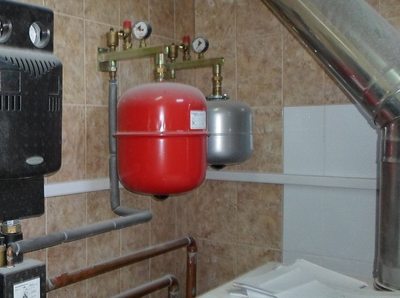
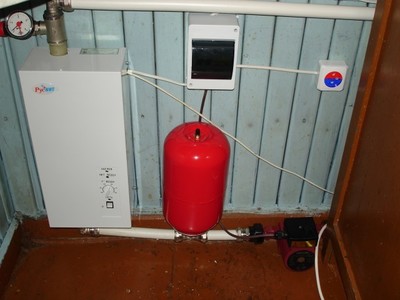
Photo 3. Diagram of connection of membrane tank to closed heating system. All parts of the structure are marked with numbers.
Errors that occur during installation
Since private home owners try to do most of the work themselves, no one is immune from errors during installation and adjustment of equipment:
- Poor quality of required tools or lack thereof.
- Use of poor quality seals or cheap sealants in the joints. Using substances that are not designed for high temperatures will result in leaks when the fluid in the circuit is heated.
- Installing the expander in an inaccessible place.
- Selecting a tank without preliminary volume calculation leads to boiler failure or incorrect operation of the system.
- Failure to comply with safety standards and regulations during installation capacity leads to an emergency situation and poses a threat to life.
Useful video
Watch the video to learn how to set up an expansion tank in a heating system.
General recommendations
Installing an expansion tank does not require specialized knowledge, You can easily handle this on your own. Understanding how the system works will help you troubleshoot problems when they occur. If you experience sudden pressure spikes or drops that cause the burner flame to go out, this could be due to a change in pressure inside the tank or a leak in the heating system. In these cases, you will need to measure the pressure and adjust it, or fix the leak.
In addition, before installing heating in a private house, choose the type of heating system: open - with natural circulation of the coolant, or closed - with forced circulation using a pump. Each type has its own advantages and disadvantages.
Closed type heating circuit is gaining more and more popularity. This is because such a system is easy to install, compact and has some operational advantages.
In addition, with the right calculations, you can select the optimal model of a closed expansion tank, which will allow the heating system to function as efficiently as possible.
In addition, the role of the tank in the heating system is extremely important; for its normal operation, the operating rules must be followed. The following events are held every six months:
- preventive examination for damage;
- measurement of the initial pressure of the gas space;
- checking the membrane for integrity.
If necessary, the tank is removed and repaired.This allows to improve the performance of devices and ensure normal functionality of the system.