How to easily and quickly connect an electric boiler: DIY installation and test run
Installation of an electric boiler does not require obtaining any permits and can be carried out entirely on your own.
To do this, you need to have minimal skills in electrical and plumbing work and know Electrical Installation Rules (EIR), which describe in detail all work with electrical appliances - after all, it is the electrical part of the device that requires special responsibility during installation.
What is needed to install an electric boiler yourself?
When installing the boiler you will need the following materials and tools:
- drill or hammer drill to create holes in the wall at the place where the device is mounted;
- anchors, dowels, screws for fastening installation elements;
- screwdriver or keys, depending on the type of fasteners;
- building level for mounting the device strictly horizontally;
- roulette to take measurements;
- marker for marking;
- adapters and flanges for fixing the boiler to the pipes;
- pipes for installation of the harness;
- pipe wrench or adjustable pliers for tightening threaded connections;
- waterproof socket, electrical cables for connection to the home electrical network;
- screwdriver indicator to check the electrical network;
- plank for mounting (in wall-mounted models);
- instruction to the device;
- scheme installation.
Selecting and preparing a place for installation in a private house
The location of the boiler is not limited, but when choosing it, you should follow several rules:
- If possible, it is better to place the device in in a separate room, to reduce the likelihood of accidental damage or unauthorized interference in its operation.
- The device should be placed in such a way that it will be possible to use it later easy access for its maintenance and piping.
- Wall-mounted boilers with heating elements are mounted not lower than 1.5 m from the floor level.
- Induction and electrode models are attached at any height, but only vertically.
- It would be more rational to place the lower tube of the device below the heating radiators, which will create better conditions for the circulation of the coolant.
- There should be no in the room high humidity, to avoid damage to the electric boiler.
- The device must be protected from accidental contact. water.
- To power the device, single-phase or three-phase power supply, depending on its type.
The location for installing the boiler must provide for minimum distances to other objects:
- up to the ceiling - 80 cm;
- to the floor - 50 cm;
- to the walls - 5 cm;
- to the nearest pipes - 50 cm;
- for servicing the boiler from the front - 70 cm.
Before installing an electric boiler, the following work is performed:
- It is closed using shut-off equipment water access to the system.
- All surfaces are cleaned from dust and dirt.
- The electrical wiring is checked for compliance passport data of the device and absence of damage. If breaks are detected, the connection is restored and isolated.
Important! It is necessary to provide in advance that during the installation of the device there is no access to it children, strangers and pets.
How to install an electric boiler
Before starting work, all installed elements are checked for integrity and absence of damage, which may lead to boiler malfunction. The work is carried out in the following order:
- Using a level and tape measure, mark on the wall place for hanging the device. The marker marks the points for drilling holes.
There should be no water or electrical lines near the mounting location.
- It is fixed to the wall mounting plate for hanging the device. It is leveled using a spirit level and secured in pre-drilled holes with dowels.
- The device is hung on the bar and is being fixed on it.
- Floor models are mounted on a special stand, included in the delivery set.
- It is being mounted residual current device (RCD). It is necessary to automatically switch off the boiler when the current in the network rises to a certain critical value.
- If the device is powered by three-phase networks, then it is installed near it circuit breaker.
- Copper wire cross-section not less than 4 sq.mm The socket is connected to the house grounding network. It is prohibited to connect to metal pipes and other objects not intended for this purpose.
- Add if necessary pumping equipment to increase the pressure in the network.
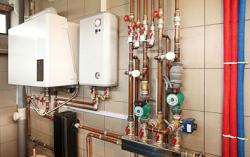
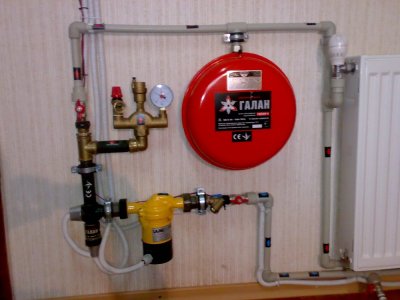
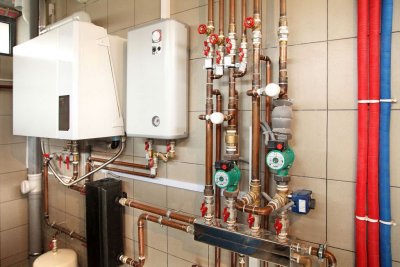
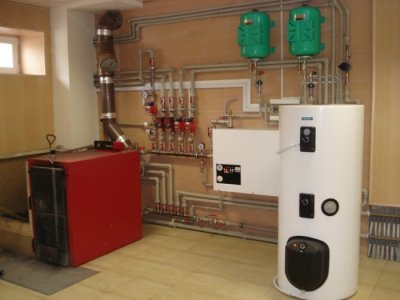
Connection to heating and water supply systems
In production binding electric boiler. It depends on its model and is described in the instructions for the device. For the classic type of piping you will need:
- Shut-off equipment, allowing you to turn off the device for replacement or repair.
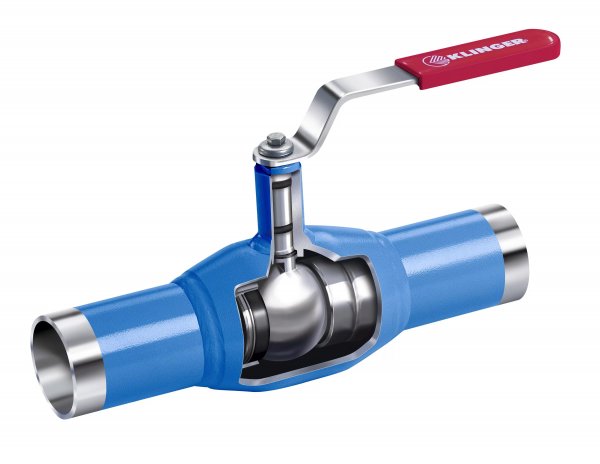
Photo 1. Standard bore steel ball valve with handle, Series 282, manufacturer - Temper, Russia.
- Filter to filter out particles that could damage equipment.
- Safety and check valves.
- Pipes, connecting tees and elbows.
- Brackets for fastening pipes.
- Pressure gauge and thermometer.
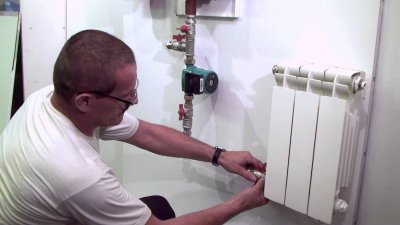
The boiler is connected to the heating and water supply systems according to the same rules:
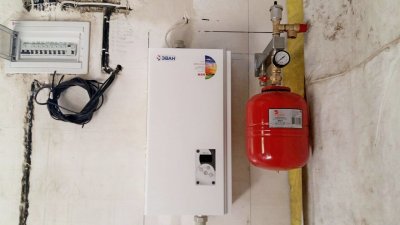
- The boiler is mounted in system breakdown. Three-way valves and a bypass line are installed at the insertion points. These elements allow you to shut off the water flow through the device and direct it around for repairs or maintenance.
- To relieve excess pressure in the system, a pressure relief valve is installed. safety valve, protecting it from damage.
- A boiler entrance is installed filter.

Test run
After completion of all installation and connection work of the electric boiler, the system is prepared for a test run in the following sequence:
- Opening taps on the boiler, pump and expansion tank.
- Opening valves or thermostats on heating batteries.
- They are closing Mayevsky cranes and taps on the manifold.
- The heating system is filled with coolant, and the hot water supply system is filled with water. To do this, tap water is supplied to the inlet valve of the collector or boiler. The pressure should rise up to 1.5 atmospheres.
- After filling the heating network with Mayevsky taps, the air accumulated there is released from the radiators. To do this, in turn, all the radiators are opened in the direction of water flow Mayevsky cranes, as soon as air stops coming out of them and water appears, the tap closes.
- After this procedure, the pressure in the system may drop. This is normal, you will have to add more water to the initial pressure. 1.5 atmospheres.
- Next, the air is released from the injection pump through special screw on its body.
After the system is prepared, a test run of the system is carried out:
- The boiler is starting up for 10-15 minutes. Every 2-3 minutes. You need to unscrew the drain screw and check if water is flowing from there.
If it leaks, everything is fine and you can continue the test run. If not, air has accumulated in the system and needs to be released.
- When starting up, it is necessary to monitor the pressure in the system and maintain it. at a level of 1.5 atmospheres, adding water as it decreases.
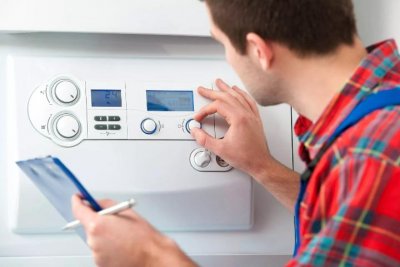
- After this, the boiler is switched on at a reduced temperature. power (40-50 °C) and all radiators in the house are checked. The main sign of correct installation and connection of the device is a fully functioning system approximately an hour after startup.
- If everything works fine, the boiler can be turned on at full power. power (70 °C). In this mode, the system should be allowed to operate for several hours to ensure that the device is connected correctly.
What you need to pay attention to when starting
During operation, it is necessary to monitor the condition of the boiler and pay attention to the following signs, which characterize its incorrect connection or failure:
- Pressure increase in the system.
- Impossibility temperature regulation in models that are technically capable of this.
- Clicking, noise and other sounds in the boiler.
- Fast boiling boiler.
- High consumption electricity.
- Sensor The temperature gauge shows high temperature, but the heating system is actually cold.
In these and other situations when the boiler is not working properly, it is necessary turn it off immediately and contact specialists who will figure out the reasons and correct the incorrect connection if it occurred.
Useful video
Watch the video to learn how to install an electric boiler in your home yourself.
Safety rules
When installing the boiler, the following safety measures must be observed:
- All work must be carried out on disconnected section of the power grid.
- The wiring must match power of the device.
- It is mandatory to perform grounding devices.
- All requirements must be met between the building structures and the boiler body. recommended distances.
- Power cables are mounted in sealed protective covers to protect them from water ingress.
- The power line supplying the device is supplied individual circuit breaker.
- The boiler piping is fastened to the wall or supports to reduce the load on its body.
- The wall on which the device is mounted is protected from overheating. a sheet of non-flammable material.
- The electric boiler is not installed next to water sources or running water.
Failure to comply with these rules may not only result in failure of the device, but also lead to human casualties. It is not difficult to avoid sad consequences if you carefully and slowly carry out all work in accordance with the recommendations.