Without it, you can simply suffocate! How to make a chimney for a gas boiler correctly
The temperatures to which the surfaces of gas boiler chimneys are exposed are not very high, so they are less dangerous.
It happens that gas leaks occur in such devices and it is difficult to determine where. The safety of pipelines directly depends on the tightness of the joints.
General principles of construction of gas boiler chimneys
Design requirements are regulated by acts SNiP RF (building codes and regulations). In particular - SNiP 2.04.05-91.
Main parameters:
- the diameter of the chimney must be no less than the outlet pipe on a gas boiler;
- the structure must be vertical, the possible slope is 30 degrees, but the length of the inclined section is not higher than the height of the building;
- as part of a chimney there should be no narrowed or curved elements;
- the components are manufactured exclusively made of gas-impermeable materials;
- the execution of joints implies their gas and water resistance;
- the presence of a device for collecting condensate (tee) is mandatory;
- proper traction must be ensured, which requires raising the end of the chimney above the roof ridge by 50 cm, in cases where the output is located next to it;
- the outer opening is equipped with a visor to protect the pipeline from foreign objects.
Chimneys are classified by location built-in and external. Built-in ones are located inside the house, they are more difficult to install, and they are more dangerous in terms of possible gas leaks. In addition, subsequent repairs of the internal chimney are difficult to carry out.
On the other hand, the external device does not look very attractive (it may be necessary to construct additional decorative structures), will require more materials, the chimney is more susceptible to environmental influences (especially relevant if it is ordinary galvanized steel).
Chimneys are manufactured from the following materials:
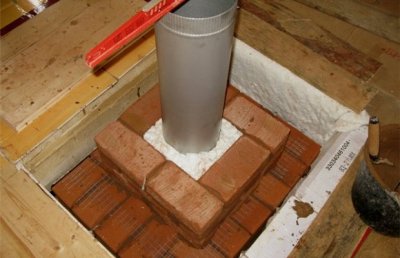
- Brick. Brickwork is one of the oldest methods of creating a chimney, it is bad because of its high cost and susceptibility to destruction under the influence of condensate. In modern construction it is used more as a lining for pipelines.
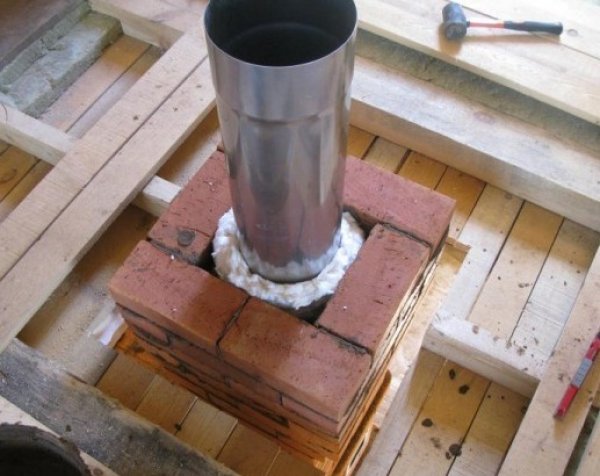
Photo 1. Installation of a brick chimney for a heating boiler. The brick covers the metal pipe coming from the boiler.
- Galvanized or stainless steel. Galvanized and stainless steel pipes are the most common material. The first is less expensive and less durable - 4-5 years.
- Asbestos pipes. They absorb condensate well, but do not provide a tight seal at joints; they can be destroyed when overheated, which is why they are used in the construction of non-critical structures (pipes for baths and saunas).
- Sandwich systems. The sandwich pipe is a double pipeline and basalt wool inside, which acts as a layer. Suitable for external systems, as it does not require additional insulation.
- Coaxial design (for closed combustion chambers). This is one of the most progressive systems. Two pipes — one inside the other, with jumpers between them to prevent contact. Installation is allowed both horizontally and vertically. The pipeline is both an air intake to maintain the operation of the device and a smoke exhaust; the air simultaneously cools the exhaust pipe. It is installed on boilers with internal combustion chambers, in which case additional ventilation is not required.
- Ceramics, including in combination with other materials. It is considered the most durable material. It is mounted end-to-end using a special mastic. It has a layer of insulation on the outside, and sometimes there is a steel casing on top for outdoor installation of pipes.
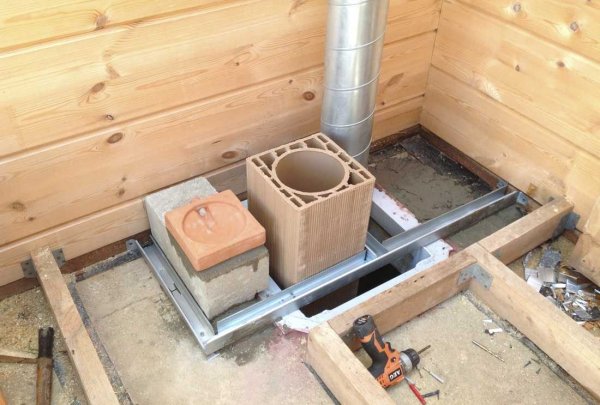
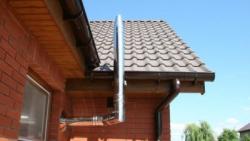
Photo 2. Installation of a ceramic chimney for a heating boiler. This product is the most durable.
Necessary tools and materials for installation
No special equipment is required for work:
- drill, hammer drill;
- Bulgarian;
- sealant gun;
- kit wrenches;
- hammer;
- plumb line or bubble level;
- hacksaw on wood;
- roulette.
Additional materials you will need: self-tapping screws, sealant for processing joints, clamps and dowels to attach them to the walls.
How to make a sealed chimney for gas removal
It is especially worth canceling the main principle of pipeline assembly. For external use the upper pipe is inserted into the lower one (“by condensate”).
In the internal chimneys - the lower pipe is inserted into the upper one (“by smoke”), this is an additional guarantee that if the seal is broken, it will be “easier” for the gas to follow the pipe than to leak out through the joint.
Sandwich structures are preferably assembled using a mixed method: the inner circuit is "by condensate", the outer one is "by smoke". The method is complicated, but it will provide the connections with maximum protection.
After installing the boiler You should think about how the pipeline will be located.
The easiest option, if the device is adjacent to an external wall, is to bring the pipes outside. First, you should mark and cut the hole. The marking is done according to the level of the boiler outlet pipe, hole in the wall need to do 1.5 times larger than the pipe diameter.
Depending on the material and thickness of the wall, you will need to drill a through hole. hammer drill, hacksaw or grinder.
Attention! Before you cut a hole, you should make sure that there is something inside no electrical wiring.
Once the hole work is completed, you can begin assembling the pipes.
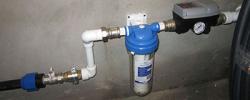
- For this A special adapter is placed on the boiler outlet pipe. It is secured with a clamp, and sealant is applied to the joint before assembly.
- The next pipeline element is connected to the adapter. so that it fits freely through the hole and does not touch the wall surface (gaps are necessary for subsequent insulation and sealing).
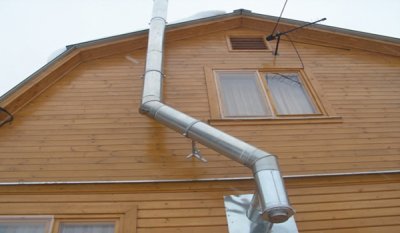
- Horizontal sections should be as short as possible (within 2 meters), to ensure normal overall chimney draft. After being brought out, the section is connected to a condensate removal tap (tee).
- They continue to expand the pipeline vertically, fixing it to the wall using clamps and brackets.
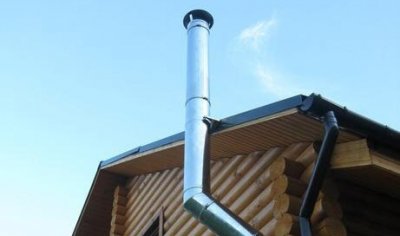
- When the roof level is reached, the last element, the “mushroom”, is joined., to prevent precipitation from getting inside. A weather vane or a volper can also be used to increase draft.
- The hole in the wall is carefully sealed with thermal insulation and covered with decorative plates.
- Place clamps on all joints and tighten them.. To check for leaks, you need to dilute a soap solution in a container and, while the boiler is running, apply foam to all the joints one by one. If inflating bubbles appear, the joint is not leaky. Such joints are repaired.
- If necessary, the pipeline itself should be insulated. and paint it with a special heat-resistant primer.
If it is decided to run the chimney through the house, then it will be necessary to make holes in the horizontal ceilings and the roof. To ensure the accuracy of the marking, a plumb line is used. The holes are also cut larger than the diameter of the pipes.
A tee with a tap for draining condensate should also be present.
In places where the pipe passes through the ceilings, it is necessary to install squares from sheet steel (stainless steel or galvanized) with a hole in the middle, the diameter of which is slightly larger than the diameter of the pipe. The squares are placed on both sides of the ceiling, and basalt wool is placed between them to prevent contact between the pipe and the surface being crossed.
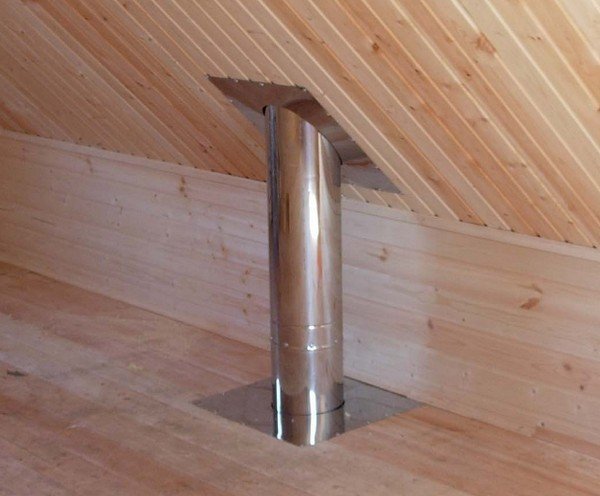
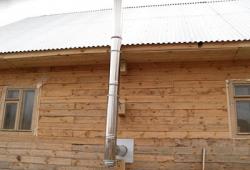
Photo 3. Chimney with special steel squares installed in places where the pipe passes through the ceilings.
Instead of squares you can use special passage units.
Pipes should not touch the walls., for rigidity it is necessary to attach brackets, as when installing outdoors. There should be no joints in places where the roof and floors pass.
In the rooms insulation it won't be useful for pipes, but in the attic - better to use, especially if there is no heating there.
Subtleties during installation
The most common mistake is insufficient tightness. Even if there is a small leak, over time it will only increase, as practice shows. This will lead to damage to the walls, even if they are made of brick, and deterioration of draft.
If a brick shell is made around a steel chimney, then Be sure to leave gaps between the masonry and the pipesIn addition, there must be ventilation holes for heat dissipation.
It is better to install the first pipe from the stove without insulation, otherwise, it may quickly burn out (the insulating layer does not conduct heat well and the pipe will overheat).
It is better to use sealant when joining pipes only for installing the adapter on the stove, if the entire pipeline is sealed with sealant, it will be very difficult to disassemble it.
Before purchasing material for assembling a chimney, you need to measure with a tape measure:
- distance from the stove to the ceiling;
- thickness of the ceiling;
- distance to the next overlap;
- distance to the roof exit;
- distance from the outlet to the roof ridge;
- the height of the entire roof (from the base to the ridge).
After receiving this data, Sellers will be able to select the necessary material.
Useful video
Watch the video, which demonstrates the installation of a chimney for a gas heating boiler.
A professional approach to flue gas
Variety of building materials on the market allows even an amateur to assemble rather complex building structures.
The chimney is no exception. If in the old days the profession of a stove-maker was in great demand, now homeowners prefer to save money and do everything themselves.
If you follow the rules, there is nothing wrong with this, but if the work is being done for the first time, then It would be better to at least consult with professionals.