Rules for connecting a double-circuit gas boiler: how to avoid making mistakes?
People are used to the fact that city apartments are warm and cozy, You can open the hot water tap at any time and wash the dishes or take a warm shower.
The same comfort is desired in a country house. But outside the city there is no centralized heating and water supply system. And, therefore, a special approach is needed here.
Modern double-circuit gas boilers come to the rescue, they allow you to provide your home with both heat and hot water, while being compact, don't take up much space and easy to manage.
What are double-circuit gas boilers and how do they differ from single-circuit ones?
The operating principle of the device is as follows: there are two contours, Moreover, they work independently of each other.
One ensures uninterrupted supply and correct operation coolant in the heating system, second — in the system hot water supply.
Heat exchangers (main and additional) allow to perform two tasks: heat the coolant circulating in the heating system and water for hot water supply. A single-circuit boiler cannot boast of such capabilities. It is equipped with one heat exchanger, so it is used only to supply the house with heat.
Installation diagram and connection of the device: features
First, we determine where and why we will install the equipment, obtain technical specifications and design documentation in the gas service, which connects the device to the main gas pipeline. All that remains is to fix the boiler to the wall, connect the necessary pipes to it, install a chimney, and connect the device to the power grid.
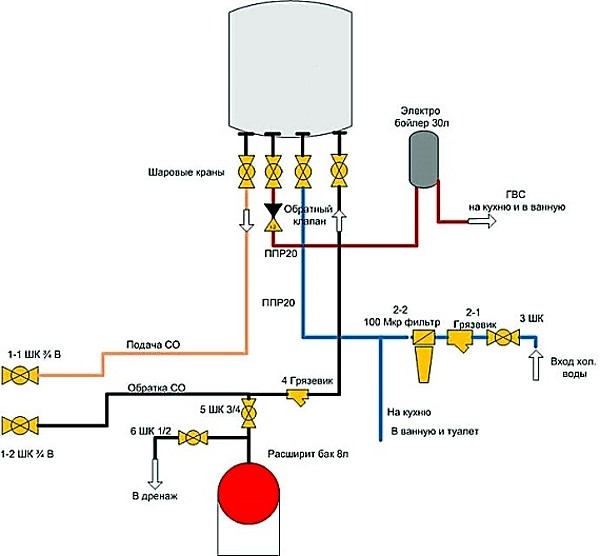
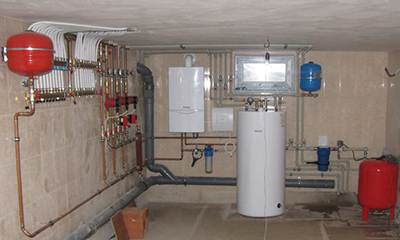
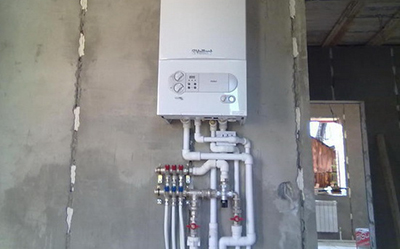
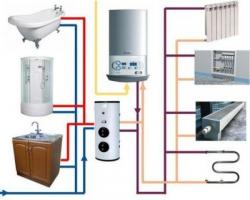
Photo 1. Diagram of connection of heating and water supply pipes to a double-circuit gas boiler with a boiler.
A double-circuit boiler is not always capable of providing high water requirements for DHW (a huge country house, increased water consumption in a large family), in this case it is more rational to use models with boiler (external or internal).
Important! It is necessary to choose the optimal piping scheme to eliminate overloads in the system and uniform heating of the premises. The choice depends on the type of building, the heating system and the boiler itself. Installation of complex circuits It's better to trust a professional.
Correct binding allows to compensate for thermal expansion and avoid pressure increase in pipes to critical values, ensure air removal, prevent blockages in the system.
What materials and tools will be needed and how will they be used?
The choice of materials and tools depends on the methods and scheme of connecting the device. To install the boiler you will need:
- brackets, screws, dowels, level — for attaching the device to the wall;
- ball valves, detachable connection "American" 1/2 inch DN15 — for connecting cold water pipes and hot water supply;
- ball valves, "American" 3/4 inch DN20 — to connect the heating system;
- fittings (tees, couplings, elbows), nuts, couplings — for installation of pipelines;
- fum tape, tow, paste, sealing thread — for sealing joints;
- coarse water filter, magnetic filter — in order to prevent the supply of contaminated water and protect the heat exchanger from salt deposits;
- automatic switch 2A, socket or three-wire cable VVG 2.5 mm² — for connection to the power supply;
- pipes for heating circuit and chimney;
- a set of keys, screwdrivers, a hacksaw or pipe cutter, a tool for cutting pipe threads, a file, a drill.
If plastic, metal-plastic or copper pipes are used, the set of installation parts and tools may change.
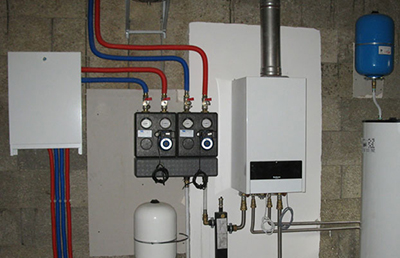
Installation location
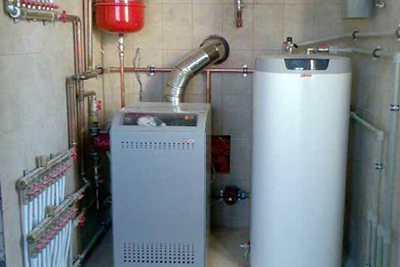
The best place to install a boiler, especially if a complex piping system and a powerful boiler are used, is a separate room (basement, ground floor, boiler room, outbuildings) - The dimensions are determined in accordance with current standards.
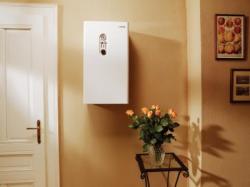
Device up to 60 kW (these are usually all wall-mounted models) can be placed in any room, including the kitchen.
The boiler in a private house is placed near the outer wall. The floor version requires the installation of a non-combustible base (concrete, metal, clay). It is necessary to ensure free access to equipment and good air exchange.
Attention! The presence of ventilation and lighting (including natural) are mandatory. Detailed requirements for boiler room premises are set out in the SNiP rules.
Stages
Connection and installation are carried out in several stages.
Boiler installation
First, the device is secured to the wall using a mounting template, brackets, screws and dowels. Fasteners usually supplied as a set.
The brackets must be adjusted using a level to eliminate the slightest distortion and ensure subsequent precise connection of all system elements.
A wall made of flammable material is protected by a screen made of roofing steel, asbestos, basalt cardboard, minirite. Using markings, it is determined space for equipment and chimney. Secure the pipe connection bar (included in the kit), remove the plugs from the boiler pipes and hang the device on the brackets.
Connecting the heating system
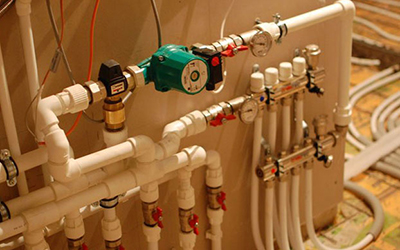
During operation, cleaning and possibly replacement of water filters or repair and replacement of the boiler itself will be required, so we use shut-off (ball) valves when installing pipes. We connect them to the nozzles of the device using a detachable American connection, which allow you to quickly remove the boiler if necessary.
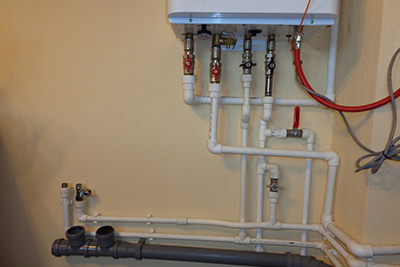
We define the required length of pipes to connect the boiler to the water supply system, we cut out the required section, make a thread with a special tool, perform the binding, connecting all the elements with the help of couplings, fittings, etc.
We put a filter on the water pipe that carries out rough cleaning water and magnetic fine filter. This will ensure the absence of foreign impurities, dirt in the water supply system and salt deposits (scale) in the heat exchanger. We seal the assembly connections.
We fix the coarse filter (the arrow points towards the boiler) and the shut-off valves on the return line, and connect the pipe to the device using a similar diagram.
We install shut-off valves on the pipe that supplies the coolant to the system (outlet from the boiler). We fix them on the pipe using a threaded fastener, connect them to the branch pipe using an "American".
DHW circuit
We install a shut-off valve on the pipe supplying hot water (outlet from the boiler) for domestic needs, we use American couplings for connection to the device branch pipe.
Connecting the boiler to the power grid
There are 2 connection options: by means of a three-wire insulated cable or a cable with a plug, usually supplied with the equipment:
- We install a 2-amp circuit breaker near the boiler. (so it can be quickly disconnected if necessary), we lay the cable. We ground the boiler to the general circuit of the house.
- We equip an individual socket with cable connection through a circuit breaker.
Reference! It would be a good idea to stock up on a backup power source in advance, as in the absence of electricity the device will not work.
It wouldn't be a bad idea either voltage stabilizer.
Chimney design
If the device is wall-mounted, with a closed firebox, we do it coaxial chimney device: we make a hole in the wall and install a pipe that carries the combustion products of the gas outside.
This option is not suitable for floor-standing devices due to their greater power and increased amount of combustion products. In this case, vertical construction only. The chimney is led upwards (preferably without bends and unnecessary turns) beyond the roof with a protrusion not less than 50 cm. Joints must be sealed.
How to connect the device to the gas pipeline?
The gas pipeline should be located as close to the boiler as possible. If necessary, the heating unit is placed at some distance from the gas supply source, using special hoses. But the preferred option would be extension of the pipe itself (it’s more reliable and safer), in this case it’s better to contact specialists.
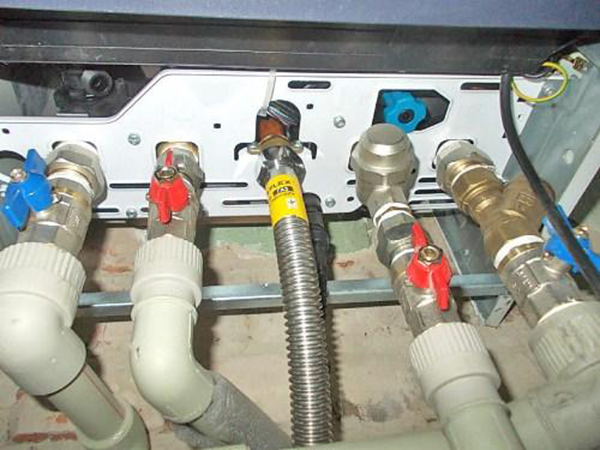
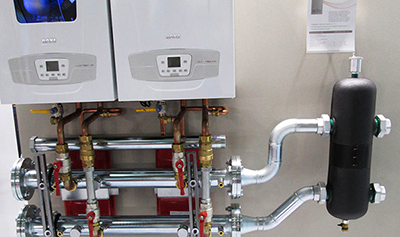
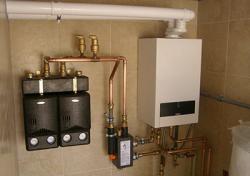
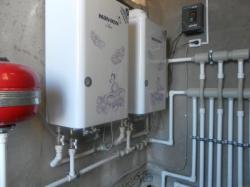
Photo 2. Double-circuit wall-mounted gas boiler, connected to the gas supply using a special flexible hose.
Next you need to:
- Obtain technical conditions, permission to connect to the main line, design documentation (installation diagram, communications) for the boiler in the gas company.
- Call a gas service representative, which will connect the boiler to the main gas pipeline. Self-connection is prohibited.
- Obtain permission to put the device into operation.
Useful video
The video shows a detailed process of installing a dual-circuit gas device.
Conclusion
In conclusion, it should be said that the installation and setting boiler a specialist should handle this, as stated in the instructions included in the purchase documents.
The master is engaged installation, connection and commissioning works: performs pressure testing of the device, observes how the control and safety system works, sets the required operating mode, teaches the owner how to properly handle gas equipment.

Comments