Correct fastening is the key to successful work! Brackets for heating radiators
The efficiency of heat supply directly depends on the proper operation of heating radiators installed in heated rooms and on their installation, which includes not only connecting the batteries to the heating circuit, but also their correct fastening.
For this purpose, brackets of various designs are used, allowing them to be securely fixed to the floor or wall.
Characteristic
Brackets for heating batteries are fasteners of arbitrary design, shape, and size, made of steel, cast iron or other metals or alloys.
The products are divided into:
- wall-mounted fasteners designed to secure the radiator to the wall;
- floor stands.
There are both adjustable, so and unregulated holders of both varieties.
Important! The key to proper installation of any heating battery is the selection of fasteners that match the characteristics of the model being installed. It is optimal to use those that come with the radiator.
Wall mount
Wall mounting method for batteries most common when installing heating systems. The selection of fasteners is carried out taking into account the weight of the battery and the material from which it is made.
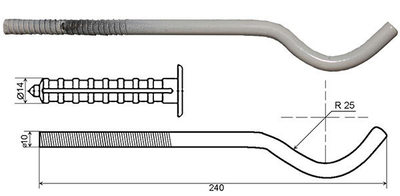
Fasteners for cast iron radiators
These are the clamps are distinguished by their massiveness and increased strength. As a rule, they are marked “reinforced” in price lists.
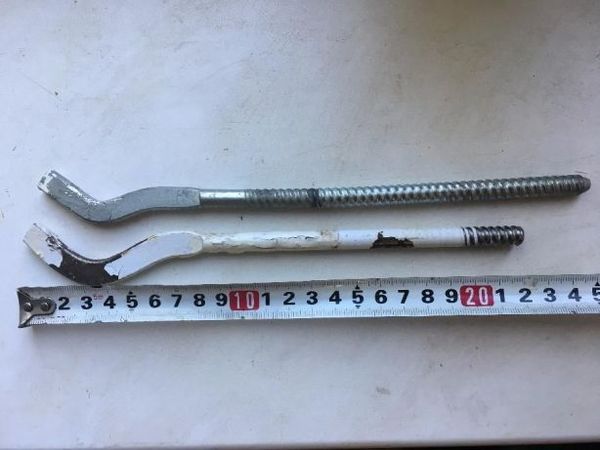
Photo 1. Brackets for cast iron heating radiators. The products are highly durable.
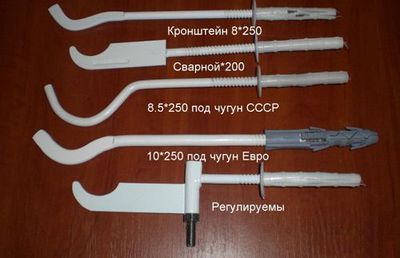
For wall mounting of cast iron radiators The following types of fasteners are used:
- Non-adjustable cast iron mounts.
- Adjustable, made of steel. They allow you to change the distance between the wall and the radiator, which makes it possible to make adjustments in height and horizontally.
- Pin holders made of steel.
- Holders on the bar. This is a steel strip with two hooks for fastening the upper and lower collectors of the battery, which is attached vertically to the wall.
Attention! When installing cast iron radiators, it is important not only to choose the right fasteners, but also accounting for wall material. For brick and concrete, as a rule, standard hanging brackets are sufficient. For plasterboard or wooden walls, reinforced floor fasteners are used that can take the main load.
For aluminum and bimetallic heating radiators
Unlike cast iron analogues, the fasteners are lighter and less massive.
For wall mounting, use fixators of the following types:
- Corner fastenings made of steel. Depending on the weight of the radiator, regular or reinforced models are used. They have two notches that allow it to be fixed both by the lower and upper manifold.
- Steel pin holders. They are divided into molded and round models.
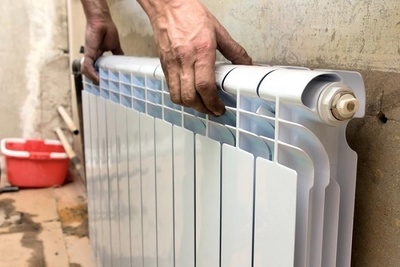
- Universal wall fasteners with polymer coating. The brackets themselves are made of steel, and the polymer overlay serves to prevent the battery from shifting due to thermal expansion.
Floor mounting method
It is used much less frequently compared to the mounted one.
The main reasons for choosing floor-standing installation:
- Inadequacy of wall material to the required load. Relevant for aerated concrete and plasterboard walls.
- Need to reinforce wall fastenings. Used for heavier models, primarily cast iron.
- Cannot be placed on the wall due to lack of space.
- Lack of a suitable wall (there is a panoramic window in the room).
- Design solution.
Among the main types of floor holders are:
- Adjustable clamps. Some models are equipped with plastic pads.
- Non-adjustable holders. Some models also come with plastic pads.
- Combined holders.
- Special holders width from 80 to 100 mm.
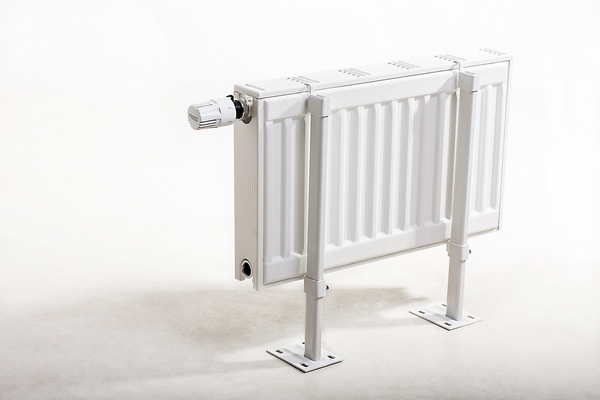
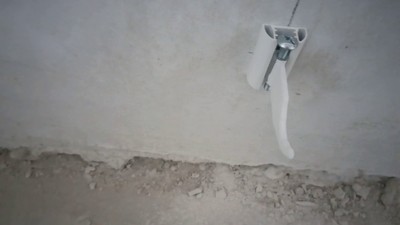
Photo 2. Brackets for floor installation of heating batteries. They are racks that are attached to the floor.
Floor types are manufactured made of cast iron, steel or other alloys, designed for the weight of certain battery models.
Calculation of the required number of brackets
As a rule, independent calculation is not required, since This information is contained in the technical documentation for the radiator. It also provides recommendations on the use of brackets of certain models.
Calculation for wall mounting:
- For cast iron batteries, where the number of sections is from 2 to 9, 3 pieces are required, two from which the battery is held one on top, one on the bottom. If the number of sections is greater, brackets are added based on the average calculation: 1 fastener for 3 sections.
- For aluminum batteries with the number of sections from 2 to 12, 3 brackets are also required: top and bottom - 2 and 1 respectively. Additional holders are added based on the average calculation: 1 fastener for 4-5 sections.
- For bimetallic radiators, the number of fasteners is similar to aluminum if there are less than ten sections. Additional holders are added based on the calculation: 1 fastener for 4-5 sections.
The number of racks for installation on the floor is selected based on the calculation: 2 holders per battery with up to 10 sections. For every 4 subsequent sections are added 1 fastener.
Marking and installation
The optimal areas for placing heating batteries are considered to be those located directly under windows.
For efficient work The following parameters are important:
- distance from the bottom edge of the battery to the floor - from 80 to 120 mm;
- distance from the top edge to the window sill — from 60 to 100 mm;
- distance from the wall to the radiator body — from 30 to 50 mm.
Wall mount
It doesn't depend on the type, but Compatibility of the brackets with the installed battery is important. The marking begins with determining the vertical line dividing the window opening in half, after which this line is marked on the wall under the window.
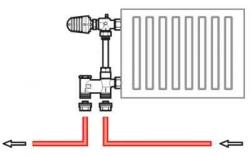
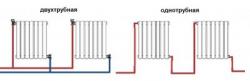
Further marking depends on the layout of the heating circuit:
- If there is wiring in the room lower type - the upper edge of the radiator is marked on the wall with a horizontal line parallel to the floor.
- If it's a scam lateral — the horizontal line runs in accordance with the axis of the feed pipe.
Then the distances between the mounting points on the radiator are measured and the resulting sections are are projected onto previously drawn horizontal and vertical lines.
The starting and ending points of the segments determine the locations where the fasteners are attached to the wall.
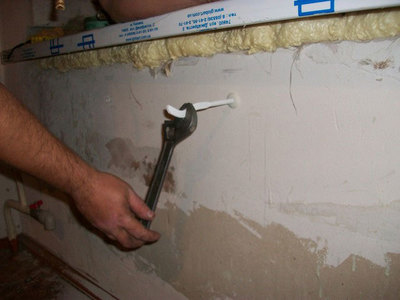
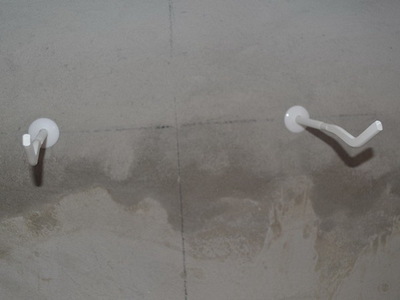
Afterwards, holes are drilled in them using a hammer drill, into which dowels are installed and the brackets themselves are screwed in. If the procedure is performed correctly, the supply and return pipes will clearly match the corresponding fittings on the battery body. After hanging Check the reliability of the fastening and make sure there is no play.
Floor mount
The floor installation procedure is very similar to wall installation and includes the following stages:
- Finding a vertical line dividing the window in half and projecting it onto the floor.
- Measuring the distance between the mounting points on the radiator and projecting the resulting segment (or several, if more than two brackets are used) onto the axes of the distribution pipes, taking into account the previously drawn line. By analogy with wall mounting, the starting and ending points of the resulting segment are the places where the brackets are attached to the floor.
- Drilling holes, installing and fixing holders.
- Installation and subsequent testing of the radiator for stability.
Useful video
Watch the video to see exactly how to install radiators on brackets.
Optimal choice
Choosing the right fasteners is easy and within anyone's power.
However, it is worth remembering that the correct choice of fasteners the efficiency of work and operational safety depend heating equipment.
To minimize possible risks use the services of qualified specialists, able to select suitable fasteners and perform installation work taking into account all the nuances, sometimes not obvious to non-professionals.