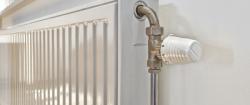
Suddenly it became cold and uncomfortable? Replacing heating batteries is the right decision
There are many reasons for replacing the battery. This includes the desire to install a model with greater heat output, the appearance of corrosion, and the desire to see a modern version in the updated interior instead of the outdated cast iron unit.
With a certain amount of skill, this procedure can be carried out independently, but It is better to use the services of a specialist.
Content
Selecting a heating radiator for replacement
Many people, when choosing a new heating unit, rely on two factors: on cheapness and appearance. It is difficult to argue with this: it is important to be able not to overpay for unnecessary details and to harmoniously arrange the innovation in the home. But these criteria are not in the first place.
Before carrying out the work it is necessary to install compatibility of the device with the heating system in terms of:
- maximum pressure;
- type of media.
Primary importance is given to material, from which the radiator is made. The heat output, weight, and service life of the unit depend on it. The next criterion is corrosion resistance.
Radiator material
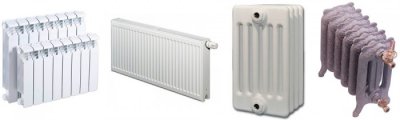
Radiators made of aluminum are very popular, they are light, durable, look beautiful and have high thermal conductivity. Half of the heat is released through radiation, the second half is through convection.
Attention! If your home is in a multi-story building, aluminum coolant will not work! When lifting the battery to the twentieth floor and above, the working pressure in the system will be 15 atm. The welding will not hold up and the radiator will fall apart.
Heat carriers are more reliable made of bimetal. They combine the advantages of both aluminum and steel units, are not afraid of either hydraulic or pneumatic shocks, and are resistant to pressure drops. This is the best option for business centers, high-rise buildings, and apartments on the upper levels of residential high-rise buildings. The pressure in the system is maximum 2 atm., it is better not to use such units in a country house.
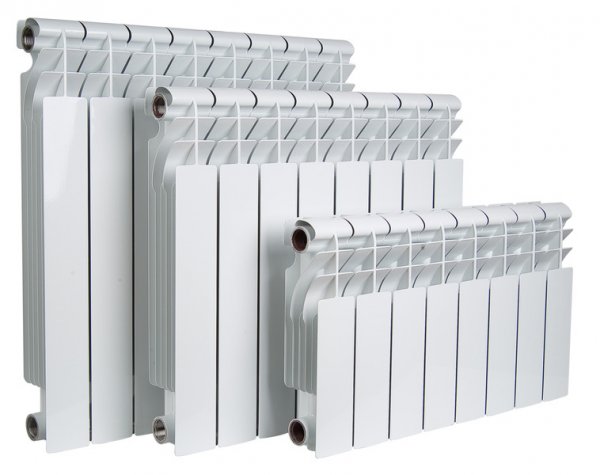
Photo 1. Heating radiators made of bimetal. Nowadays, such units are very popular.
Residents of high-rise buildings pay attention to copper models. It is hardly possible to find serious disadvantages in radiators of this type. They are easy to install, heat well, serve for a long time, and are not afraid of either changes in water pressure, corrosion, or caustic impurities. Some time after purchase, inside the case accumulates oxide layer, protecting the surface from corrosion.
Suitable for individual heating systems steel radiators. They are distinguished by their simple design and low inertia. Externally, they are an “accordion” of two steel sheets with a thickness of just over a millimeterThe design consists of collectors and connecting channels.
The steel radiator is the most resistant to temperature changes, heats up and cools down quickly. It is recommended to purchase a additional thermostatic equipment, it will allow you to maintain the desired level of heat in the room.
It seems that cast iron radiators have become a thing of the past along with the Soviet era. But this is not so. They have high heat output, are resistant to aggressive influences, including chemical impurities, and are not afraid of corrosion.
Once you have decided which unit you need, study the next criterion - power. It depends on a number of factors, namely:
- from the size of the heated room;
- from the number of external walls;
- from the number of windows;
- from the material from which the building is constructed;
- depending on the type of window construction.
The power is determined according to the following scheme: 1 m2 have to 100 W power + 30% taking into account additional parameters such as the height and thickness of the walls.
Having decided on this indicator, you can order the radiator and pay for the purchase.
Important! It is best to purchase models, made in Russia. In terms of quality, they are in no way inferior to European radiators, but they are designed taking into account the peculiarities of the Russian heating system. It is not worth buying Chinese units: they use a porous, brittle and weak alloy. Such structures will not last long.
Tools for removing an old battery
For the work you will need:
- nipple wrench;
- set of wrenches;
- Bulgarian;
- industrial hair dryer;
- chisel;
- hammer.
Think about the place to dismantle the radiator. Free up some floor space or move a sturdy table. Put something under the radiator a piece of waterproof fabric: If dirty water flows out of the device, it will damage the room’s finish and leak to the neighbors.
Dismantling process
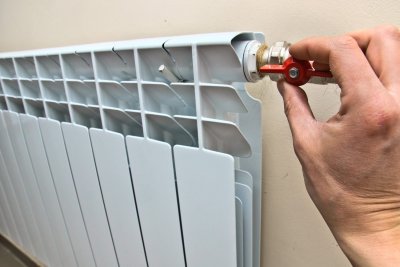
First step — closing the radiator valves. The regulating valve is closed manually, for the shut-off valve you will need a hex key.
Remember how many turns you made - this is the number of turns you will open it later.
Next stage — disconnecting the battery from the valves. This is done using a gas or wrench. If the radiator is on an American (removable coupling), unscrew the nut.
Attention! See if there is any jumper between connections with valvesIf it is not there, then by turning off the tap, you will block the entire riser, disturbing your neighbors.
How to drain water
The feed from the top fill is carried out to the attic and connected to the return fill in the basement by means of independently functioning risers. Each riser has two shut-off points, upper and lower. Turn off the top valve first., which is located in the attic, then the basement. Unscrew the plug a couple of turns. Wait until the stream of water subsides, then screw it all the way in. Some of the water will remain in the riser, it will spill out after opening the liner.
The feed and return risers for the lower filling are located in the technical basement of the building. On the upper floor they are connected by means of a jumper. Turn off both the supply and return risers.
If you don't know what type of wiring the house has, go down to the basement. How many pipes are there? If the house is surrounded by two pipes dressed in thermal insulation, then this is the lower spill, if by one - the upper one.
Close your riser and the two adjacent ones.
Removing a cast iron radiator
If everything is done according to the standard scheme with an aluminum radiator, then a cast iron appliance requires a special approach:
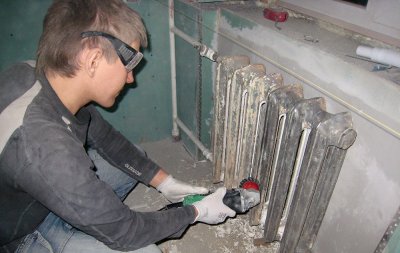
- Do not remove the radiator from its mountings alone: The battery with water is very heavy. Let two assistants make the work easier.
- Unscrew the radiator fittings with an adjustable wrench.
- If you can't disconnect the battery with an adjustable wrench, take a special radiator keyYou can contact the management company for it; it is not available in construction supermarkets.
- Unscrew the upper and lower nipple nuts one by one. (for every one turn of the key).
- It often happens that the joints are so stuck together that it is impossible to disconnect the radiator even with a special key. Use a grinder or hacksaw for metal.
After removing the old unit proceed to installation of the new one.
Installation of heating battery
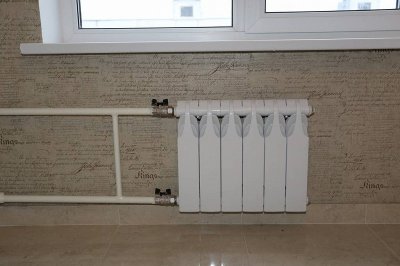
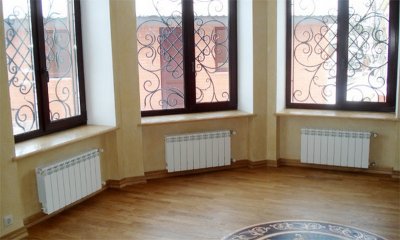
It is better to delegate the installation of the battery equipment from the management company (She will then check how the new radiator works). But if you rely on yourself, consider a number of features. The first of them is the principle of placing the coolant. The quality of the unit's operation depends on this. The optimal place to install a radiator is under the window. Rising up, the warm air prevents the penetration of street cold into the home.
Important! The radiator is not installed straight, but at a slight angle. This is necessary to prevent air from accumulating inside the case.
How to mark a radiator and install taps
Having removed the old radiator, mark the place for the new unit and install the brackets. It is very important to observe the distances, prescribed by SNiP, verticality and horizontality. The principle is the same for all batteries, aluminum and cast iron.

Photo 2. The process of checking the correct installation of the heating radiator using a building level.
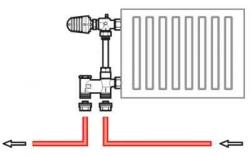
For any type of heating, installation of the unit begins with fastenings for full bore ball valves. With their help, if necessary, it will be possible to remove the radiator for cleaning or repair without blocking the riser.
The battery is located in the middle of the window, the permissible error is no more than 200 mm.
Now pay attention to the gap between the floor and the heater. The maximum permissible value is 12 cm. Between the top edge of the battery and the lowest point of the window sill - at least five centimeters. Leave the same amount of space between the wall and the radiator.
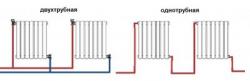
Wiring diagram
The radiator connection diagram depends on where the battery inlet and outlet holes are located.
There are three such schemes in total:
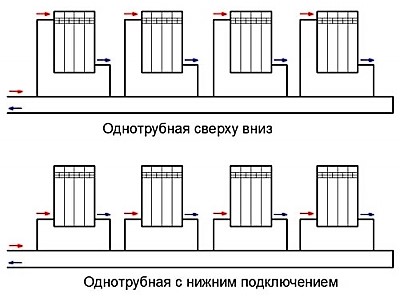
- single pipe (up to 20% heat loss);
- cross (2%);
- lower (13%).
The most common is the one-pipe system.. The lower one is found mainly in townhouses. It is distinguished by the simplicity of radiator installation and the lowest heat loss.
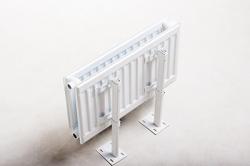
Cast iron and aluminum batteries are installed according to the same principle. In a wooden house or an old building, it is better to install a cast iron unit not on a bracket, but on special legs (they often come with the battery, but can also be purchased separately). Additional supports will also be required.
Reference. Remember that the weight of a cast iron heater can be up to a hundred kilograms, use the help of a partner.
Useful video
Watch the video to learn when to replace heating radiators and how to replace units in an apartment building.
The final stage of installation
Once the installation is complete, the last but not least stage remains: testing of the heating system. To do this, you will have to call engineers from the management company, they will check the correctness of the installation and fill the battery with water. If the radiator was installed in the summer, the taps on the connections must be closed.

Comments
When I changed the radiators, I had to invite a specialist and he offered me and installed a thermostat on the batteries, which helps to adjust the appropriate temperature in the room. It turns out that this thermostat is not suitable for cast iron batteries and it can only lower the temperature in the room, but it cannot increase it, but the first thing is most important to me.