Easy to do it yourself! Installing a thermostat on a heating radiator
The task of the thermostat is to control the temperature in the heating radiators.
This will not only create comfortable conditions, but also save on fuel.
But for the device to work well, it must be installed correctly.
Operating principle of a thermostat for a heating radiator
The device is a sealed chamber containing liquid.
When heated, the water expands, straightening the container. The valve blocks the movement And does not allow the coolant to enter the piping.
As the temperature decreases, the actions occur in reverse order.
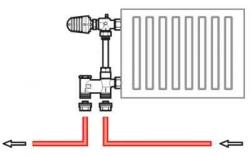
Device diagram
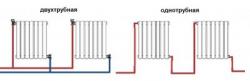
The device is used in both single and double pipe systems. Regardless of this, it includes:
- valve;
- static element (thermal head);
- sensitive component;
- spool;
- stock;
- compensator;
- retainer;
- scale.
And also there are several fasteners, a drive and a regulatorThe device is filled with working liquid or gas, as desired.
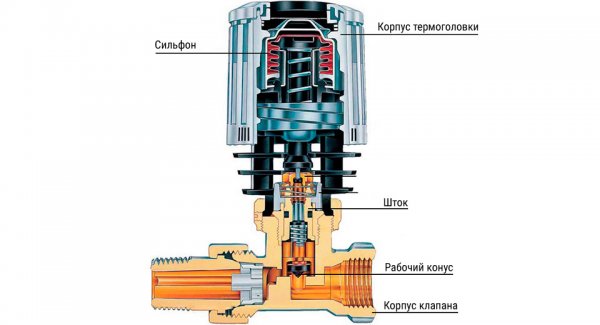
Photo 1. Schematic diagram of the thermostat for heating batteries. The arrows indicate the components of the structure.
Where the device is installed
The operation of the device is influenced by 4 factors:
- exposure to sunlight on the body;
- outside temperature;
- air circulation in the room;
- additional heating sources.
In apartment buildings, thermostats are placed at the top, near the roof., because heat rises. This helps to balance the temperature differences in the building. In single-story buildings, on the contrary, their mounted near the heater.
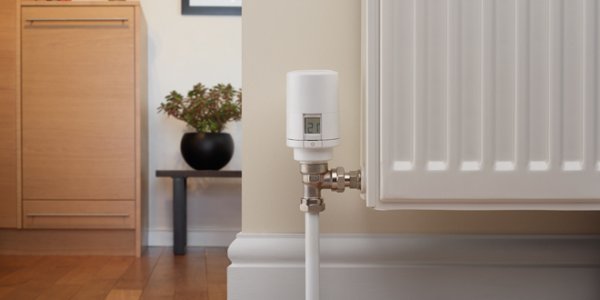
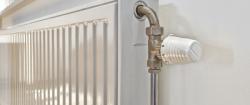
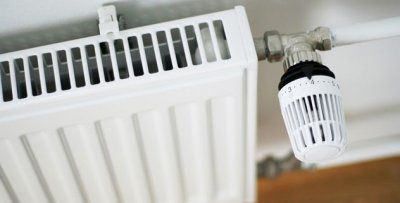
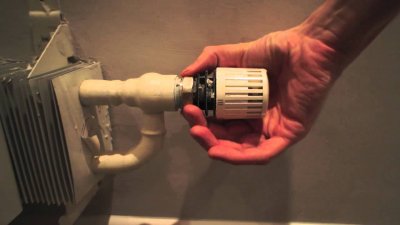
Photo 2. Electronic thermostat installed on the heating battery. The device is connected to the coolant supply circuit.
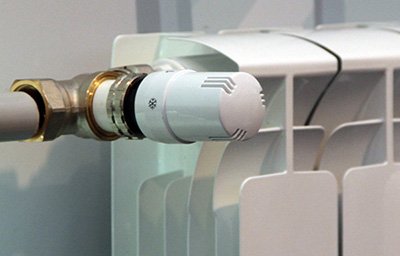
The most favorable placement of a highly sensitive device is considered to be on the feed. This principle has a limitation: The piping elements should not be covered by anything. The thermostat is placed in front of the radiator, after the branch from the main line. This allows it to regulate the room temperature without affecting the neighbors below.
Important! Otherwise, you must use device with a remote sensor.
How to install a thermostat on a radiator with your own hands
No special skills are required to place the device. The most difficult part of the process is installing the bypass. in a system with metal pipes. If problems arise with the latter, you should invite a specialist who will help assemble the device.
To work you will need:
- the device itself;
- shut-off valves;
- section of pipeline, fasteners or welding for its installation;
- bypass;
- set of keys;
- tow or any other sealant.
Before starting work, be sure to drain the coolant. To do this, simply close the valve located after the branch pipe from the main line to the radiator.
It should be taken into account that the lower tap, if there is one, must be opened, otherwise the liquid will become stuck in the battery.
Attention! The thermostat installation should be carried out in the warm season. For example, in the summer, before the start of the heating season.
After draining the coolant, proceed to installing the taps. A vertical cut is made on the section of pipe near the radiator, disconnecting the main line. Then do the following:
- If the thermostat is metal, then the bypass is simple are welded. If electronic, then place a jumper between the pipe sections.
- The nuts and tailpiece are removed from the shut-off valves.. The same is done with the device. The resulting parts are screwed into the radiator plugs.
- The valve is installed one by one And temperature control device.
- Assembling the pipeline by tightening the fasteners or by welding.
- Fill the system with working fluid And conduct a test launch.
After conducting an initial check, inspect the piping for leaks or defects. The former are eliminated with a sealant, the latter - by repeated heat treatment.
Before installation, when choosing a location, It is recommended to think about access to the device in case of repair. To do this, you will need to select a place in the free space and correctly direct the head of the device.


The process of setting up the device
- Preparation consists of eliminating factors that affect heating.. These include natural and artificial wind circulation, additional heat sources. Then a thermometer is placed near the device.
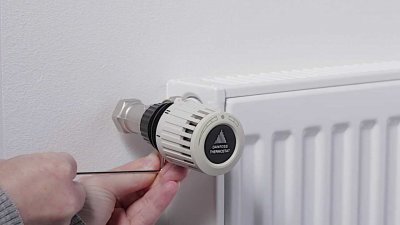
- The head of the device is turned counterclockwise, opening it completely. When the room temperature exceeds the norm by a couple of degrees, the element is returned to its initial position.
- As the system cools down, the thermometer reading will coincide with that specified in SNiP. At this point the valve is opened.
- The rotation is stopped when the valve body warms up and the sound of water appears.. This step completes the setup.
Modern thermostats have a built-in scale. The temperature that the device should create and maintain is set on it. In this case, an adjustment is possible. It is done if the device has created an incorrect climate.
Reference. Electronic thermostats much easier and more accurate to set up.
How to remove the temperature controller
It is quite simple, as it consists of three steps:
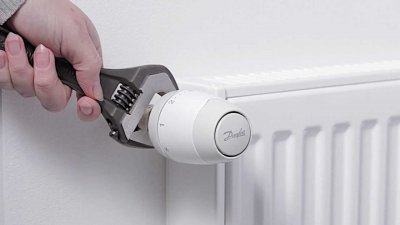
- The static element is simply detached by hand. If necessary (strong tightening), use pliers.
- The rod is slightly loosened And are deleted.
- Boil the bypass, seal the pipes.
Preliminary is mandatory close the shut-off valves and drain the water.
If it is necessary to disassemble for verification, then In the second step, the rod is left pressed. After some time, the radiator should warm up. Then the device is simply assembled. Otherwise, the valve is replaced.
Useful video
Watch the video, which explains how to properly install an electronic thermostat on a heating battery.
Conclusion
Despite the simplicity of installation, it is better to contact specialistsThey will help you install and configure the device if necessary.