Economical heating without overpayments! How to install meters for heating in an apartment?
Having a heat meter in an apartment has certain benefits - owners of residential property pay only for the heat they receive, without overpayments for transportation losses.
To maintain savings, sources of heat loss in rooms are eliminated: a sealed window frame is installed, the room is insulated, etc. All the nuances are taken into account during installation.
Options for installing heat meters in an apartment building
There are several options for installing a heating meter in an apartment.
Common house
Installation is in progress not for one family, but for severalPayments are made monthly and then distributed among apartments according to the area of the premises.
A general meeting of apartment owners is being held. At this stage, issues of installation, meter readings, and payment statements are discussed. The decision is recorded in the protocol and one of the owners submits a written application to the management company to connect the devices.
Important! If the service provider does not fulfill its obligations to ensure the agreed temperature conditions in the house in good faith, Residents get their money back.
Individual
Thermal flow meter mounted to the riser leading to the room. In old houses, the vertical distribution of the heating pipeline. This means that there may be more than one riser with devices in a separate apartment, but the benefit is lost. To solve this problem, special measuring devices for batteries.
Manufacturers of metering devices offer installation in houses with vertical distribution of a distributor that measures consumption taking into account the temperature difference between the battery and the air.
Another solution there will be installation of a common house metering device.
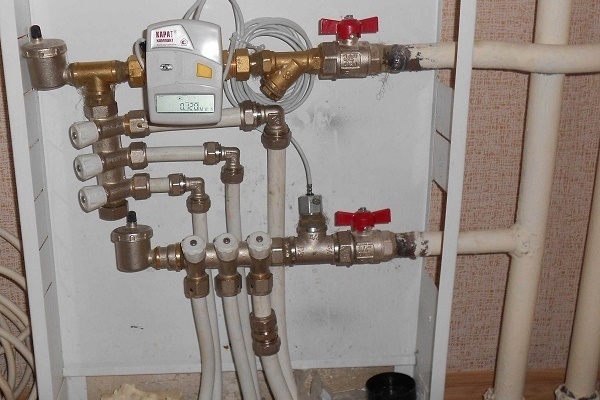
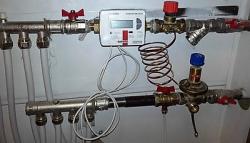
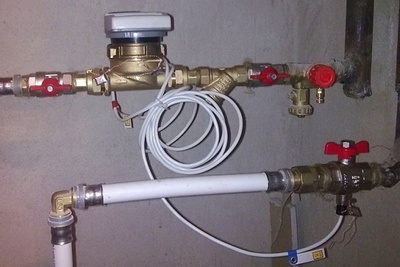
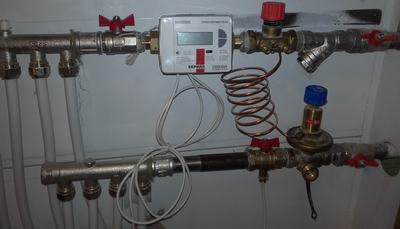
Photo 1. Individual heat meter installed in an apartment. Data on the amount of energy spent is displayed on an electronic display.
The individual heat meter is fixed independently or with the help of specialized companies. The device is mounted on the pipe supplying the coolant to the house or on the return line.
Installation steps
To install an individual meter The owner of the property goes through the following stages:
- A decision is made regarding the installation.
- Design documents are being developed.
- The counter is being installed.
- Calculations are made, the meter is sealed, and the device is put into operation.
Requirements for the project and technology
Before installation the following technological requirements are taken into account:
- A convenient one is chosen location for the device with free access to take measurements and perform maintenance.
- Installation is in progress on a flat platform for heating distribution. The pipe must be long enough to prevent wave divergences during movement. This will affect the quality of measurements.
- A temperature sensor is installed to provide the sensitive element with income. to the middle of the pipeline cross-section.
- Air in the system will disrupt the operation of the device. To prevent air from entering the sensitive element, a fitting is installed in the heating circuit before fixing the meter.
- To carry out the installation of equipment, install ball valves on both sides.
Registration
Documents to record the heat energy meter readings in the room:
- Written statement to the building management service to obtain permission for installation.
- Documents confirming ownership on residential property.
- Technical passport of the dwelling.
- Technical conditions for installation heat meter by the energy supplier (in most cases this is the management company).
- In preparation accounting project and installation papers.
Attention! The organization that carries out this procedure is: having legal grounds for providing these services and the right to provide design work.
At the final stage, the design is agreed upon. documentation from the heat supply company.

How to install a heating meter yourself
The heat meter can be installed independently. Before installation, tools and components are prepared. This requires the presence of:
- Heat meter.
- Connecting elements for obtaining contacts with a check valve.
- Filter elements.
- Welding machines for fixing plastic pipelines.
- A wrench when fixing a metal pipe.
- Collets.
- Special fittings with thermal sensors.
- Thermally conductive paste.
First, the heating main where the measuring equipment will be installed is flushed. Then, the flow elements of the meter are installed. The following rules apply when performing this operation:
- The equipment is installed along horizontal or vertical sections of the main line.
- The installation of the liquid crystal display is carried out with the calculator turned upward.
- Flow-through elements of the equipment must be constantly filled.
- The supply part is installed using a threaded connector. This element is included with any model of the measuring device.
- Arrangement of parts to align the pointer with the direction of water flow.
Upon completion, contact the authorized body or company for sealing heat meter.
How to install a meter on a battery
There will be no benefit from these measuring devices in cases where:
- the heating main is being introduced using outdated schemes;
- the premises are located at the end, on the outer floors;
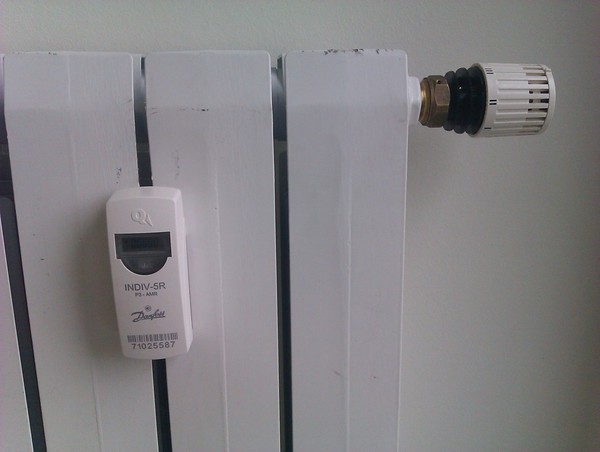
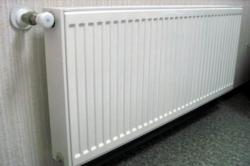
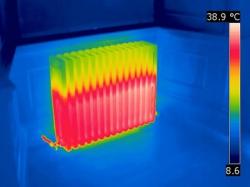
Photo 2. Heat meter on a bimetallic heating radiator. The device is installed between the sections of the battery.
- window frames with gaps;
- there is no glazing of the balcony;
- high ventilation of the room.
Important! To finally minimize heating costs, it is not enough to install a common house or apartment meter. It is necessary to modernize the heating system — replace the elevator unit with an AITP or AUU.
When carrying out work to improve the energy system of a multi-storey building, both comfort and savings are achieved.
Useful video
Watch the video, which talks about the features of installing a heat meter in an apartment.
Cost-effectiveness of the installation procedure
At the first stages, a significant amount is spent on installation and design. The final price includes: the device itself, components, installation costs. The meter is checked every four years. The cost of the device for measuring heat readings will pay off within a year due to savings.