Is it possible for everyone to make a clay tandoor with their own hands?
The tandoor gets quite hot when kindling. That is why it is made of fire-resistant materials. This property is possessed by fireclay clay.
To get it, light kaolin The clay is fired and ground into powder. In this form, the material is sold in construction stores.
To build a tandoor, clay powder is diluted with water. Sand and plant fibers are also added.
Content
How to make a clay tandoor with your own hands
If you do everything correctly, the process of making a clay tandoor takes quite a lot of time. But the product will last a long time. And the food cooked in it will be tasty and high-quality.
List of tools and materials
To make a clay tandoor you will need the following tools:
- capacity for mixing clay (for example, a large bucket or basin);
- building mixer;
- pencil;
- Bulgarian or a brick cutting machine.
The following materials will be useful for building a tandoor:
- fireclay;
- sand;
- fiber;
- crushed stone;
- reinforcing mesh;
- concrete;
- fireclay brick;
- thick waterproof cardboard.
Composition: sand and fireclay
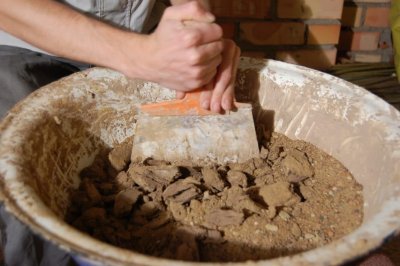
Clay powder sometimes contains foreign impurities. To remove them, the powder is sifted through fine sieve, and then fill with water. Lighter particles float to the surface. They are removed by draining off some of the liquid.
Then the clay is kneaded. Previously, it was kneaded with feet, now a construction mixer is used.
I leave the clay solutiont for 2-3 days in a shady place and stir from time to time. If water accumulates on the surface, drain it.
After this, fine river sand and plant fibers are added, which give the mixture additional viscosity. During the firing process, they burn out, and the product becomes lighter. Approximate ratio: 1 part clay to 2 parts sand and 1 part fibrous substance.
Reference! Traditionally, such fibers are used: finely chopped sheep or camel woolChopped straw or sawdust will also work.
This mixture is infused no less than a week. Stirred from time to time.
The result should be a substance that resembles plasticine in consistency. It is formed into stripes. 5-7 cm thick.
Their length is approximately equal to the circumference of the future tandoor. Since the oven narrows towards the top, some of the strips will be shorter.
These stripes are still a day or two lie in a place protected from the sun. At this time, the foundation is being prepared.
Preparation and pouring of the foundation
For the foundation of the tandoor, a hole is dug to a depth of about 20 cm. Its shape can be round or square. And its size is 15 cm larger than the future base. For example, it is planned to construct a tandoor with a diameter at the bottom about a meter. Then, depending on the shape of the foundation, the diameter of the round area, or the side of the square one will be 130 cm.
Pit half is filled with sand. A layer of crushed stone is placed on top. Formwork is installed so that the foundation is above ground level. Reinforcement mesh is laid, after which concrete is poured.
Laying out the foundation
First, mark the place where the oven will be located. Since the shape of the tandoor base is a circle, it is convenient to use a string or a strip for marking, one end of which is secured in center.
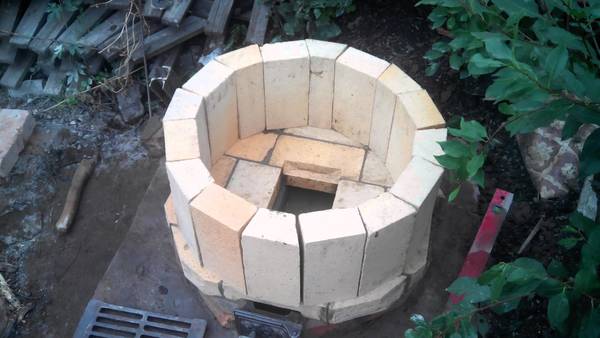
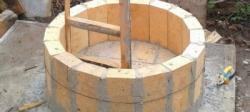
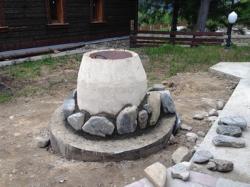
Photo 1. This is what the base for the tandoor looks like, the bricks are laid in a circle, and the first row of walls is placed on them.
Fireclay bricks are laid in the resulting circle. It is convenient to lay them out without mortar, mark them, and then saw them. During final laying, the seams between the bricks are filled fireclay or special mortar for stoves.
Selecting and installing a molding cone
To make it easier to mold the walls of the tandoor, a template is installed. It is folded from moisture-resistant cardboardSand is poured inside for stability.
Peculiarities! The shape of this template is truncated cone. The diameter of the lower part is larger than the upper part.
Formation of walls
The prepared strips are laid around the cone. The joints are smoothed. The surface of the walls should be even and uniform, without cracks.
When the clay walls of the tandoor rise to the level of template, form a hemisphere for the top. To do this, add more sand and give it the desired shape.
The top is covered with newspapers soaked in water. The wet newspapers are covered with a clay layer. The thickness should be the same as on the walls.
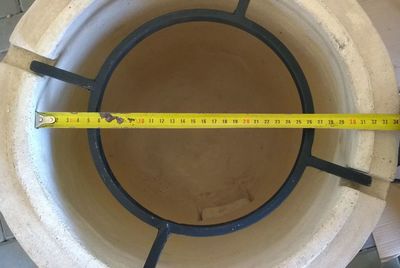
In this form the structure is dried. about a week. Then the lid is cut off. A bucket of suitable diameter is used for marking.
The newspapers, sand and cardboard are removed. A hole for blowing is cut closer to the base of the tandoor. The dimensions are approximately 10x15 or 15x15 cm.

Drying, initial firing, crack treatment
The clay structure stands a week or two, until completely dry. In damp climates, this may take longer.
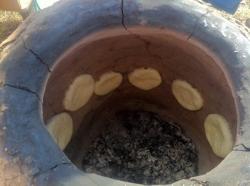
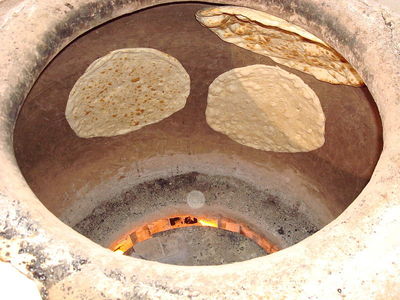
After the walls of the tandoor have completely dried, they are coated from the inside with vegetable oil. Cotton oil is best. After such treatment, the inner surface becomes smooth. The flatbreads will not stick to it during cooking.
After the coating, the initial firing begins. A fire is lit inside the tandoor.
Attention! It is important that heating (and then cooling) occurs graduallyThe slower the process, the fewer cracks is formed.
Therefore, first a fire is made from kindling and brushwood. It is maintained within a few hours, then they start adding firewood.
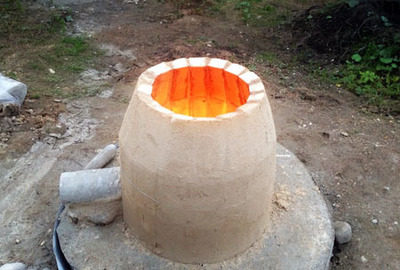
The entire process of firing the clay tandoor can continue up to 24 hours. During this time, all the material warms up.
During the firing of the tandoor, the inner surface is covered with soot, which burns out at the end. The walls become clean.
After this, the structure cools down. This happens naturally, without cooling.
If cracks appear in the walls, they are sealed with a clay-sand mixture. But the proportions will be different, 1:4Then the firing is repeated.
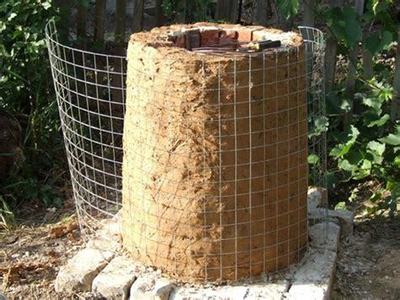
Insulation and external finishing
A second layer of walls is laid around the clay structure – made of bricksThe space between them is filled with heat-absorbing material, usually sand.
Important! The greater the overall thickness of the walls, the longer they will last. keep warm.
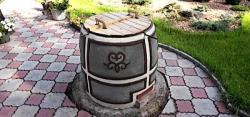
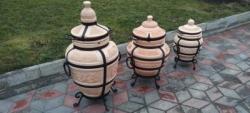
The outer surface of the tandoor can be additionally decorated. For this purpose, tiles, plaster, natural stone, etc. are used.
Potential Problems When Making a Clay Homemade Oven
This type of stove is built outdoors and can therefore be exposed to rain.
Walls that have not been fired will eventually become wet and runny.
To avoid this, before starting work, they construct temporary roof. It is important to make the canopy waterproof.
And the height of the tandoor is chosen so that it is comfortable to work under it.
Useful video
Watch the video, which demonstrates the main stages of making a tandoor.
Rules of use in accordance with fire safety requirements
The fire lit in the tandoor can burst out (to a height up to a meter). Therefore, the stove must not be placed under trees or flammable canopies.
The walls become very hot during cooking. Because of this, you should not touch them with your hands. When cooking, use special tools and gloves. It is not advisable to allow animals and small children close to the operating stove.
Making a tandoor is a rather long process, which has a number of nuances. But the result will please you for many years.