How to make the oven easier to use: a table made of tandoor boards and other accessories
Special devices for the tandoor make its use more convenient and safer.
In addition, accessories protect the device from adverse factors, such as humidity.
How to make devices for arranging a tandoor
Such accessories for tandoors are sold in stores. But their it's not hard to do and with your own hands. This will save money. In addition, homemade devices for tandoors are better suited for a specific device.
Canopy or umbrella for your dacha with your own hands
The purpose of a canopy or umbrella is protect from rain both the stove itself and the person cooking on it. A roof wouldn't hurt a person either on a hot sunny day.
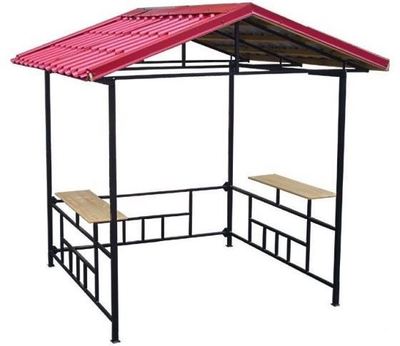
For this, a small canopy of the following dimensions will be sufficient: about 2-3 meters. They will serve as a support 4 pillars. If one side of the roof is enlarged, a small recreation area can be placed nearby.
Then you won't have to carry the prepared dishes far. But in this case you'll need more supports for the structure. They're put every 2-3 metersThe exact distance between the supports depends on the weight of the roof.
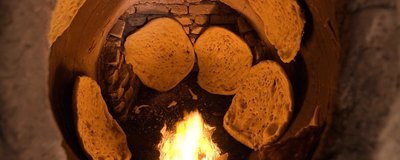
When lighting the tandoor the fire can rise quite high. Therefore, the canopy is made about a height ofabout 3-3.5 m.
Materials for the canopy are selected non-flammable to ensure fire safety. That's why the supports are made of metal, and for the roof they take polycarbonate, metal tiles, slate etc.
Reference! The remains are suitable for construction roofing material from the house or utility room. In this case, the canopy will fit better into the local area.
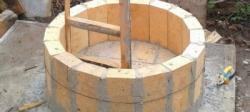
To install the support posts for the canopy, follow these steps:
- Mark it up places for supports.
- Dig holes deep about a meter.
- Pour some on the bottom layer of sand and compact thoroughly.
- Place in each hole profile pipe and secure with stretchers. Use a level to check that the supports are positioned strictly vertically.
- Fill the holes concrete.
The canopy posts are made on one side 30-50 cm higher, than the other. Thanks to this, water and snow will not accumulate on the roof.
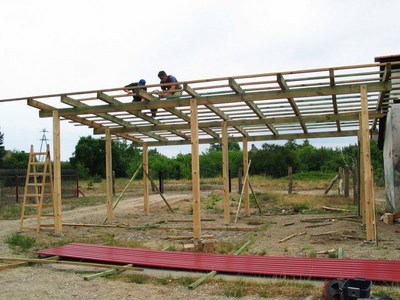
For concrete to harden completely, it will take 2-3 weeks. After this, you can assemble the canopy roof:
- Weld the metal pipes to the posts to create square or rectangle.
- Add additional cross beams. The step between the beams should not exceed 2 meters.
- Trim roofing material to the required size.
- Secure it sheets on the beams.
The method of fastening sheets depends on the type of material.
Case
A case is used to protect portable devices. It contains the device and they keep, And are transporting if necessary.
Fabric covers protect tandoor from moisture and dust. Therefore, their production requires waterproof material that is easy to clean from dirt.
Reference! Modern synthetic fabrics have similar qualities, for example, thick polyester, from which tents and awnings are made.
The simplest option - sew a cover for the tandoor from two pieces of fabricThe bottom of such an accessory is round, and the neck of the case is pulled together with a thick rope or strap.
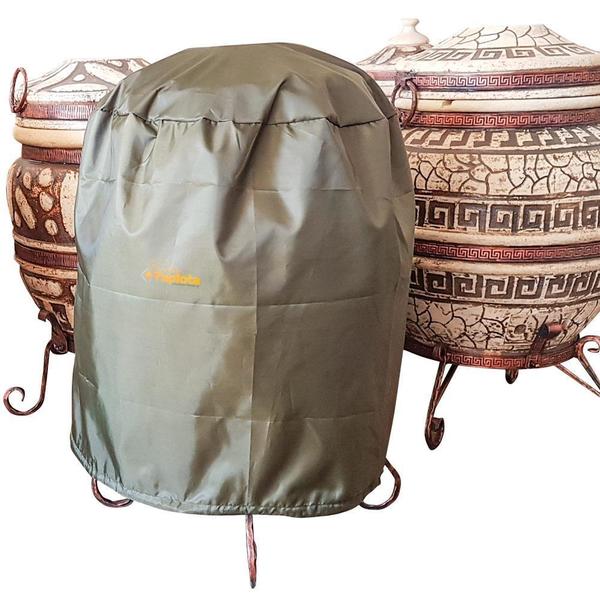
Photo 1. Ready-made cover for tandoor, height - 100 mm, diameter - 65 mm, manufacturer - "Teplota", Ukraine.
To sew a cover for a tandoor:
- Cut out from fabric 2 rectangles, which will be 20-30 cm more, than the height and width of the tandoor itself.
- Sew 2 short sides together in a semicircle.
- Long sides connect in a straight line.
- Fold the remaining side edges by 1.5-2 cm and hem. Leave a small opening to thread the twine through.
- Trim excess fabric.
- Turn the product right side out and insert rope.
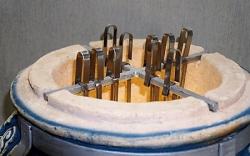
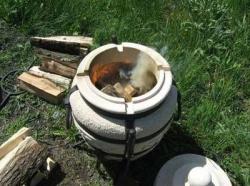
How to make a stand
Portable devices cannot be placed directly on the ground, so special heat-resistant tandoor stands are made for them. To make the stands not only convenient but also beautiful, it is better to make them from individual forged elements.
Such parts are sold in specialized and large construction stores.
To make a stand for a tandoor you will need:
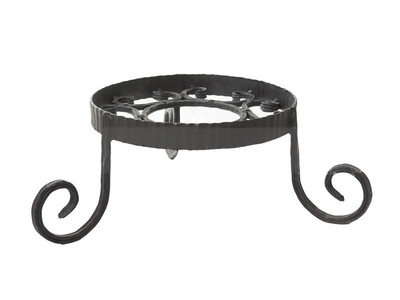
- 4 S-shaped elements;
- wide metal strip;
- rods.
The order of actions for making a stand for a tandoor will be as follows:
- Cook circle of forged tape with a larger diameter than the base of the ceramic stove.
- Weld it to it S-shaped elements, which will act as legs.
- Fasten them at the bottom criss-cross crossbars made of rods.
- Weld to a metal circle 2 ribbons (also crosswise).
- Cover the structure heat-resistant paint.


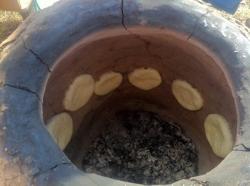
How to arrange an exhaust hood in a gazebo and indoors
If the oven is outside, the smoke disperses evenly. And in the house or in a closed gazebo, a hood for the tandoor is installed. It not only removes combustion products, but also improves traction.
The dimensions of the hood for the tandoor are selected so that it is 20 cm wider than the stove. Most often it is made of steel.
To work on the hood you will need:
- metal sheet;
- metal pipe.
Attention! If the pipe is in cross-section square, rather than round, it is much easier to make an accessory.
To assemble the tandoor hood structure:
- Cut out from the sheet 4 flat trapezoid pieces. Their narrow side should match the width of the pipe.
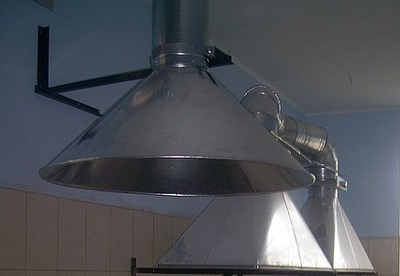
- Fold the edges at the wide part by 2-3 cm.
- Cook from blanks cap.
- Weld it on top of it pipe.
Check if the device works. To do this, use a hot match, candle or lighter. Then the tandoor hood is connected to the exhaust duct.
There are hoods for tandoor island or hanging. The first ones are attached to the ceiling, and the second ones to the wall. The choice of hood depends on the location of the stove and ventilation ducts. As a rule, island hoods for tandoor are placed in gazebos. Both options are used in houses.
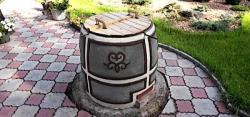
Table made of planks
The portable stove is placed not only on a stand, but also on a special table. Then everything necessary for cooking will fit on the table nearby.
This table has an unusual design: the tabletop has a cutout round hole, and the tandoor itself is placed on the lower shelf. To protect against high temperatures, the tabletop is lined with a metal plate.
This table is also suitable for a home grill.
To make a stand table for the tandoor:
- Assemble from thick boards frame for the table top.
- Attach it to the inside legs from wooden blocks.
- Fasten the legs on the sides crossbars.
- Attach the table top boards to basis. They can be placed lengthwise or crosswise.
- Mark a round hole in the center of the tabletop. Its size should be larger than the diameter of the ceramic product, so that the wood does not come into contact with the hot walls of the appliance.
- Cut this out hole.
- Connect boards side crossbars.
- Secure the resulting shelf on top metal sheet.
- Treat the table with sandpaper or a grinding machine.
- Cover varnish or paint.
Attention! In work use only fire resistant varnishes and paints.
Useful video
Check out the video that shows how to make a tandoor lid.
Recommendations for optimal use
If you use the stove correctly, it will last a long time.
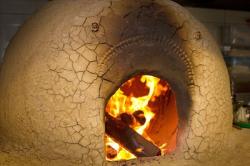
When heating up, the device is filled with firewood no more than 2/3. And after the food is cooked, the structures are allowed to cool.
For clay contact with water is harmful, therefore the stationary device is protected canopy or gazebo. Portable models are placed on a stand, and for the duration of storage The tandoor is packed in a protective case.
Sometimes the tandoor is placed indoors. In this case, a tandoor is constructed hood.
Comments