How to save money without losing quality? DIY brick oven repair
During operation of the furnace are gradually being destroyed. The firebox walls lose strength from the heat. Bricks burn through and break off, masonry joints crack, and soot accumulates inside the wells and on the walls of the chimneys.
High temperature load the firebox door, the hob, and the grates are exposed. In the northern regions, in freezing temperatures, firewood has to be burned every day, which gradually leads to the destruction of the stoves.
Content
What requires more attention: a stove in the country, a country wood stove or a sauna stove?
Furnaces in which burn hard and brown coal.
Several years after construction, bath and country stoves require repairs. Heating devices, in which almost around the clock bake tin bread, loaves and pizza.
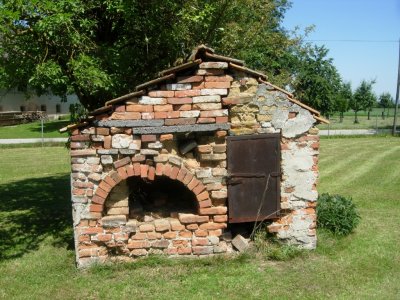
Italian Pompeian ovens are built in many countries. Pizza baked in such structures has a special taste and smell. This oven is usually built outdoors. Food is cooked under a brick vault, under the action of fire and heat of heated bricks. There are two types of Pompeian ovens - Neapolitan (with a low vault, designed mainly for baking pizza) and Tuscan (with a high vault, which allows you to put a pot or pan inside and cook not only pizza, baked meat and fish, but also soups).
Diagnostics of the malfunction
The condition of the furnace can be diagnosed on one's own, without the involvement of a professional stove-maker. Methods for identifying faults include:
- revision external damage;
- work evaluation flooded oven.
Diagnostics of faults begins with an external inspection. The seams in the masonry, walls, foundation, firebox, chimney in the house, in the attic and on the roof are subject to assessment. The condition of metal parts and components (cooking stove, dampers, firebox door, grates, firebox lining) is checked.
Reference. The furnace requiring repair has one or more external signs of malfunction: cracks in the masonry, in the foundation, in the chimney, in the seams between the bricks. Inside the firebox, fragments of burnt brick are visible. The door is loose, broken, the hob and grates have cracks.
Then the stove is fired up and its condition "in operation" is assessed. The heating structure is faulty if:
- the stove cannot be lit because poor traction (or lack thereof);
- from cracks in the masonry, from the door, through the gaps of the hob, through the holes for the dampers there is smoke coming out;
- it accumulates in the house carbon monoxide (CO).
You can't light the stove, foundation which deformed or crooked.
In this case, the chimney, walls, and cuttings are under stress, which can lead to sudden destruction of the house or stove elements. If this happens while burning wood, a fire can occur.
It is especially difficult to determine carbon monoxide buildup in the home, which causes fatal poisoning in humans and animals.
This gas is heavier than air, it accumulates in the cellar, near the floor in the rooms. The gas has no smell, it accumulates in the house if the firewood has not completely burned out (it no longer emits smoke, but the fire is still smoldering in the ashes), and the damper is already closed. Carbon dioxide can accumulate if a bucket of hot ashes is left in the house overnight. Coal ash is especially dangerous.
Important! Deep, extended cracks in the body of the furnace indicate its destruction. Such a device needs major repairs.
Minor DIY repairs: how to handle them without disassembling the entire stove
Once defects and faults are detected, repairs begin. Minor corrections are made within a few hours.
How to clean a chimney
To clean the chimney from soot you need:
- aspen or alder firewood;
- trowel with sharp edges for removing knocked-out bricks;
- scraper and narrow spatula to remove soot from the chimney;
- clay mortar for masonry (not cement), to cover the knocked-out bricks installed in place;
- plaster, lime for whitewashing.
The chimney is cleared of soot by heating the stove with aspen or alder logs. They burn quickly, create good draft and high temperature, and burn out the soot.
The effect is enhanced if the burning logs are sprinkled with table salt. This method is used to clean chimneys and smoke pipes. It is recommended to clean two or three times a month.
If burning wood does not help and there is too much soot, the chimneys are cleaned manually by removing knock-out bricksThey protrude slightly from the wall.
They are taken out by scraping off the plaster with a trowel. If the chimney is blocked by a burnt brick, the pieces can be taken out through the same holes.
Important! The fall of brick pieces into the smoke channel indicates that the stove has begun to collapse from the inside.
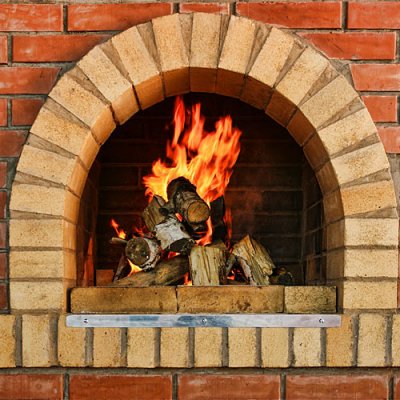
How to seal the cracks
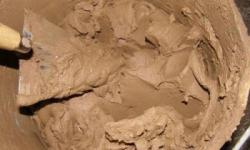
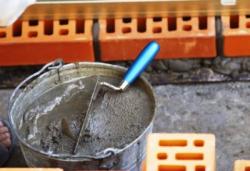
The cracks in the brick wall can be sealed with mortar. For the job you will need:
- clay, sand, cement, heat-resistant glue (for self-preparation of the solution) or ready mix factory production;
- trowel, board with a handle for grouting;
- capacity for solution;
- ceramic cord.
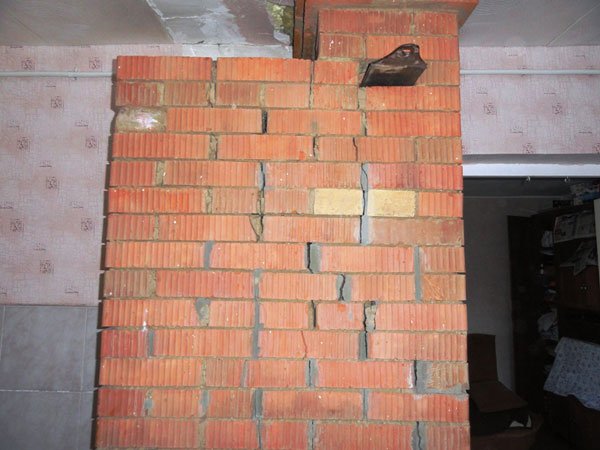
Photo 1. Cracks have appeared between the bricks on the stove. It's time to take the tools and fill the gaps.
The composition of the work depends on the size of the cracks. The work is performed in the following order.
- Stove wall is being cleaned from whitewash and the old solution.
- Into wide cracks fits in ceramic cord.
- Cracks moisten with water and seal mortar for masonry.
- Surface of the oven rubbed and leveled.
Reference. Instead of a ceramic cord, they often use basalt wool or construction felt.
Cracks in the masonry that form around metal parts are temporarily sealed in the same way. This happens if gaps between the brick and metal elements are not made during the construction of the stove. Such sections of the masonry are dismantled and re-laid.
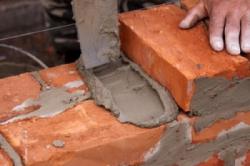
Replace a burnt brick without dismantling the masonry
Burnt or fallen bricks are replaced when they are destroyed and pieces fall out. For work you need:
- bricks for repairs;
- hammer to reduce the standard brick size (if necessary);
- solution for masonry;
- water;
- trowel, scraper to clean the fallout area.
New bricks are put in place of the burnt ones. moisten with water (dip into a bucket), then apply the masonry solution.
The solution is generously applied to the area where the brick (pieces) fell out. A new one is placed in place of the old one, lightly pressed and sealed.
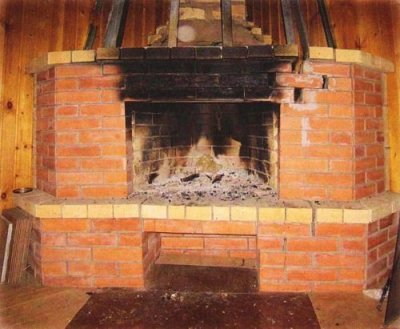
How to Repair a Firebox Door
If the seal and mortar around the door are crumbling, pieces of brick are falling out around the frame, and the door is tilting and tends to fall out, it needs to be reinforced. This can be done in different ways. The work will require:
- flat-nose pliers and round-nose pliers;
- new nichrome wire or steel strips;
- screws or bolts;
- drill;
- thermal insulation materials;
- new brick;
- solution for masonry;
- trowel, grout.
The wire on which the door is attached is pulled and twisted using pliers and round-nose pliers. A heat-resistant sealing material (kaolin wool, asbestos, ceramic cord, silica cloth, Supersil) is placed around the door. The cracks are sealed with pieces of brick and covered with mortar.
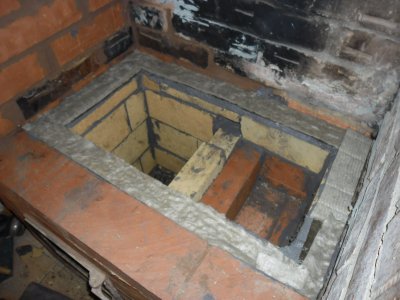
For more extensive repairs It is recommended to disassemble the portal oven and remove the door. Then proceed to installation.
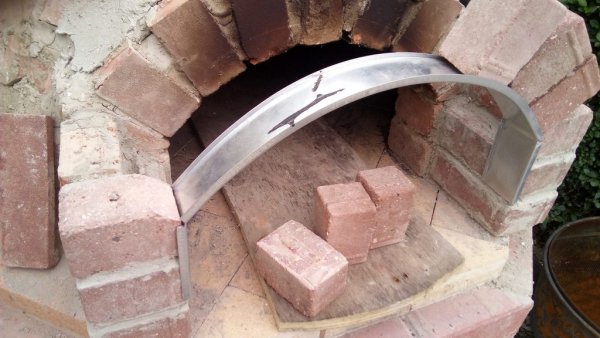
Photo 2. Disassembled furnace portal. Now the structure is supposed to be strengthened and reassembled.
The door portal is restored using new bricks and mortar. The new masonry needs to be dried within a few days.
How can I secure it?
Fastening the door with bolts. The simplest method of fixing the door to the restored masonry is to use screws or bolts (anchors). To do this, holes are drilled in the bricks.
Fastening the door to the strips. The door can be fixed to steel strips; this is done during the process of laying the furnace portal.
Steel strips are screwed to the four corners of the door frame (parallel to the masonry) using self-tapping screws. The strips are laid in the seams of the brickwork, on the mortar. The metal is insulated from the brick with any heat-resistant cloth. Then the seams are finally sealed with mortar.
Fastening the door to the wire. This is the most labor-intensive method of fastening, since you will have to disassemble half of the firebox. Nichrome wire is attached to 4 corners door frame, twisted into a "string". The wire is placed in the seams of the firebox "on the corner" - at an angle to the opening action.
What and how to replace grates
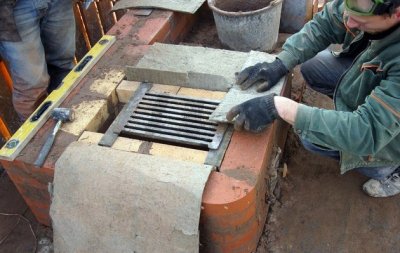
The grate bars burn out over time and require replacement. There are cast iron grates and grilles made of heat-resistant metal alloys.
Ceramic grates have increased heat resistance, they are used for solid fuel boilers. The grate is placed in the furnace freely, with a gap, on specially laid out protrusions. The grate is replaced in the following order:
- They take it out old grate.
- If necessary repairing the masonry and the draught was blowing.
- They are laying down new grate, leaving thermal gaps (5 mm).
- Gaps covered with sand or ash.
If the stove has a hob, it is removed first.
Not recommended use homemade grates, since the metal that DIY craftsmen work with may not withstand constant exposure to high temperatures.
Replacing the firebox sheets
Damaged firebox sheets are not repaired, they are replaced with new ones. For work you will need:
- steel sheet size 50 by 70-80 cm;
- heat-resistant fabric (asbestos, ceramic cloth, felt soaked in liquid clay solution, other heat-resistant material);
- nails, screws or bolts.
The damaged firebox sheet is removed from the floor using a construction tool.
A heat-resistant sheet is laid in its place. A steel sheet is placed on top and secured to the floor with bolts or screws, leaving no gap between the sheet and the stove masonry. The side adjacent to the stove, must have a corner to prevent sparks and embers from getting into the gap between the masonry and the sheet.
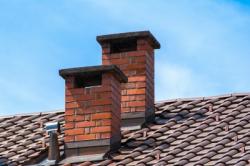
Chimney restoration
There are several ways to restore a chimney. The choice of materials and tools depends on the repair method and the degree of destruction of the brickwork.
Replacing damaged bricks
To carry out the work you will need bricks, mortar, and construction tools.
The masonry is inspected, and the places of greatest destruction are determined. If the bricks are destroyed less than 20%, they can be replaced with new ones.
- The dried solution is removed using a construction tool.
- Carefully remove damaged bricks.
- Apply fresh solution.
- New bricks are being installed into the masonry.
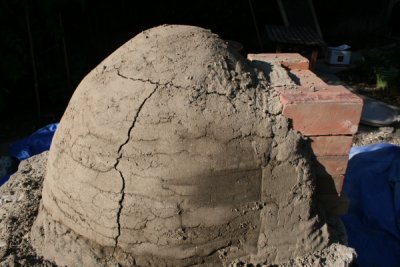
Installing a sleeve in a chimney
It is built into the chimney metal or ceramic sleeve (round or square section pipe). The work on installing the sleeve includes:
- dismantling the masonry at the joints of the sleeve parts;
- installation of a sleeve inside the chimney;
- filling the space between the sleeve and the wall with heat-resistant material;
- installation of a metal umbrella on the pipe head;
- restoration of dismantled masonry.
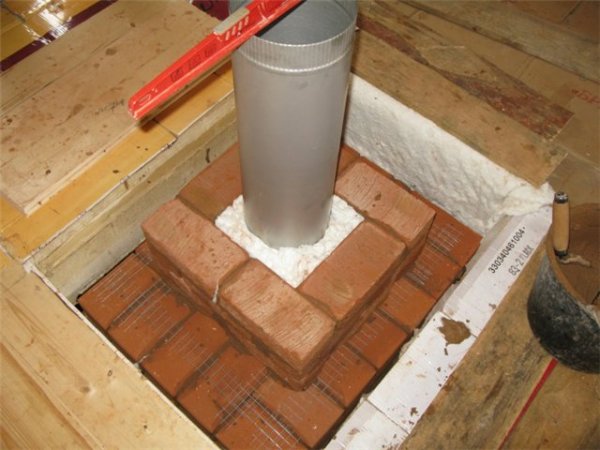
Photo 3. The process of installing a sleeve in a chimney is shown: the pipe itself, heat-resistant material, dismantled masonry.
Lining or plastering the inner surface of the chimney
Conducted by staff construction companies. It is difficult to do such work on your own. For lining you will need special equipment (brushes, winch) and a special mixture.
How to fix a firebox
The furnace firebox is destroyed during long-term operation, during rapid heating in winter. The strength of the masonry is affected by the quality of the firebrick. The masonry in the firebox is repaired by removing the destroyed bricks and inserting new ones in their place. For restoration work, the following is required:
- spatula, hammer, chisel;
- solution for masonry;
- water;
- brick refractory.
The old dry mortar is removed using a construction tool. After dismantling the burnt bricks, the masonry is moistened with water, the mortar is applied and new bricks are laid. It is permissible to remove several bricks at the same time.
Advice. After repairing the firebox, the stove can be fired. in a week, burning a small amount of wood. After two weeks, the stove is heated to full temperature.
What to do with the stove
Cast iron cooktop can crack, when a heavy object is dropped on it. Cracks appear if boiling water splashes on its hot surface. Cold water causes the hob to split instantly. It is impossible to restore a cracked panel, and the hob will have to be replaced. To install a new hob, you will need:
- seals: Supersil, asbestos cord, other heat-resistant materials;
- clay mortar;
- building level;
- sand.
Clay mortar is applied to the recesses in the masonry 3-5 mm thickThe solution is covered with a heat-resistant sealing material.
After this, the cooking flooring is laid and its position is checked with a level. The gap between the flooring and the masonry should be not less than 5 mm on each side.
How to tidy up the lining of a firebox
To repair the lining of the firebox, a new one is required. firebrick, solution for masonry, construction toolRepair of the lining includes the following steps.
- Removing the cooking deck.
- Dismantling the lining using construction tools, removing bricks.
- Cleaning bricks from dried mortar, assessing their condition.
- Replacing damaged bricks with new ones.
- Laying the lining on mortar (or fastening with metal bolts).
The dangers of refusing to repair a brick oven
Refusal to repair the stove leads to its further destruction. Operation of faulty stoves in a wooden house - cause of fires, which destroy property and take lives. Carbon monoxide emission through cracks often causes fatal poisoning of residents. Timely repair of heating devices will help avoid extreme situations and accidents.
Useful video
A video showing a good example of a self-made repair of an old Swedish stove: what problems may arise in the process and how to solve them.
And the combustion temperature of coal is not much higher than the combustion temperature of charcoal. That is why the furnaces are called "solid fuel furnaces". The fire resistance requirements for grates do not depend on the fuel.