From selection and approval to testing the system: step-by-step replacement of heating batteries
Installing batteries - the process is quite complicated. The main reasons that motivate a person to replace them are the desire to refresh the design of the room, improve the standard water indicators and improve the process of using radiators.
The period for replacing heating batteries can be divided into individual stages.
Content
- Preparatory stage
- The procedure for dismantling the old battery
- DIY installation process
- Starting the heating system
- Advantages of using gas welding and welding
- Features of replacing batteries in an apartment in winter
- Installation at your own discretion
- Useful video
- Nuances of the battery replacement process
Preparatory stage
It includes a number of sequential actions, aimed at preparing the premises for the installation of new radiators.
Coordination with neighbors in an apartment building about disconnecting the riser
Coordination is established with those who live on the floors above and below in an apartment building. This is done to conduct complete replacement of supply pipes.
A proposal is made to purchase with one's own funds transition fittings and pipes for neighbors batteries.
This is a reliable way to eliminate the need to replace heating sources in the future.
If the dialogue with the neighbors does not work out, then cutting the riser at floor level and under the ceiling. Then, in your own premises, the transition to a reinforced polypropylene pipe is carried out.
Measuring the dimensions
It is carried out in case of successful negotiations with neighbors. It is measured:
- diameter of outlet holes from neighbors' radiators from the upper and lower floors;
- length of pipeline to connect neighbors from both floors;
- length of the pipe in your own room;
- length and diameter of the pipe, going through the ceilings.
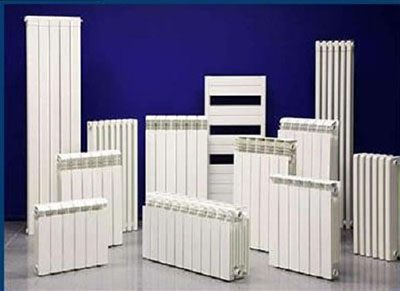
Purchase of new radiators
After taking the main measurements, estimate calculation for the purchase of materials.
Batteries are being released 4, 6, 8, 10 sections. If necessary, their number can be changed up or down.
When purchasing bare radiators, you will additionally need to purchase 1 right lower a blind plug and 2 left transitions with a transition to a certain diameter.
In addition, in order to be able to bleed air from the system during its start-up, it is necessary to have a right-hand passage plug for installing the Mayevsky crane. For all plugs, purchase gaskets.
To disconnect the radiator for the purpose of removing and flushing it, use American taps. When they are in the closed state, and there is a need to turn on the heating system with the battery removed, it is used polypropylene tap.
To connect to the neighbors' radiators, a PPR end switch is used. diameter 2.2 cm and external thread 2 cm.
Attention! The polypropylene pipe must be reinforced.
Preparing the tools
An important part of the preparatory stage before replacing the battery is having all the necessary tools:
- pencil for marking;
- adjustable and gas wrenches;
- roulette;
- concrete drill for fixing the radiator to the wall;
- building level;
- soldering iron for soldering pipes;
- Bulgarian using a metal disc;
- lerka (in case it is necessary to cut external threads on a pipe at floor and ceiling level).
The procedure for dismantling the old battery
With the help of “couplings”, on the long finished thread of which the coupling and lock nut are fixed, it is produced connection of equipment to the pipeline.
Sequence of actions:
- the lock nut is twisted along the lower and upper connections to the end of the thread;
- using a building level the cutting location is determined with a thread reserve of 1 cm;
- by marking the pipe is cut;
- the radiators are removed from the mounts, which also need to be removed;
- if there are differences between the sizes of the old and new batteries, a lengthening tool is used to increase the length ecoplast insert, to reduce it, the pipe is shortened and a thread is cut;
- The edge of the thread is processed with a grinder.
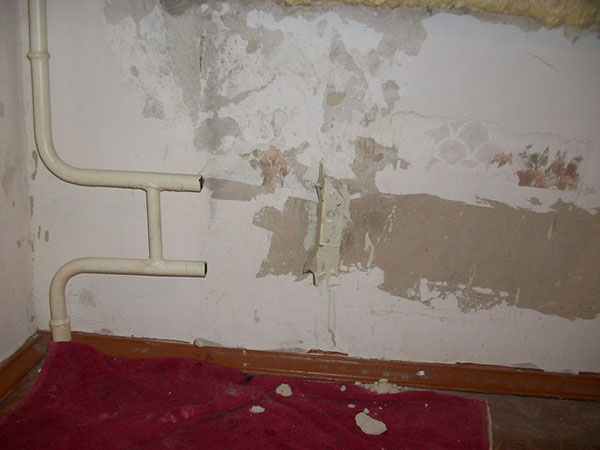
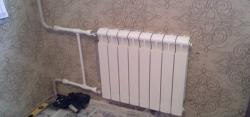
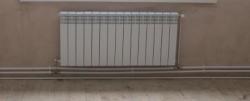
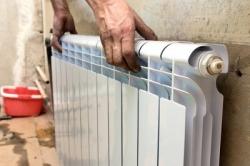
Photo 1. In the apartment, the old heating battery with a cut from the riser was dismantled, the fasteners were removed.
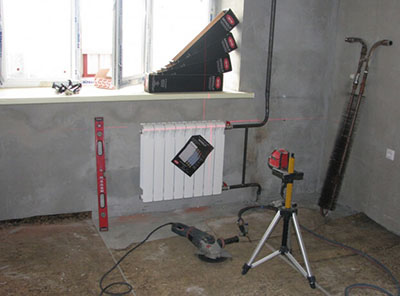
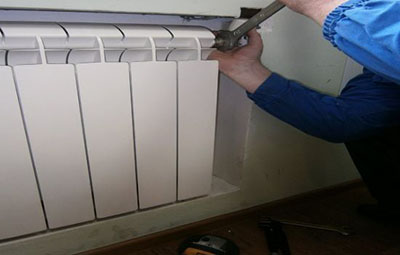
DIY installation process
After all the preparatory steps have been completed, the action begins. stage of direct installation of equipment.
Location Markup
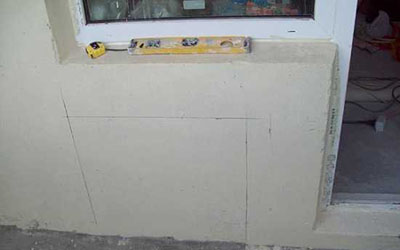
The distance between the battery and the window sill should be not less than 15 cm in order to eliminate the possibility of poor convection.
The gap between the heating radiator and the wall is adjustable screw-in depth of fasteners, on which the battery is fixed, and is 3–4 cm.


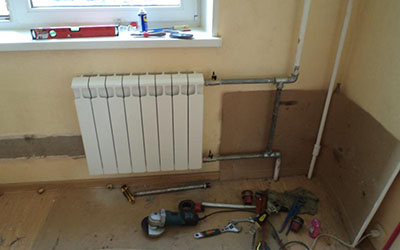
Pre-assembly of units
Heating batteries are assembled as follows: through and blind plugs are screwed in, Mayevsky and “American” taps are screwed in, and gaskets are installed.
Next marking and cutting of pipes is carried out, fixing corners and tees. The joints are welded at the top and bottom until the corners are obtained at 90 degrees.
Agreement with the housing office
This procedure is relevant after all preparatory work has been completed and assembly of the main units so that the operating service can turn off the heating riser.
The housing office may refuse in the event that the battery replacement will be done by yourself without the involvement of professional workers.
Insert
This process begins with threading the pipe so that when rotating, its end did not rest against the wall. To do this, it is necessary to turn it for the neighbors on the upper and lower floors.
Then the cut elements from the neighbors' batteries, floor slabs and old radiators are removed.
Next, the marking is carried out fixing new radiators. The transitions from neighboring radiators to the polypropylene pipe are wrapped and joined using sealing tape. Through corners 90 degrees the pipe outlet into the room through the ceilings is welded.
The length of the pipe must be taken with a reserve so that an overlap is formed at the place where it is soldered to the heating unit.
The final stage is cutting the pipe from the upper and lower neighbors to the required size and fixing it in the corner 90 degrees.
Reference! This process requires disconnect the batteries from the pipes at the site of fixation with American cranes.
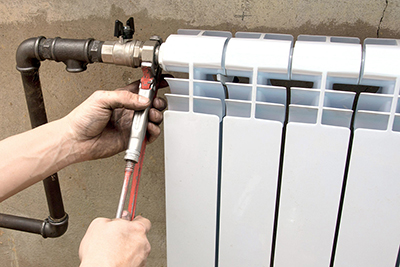
Starting the heating system
It is produced after contacting the housing office completion of the installation process.
First, it is mandatory to contact the operating service with a request about opening the return pipe, to bleed off the air on the upper floor and let the coolant flow into the riser from the bottom up.
Next, the feed tap is activated. This is what happens resumption of coolant circulation in the heating system, and the unit is checked for leaks.
Trial
For personal insurance and to check the quality of the work on installing radiators, it is necessary to test them. This requires negotiate with the maintenance service, which initially drained water from the heating system so that after installation it would release the coolant under pressure.
For the most part, the final filling of the heating system occurs only at the general start-up, when the pressure indicator is reached at 2–4 atmospheres.
If any problems are detected during testing, it is necessary move towards their immediate elimination.
Advantages of using gas welding and welding
This method of fixing radiators and heating pipes has long proven itself on the good side. It has a number of advantages before other methods of connecting elements:
- Aesthetic appearance designs without the use of heavy fittings and nuts.
- Lack of seals, used for threaded connections. This prevents wear of individual structural elements and guarantees an increase in service life.
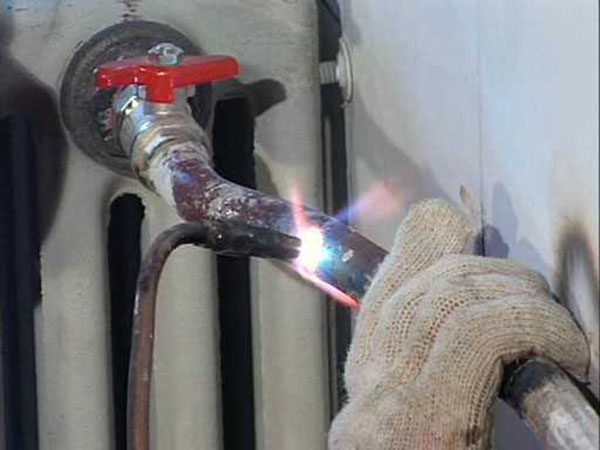
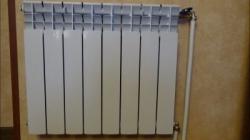
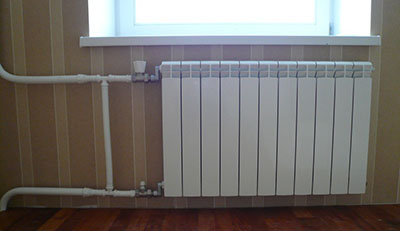
Photo 2. Welding to secure pipes and a radiator without fittings.
- High level of reliability of the process being carried out, no system failure when the pressure parameter increases.
- Application of gas welding in high pressure systems. The possibility of thread damage is eliminated.
Features of replacing batteries in an apartment in winter
If there is a need to carry out this process during the heating season, then there is two possible developments of the situation depending on the nature of the problem that has arisen.
Radiator leak
In this case it is required notify the management company immediately or housing office. To fix the problem, you will need the help of plumbers. They put a clamp on the leak site (used only if the problem is local). If the leak is large and it is impossible to fix, then the heating is turned off and installing a new radiator even in winter.
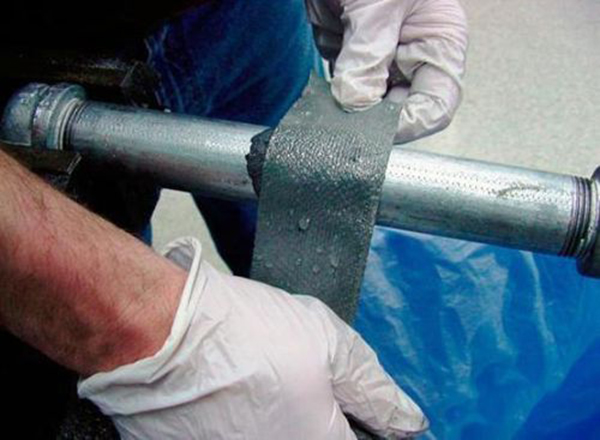
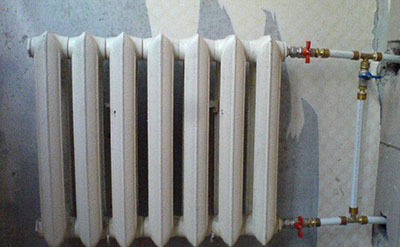
Photo 3. The process of applying a clamp to the radiator in the place where the leak has formed can only be used locally.
Installation at your own discretion
Exists classical method of replacing radiators and modern.
Classical

You need to start by obtaining permission from the operating service. to turn off the heating.
The housing office may refuse in the event of replacement of radiators in the entire apartment or if the outside temperature below 15 degrees.
The service of shutting off risers is a paid one.
Time for their shutdown agreed with the master or team of specialists, who will carry out the entire battery replacement process in the shortest possible time.
Important! Before starting work and contacting the housing office, be sure to inform about this. notify the neighbors.
Modern
It involves the use of special equipment for freezing heating pipes, which creates a ice plug, thereby making it possible to replace radiators without shutting down the heating system.
The work using this method is much faster. At the same time no need to negotiate with the housing office about obtaining permission.
Freezing only works when the circulation of the coolant in the system has completely stopped.
Special equipment freezes individual sections of pipes, thereby stopping the water for a while. The ice plug prevents the liquid from moving through the main line and pipes.
Most of the devices used for this method operate using liquid carbon dioxide. They must have spare cylinders to maintain the ice plug during the process.
To eliminate the possibility of carbon dioxide accumulation, the system must be fully adjusted. ventilation.
Useful video
After watching the video, you can familiarize yourself with the process of replacing heating batteries using pipe freezing technology.
Nuances of the battery replacement process
In terms of installing batteries, it is important to take into account the list of required tools and coordinate the work with the housing office and neighbors. If possible, use gas welding to secure the components of the system.
When carrying out work on replacing radiators in winter, evaluate the rationality and necessity of this process, and make your choice on one of two tested schemes.
Having decided to carry out the work independently, to study all possible nuances competently this procedure.
If any questions arise, contact a qualified specialist for advice. To reduce time and improve the quality of work, it is best to contact a team of craftsmen.