To avoid freezing on long winter evenings: how to build a Dutch oven with your own hands?
You are viewing the section Heating Dutch oven, located in the large section Types of furnaces.
Dutch oven - accessible and reliable a method of heating a private house when it is impossible to connect to gas supply communications. Construction of a Dutch oven does not require complex calculations and expensive materials.
Dutch ovens are made of brick and have compact dimensions bases and variable heights.
A common feature of Dutch stoves is the principle of laying bricks, which allows for several long smoke circulation channels to be installed inside the stove body. This feature ensures high heat transfer by increasing the time it takes for smoke to circulate inside the stove.
Content
Dutch oven made of bricks
The Dutch stoves got their name from the place of their invention. This principle of laying stoves was first used in Holland in the fifteenth century. Dutch women appeared on the territory of the Russian Empire during the reign of Peter I and so on the second half of the nineteenth century have become the most common heating devices in Moscow and St. Petersburg.
Appearance
The appearance of the Dutch oven is associated with the features of a certain configuration and installation pattern.
The height of the furnace depends on the required length of the smoke circulation channels and varies from one and a half meters to several floors.
Over the course of the Dutch oven's existence, various additions have been made to its design, increasing its efficiency or adding new features.
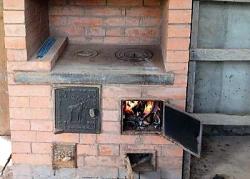
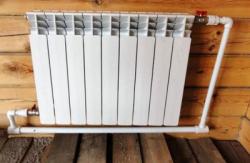
A very common modification of Dutch ovens are stoves with built-in boilers water heating. There are construction schemes with built-in hobs or fireplaces.
Key Features
Among the main features of Dutch ovens are the following:
- Mandatory presence foundation.
- Rectangular shape of the fireboxThis feature makes the stove relatively easy to install - there is no need to design and construct a complex arched vault.
- Availability at least three descending And three ascending smoke circulation channels. Depending on the design, the furnace body may be equipped with until twelve smoke circulation.
Important! To ensure a comfortable temperature in the room, the Dutch oven needs to be heated at least twice a day.
- Variable height. Depending on the number of floors of the building, it is possible to build a multi-story Dutch stove. The implementation of such a scheme allows heating individual floors.
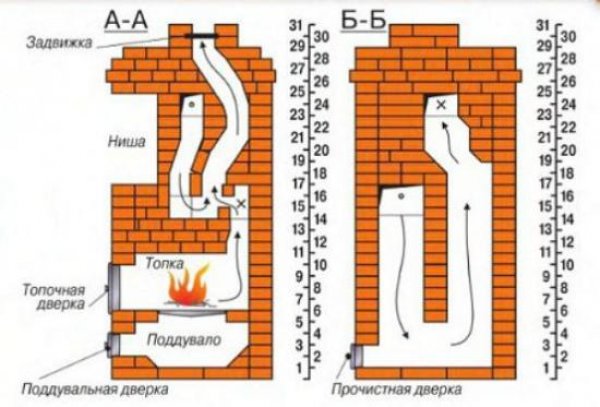
Photo 1. Diagram showing the movement of heat inside the furnace: A - side view, B - rear view. The order is shown on the right.
Varieties and modifications
There are several common modifications of Dutch ovens:
- Heating (classic). Optimal for heating residential premises small area.
- Cap-shaped. They are distinguished by the most compact dimensions, existing laying patterns allow the construction of miniature Dutch ovens triangular section for corner placement.
- Heating. The action is based on the principle of forced air circulation. Optimal for buildings with high ceilings.
- Heating with water heating boilers. They are used when it is impossible to place the stove in the central part of the house. Installation of a Dutch stove with a built-in heating boiler is carried out in the kitchen or in the hallway, after which the heating circuit is installed.
Important! Operation of Dutch stoves with built-in boilers for heating large areas requires the use of coal as fuel.
In addition to using the Dutch stove as a purely heating structure, there are possibilities additional equipment stove with a hob, fireplace or stove bench. To do this, it is important to make the required amendments to the selected laying scheme at the preparatory stage. It is possible to use ready-made schemes that are publicly available.
Heating Dutch stove
The principle of operation of the classic Dutch stove is to increase the time of smoke circulation inside the body by installing winding smoke circulation channels. Before exiting into the chimney, the smoke from the burnt fuel transfers its own thermal energy to the body. The stove acts as as a heat accumulator: heat accumulates in the body and is systematically used to heat the premises.
Reference. Classic Dutch do not require constant combustion and warm up quickly after long periods of inactivity.
In addition to the general design features, the differences between Dutch ovens and other types of ovens vary depending on the layout and the presence of additional equipment. The difference lies in both the efficiency and the set of functions.
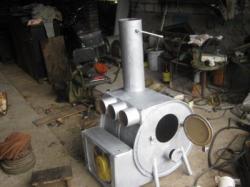
With a water heating boiler
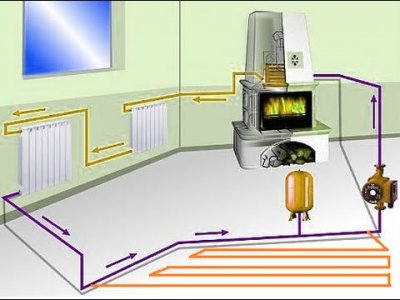
The operating principle of Dutch stoves with a built-in water heating boiler is similar to the classic version.
Presence of a heating circuit increases efficiency furnaces by ensuring uniform distribution of thermal energy within the heated premises.
The stove is transformed from a heat source implementing the principle of air heating into a central element liquid heating system.
How to build a Dutch oven with your own hands. Step-by-step instructions
Building a Dutch oven yourself requires a careful approach and careful adherence to instructions.
Criteria for choosing a home project
There are many different schemes for constructing Dutch ovens in the public domain. The choice of a particular scheme, first of all, depends on the area heated premises, ceiling height and frequency of use. At the initial stage, the feasibility of additional equipment is determined and the cost of materials and other equipment is calculated.
Important! A careful analysis of the existing conditions and opportunities can reveal expediency use of other heating devices.
Necessary materials and tools
To create a Dutch oven you will need the following materials (the amount of material depends on the chosen pattern) and tools:
For the construction of the foundation
- monolithic plate;
- dry cement;
- reinforcement;
- metal wire;
- roofing felt.
The mortar for masonry consists of
- from river sand, which must be pre-sifted; the presence of small stones and other impurities is unacceptable;
- from building clay;
- from water.
Attention! When buying clay, you should smell. Natural clay has no smell, its presence indicates foreign additives. Seams sealed with a solution based on such clay are very likely will crack.
The furnace body requires
- red ceramic brick standard size;
- fireclay refractory brick standard size;
- asbestos cord;
- doors for the firebox and ash pit;
- lattice grate;
- cleaning doors and latches;
- chimney pipe.
Advice. The main criterion for choosing metal elements is the material of manufacture (refractory steel).
Necessary tools
- sieve;
- trowel;
- pick for cutting bricks;
- capacity for solution and water;
- Measuring instruments: tape measure, level, square, plumb line.
How to build a foundation
The first task when constructing a Dutch oven is to build a foundation; its area should be slightly larger than the area of the base of the oven.
At the chosen location marking is being done.

The floor covering is removed, a pit is being dug depth from half a meter. Cement is mixed solution in proportion 1:3:4 (cement, water and sand respectively).
It is placed into the dug pit monolithic slab, it is poured on top layer of cement mortar.
In production reinforcement: the reinforcement is laid in a grid with the distance between the bars within the limit 100-120 mm. At the intersections of the reinforcement, the rods are installed vertically, after which the resulting frame tied with wire.
The remaining part of the solution is poured. Foundation surface sprinkled with dry cement and leveledThe resulting base hardens within seven days.
Preparing for the construction of the furnace
After a week, you can begin to create the Dutch oven.
What to make mortar for masonry from
Preparation of the solution requires preliminary soaking. clay in water. After a few hours, the remaining water is drained, the clay is mixed with sand in equal proportions. Then it is added waterIts volume should be equal to eighth part volume of the resulting mixture.
Working with the foundation
Preparing the foundation involves ensuring waterproofing: the finished base is laid twice with roofing felt. Then a layer of sand no more than 50 mm thick is poured. The sand is leveled in accordance with the level readings.
Important! To prevent the bricks from absorbing moisture from the mortar, they must be soaked in water before laying. within a minute.
Row order. Laying scheme
The bricks are laid out in order according to the selected laying pattern.
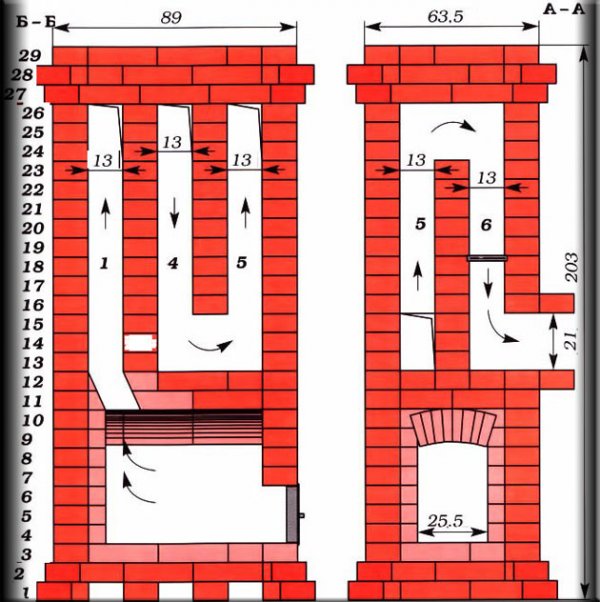
Photo 2. Drawing of a Dutch oven with the order and dimensions indicated on the left. B - side view, A - front view.
The diagram may differ in different versions:
- 1 row is laid out of ordinary bricks on a prepared foundation. After checking the level, the bricks are filled with a thin layer of mortar.
- 2nd row — the bricks are fastened with mortar. The ashpit door is installed. The laying is carried out in accordance with the row layout scheme.
- 3rd row is laid out of fireclay bricks. The grate is placed between the third and fourth rows.
- 4th row. The bricks are laid on edge. The firebox door is fixed. The brick of the back wall is laid without mortar. This measure will allow the brick to be removed later for cleaning the stove.
- Row 5The laying is done in the same way as in the previous row, but the bricks are laid flat.
- Row 6The bricks are laid on edge.
- Row 7. The bricks are laid flat, but the back wall is laid on edge. The following rows are laid flat.
- Row 8. The firebox piping, the chamber door is closed. The firebricks above the firebox are beveled.
- Row 9. Bricks are shifted to the back wall. Starting from the tenth row, fireclay bricks are not used.
- Row 10The foundation of the chimney is laid out.
- Row 11. Installing the valve.
- Row 12. Installation of the chimney pipe. The metal pipe is brought out onto the roof, thermal insulation is performed. The minimum height of the pipe above the highest point of the roof is 500 mm.
Important! During the installation process, you need to monitor plumb lines and level readings and, if necessary, make timely adjustments.
After laying, the finished Dutch oven is drying for two-week period. The doors of the stove must be open. The draft is checked by burning paper in the firebox. If the technology is followed, the smoke will go out through the chimney.
The external finishing of the device is made of ceramic or glazed tiles; the surface of the stove can be painted or whitewashed.
Photos at different stages of construction
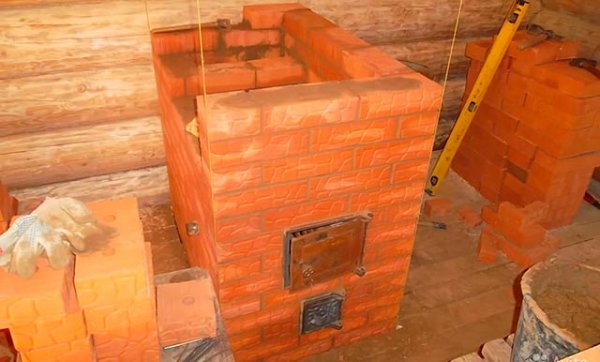
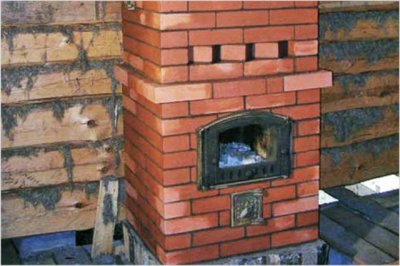
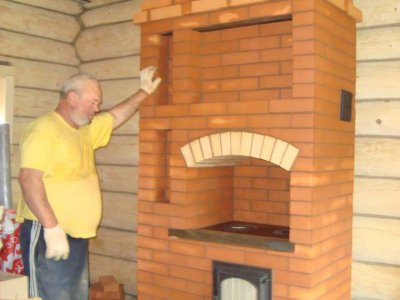
Photo 3. Construction is in full swing, 12 rows have been laid out and the stove is half ready.
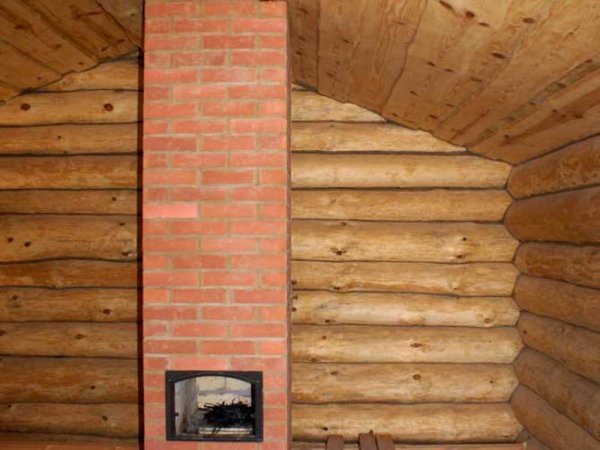
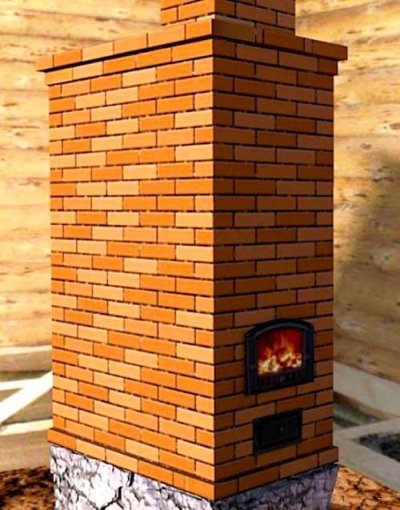
Photo 4. Possible version of the finished design. The stove of small width and height can be as needed.
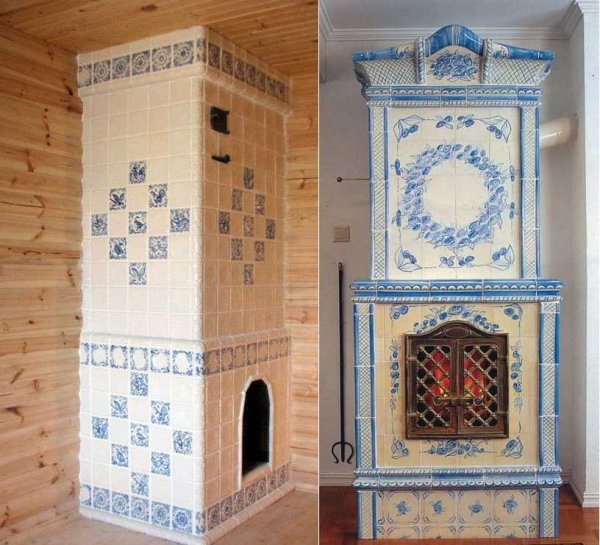
Photo 5. The last stage is finishing. For example, Dutch stoves with tiles (ceramic tiles, a type of tile) look very nice.
Possible complications
Despite the simplicity of the device, the construction of a Dutch oven requires theoretical and practical skills in this area. An inexperienced craftsman can make a mistake at any stage - from choosing a suitable scheme to purchasing materials and directly laying. The price of a mistake can be both minor external defects, and malfunction ready-made Dutch oven.
Furnaces are sources of increased danger. Any mistakes made during construction are fraught with the occurrence of risk to health and life household members. The guarantee of high efficiency and safety of operation of Dutch stoves is the calculation and installation work performed by qualified specialists.
Advantages of Dutch ovens
Dutch ovens have a number of undeniable advantages, among which the most notable are: high heat transfer rates, guaranteeing a comfortable temperature background.
Dutch women are distinguished by their compactness and occupy a small area, which is very critical for small spaces. The design of the Dutch ovens is simple, and the construction does not require significant costs.
There are many schemes and modifications that allow you to choose the best option depending on existing conditions, personal preferences and the capabilities of the property owner.
Location
Regardless of the quality of thermal insulation, the main sources of heat loss are window and door openings. Due to this circumstance, Dutch ovens should be located at the maximum distance from windows and doorsCompliance with this condition guarantees the optimal operating mode of the furnace and the stability of a comfortable temperature background in the room.
But if there is a built-in water heating boiler, this factor becomes irrelevant due to the fact that the main heat transfer will be carried out not through the air, but through the heating circuit.
Useful video
A video that shows step-by-step and with explanations how to build a Dutch oven using a 3D model.
Comments