Ideal for heating and culinary experiments: a Dutch oven with a stove. Do-it-yourself construction, row by row
The Dutch heating and cooking stove is a worthy alternative expensive and large-sized Russian stove.
Its advantages are considered to be multifunctionality (heating, cooking, decorative element), compact weight, economy, high heat output, simplicity masonry.
It is not difficult at all to build a Dutch heating and cooking stove with your own hands if you strictly follow the diagrams and recommendations.
Content
Heating and cooking Dutch ovens

Operating principle all Dutch ovens are elementary - heated air goes through artificially lengthened path to the chimney, but the design schemes differ:
- Forms — rectangle, circle.
- Dimensions.
- Presence additional equipment (stove, oven, stove bench).
- Gas distribution systems: multi-channel and bell-shaped. The latter is more effective, as it has a high efficiency - when fuel burns, the heat remains in the chambers. Cold air that gets into the heated furnace passes through, bypassing the chambers. Multichannel the system, in turn, is easier to construct, the number of channels can reach six.
With a stove
This design differs from the standard one in that it is equipped with a hob. on the 3rd-5th row from the firebox. The best material for such a part is cast iron plate 5-8 mm thick.
The stove can be solid, used only for heating food, or with burners installed in it for cooking food. There may be several burners.
With hob and oven
This design of the Dutch oven is also equipped with oven. The oven can be installed above the stove or to the side of the firebox.
The first position is preferable, since the hot air in this case evenly envelops the entire area of the oven. Being located on the side of the firebox, the structure is heated mainly on one side.
Making a stove with your own hands
Before you start construction, you should choose a scheme and prepare everything you need.
Selecting a project and arranging it
When developing a drawing The following factors are taken into account:
- appearance designs - if you do not plan to hire professionals, then the simplest design is chosen;
- necessary set of functions - heating, cooking, place to relax, water heating;
- price construction - a structure finished with tiles looks impressive, but such finishing is quite expensive and labor-intensive;
- stove binding to room layout;
- possibility of construction separate foundation, the chimney should not fall on the floor beams.
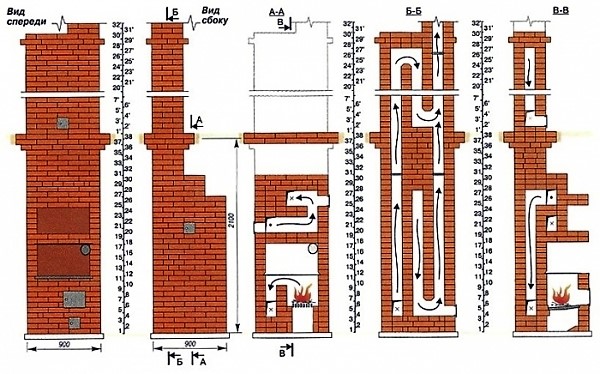
Photo 1. Chimney diagram and ordering for a Dutch stove with a stove. Front and side views.
Materials
It is permissible to construct a Dutch oven from not very high quality and even from used bricks. But it is better not to experiment, cracks can increase the fire hazard of the structure. The main masonry is made of solid ceramic red standard size bricks 120x65x250 mm. It is used for heating. fireclay refractory brick of the same dimensions.
Clay mortar is mixed from red clay with the addition of sand in different proportions and water. If natural clay is taken, the ratio of sand and clay for each of the rocks will be different. The entire design of the stove depends on the quality of the solution, so beginners are advised to purchase special fireproof mixture in the store.
For filling foundation you will need:
- solution (cement + sand + water);
- gravel;
- reinforcement;
- formwork;
- waterproofing material.
For furnace equipment required:
- knitting wire thickness 0.8-1.5 mm;
- metal corner;
- asbestos cord;
- a set of doors, grilles and latches;
- hob, oven.
Preparing the tools
You will need:
- pick;
- Bulgarian;
- trowel;
- rubber mallet — for processing and laying bricks;
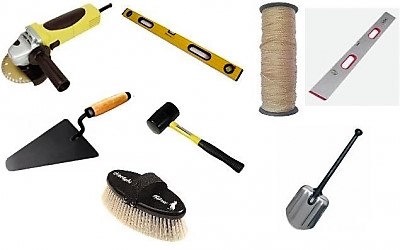
- level, plumb lines, squares — the verticality of the masonry is easy to control if you place four plumb lines at the corners of the stove from the very beginning;
- sieve for clay;
- bucket for solution;
- shovel;
- hammer;
- building mixer.
Place for the stove and construction of the foundation
It is most rational to place the stove so that it can heat as many rooms as possible. A heating and cooking Dutch oven, located in the kitchen, partially replaces the partition. It is important to obtain permission for subsequent maintenance and repair to all sides of the stove. Indent from wooden structures - not less than 250 mm. Furniture and other interior items should be located not closer than 40-50 cm.
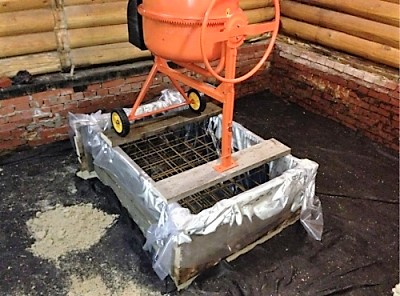
Digging in the chosen place pit slightly larger than the dimensions of the stove and the foundation is poured. It is unacceptable for the stove base to adjoin the existing foundation of the house. The depth of the pit not less than 50 cm, depending on the type of soil. The foundation is poured to floor level premises, after drying, it is sprinkled with cement powder and a layer of sand. A layer of waterproofing.
Advice. The foundation can be deepened 0.3 meters lower level of the finished floor, and lay it on top of it four rows ceramic bricks, which will not allow the heat from the stove to escape into the concrete. Waterproofing is laid between the top of the foundation and the bricks in two or three layers of roofing felt with overlapping sheets not less than 0.15 meters.
To glue layers of roofing felt together, it is used bitumen primer. Foundation reinforced rods with a diameter of at least 10 mm in two layers (bottom and top) with a step of 150 mm. The reinforcement is crossed and tied with wire. Additionally, vertical reinforcement is carried out. To fill the solution, a wooden frame is installed along the perimeter of the pit. formwork, inside which is done in two or three layers of waterproofing.
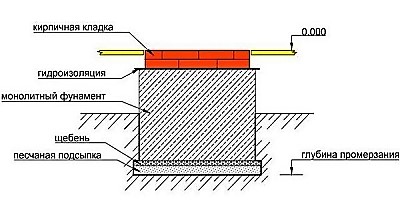
It is placed at the bottom of the pit sand cushion 25 cm, is poured with water and rammed, filled up 10 cm gravel. It is placed on top two or three layers of waterproofing.
The foundation is filled with mortar - cement + water + sand in the ratio 1:3:4. Freezes approximately week.
Masonry scheme
Once the foundation is ready, you can begin to form the stove itself. For beginners, the diagram of the simplest version of a Dutch heating and cooking stove is suitable: three-channel design with a hob and oven. The thickness of the walls is equal to one brick. The ordering is not complicated, but requires additional explanations:
- First row is laid dry, the next two are formed into a continuous layer.
Important! Check, does it deviate construction from vertical and horizontal.
- On the 4th row a blower is made, on the 6th row it overlaps.
- A steel wire is attached to the hinges of the ash pit door and embedded in the mortar.
- On the 6th row A grate is installed between two halves of a brick cut lengthwise.
Important! In all places where metal meets brick, expansion gap (5 mm) and is laid asbestos cord. When heated, the metal expands, and the lack of gaps can lead to the destruction of the masonry.
- Between rows 7 and 9 the firebox door is installed. The firebox is made of fireclay bricks.
- On the 10th row The firebox is closed and a metal plate is attached to the seat with gaps.
- To protect the brick from heating, the hob is installed on a clay mortar. Metal corners are placed along the edges.

Photo 2. Approximate layout of a heating and cooking Dutch stove with a hob and oven.
- On the 14th row Metal corners are built in to support subsequent masonry.
- Row 16 The bricks serve as support for the oven.
- In the 22nd row the oven chamber is covered by metal strips installed at 21 row.
- In the 16th-18th row a chimney cleaning door is installed, at 23 row - smoke channel damper.
- In the 24th row the bricks protrude three centimeters at the edges, 25 the row is laid similarly 23.
- From row 26 the chimney is formed.
Possible errors and their correction
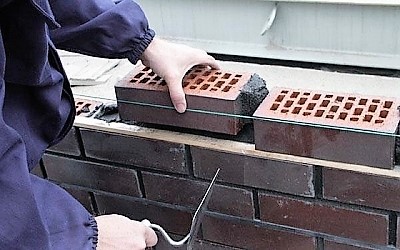
To make the stove look beautiful and last a long time, the seams should be even, approximately 5 mm thick.
For this purpose, bricks are placed on wooden slats or square metal rods: brick row - slats - mortar - brick row, then the slats are removed.
Even experienced stove makers make mistakes in laying the bricks, which are difficult to correct later. Therefore, it is recommended put first bake according to the scheme on dry, then only lay the mortar. This will help determine whether the amount of materials has been calculated correctly.
Just before laying, the brick is completely soaked for a while in water. This will prevent it from subsequently drawing water from the solution. It is enough to simply sprinkle fireclay bricks with water.
Whatever the design of the stove, it is important to observe the following when constructing it: fire safety measures.
Photos of finished stoves
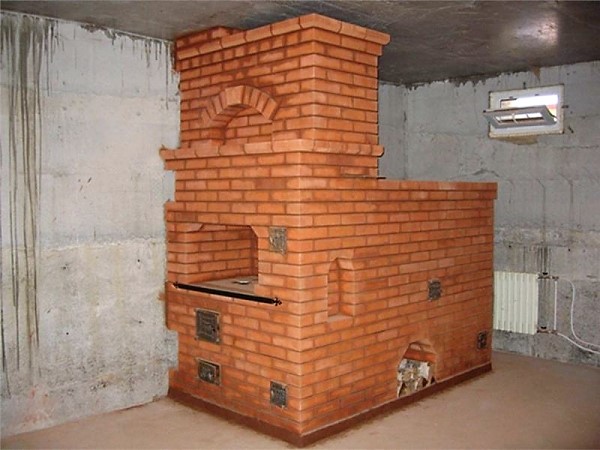
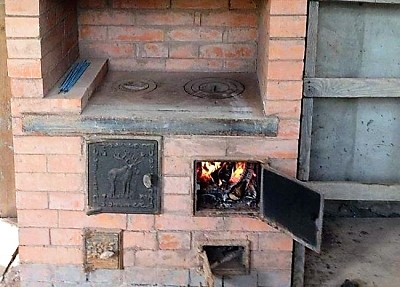
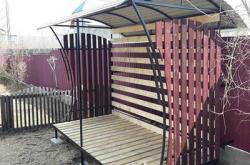
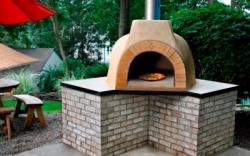
Photo 3. Large Dutch stove with a stove and a stove bench. There is also a woodshed below.
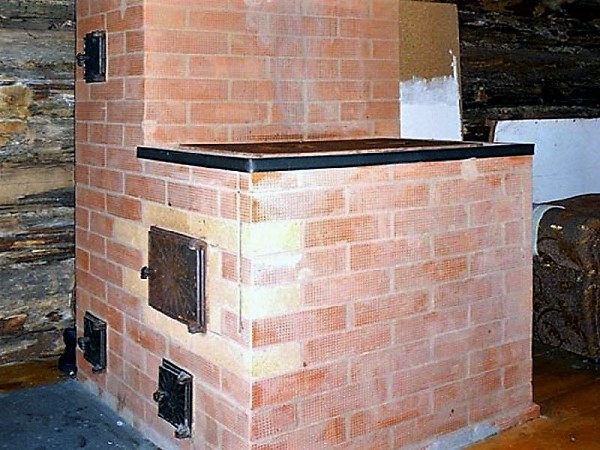
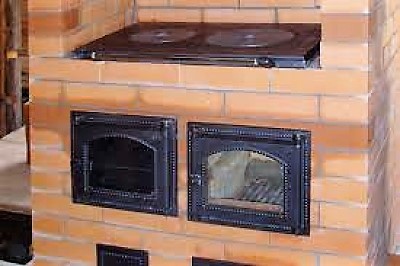
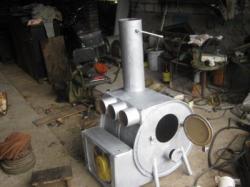
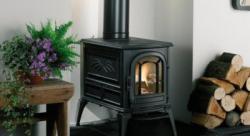
Photo 4. Heating and cooking Dutch stove with a hob for cooking.
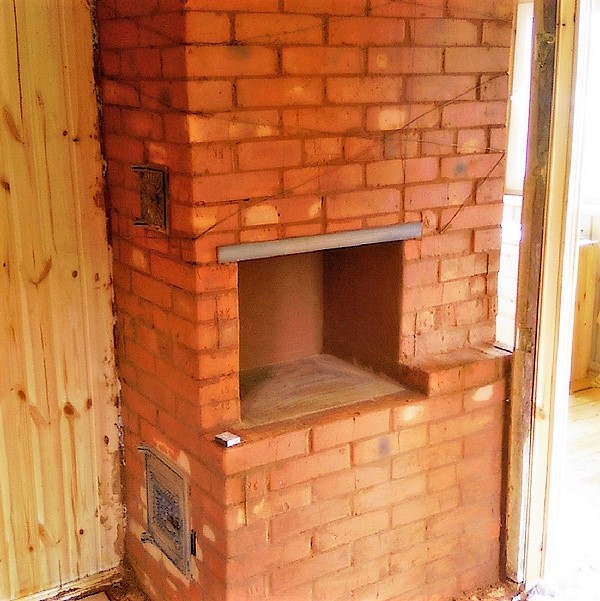
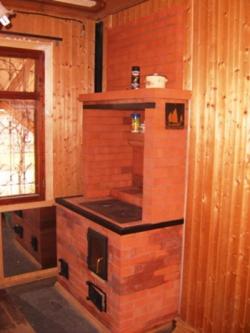
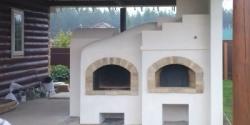
Photo 5. A Dutch stove with a stove located close to the wall can heat two rooms at once.
Useful video
A video showing the construction of a Dutch oven with a hob for a country house.
Tips for using a Dutch oven
The finished oven should dry for two weeks. The test firing is first carried out with small chips: for 30 minutes with the valves openThen the amount of fuel is gradually increased. Such drying lasts about a week in summer and 2-3 weeks in autumn and winter.
Advice. If the stove was folded at the stage of building a house, it is not allowed to fire it without installing windows and doors in the room.
During operation it is required clean chimneys regularly from accumulated soot. It is not allowed to overheat the stove, or to heat it with materials not intended for this purpose. If the structure is built correctly and is used carefully, it will last up to 25 years without repair and additional expenses.
Comments