To heat black or white? 2 options for how to build a wood-fired stove for a Russian bathhouse
The modern Russian bathhouse is a small hut made of timber or logsInside the building is divided into two parts - anteroom And steam room.
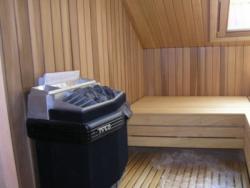
There is a stove with a heater, containers with hot and cold water, benches and sleeping platforms.
A bathhouse stove is built from different materials according to individual designs.
Content
Requirements for stoves for Russian baths
Modern stoves in a Russian bathhouse should heat the air to a temperature 50-65 degrees. In this case, the steam generated in the stove after water is supplied to the heater creates humidity within the limits 60-80%.
Otherwise, the requirements for the stove and bathhouse are not much different from those for other types of baths.
- Heavy weight ovens more than 300-400 kg are erected on foundation (most often rubble or cast reinforced concrete). If the floor and joists are strong, a lightweight stove can be installed without a foundation.
- They put it under the metal stove two layers of brick (on cement mortar).
- The stove for a Russian bathhouse is built so that it does not reach the walls of the log house by 40 centimeters or more.
- If the firebox is located in the dressing room, the partition is protected heat-insulating materials.
- Chimney should not touch wooden ceiling, walls, roof. For thermal insulation are used expanded clay, asbestos fiber, basalt wool, sand.
Description
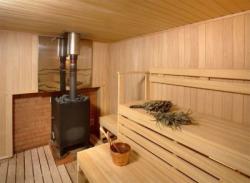
Stoves for Russian baths are designed for heating the steam room and water for washing. The stove heater (closed or open) creates hot, comfortable steam. The size of the sauna stove depends on the area of the sauna house and the height of its ceiling.
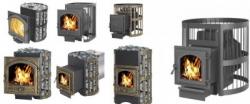
The materials from which the stove is built vary structure, heat transfer, ability to heat up quickly. The following are suitable for building a sauna stove:
- bricks;
- steel;
- cast iron;
- stone;
- clay.
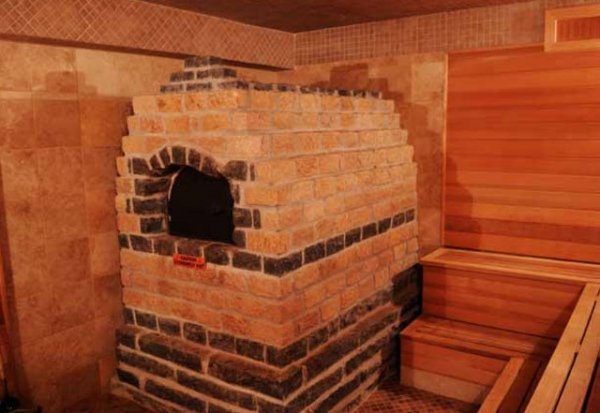
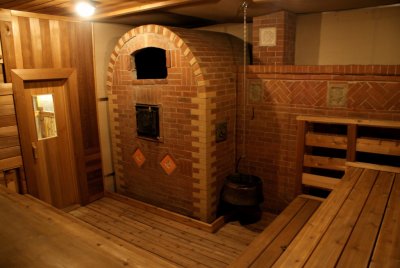
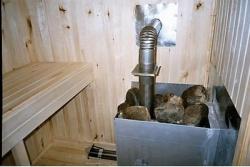
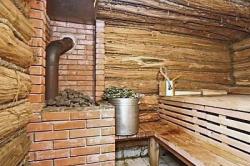
Photo 1. An example of a wood-burning stove with a closed heater for a Russian bathhouse built of brick.
In combined models of sauna stoves, they use simultaneously steel and cast iron, bricks (fireclay and ceramic), talc chlorite, talc magnesite, vermiculite and fireclay boards thermal insulation. Rounded or lump natural stone, cast iron balls are placed in the stove heaters. Clay and stone stoves are rarely built in Russian baths today.
Dimensions stoves for Russian bath differ from those of conventional stoves. Home stoves are larger, they are designed for heating the home, cooking food on the stove and in the oven. Bathhouse models are smaller in size, they are built exclusively for heating water, creating steam and warming the bathhouse.
Varieties
Standards for the construction of Russian baths and stoves for them No, only the general principles of architecture and construction are observed. There are dozens of models of sauna stoves in stove making textbooks and on Internet resources.
Russian wood-fired sauna heated in a black way
In old black-heated baths, the ceiling was low. Small holes were cut in the roof or wall. windows for smoke exhaust. When he left, the openings were closed with shutters.
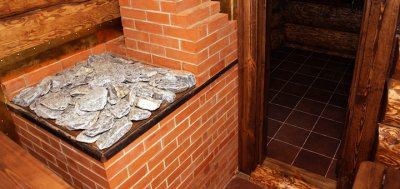
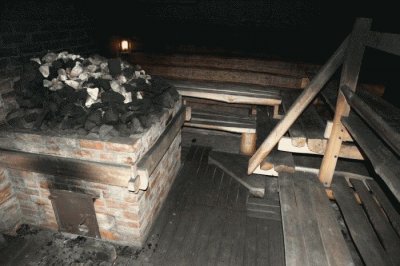
A modern black sauna is a brick firebox lined with stones. They are placed against the walls of the stove and on top (on the grate). The water tank is placed against the stove wall (or built into it).
Bath stoves of this type have one thing in common: no chimney. After the firewood has burned out, the coals and embers are raked out of the firebox and taken outside. The sleeping benches and floor are washed using sand or another abrasive.
The model is laid out of ceramic or fireclay bricks. The stove is built on monolithic foundation or on a solid floor (they lay out a solid base, the dimensions of which by 15-20 cm extend beyond the perimeter of the furnace). The work is carried out in the following order:
- 1 row they put it on foundation (base). Solid masonry.
- In 2nd row form niche for the firebox, secure the cast iron frame (oven portal) by placing wire or steel strips screwed to the frame into the seams.
- 3 and 4 rows. Continue formation of the firebox.
- Row 5 completes the laying. The frame is finally secured, and they lay it out above it. brick arch.
- Placed on top of the firebox steel reinforcement grid, fix it with screws or anchors. The grating must be inserted into the pre-prepared grooves.
Important! The oven is dried for 7-10 days. After this, they place it on the grate on the side walls of the firebox. large stones.
A large tank of water is placed close to the back wall of the stove, giving preference to containers with flat walls.

Wood burning brick oven
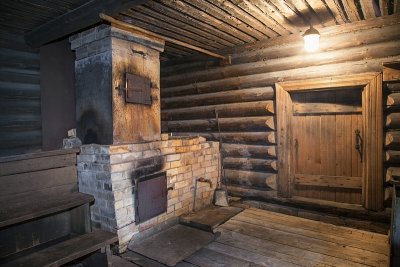
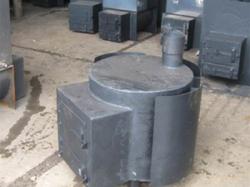
A brick stove with a chimney going out onto the roof allows you to warm up the room well. Let's consider the structure of a brick sauna stove with an open stone heater.
This stove has a simple structure and is designed to heat a small bathhouse with an area of 9-12 square meters. Size of the foundation of the structure 102x62 cm (4x2.5 bricks)The stove heater has the following design features:
- Firebox directly connects with a vertical smoke channel and a chimney.
- There is a firebox located under it ash-pit.
- A firebox is placed at the bottom grate.
- Firebox portal and ashpit closed with cast iron doors.
- To clean the smoke channel in the lower part of the structure, a hole with a door.
- The ceiling of the firebox is closed steel sheet. This is the bottom of the stove.
- It is located on it lump stone or pebble.
- At the top of the structure, above the smoke channel, a steel water heating tankThe container has a square cross-section.
- The height of the stove together with the tank is 189 cm.
- It is built horizontally into the lower part of the body hollow pipe for additional air heating.
Attention! The water heating tank is installed from above or from the side ovens.
How to make a brick oven with an open stone stove with your own hands: step-by-step instructions
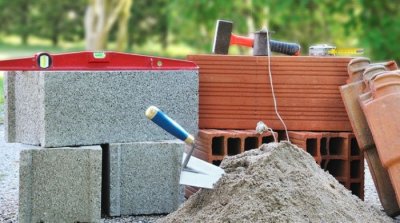
To successfully build a brick stove, choose a construction project that is suitable for a bathhouse of a certain area. To build a stove, you will need materials, stove-maker's tools, equipment.
Selection of materials
For the brick model of the stove in question, they buy ceramic solid (red) high quality brick. Suitable for mortar clay-sand mixture, which can be purchased at a hardware store.
Masonry mortar is also prepared from natural materials taken from the area.
To check the quality of the solution 5 mm layer applied to the surface of the brick. Then it is dried.
Skinny mixture after drying crumbles from brick with light scratching, fat - is covered cracksNormal paste holds well, lies in an even layer, and does not form cracks.
To build a stove, you will need cast iron and steel products. The list includes:
- doors - firebox and blower;
- door for cleaning the smoke channel;
- steel sheet for the production of a water heating tank with a thickness 2-3 mm;
- steel plate thickness 10 mm for making the bottom of the heater;
- grate;
- angle steel products;
- steel wire diameter 0.8—1 mm or steel strips for fastening doors;
- hot air ventilation pipe diameter 10-11 cm;
- steel sheet (50x70 cm);
- sheet asbestos (50x70 cm).
Reference! For filling heaters red and white will do quartzite, diabase, gabbro-diabase, river and sea large pebbles, peridotite, jadeite, quartz.
Necessary tools
To mix the solution you will need a three-bucket tank and a wooden mixer. For masonry work - stove-maker's tools:
- trowel;
- expansion joints;
- narrow and wide spatulas;
- trowel;
- stove hammer with a pick;
- rule;
- plumb line;
- long building level;
- grout.
To cut bricks use grinder with a diamond discTo mix the solution you need construction mixer, for welding a hot water tank - welding machine, for cutting steel - Bulgarian with a disc for metal or plasma cutter. To cut the metal you will need chalk, metal pencil, tape measure, ruler, square.
Preparing a site for construction, building a foundation
When building a new bathhouse, a stove foundation is laid simultaneously with the base of the house. It is not advisable to combine them.
The construction of the foundation is carried out in the following order:
- A hole (pit) is dug in the ground depth of 50 centimeters or more.
- They pour it into the bottom of the pit gravel (or crushed stone), sand.
- Loose layer leveled and compacted.
- Bottom and walls of the pit covered with roofing felt.
- Joints pieces of roofing felt hermetically sealed they cover it with mastic.
- They are installing it in the pit steel honeycomb frame from reinforcement.
- The pit is being filled concrete.
- Concrete is freed from air bubbles using vibratory drill (or pierce it with an iron rod).
- Cement leveling and leave until completely set (2-4 weeks). The horizontality of the foundation is checked with a level and, if necessary, adjusted by applying portions of cement.
- They lay it on the foundation roofing felt (two layers).
- The solution is laid on top of the roofing felt two layers of bricks.
Attention! IN dry construction of furnaces on the ground is permitted brick foundation, the masonry is done on cement-lime solution.
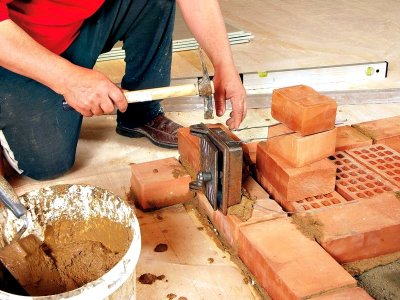
Construction of a brick oven
The stove is laid in accordance with the row-by-row schemes. The clay-sand mortar is diluted several hours before use.
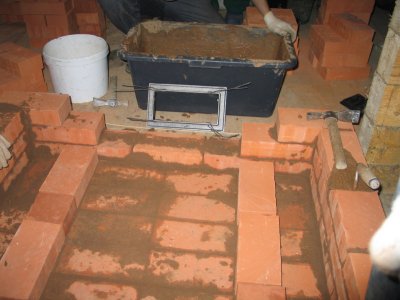
- 1-2 rows. In progress solid laying according to the schemes.
- 3-4 rows. They are being laid out ash-pit And lower part of the smoke channel. In the ash pan portal and in the window for cleaning the smoke channel are placed doors. They are placed in the seams door fasteners — twisted wire or strips. The wire is threaded through pre-drilled holes in the door frames and twisted into a rope. The strips are attached to the frames with bolts.
- Row 5. They put it on the ashpit grate. A pipe is sealed across the chimney for heat circulation. According to the diagram, they lay side walls of the firebox.
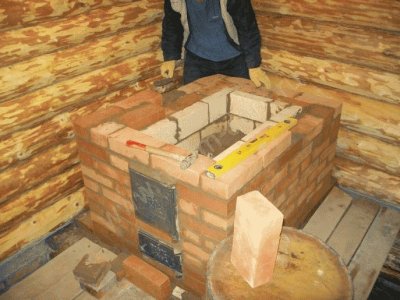
- 6-11 rows. It is being built combustion chamber, is being formed smoke channel. The firebox door is attached (to wire or strips).
- Row 12. Erection chimney And heatersA steel plate is placed on the bottom of the heater.
- Row 13. Construction smoke channel and heater body, installation of a damper in the smoke channel.
- 14, 15 rows. Layout walls heaters, smoke channel.
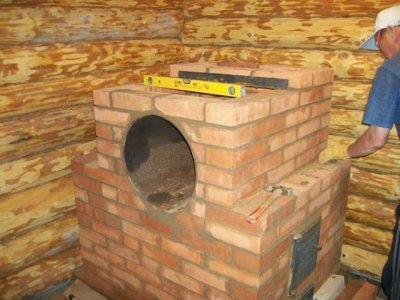
- 16-22 rows. Erection chimneyThis completes the laying.
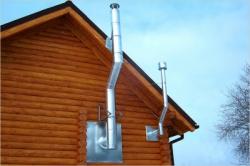
They are installed on the top of the oven water heating tank and attach it to the masonry with brackets. In the masonryThey are fixing the steel chimney. The best are two-layer chimneys in which there is a space between the inner and outer pipes layer of basalt wool (sandwich chimneys).
At the final stage of construction of the stove before the firebox on self-tapping screws fasten the steel sheet. They put something under it layer of sheet asbestos.
After that, bake dry for 1-2 weeks and begin to carefully heat with dry firewood. The stove masonry will dry out in 3-4 weeks, in winter - in 6-10 weeksAfter this, stones are placed in the heater.
What problems may arise and how to fix them
- If the master decides to install a light steel tank instead of a light steel tank heavy cast iron, problems may arise even during construction. The chimney will start to collapse due to the weight, and cracks will appear in the seams and bricks. cracksTo reduce the pressure, cast iron tanks are attached to the ceiling hooks and powerful anchors.
-
A heavy stove puts pressure on the floorboards (1500 kg or more per square meter). What to do if during the construction process the boards began to bend under the weight of the stove?
The problem is being solved on a large scale: the masonry is completely dismantled, then they saw the floor and start build a foundation.
- If the master noticed that the seams after drying crack, then the solution is mixed wrongIts composition is adjusted by adding sand or clay. Poor quality masonry is dismantled and laid again.
- Not all DIYers use it with a plumb line or guide blocks. As a result, the brick walls deviate from the vertical position. To correct the curvature, the masonry is taken apart and laid out again, constantly checking the horizontality of the layers with a building level, and the verticality of the walls with a plumb line.
Useful video
Check out the video, which provides detailed instructions on how to properly build a sauna stove with your own hands.
The best fuel
Suitable for burning in a sauna stove firewood or pellets, made from straw and sawdust. Any wood will give a good heat to the stove, but the best wood is considered to be made from birch, poplar, ash. Their combustion products do not contain a large amount of soot, which clogs the smoke channels. The combustion products of coniferous trees create more stove condensate.
Aspen and alder When burning, they produce strong heat, good draft and practically do not form condensation. Oak firewood stands out tannin (tannin), but with good draft it is not felt in the bathhouse air.
Comments