Safety directly depends on the quality of installation! Rules for installing a gas boiler in a private house
Gas is a budget fuel, so many people prefer to heat their homes and water with it.
Legal installation procedure gas boiler quite complicated.
The preparation of documentation takes even more time than the installation itself.
Content
Installation standards in a private home, apartment and production
Placement of gas boilers regulated by SNiPs:
- "Gas distribution systems" (42—01-2002).
- "Boiler installations" (II-35—76).
- "Related" regulations: on heating, ventilation, safety in construction, etc.
The rules are designed to reduce the likelihood of an emergency situation. Accommodation options gas boiler depends on:
- parameters of the equipment itself;
- characteristics of the premises.
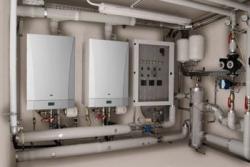
Device power up to 60 kW may be installed in non-residential and non-walk-through premises. For more powerful gas boilers, a separate boiler room is required. For power from 60 to 150 a separate room will be needed. And with the power from 150 to 300 kW The boiler room is located:
- on the first floor;
- in the basement;
- in the basement;
- in the extension.
Reference. Previously, SNiP “Gas Supply” was also used (2.04.08—87). But now the standard has been cancelled.
It turns out that it will only be possible to install a gas boiler in the apartment up to 60 kW. In a private house, it is often possible to set up a boiler room, so the boiler capacity can be higher. As a rule, the capacity up to 150 kW will be enough. More productive devices are required in production. Here the requirements for reliability will be higher.
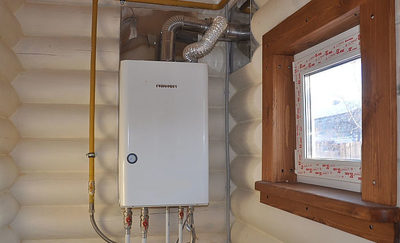
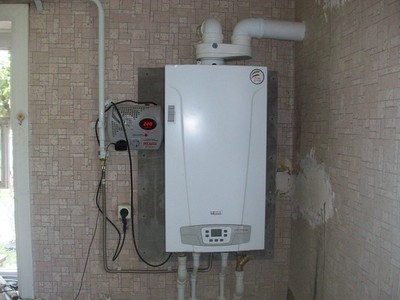
By type of accommodation gas boilers are divided into:
- wall-mounted;
- floor-standing.
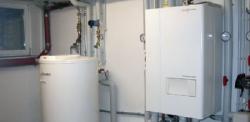
Floor-standing gas boilers must be installed in a separate room. For an apartment will do wall mounted version only gas boiler.
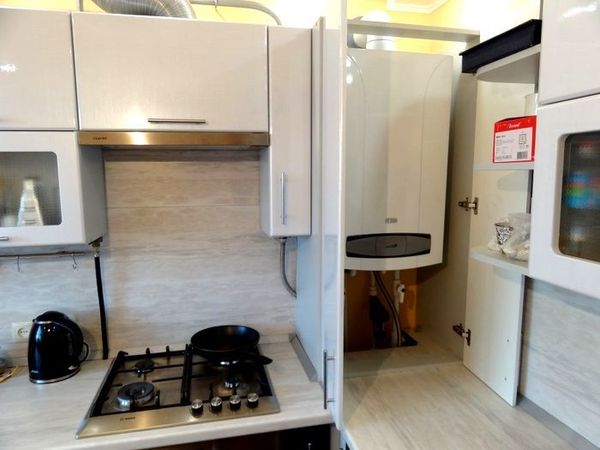
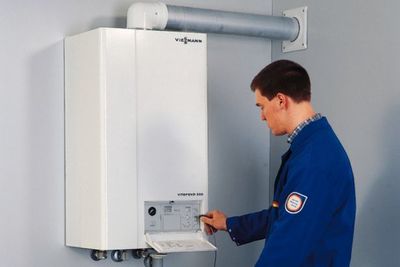
Photo 1. Wall-mounted gas boiler installed in the kitchen. The device is hidden in a special cabinet.
Parameters of the premises suitable for placement:
- Ceiling height from 2.5 meters and above.
- Overall dimensions - from 15 cubic meters.
- Window. For the device up to 60 kW a window with a transom is enough. For more powerful ones, the glazing area required is no less than 0.03 sq. m per cubic meter of area.
- An exhaust hood that provides three air exchanges per hour.
- The front door is no smaller 80 cm in width.
- No false floor or false ceiling.
Attention! Walls and floors made of flammable materials are covered with a protective screen of thickness not less than 3 mm.
Stages of installation of a gas boiler
- Get technical conditions.
- Develop in accordance with them project.
- Approve his.
- Edit according to the project, the boiler and junctions.
- Connect to the highway.
Obtaining technical conditions of the gas service
The technical requirement for connecting the boiler is a document containing information about the gas source. The document is issued by the supplier organization. As a rule, this Gorgaz, Raigaz etc.
The issuance procedure is regulated by:
- Federal Law "On Gas Supply" (№69-FZ).
- Rules for the use of gas (approved by the Government Decree N 317).
When applying for installation of a gas boiler The following documents will be required:
- Passport.
- INN.
- Real estate documents: an extract from the Unified State Register of Real Estate or a registration certificate for finished housing or a building permit for housing under construction.
- If the house is being gasified: documents for the plot and a situational plan for the placement of the house on the plot.
- Calculation of the planned maximum consumption (if any) more than 5 cubic meters per hour).
- Topographic map of the site (scale 1:500).
- Registration certificate of the house.
- If the house has already been built - layout of ventilation and smoke ducts.
- Certificate of their suitability.
- Floor plan of the building.
- If the house is located in a garden association, an agreement on the use of its infrastructure.
- Power of attorney, if the applicant is not the owner.
Important! In different areas the list of documents may differ slightlyIt is advisable to clarify this issue on site.
The technical specifications contain:
- Regulatory documentation that is taken into account in the project.
- Recommendations for materials used.
- The procedure for coordinating and submitting documentation.
Reference. The validity period is specified in the document itself. As a rule, it is 2-3 yearsIf for some reason the gas is not connected during this time, you will have to get a new one.

Project development
The documentation is developed in accordance with SNiPs and technical specifications. It includes:
- diagram of equipment installation in the house;
- layout of ventilation ducts;
- a diagram of the gas pipeline layout from communications to the connection point;
- a diagram of the layout of the site with a designated entry point to the building (in a private house);
- information about the equipment being installed.
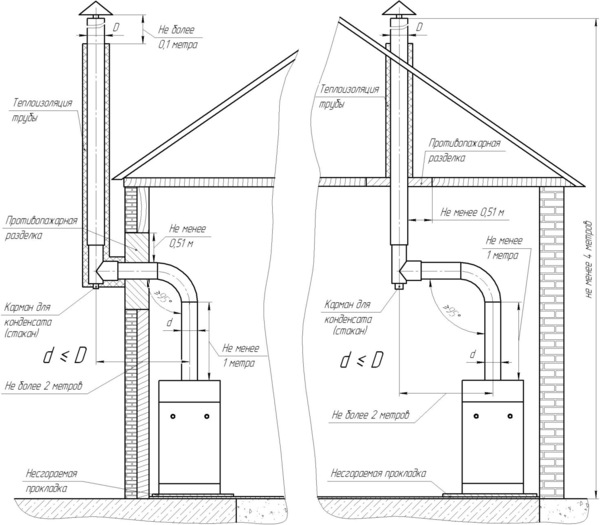
Photo 2. A variant of the gas equipment installation project. The location of the boiler itself and the chimney are indicated.
The document contains drawings and explanations for them.
The development is carried out by design engineers, working in specialized organizations and having the appropriate license and permits. Often, when receiving technical specifications, a list of companies recommended for this is also issued.
Coordination of the project with regulatory authorities
The completed project is submitted to the gas service for approval. The following documents are attached to it:
- technical passport products;
- instructions on its operation;
- certificates for equipment;
- expert opinion, confirming its compliance with the necessary requirements.
Attention! These documents are provided by the boiler manufacturer. Therefore, when purchasing Be sure to check for their availability.
Accepted documentation certified by the organization's seal. In accordance with it, the equipment is subsequently installed and connected.
Gas boiler installation rules
Incorrect installation of a gas boiler often leads to serious and unpleasant consequences. Therefore Not all types can be installed independently.
Do-it-yourself installation is possible for the following options:
- Single-circuit models with an open combustion chamber. The installation is relatively simple and therefore there is less chance of error.
- Fully automatedIf there are any violations, such a device will not work.
All other types are installed by certified specialists. Such a person is invited from:
- State Gas Service;
- commercial company.
First of all, the gas boiler is installed in the chosen location. Wall-mounted gas boiler models are hung on special fasteners, which are sold in the kit. The height from the floor to the lower level is not less than 8 cm.
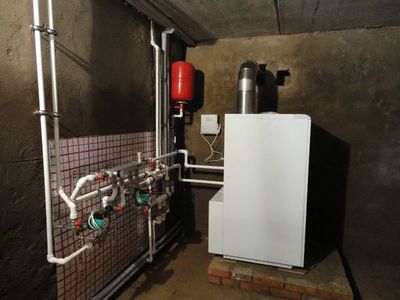
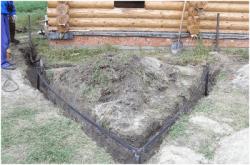
Floor standing devices installed on a fireproof base. Concrete, brick or metal are used as materials.
It is important to position the equipment absolutely level. using a building level.
The next step is - connection to the flue pipe through the outlet branch. When using natural exhaust, check the draft strength. The chimney pipe must have a hatch for cleaning soot. And no more than three bends are allowed in the channel itself.
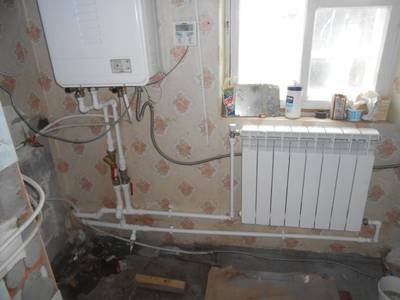
Then the device connects to the heating system and to the water supply. The connection diagram is contained in the instructions for the device. If the system is double-circuit, a filter for water purification is installed in the "return".
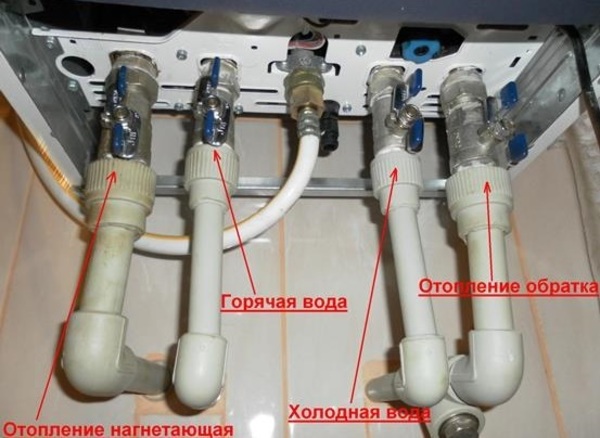
Photo 3. Connecting a gas boiler to the heating circuit. The arrows indicate the location of the various pipes.
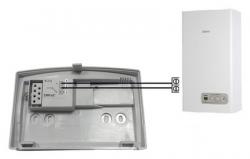
After that, the automatic equipment connects to the power grid using a three-wire cable. The system is required with grounding and automatic power off in case of an emergency. It is also advisable to install a UPS. Then the work will not be interrupted even if the power is turned off.
Connect to the main line in any case A certified specialist is involved. Once the work is completed, a gas service representative must be called to check compliance with the project.
Attention! Only a representative of this service has the right to grant permission to use the device and put it into operation. This is done after checking the correctness of the installation.
Possible complications
The project is not always accepted immediately. If rejected, an official document is issued stating the reasons. Attached to it is list of edits to be corrected. After correction, the documentation is submitted again.
Useful video
Watch the video, which tells about the correct installation and start-up of a gas boiler.
Deadlines
Connection to the gas network - quite a long process. And the main time is taken up not by the installation itself, but by issues related to documentation.
Technical conditions are issued within 14 days after the application is accepted. Development takes 1-3 weeks. The approval process takes longer.
On average, you have to wait for an answer from 3 weeks to 3 months. If the project is not accepted, it has to be corrected and re-submitted.
When all the work is done, a contract is concluded for connection to the gas pipeline. This has to be waited for up to 30 days.
The longest wait is for approval. Therefore, it is advisable to draw up the documentation correctly from the very beginning, in accordance with the conditions and SNiPs. That is, it is necessary to choose the right company that has experience in development and approval in this particular area.


Comments