Even beginners can handle it! Making a heating system in a private house from polypropylene pipes with your own hands

An inexpensive and technological option for heating - plastic pipes.
They are durable, easy to install and inexpensive. A well-welded polypropylene system can serve 30–60 years without repair, but there are factors that significantly reduce service life and reliability.
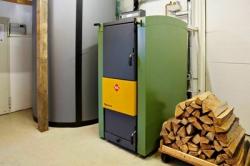
This excess temperature, pressure, prolonged exposure to direct sunlight. Polypropylene pipes should not be used when connecting a solid fuel boiler, on steam mains, in contact with hot metal, or in heating systems of high-rise apartment buildings.
Content
Types of polypropylene pipes
The manufacturer makes markings along the entire length of the product. It indicates the type of material, nominal pressure, operating temperature, diameter, wall thickness, and UV protection..
Depending on the wall material, pipes are divided into:
- Monolithic. They are used to transport liquids at low pressure and temperature. They are used for water supply systems and in irrigation systems. They are designated as PPH, PPB. Nominal pressure PN15, PN 20.
- Random copolymers. They are used in water pipes and in the organization of low-temperature heating - warm floors. They are designated PPR. Nominal pressure PN20 - PN 25.
- Heat-resistant reinforced - PPS. The strength of such pipes is higher than metal-plastic, they are used in heating systems. Nominal pressure PN 25. Withstands temperature 95 °C, are used in any heating systems of private houses.
- Reinforced. The walls of polypropylene pipes can be made of either monolithic polypropylene or reinforced with fiberglass or aluminum foil. Reinforcement is needed to increase strength, durability, and reduce linear expansion.
Important! In heating systems, the most versatile and widely used are composite ones: glass fiber reinforced products.
How to solder a heating system
The huge advantage of polypropylene pipes is ease and technological efficiency of joining. The connection is uniform and monolithic. Each type of pipe is connected using its own technology.
End connection
Applies for large diameter main pipes. They are soldered using heated air and a filler rod. The process resembles welding metal with an electrode.
A non-critical joint can be obtained even with small diameters by heating the ends up to 270 °C and joining the pipes. This method is not used, as the joint is weak, porous, and leaks are possible.
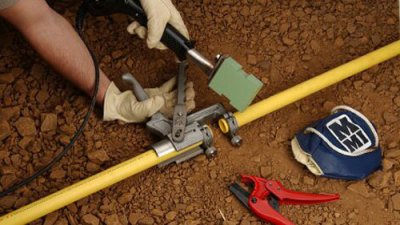
Electrofusion connection
Applies for high-quality connection of high-pressure pipelines. The ends of the joints are cleaned and compressed with casing clamps. A coupling with electric heaters already soldered into it is installed on the joint. The clamps are loosened, a fixing and centering clamp is put on. A direct electric current is connected to the coupling contacts. The voltage, current strength and heating time are indicated on the coupling. After heating, the joint cools down, after which it is ready for use.
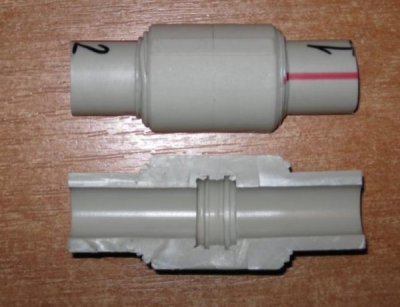
Socket soldering
Used for small diameters - up to 62 mm. To make the connection, you will need factory-made shaped elements: adapters, tees, couplings, taps, fittings, and bends.
For soldering you will need: soldering iron with Teflon tips, pipe cutter, clean rag, degreaser, ruler and pencil.
We cut the pipes to be connected to the required size using spring scissors. When measuring, leave stock 8-10 mm for the joint.
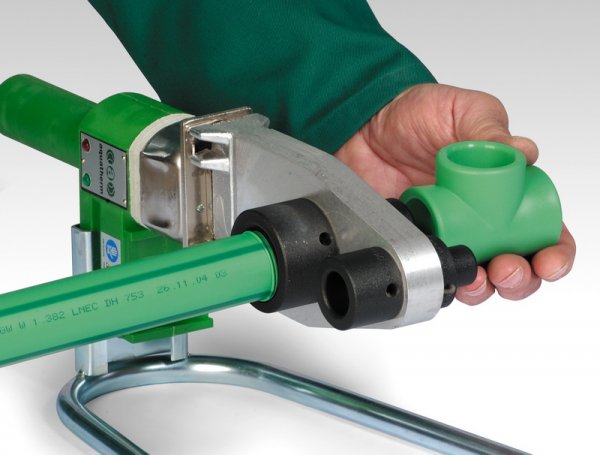
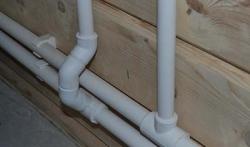
Photo 1. The process of socket soldering of polypropylene pipes. A special soldering iron is used for this.
Degrease and clean the ends and seats in the fitting. Dirt, grease and water prevent welding of polypropylene, a hermetic reliable joint will not be achieved.
We mark the depth of the seat in the fitting on the end of the pipe. A few millimeters we leave for excess plastic.
If a pipe reinforced with aluminum foil is welded, we use a special "sharpener", it will cut the reinforcement evenly, and the joint will be reliable.
Attention! Surface of welded polypropylene must be clean and dry. Use a rag and degreaser. Be sure to remove water in case of repair or alteration of the system.
Heat the soldering iron to temperature 260—280 °C. We put on the pipe and coupling, not Teflon tips, hold 5-7 seconds. After heating, we connect the joint and fix it for 10-15 seconds.
Welding of polypropylene into a monolith occurs during heating. Therefore, there is no need to adjust the position, tighten or press further — the joint will be of poor quality.
If the fitting overheats, plastic residue inside it can narrow or even block the fitting.
Space is left in the socket for excess plastic 2-3 mm.
Therefore, the marking stage is also important.
The cooled joint can be used immediately.
The connection gains strength as it cools.
Polypropylene for heating
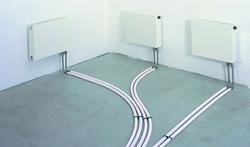
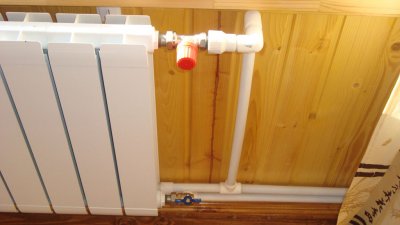
Polypropylene pipes are used to transport liquid coolant from the boiler to heat exchanger batteries. When designing a heating system, it is worth paying attention to:
- Diameter. The larger the cross-section, the lower the hydrodynamic resistance and the further the coolant can be supplied.
- Material. For a “warm floor” it is enough to use cross-linked polyethylene, for the installation of battery heating a fiberglass-reinforced pipe for hot water is used, for the boiler piping it is better to use heat-resistant PPS pipe. The piping of a solid fuel boiler is made of metal.
- Length of straight sections of pipeline. Polypropylene has a disadvantage - linear expansion. When heated, the length of the pipe changes. Therefore, it is not worth rigidly fixing corner joints, and on long straight sections, designing compensation loops and bends.
Polypropylene is used in any heating system.
It is suitable for both battery systems and underfloor heating.
Polypropylene is not suitable for use in systems with superheated coolant (above 95 °C) or high pressure (above 10 atmospheres).
How to make a heating system in a private house with your own hands
There are a large number of heating systems. Each system has its own characteristics and is used to solve specific problems. When choosing, you should pay attention to the following initial data:
- Number of floors and area of the house. For heating several floors, complex systems with calculation of hydrodynamic resistance are used. A distribution system with a riser, "Tikhelman loop" is suitable. For a one-story building with a simple layout, the one-pipe system "Leningradka", a simple system of the lower spill, will be optimal.
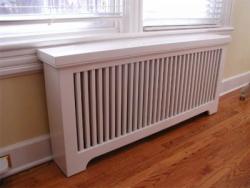
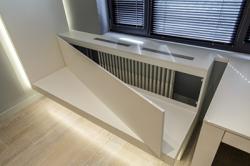
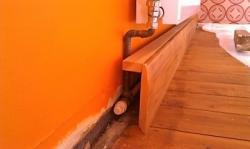
- Layout and aesthetic considerations. To prevent pipes from spoiling the appearance of the walls and preventing furniture installation, you can design decorative screens for the upper spill, hide the lower spill in the walls or floor screed. Pipes should not pass under doors, and should not interfere with walking. Heat is evenly distributed throughout the heated room.
- Energy dependence. If the house experiences frequent and prolonged power outages, it is better to design a gravity system with an open expansion tank. If there are no power outages, a more efficient closed system with a membrane expansion tank and forced circulation is used. The pipes can be of a smaller diameter.
- Power. Depends on the heat loss of the house. The greater the power of the system, the larger the diameter of the pipes to facilitate the circulation of the coolant.
Tools for installation
To assemble the system, you will need an inexpensive and accessible set of tools.
- Tools for working with polypropylene. This is a soldering iron, pipe cutter scissors, rags, ruler, pencil, degreaser. To remove the aluminum reinforcement, you will need a reamer of the appropriate diameter.
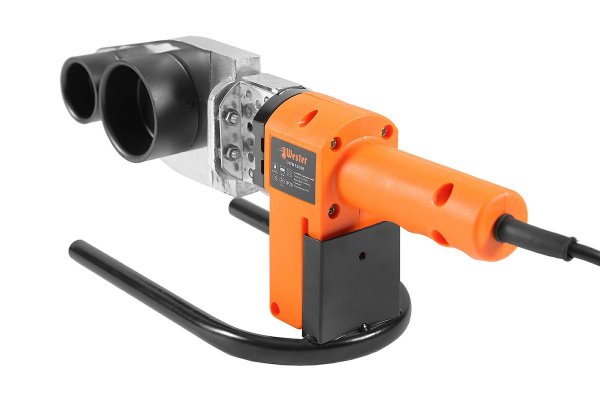
Photo 2. Special soldering iron for connecting polypropylene pipes. The device has two holes of different diameters.
- Set of plumbing accessories — open-end and adjustable wrenches, fum tape, pliers.
- Construction tool kit: hammer drill, grinder, foam gun, mixer.
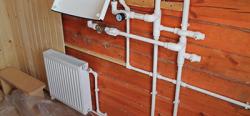
Stages of work, heating structure diagram
The assembly of the heating system is carried out in sequential logical stages.
- Marking the installation of the boiler and batteries. Radiators are placed at the entrance and under the windows to create the correct convection flows in the room. The boiler can be installed in the boiler room, some types are allowed to be placed near any external wall.
- Determining the locations of pipes. We always design expansion loops - the length of polypropylene pipes changes when heated.
- Hanging the boiler and its piping. If necessary, we connect the water supply and gas to it. It is better to make the piping of a solid fuel boiler from metal. A gas boiler is connected with polypropylene pipes with heat-resistant characteristics.
- With a collector system, we connect the “comb” - the distributorIf the system has two or three arms, you can get by with tees.
- We install the expansion tank and safety group. The volume of the expansion tank is calculated based on the volume of water in the system.
- We fix fasteners to the floor or wallIf the system has gravity circulation, we observe the slopes.
- We install pipes and connect batteries.
- After completing the installation, we pressure test the system. We disconnect the batteries, plug all the outlets with plugs. We supply air under pressure 8-10 atmospheresIf fistulas are detected, we eliminate them.
- We connect the batteries, boiler, expansion tank.
- We fill the system with water, we remove air from the top points.
- We are conducting a test run. We pay attention to pipes, joints, connection points. We check the uniformity of heating of batteries.
- We seal the pipes in the screed, wall or decorative box.
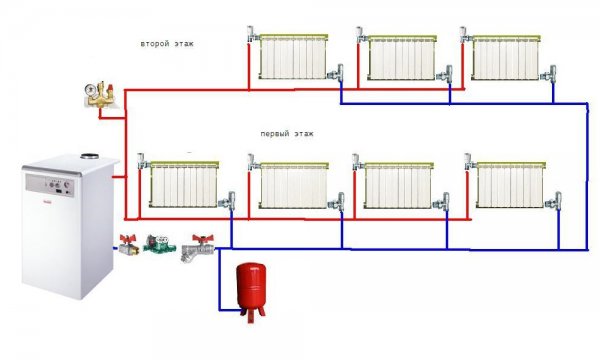
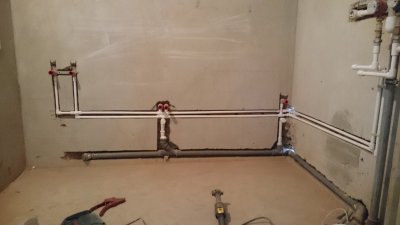
Photo 3. Diagram of the heating system of a two-story house using polypropylene pipes.
Useful video
Watch the video to learn how to make a two-pipe heating system using polypropylene pipes.
It is not the gods who burn the pots
Thanks to the simplicity and availability of the technology for welding polypropylene pipes Anyone can assemble a heating system. The cost of equipment and tools is significantly lower than the services of a specialist.
For those wishing to assemble heating in their home with their own hands, it is important to firmly know the theory, draw a heating diagram and consult with heating engineersBy following the order of execution of works and using only reliable materials from well-known manufacturers, it is possible to assemble a durable and efficient system.