Pleasant relaxation with barbecue on the veranda: building options, photos
After a working week, sometimes you just want to go to the country. Walks in the fresh air awaken your appetite, so the trip becomes especially pleasant when you have the opportunity to enjoy grilled meat.
The first one is easy to buy in any store, the second one too. But much It is more profitable and interesting to equip the grill with your own hands.
An open area on a summer cottage plot is best suited for this: terrace or veranda. Remember that not only pouring rain, but also the scorching sun can interfere with your rest. Therefore, in order not to depend on weather conditions, choose or independently arrange a place with a roof or canopy. After that, you need to decide on the project and materials.
Content
Project of a terrace with barbecue, attached to the house, photo
Terraces classified according to several characteristics: open, closed and semi-closed, attached to the house and free-standing, single- and multi-level. They can be made in different forms, at the main or rear facade, or completely enveloping the house.
There are several styles of terraces that involve using different materials:
- modern style - composite materials, stone, iron and PVC;
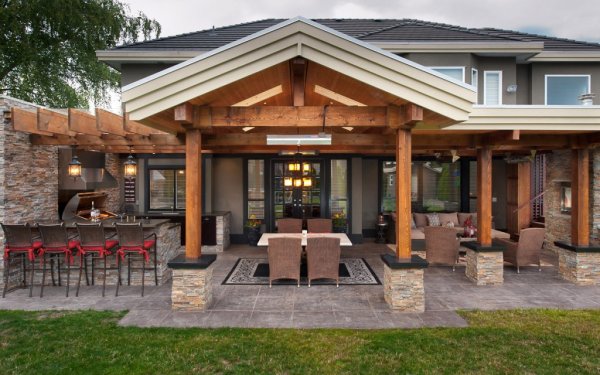
Photo 1. Terrace attached to the house, made in a modern style. Divided into several zones.
- traditional style - stone and wood, most often red or cedar;
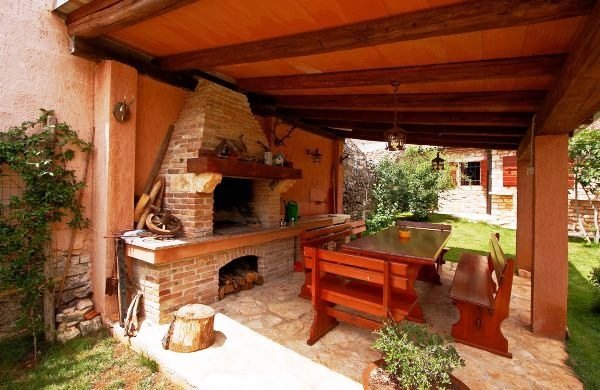
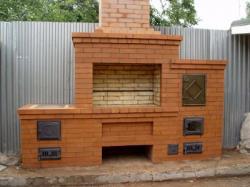
Photo 2. Terrace, made in traditional style. The foundations of the building are made of red wood, the barbecue oven is made of brick.
- colonial style terraces are designed in the style of classical architecture;
- beach style — the structure is made of wood, painted grey.
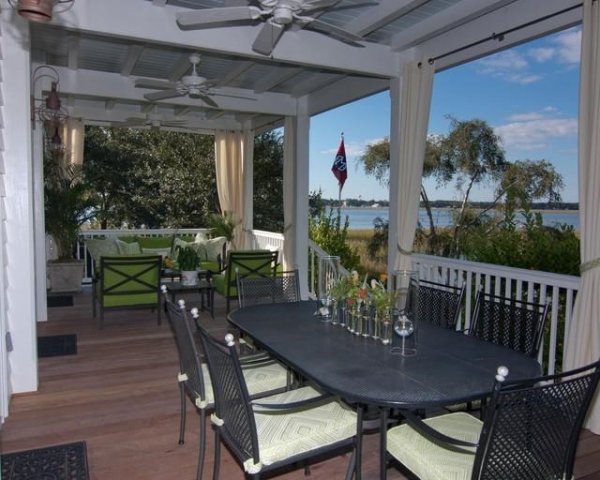
Photo 3. Terrace, made in beach style. Made of wood, painted light gray.
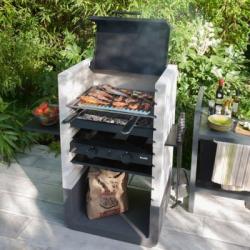
Barbecue ovens are made from brick, stone or from cast iron. Usually located near the wall of the house, closer to the kitchen. Each type has its own advantages and disadvantages.
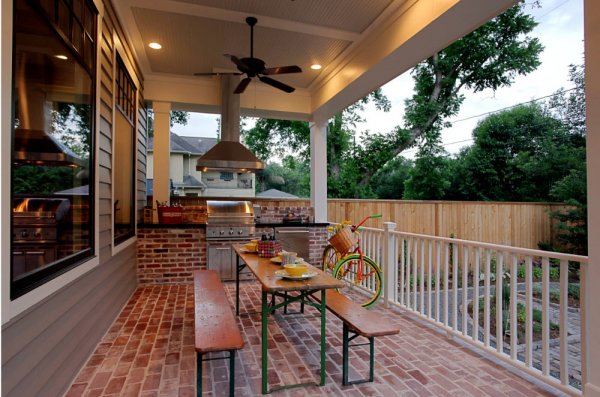
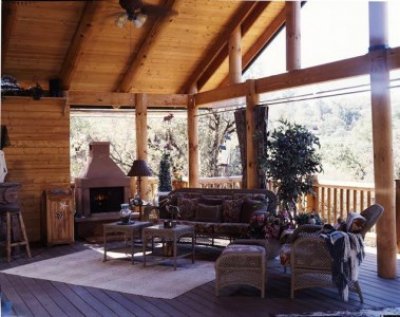
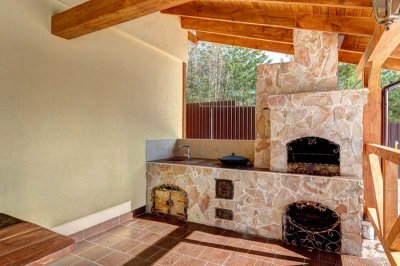
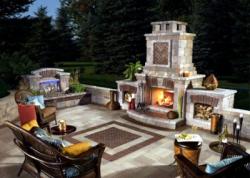
Photo 4. Open veranda attached to the house with a barbecue oven and dining area.

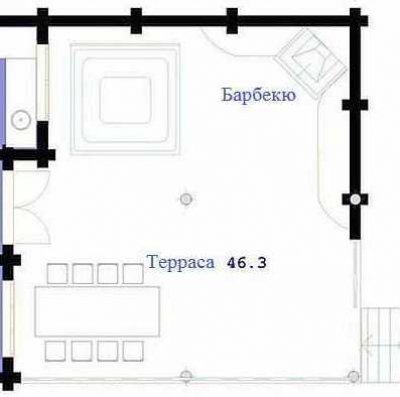
Photo 5. Possible project of a veranda with barbecue for a bathhouse, measurements are given in centimeters and square meters.
To choose correctly, proceed from the size of the veranda, remember that in addition to the grill, you will need to place furniture: tables, chairs, possibly swings and other decorative elements.
Important! Building a veranda yourself will require a lot of effort, but you will be able to do everything exactly as your soul asks. It will take a lot of time, a large selection of materials will torment you with uncertainty, and in the absence of construction experience, some stages of construction will be very difficult.
There are many different projects on the Internet. As a rule, these are projects of wooden verandas, their width (depending on the width of the house) and height: at ground level or raised. Choose according to your taste.
What materials are needed?
Wooden houses made of logs have a width 6 meters due to the peculiarities of lumber production. Therefore, below we will provide the necessary tools and rough estimate cost of materials for wooden veranda 6x3 m with a brick barbecue oven on a pile foundation with a roof made of corrugated sheet metal.

To build a veranda you will need:
- a drill, if a pile foundation is assumed;
- shovel;
- drill;
- mallet;
- hammer, nails;
- self-tapping screws.
Estimate
| Material | Cost, RUR (excluding shipping) |
| 300 kg of cement grade 200 | 850 |
| 1 t of sand | 850 |
| 7 bars 100x200 | 6000 |
| 9 bars 50x50 | 1000 |
| 30 boards 25x150 | 5000 |
| 500 firebricks | 25000 |
| Decor, lighting | 5000 |
| Total | 50000 |
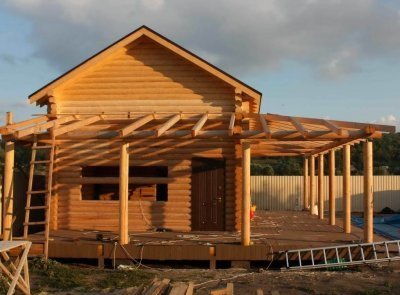
Construction of a wooden veranda
The construction of a veranda includes different stages from the production of piles to lighting and zoning of the veranda.
Installation of piles
The construction of the veranda is in progress in front of the main facade of the house. The optimal length is from 2.5 to 3 meters. First, the foundation is built. It is important to consider the size of the future veranda and the type of soil. Calculate the mass of the building and the bearing capacity of the foundation based on the cross-section of its piles and the material. Based on this, choose how far apart the bearing columns or piles will be. It is better to look for exact numbers for specific types of soil on the Internet.
Attention! Before starting work, dismantle the porch, canopy and anything that might interfere with the construction of the veranda.
If the soil is sandy, you can get by with a columnar foundation for the veranda. If the soil is clay, in winter, due to heaving, small columns will be pushed out. In this case, you need to make a foundation on piles. They are placed with a step 1-2 meters. Since the installation of the furnace is planned, it is better to make a step more often. Screw piles can be used. Pits with a diameter of 30 cm drill deep, one meter (at least)This is done so that the pile rests on denser layers of soil below the depth of soil freezing.
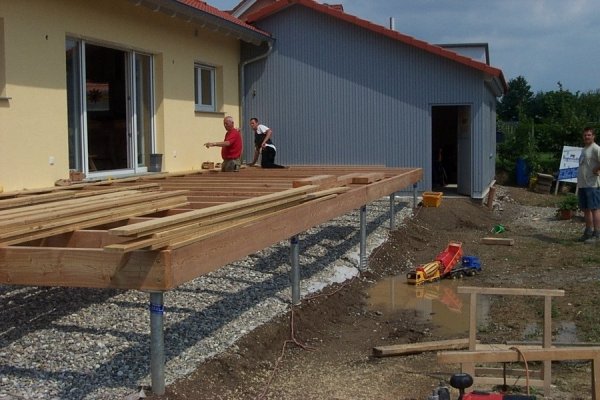
Photo 5. Foundation for a terrace on metal piles. When choosing a foundation, the soil characteristics should be taken into account.
We make formwork from roofing felt 20-30 cm higher, than the depth of the hole and immerse it inside. Ready-made asbestos-cement pipes are also suitable for formwork. Then we build a frame from reinforcement bars and place it in the hole. Fill it with cement mortar, compacting it. In order for the concrete to gain the required strength, you will have to wait as long as indicated by the manufacturer.
Frame made of logs or timber
Once the concrete is ready, cover the piles waterproofing. A layer of hot bitumen is perfect for this. Now it's time make a frame for our veranda. It is usually made from wooden beams or logs of small diameter.
The next step is - adding support beams, which will connect the first layer of the frame, the lower trim of the veranda, to the supporting beam of the house. The beams are attached to it by the end. Thanks to this, the veranda will be more stable. If the house is stone or brick, make sure that the veranda frame rests on its wall.
Between the support beams joists and vertical posts are cut in for installing the veranda roofing system. Nails can be used for fastening, but staples are better.
For the posts, use beams, as for the lower part of the frame, or thin logs.
On the racks with anchor bolts the upper trim beams are attached. The rafter system joists, on which the roof will be held, are attached to them using spacers. You can lay the joists with a straight lock, making a cut in the timber no more than halfway. The roof will look best as a continuation of the house roof.
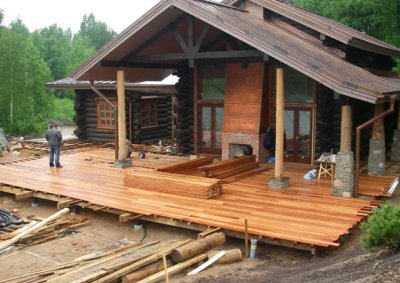
Flooring
Now lay the floor. For an open veranda, it is best to use decking board.
Reference. After the roof is laid, when the veranda is ready, cover the floor antiseptic. They are well suited for this. Pinotex Terrace Oil or yacht varnish. You can make a two-layer insulated floor if you plan to have a closed veranda.
Summer and winter coating
After finishing the floor, you can move on to laying the roof. It is better to choose the material that is covered roof of the house. Boards are laid on the rafter system, and lathing is made. Roofing material is attached to it, which can be:
- metallic;
- from roll material;
- from soft tiles;
- made of polycarbonate.
All materials for veranda roofing have their own advantages, choose them based on the climateIt is best to choose the same material as the roof of the house. Leave room for the chimney.
Additionally, it is possible to install a porch in the veranda side rails. They will give the veranda even greater strength. If it is supposed to be used mainly in the summer, it is best to glaze the veranda.
To make the building suitable for winter use, build double-layer wooden walls with insulation. Suitable for interior decoration:
- lining;
- composite materials;
- MDF panels.
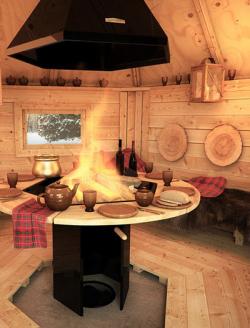
Lighting and zoning: recreation area, kitchen with barbecue, work area
Before you put the stove away, it will be convenient divide the veranda into several zones according to your preferences: a recreation area, a kitchen in which the stove and work area will be located.
First things first draw a plan of the veranda. Place dining furniture closer to the barbecue. If the veranda is open and large, you can place sun loungers or a swing. If it is closed, you can hang a hammock in the corner.
On a closed and insulated terrace you can equip a work areaTo do this, it is enough to place a desk, a chair and a cabinet.
It is better to place them further from the grill and closer to the windows. If you plan to work on the computer, do not place it opposite the window, it is better to hang curtains.
Once the zones were determined, run electricity from your homeTo keep the length of visible wires to a minimum, place the lamps on the wall of the house to achieve uniform illumination.
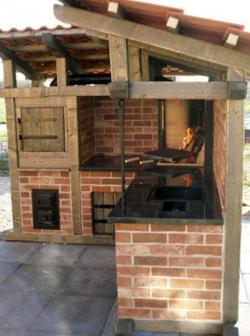
Making a brick oven
It is better to assemble a stove from bricks. Most often it is built close to the wall of the houseIf it is wooden, you need to leave a gap of about 30 cm to the wall. The height is chosen for convenience, according to height. Where the stove will be, the floor should be tiled or the wood should be covered with fireproof impregnation. You can pave the entire veranda, to your taste. The first row of bricks laid out dry.
Important! All bricks before installation soak in water, first lay the corners and reinforce every two rows. Constantly use a level. When the masonry reaches the place where the grate is installed, make recesses for the steel elements of the structure. Think about the convenience of using skewers.
To prevent the room from filling with smoke in windy weather, make a ledge in the masonry of the rear wall of the firebox. After that all that remains is to build a chimney, and the country grill is ready!
When building a stove indoors, it is very important to think through everything Fire safety aspects:
- gap from wooden walls;
- fireproof floor covering;
- high quality chimney;
- The room must be well ventilated.
Have a nice trip
We wish you that the result exceeds all expectations, and that your heart rejoices at the beautiful extension. Enjoy your vacation!
Useful video
Watch a video review of the terrace with barbecue, attached to the guest house.
Comments
In front of the summer house I laid cement and put tiles on it. I made a canopy out of metal sheets. It turned out to be something like a terrace, but outside. And inside I built a brick barbecue. It's one and a half meters high and about a meter wide, that's enough for us. Just for family recreation!