How to make a barbecue canopy for your summer house so that your neighbors will envy you?
Roofs over stoves are made from processed wood, stone, brick, metal - the material is chosen depending on the budget.
In addition, there are sail awnings for a barbecue at the dacha - that is, fabric vaults; such a roof can be easily stretched over the barbecue gazebo with your own hands.
Most often the structure combined — supports are made of timber, brick, metal pipe; polycarbonate, slate, iron are used for the roof; the lathing is made of wood or metal.
There are several types of canopies: straight or inclined, attached to a residential building or free-standing. The structures are made simple - from 4 supports and a sheet of metal as a roof, or more complex.
The easiest way to install open canopy - racks fastened from above and covered with a roof. Closed structures are complemented by walls made of lightweight material, for example, the same material used for the roof: corrugated sheet metal, wood, polycarbonate.
Content
- Advantages and disadvantages of barbecue with a roof
- Construction of a canopy for a barbecue area
- The position of the canopy on the site, the arrangement of the barbecue area with a canopy
- Gazebo and barbecue under one roof: fire safety
- Canopies over barbecue: photos of various options
- Useful video
- Conclusion
- Comments (5 opinions)
Advantages and disadvantages of barbecue with a roof
Placing the stove under the roof will allow relax in nature in bad weather, but there are other advantages and disadvantages of barbecue under a canopy, which are noticed after the construction and use of such a structure.
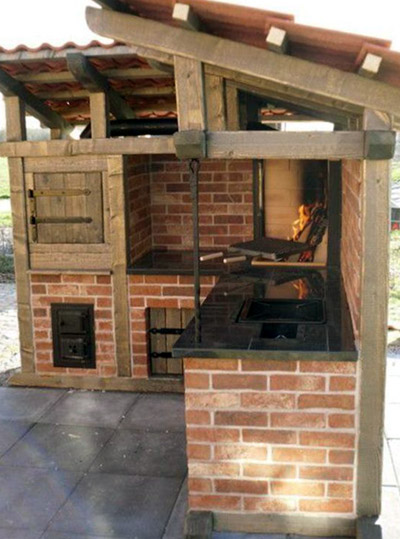
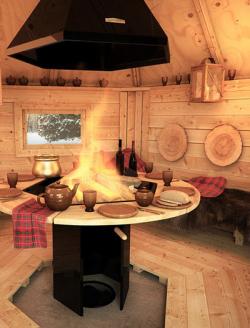
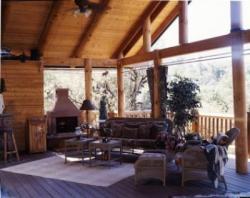
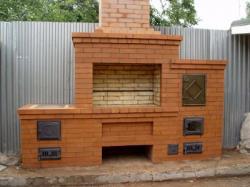
Photo 1. A brick barbecue under a simple canopy. The roof over the barbecue, as you can see in the photo, also covers a fairly spacious empty space where the cook will be busy.
Benefits of barbecue under a canopy
- The heat from the stove will evenly warm those relaxing on a cold evening.
- It is convenient for everyone to observe the flame.
- An excellent addition to the design of the garden area, and beautiful stove, created with one's own hands, is the owner's pride.
Disadvantages of a barbecue under the roof
- When cooking under a closed canopy, people will get hot, and to avoid this, they need to either go outside while cooking or set up a table further than 3 meters from the stove.
- Typically a working area at a distance of 1-1.5 m gets dirty quickly, and no one wants to clean it up while cooking. That's why you need to place the seats at a distance not less than 3 m from the work area.
- You can't lay the floor with wood or other flammable material, as sparks will scatter across the floor. You'll have to fill the floor concrete mortar or post paving slabs.
- To avoid filling a closed canopy with smoke, you need to install a stove with smokeless design and place vacationers at a distance more than 3 m from the food preparation area.
It is advisable to take into account these features of the construction of a barbecue shed when drawing its drawing. The choice of style for the future project will help make the style of other buildings on the site. It is advisable to make the roof from polycarbonate due to its ease of installation and light weight, which will reduce the overall load on the support. Consider the amount of precipitation in winter that the structure will have to withstand and plan carefully roof pitch. Remember that wind load increases proportionally with increasing slope.
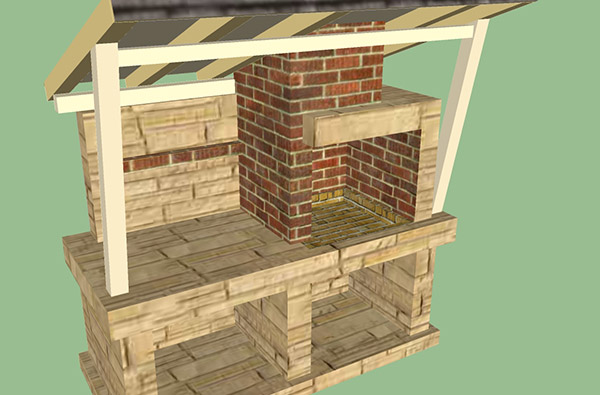
Photo 2. Computer model of a barbecue oven under a canopy: the photo shows the simplest design. Apparently, the small roof is supposed to be made of wood.
Construction of a canopy for a barbecue area
You may not want to do the construction work yourself. Well, if you don’t want to build a barbecue shed with your own hands, buying a ready-made structure is also not difficult. However, we note that building a shed is always a profitable solution, as it will allow you to ignore the weather factor when cooking. And before you start building, you need to choose a project.
Choosing a barbecue project for a summer house with a roof
If you have no construction experience, the creation of the drawing is entrusted to a specialist. He will do all the "dirty" work for you - calculate load level, cross-section of supporting supports, their thickness And materialAll you have to do is indicate your individual preferences regarding the desired type of construction.
Please note! A calculation error can be fatal - the roof will collapse due to precipitation or strong wind.
Alternatively, you can use ready-made drawings from the Internet as a template. The optimal design would be one in which the roof hangs over the stove. minimum 1.5-2 m in different directions. The supports must be concreted with a recess about 70 cm. Preferred height from the ground to the canopy - 2-3 mIf you choose a design with a lower roof location, it may be damaged by heat and soot.
Advice! The ideal slope of a single-pitched roof is 9-20, and for a gable roof it is 20-45.
Selection of materials
When choosing a material for supports and ceilings, it is advisable for a beginner to choose tree - this is the easiest material to process and install.
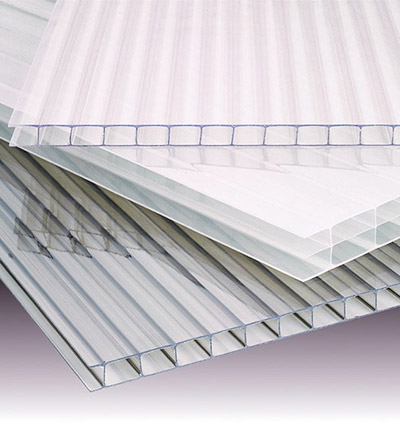
The design must be durable And fireproof. The selected canopy option has height 2.3 m, so professionals would advise choosing polycarbonate for the roof.
Polycarbonate barbecue canopies are erected very quickly, as it is a convenient and affordable material.
Features of choosing high-quality polycarbonate:
- cellular has a rib thickness of 6-12 mm and a sheet thickness of 8 mm;
- homogeneous structure - shine light on the sheets, pay attention to the absence of inclusions;
- flexibility — the sheet is flexible, does not break when bent and does not make any extraneous sounds (crunching, crackling);
- weight — 1 m2 of a sheet of high-quality polycarbonate 1 cm thick weighs at least 1.7 kg.
If you are interested in what polycarbonate barbecue awnings look like, photos of numerous options for such roofs are presented in large quantities on our website (including on this page).
Advice! Consider the amount of light in the location of the canopy. For a shaded area, transparent light shades are selected, for sunny areas - matte and dark.
Estimate of materials for purchase
Even such a simple structure as a canopy over a barbecue requires the use of a variety of building materials. Below is a list of them with an approximate amount of each building material.
- Crushed stone - 35 kg.
- Cement - 50 kg.
- Sand - 10 kg.
- Cellular polycarbonate sheets - 9 m2.
- Rafters - 2 pcs.
- Bars - 7 pcs.
- Glue for polycarbonate - 1 bucket.
- Antiseptic for wood treatment - 1 pc.
- Bolts - 24 pcs.
- 25 mm wide tape for sealing joints of polycarbonate roofs - 1 pc.
Necessary tools
Before you start building, make sure you have a complete set necessary tools, otherwise an unpleasant situation may arise when, due to a lack of one of them, the work on constructing the canopy will have to be postponed.
Check the list we have prepared to see if you will have all the tools at hand during the construction process:
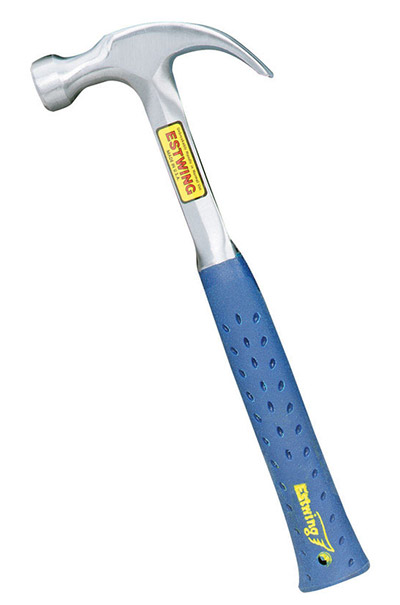
- Hammer.
- Bayonet shovel.
- Drill with concrete mixing attachment.
- Circular saw for cutting polycarbonate.
- Hacksaw.
- Axe.
- A building level for checking the evenness of installed supports.
- Screwdriver.
- Rope.
- Roulette.
- Container for solution.
Pouring the foundation for the supports
The wooden structure is lightweight, but it needs to be secured. foundation:
- 4 holes are dug at the corners of the future canopy for the barbecue area depth 70 cm;
- the depressions are filled with crushed stone 5-10 cm thick;
- the supports are installed one by one and filled with the prepared material concrete mortar;
Advice! To install the roof correctly, make sure the supports are level - check it with a level before the solution hardens. It is advisable to stretch a cord along the perimeter of the barbecue area before installing the first support - this will simplify the process.
- the design is left for 3 days until completely dry, sudden precipitation will extend this period.
Advice! While the foundation is drying, all wood is treated with antiseptics.
Installation of ceilings and rafters
According to the drawing, cuts are made at the top of the supports grooves, in which they are mounted barsThese beams will serve as horizontal overlaps and a base for attaching the rafters.
Rafters should be installed on the floors using long screws. Keep in mind that for the strength of the structure, the distance between 2 rafters should not exceed 1 m.
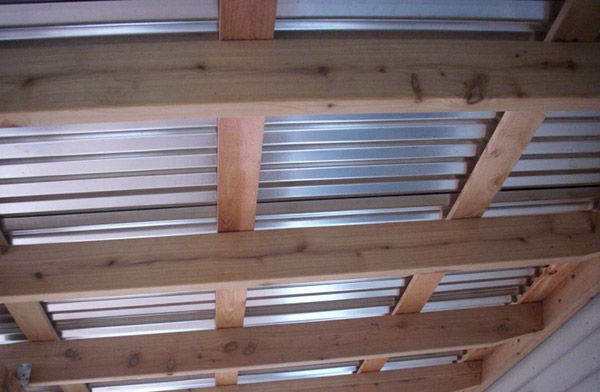
Photo 3. Wooden rafters of the canopy, on which polycarbonate sheets are laid. This design allows you to cover the barbecue with other materials - slate, plywood, wood.
Advice! If you increase the distance between the rafters by more than 1 m, the risk that the canopy will not cope with the load of the snow layer in winter will increase.
Roof fastening
To install the roof, it is enough to nail it to the rafters lathing and attach roofing material - polycarbonate, tiles, metal sheets. The selected project option uses polycarbonate, it should be attached to a metal or polycarbonate profile.
Attention! The joint of polycarbonate sheets is located in the middle of the rafters.
Sheets of non-separable polycarbonate are fixed with self-tapping screws in 30 cm increments, collapsible - one by one, first the lower part, then the polycarbonate sheets and the upper part of the profile.
Additional attributes
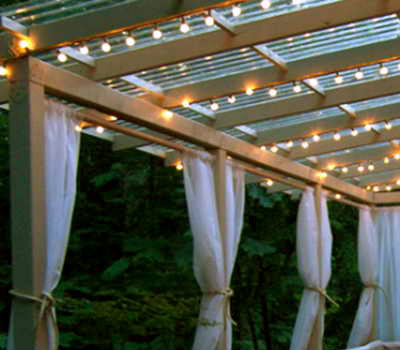
If the barbecue area has electricity, you can beautifully complement the roof above the stove with a glowing light. street garlandIt will weave along the supports of an open canopy or along the edges of the roof of a closed area.
Small ones will also be a good solution street lights, hung in the corners of the canopy.
To use the area with the stove in winter, make sure you have a shovel that will be convenient for clearing snow from the roof. It is advisable to come up with a permanent ladder for easy cleaning of transparent polycarbonate sheets.
The position of the canopy on the site, the arrangement of the barbecue area with a canopy
For arrangement wind protection a barbecue with a canopy is located closer to the wall of some building or fence. On the leeward side 1-3 walls are sealed corrugated sheet or processed wood.
Gazebo and barbecue under one roof: fire safety
It is difficult to imagine a country house without a barbecue oven. But if earlier a barbecue canopy was made of metal, and only of it, then with the advent of new substances for processing and affordable building materials, they began to recommend polymeric materials And treeAlways treat the wood used for construction carefully so that it can withstand high temperatures if necessary.
Necessarily! Maintain a minimum distance of 1.5 m between the stove and wooden supports, and do not place the canopy lower than 2 m.
If you are making a barbecue shelter with your own hands, make sure that chimney do not touch the roof directly - cover the hood with bricks, and seal the space between it and the roof with heat-resistant material.

Photo 4. Brick barbecue oven with a canopy. The photo also captures a spacious recreation area. Under such a canopy, the owners of the country house and their guests will be cozy both in sunny weather and in the rain.
Canopies over barbecue: photos of various options
You have already understood from the article that beautiful barbecues under a canopy can be very different, both in their design and in the material they are made of. We have collected for you a few more photos that show what a barbecue area with a roof can look like.
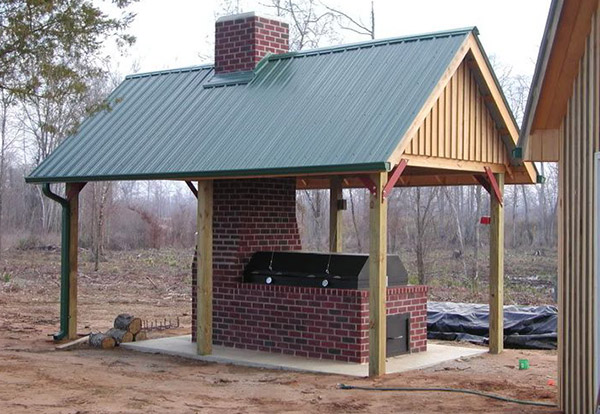
Photo 5. Simple in design, but reliable roof for barbecue. The photo allows you to see that a drainpipe for rainwater drainage is attached to this canopy.
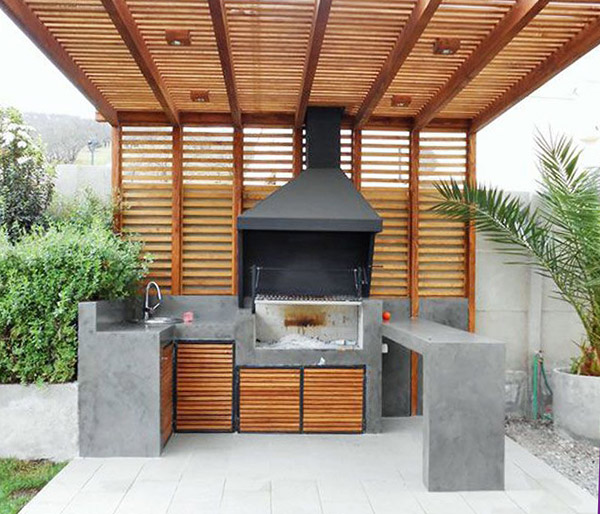
Photo 6. A small, compact barbecue oven with a canopy: the photo shows a stone model, but a brick barbecue would also look good under such a wooden roof.
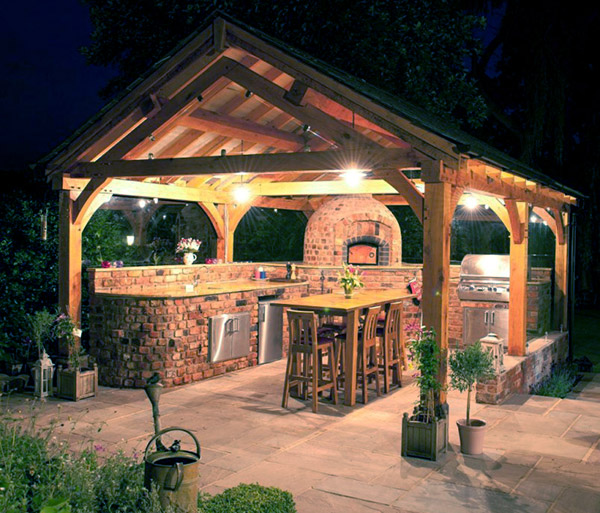
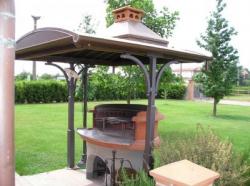
Photo 7. A solid, solid barbecue shelter at the dacha. The photo was taken in the evening and it clearly shows how well the lighting fixtures are built into the roof.
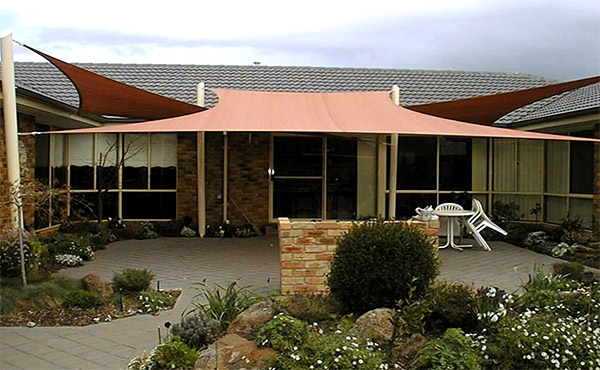
Photo 8. A small brick barbecue and recreation area. This is what sail awnings look like. It will not be difficult to stretch a fabric awning over the barbecue with your own hands even for a host who does not have construction skills.
Useful video
Watch this video for a detailed tutorial on how to build a wooden barbecue shed for your dacha with your own hands.
Conclusion
The barbecue area canopy is ready, now spending summer evenings with friends around the fire eating delicious shashlik will be even more enjoyable. Don't forget to casually mention who exactly built the barbecue canopy - this is one of the reasons for pride for the owner of a country house. Get together more often.
Comments
But it is best to use special fire-resistant paints for finishing wooden structures. Such paints not only increase fire resistance, but also give the building an original aesthetic appearance.
My husband made the canopy himself from iron beams and bricks, it turned out quite beautiful. Although we thought it would be easier to make it - from wood and in the form of a gazebo, but the first option is more durable and looks more solid.