No More Cold Feet! Underfloor Heating in a Private Home - An Ideal Replacement for Radiators
Warm floor - one of the signs of well-being private home. Heated floors make the house warm, comfortable and cozy.
Warm floor covering It does not cause discomfort when walking barefoot, and children can play on it. Uniform distribution of air temperature in a room with such a floor allows you not to worry about drafts and colds.
Content
- Installation of a heated floor using a double-circuit floor boiler
- Tools and materials for making the structure yourself
- Layout plan drawing
- Floor covering
- Preparing the base
- Schemes for laying a warm floor system in a two-story or one-story cottage
- Selecting the right materials
- How to make a heating system in a private country house yourself
- Evaluation of the possibility of heating a house with a warm floor system without radiators
- Useful video
- To the home craftsman's piggy bank
- Comments (3 opinions)
Installation of a heated floor using a double-circuit floor boiler
Design warm floor consists of the following layers:
- Floor slab or sub-base.
- Vapor barrier - polyethylene film for the 1st floor.
- Thermal insulator - penoplex.
- Waterproofing agent - polyethylene film.
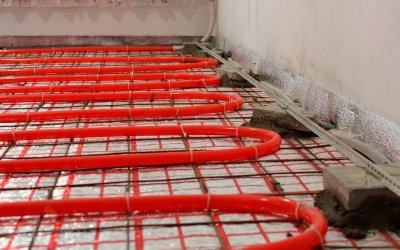
- Reinforcing mesh with a heated floor pipe attached to it.
- Cement-sand screed.
- Finish floor covering.
Tools and materials for making the structure yourself
For installation warm floor with your own hands You will need the following tools:
- Water level or translucent PVC hose, 2-3 meters greater than the length of the room.
- Building level length 2 m.
- Rule of length 1.5 m.
- Capacity 100-200 liters with round edges for mortar.
- Construction bucket 40-50 liters.
- Shovel.
- A hoe for compacting the solution.
- Roulette.
- Knife.
- Nippers.
- Pliers.
- A set of wrenches for tightening fittings.
- Knife for cutting metal-plastic pipes.
- Screwdriver.
Materials for the device warm floor:
- Polyethylene film 150-200 microns for floor waterproofing.
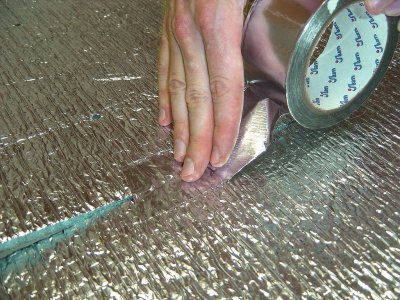
- Metallized tape for gluing film seams.
- Extruded polystyrene (penoplex) slabs for floor thermal insulation.
- Reinforcing mesh with a rod diameter 4-5 mm with cell size 100-150 mm.
- A set of plastic cable ties for fastening pipes to reinforcing mesh.
- Pipe for underfloor heating made of metal-plastic Valtec diameter 16 mm.
- A set of fittings (Eurocones) for connecting circuits to the manifold.
- Galvanized profiles (beacons) for screed.
- Sifted sand.
- Cement grade M400.
- Polypropylene fiber.
- PVA dispersion.
Layout plan drawing
The layout drawing (routing) of the heated floor is done either on a sheet of graph paper or in a graphic editor (AutoCAD or Compass) in the following sequence:
- They depict the floor plan of the house to scale.
- They mark sections of continuous screed, separated by expansion joints to prevent cracks. The area of one section of continuous pouring no more than 25 m².
- They indicate the installation locations of collectors, the points of intersection of wall contours, and expansion joints.
- Calculate the number of underfloor heating circuits and indicate their location on the layout:
- length of pipe in one circuit - no more than 80 m;
- flow rate when laying with a step 150 mm - 6.5 m per 1 m²;
- the difference in the length of the pipes of each circuit is no more than 40%.
- Select a routing scheme for each circuit (spiral, snake or their combination), laying step and draw the location of the route on the drawing. Distance from pipes to walls 10-20 cm. Optimal laying step:
- for residential premises 20-25 cm;
- for the bathroom 15 cm;
- for the hallway and kitchen 25-30 cm.
Floor covering
As a finishing coat when installing heated floors recommended:
- Ceramic tiles for the bathroom.
- Porcelain tiles for the hallway.
- Laminate, parquet board, linoleum for residential premises.
Preparing the base
- The base (floor slab) must be dry, strong, and free of debris.
- The holes and cracks in the ceiling are sealed with mortar.
- The difference in unevenness of the base is no more than 5 mm per 2 m. Partial leveling of the base using calcined sand is permitted.
Schemes for laying a warm floor system in a two-story or one-story cottage
TO the most popular schemes The types of underfloor heating installations include "Spiral" and "Snake".
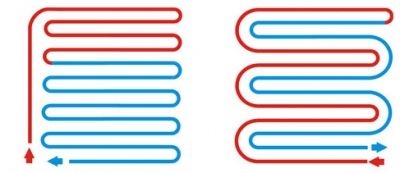
"Spiral"
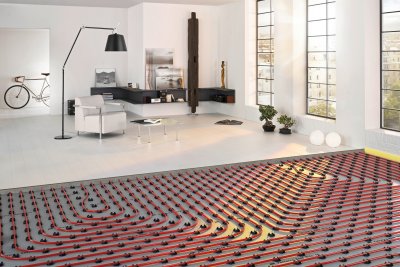
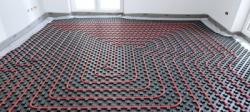
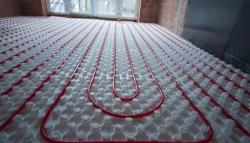
The first turn of the pipe is laid along the perimeter of the room parallel to the walls, with an indent from the walls 10-20 cm. The second and subsequent turns are laid inside the already laid contour at a double distance from it. The pipe is laid towards the center of the room, where the loop is made 180° and laying in the opposite direction, in the middle between the laid turns.
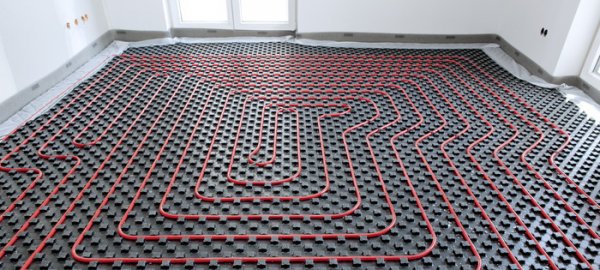
Photo 1. Laying a heated floor using the "Spiral" type. This scheme is the most popular.
In the corners of the room the pipes are bent at 90°When bending a pipe, it is necessary to maintain a minimum bending radius. 10 cm (for pipe 16 mm).
- Uniform heating of the room across the area.
- Easy to make right angle bends.
- Suitable for any premises.
"Snake"
The installation is carried out along the long wall of the room. At the end of the wall the pipe is bent at 90° and are laid along the short wall with an indentation 10-20 cm from the walls. A loop is made at the end of the wall 180° and laying in a “snake” pattern parallel to the short wall towards the entrance to the room.
- Uneven heating of the room.
- Difficulty in making loop bends 180º.
- Minimum installation step 20 cm because of the loops.
- Suitable for small utility rooms (hallway, kitchen).
Selecting the right materials
To install a heated floor in a private home, you will need a lot of materials.
Insulation
The following is used as insulation:
- Foam plastic.
- Foil stopper.
- Extruded polystyrene (penoplex).
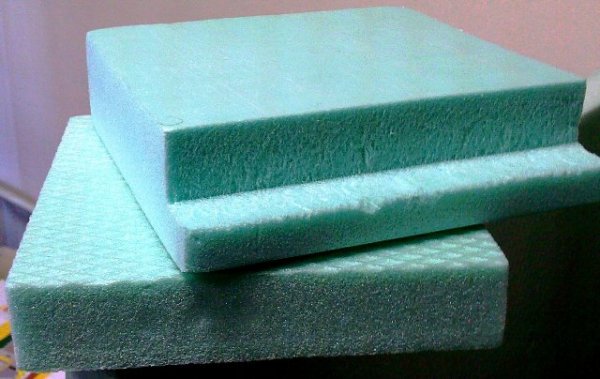
Photo 2. This is what extruded polystyrene (penoplex) looks like, which is used for floor insulation.
- Foiled polyethylene foam.
- Mineral wool.
The most commonly used penoplex is:
- has high thermal resistance;
- low weight and cost;
- easy to install;
- easy to cut with a knife.
Thickness of penoplex for the 1st floor - from 10 to 15 cm, for other premises - 5 cm.
Attention! After installing a heated floor with penoplex, the height of the doorways will be reduced by the total thickness of the insulation and screed.
The height will decrease by the following values:
- on 15-20 cm for the premises on the first floor;
- on 10 cm for other rooms.
If the height of the doorways is not enough to install the doors, then the penoplex is replaced on foil heat reflectors.
Heat reflector
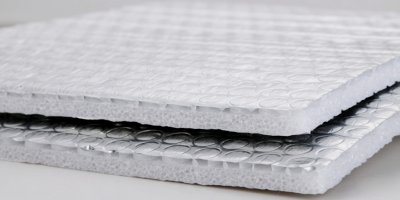
The following are used as heat reflectors:
- foil-clad foamed polyethylene 5-10 mm;
- foil stopper.
They are used instead of penoplex as a compromise solution (at critical height of doorways). When using penoplex, it is not economically feasible to use foil heat reflectors.
Fastening connections
The following are used as fasteners:
- Cable ties for fastening pipes to reinforcing mesh.
- A set of mushroom dowels for attaching penoplex to a rough base.
Screed recipe
The screed is made on the basis of a cement-sand mixture of the grade M300 with additives of PVA dispersion for ease of installation and polypropylene fiber 12 mm for reinforcing the screed.
Ratio of components:

- Cement 1 part by weight.
- Sand 3-4 parts by weight.
- PVA dispersion 0.2 parts by weight.
- Fiber 600 grams per 1 m³ ready solution.
The solution is prepared immediately before laying the screed, after laying insulation, waterproofing, pipes, and their pressure testing.
The mixture is mixed in a mixing container. with a construction mixer at low speed, gradually adding water. The finished mixture should be of a hard consistency without excess water.
How to make a heating system in a private country house yourself
The installation process is divided into several stages: laying insulation, laying pipes, concreting and laying floor coverings.
Laying insulation
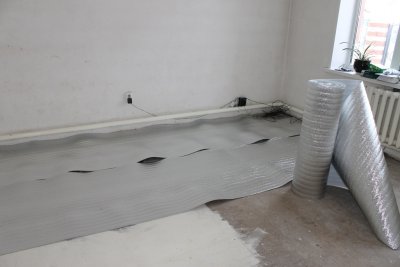
- Attach the damping tape to the walls around the perimeter of the foundation.
- Place a vapor barrier (polyethylene film) on the base 1st floor with allowance for the wall 20 cmSeal the film joints with tape.
- Place the foam plastic slabs on the base close to each other, filling the entire area.
- Attach the foam boards to the base using mounting mushrooms.
- Lay waterproofing (polyethylene film) on the penoplex with an allowance for the wall 15 cm. Seal the film joints with tape.
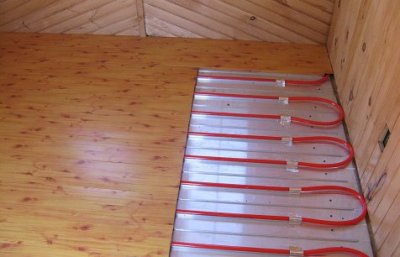
Installing pipes under a wooden or other type of floor
- Lay the reinforcing mesh on the waterproofing, trying not to damage the polyethylene film. Lay the mesh with a cell size that is a multiple of the laying step according to the drawing (if the laying step is 20 cm, then the size of the grid cell 10 cm).
- Place the penoplex trimmings under the mesh, lifting the mesh above the surface of the film by 10-15 mm.
- Lay the pipe according to the drawing.
- Secure it to the reinforcing mesh rods using a cable tie.
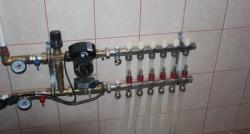
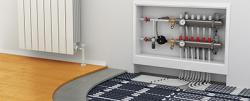
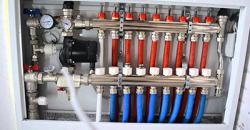
- Connect the system to the manifold.
- The collector itself is connected to a single-circuit or double-circuit boiler.
Important:
- When bending, observe the minimum bending radius. 15 cm.
- When laying through walls or expansion joints, place a piece of thermal insulation (foamed polyethylene) on the pipe and enclose it into a section of larger diameter (to avoid mechanical damage).
Concreting
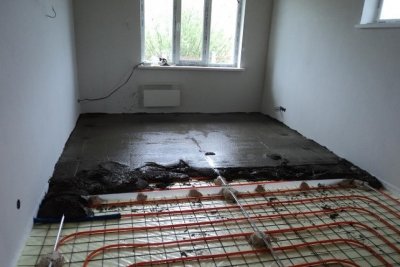
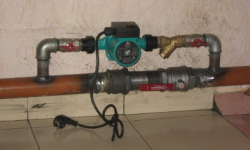
Before concreting, the contours are pressurized with increased pressure. 2 atmospheres per day.
The work on pressure testing and connection to the collector must be carried out by plumbing specialists. During concreting, the water in the pipes must also be under pressure.
- Install beacons (the height of the screed should be not less than 5 cm).
- Prepare the mixture for the screed.
- Distribute the mixture between the beacons, trying to fill all the voids as much as possible.
- Compact the solution with a hoe.
- Level the mortar using a rule along the beacons.
- Cover the screed with polyethylene film to prevent it from drying out.
Important:
- The fortress is being built within 28 days.
- When concreting in dry weather, the screed under the film is moistened (watered moderately from a watering can) 2-3 times a day throughout the week.
- The polyethylene film is removed in 2 weeks.
Laying floor coverings
The selected floor covering (tiles, linoleum, laminate) is laid in 5-6 weeks after laying the screed. If necessary, additional leveling of the screed surface is carried out with self-leveling mixtures.
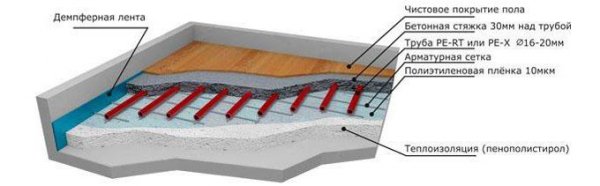
Photo 3. Scheme of the warm floor device. The whole structure consists of seven layers.
Evaluation of the possibility of heating a house with a warm floor system without radiators
- Calculate the total amount of heat loss (W) at home (through walls, windows, ceilings) in the online heat loss calculator.
- Calculate active areaoccupied by all the contours of the heated floor (m²).
- Calculate thermal power, given off by the heated floor (W): multiply the value of the active area (in point 2) by the specific power of the heated floor (80 W/m²).
- Compare the obtained values (in points 1 and 3).
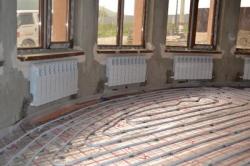
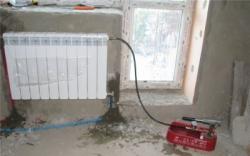
- If the amount of heat loss in the house is greater than the thermal power of the heated floor, then additional heating is required houses with heating radiators.
Useful video
Watch the video, which demonstrates the process of installing a warm water floor in a private house.
To the home craftsman's piggy bank
The entire construction part of the work on installing a heated floor in a private house can be done independently, without involving builders. The key to success is precise fulfillment of technology requirements. The quality of underfloor heating installation done for yourself is an order of magnitude higher than the quality of work done by hired workers. However, such complex work as connecting engineering equipment, adjusting and pressure testing the system It's better to trust the professionals.
Comments
And in general, heated floors are good, but there is a problem - dry air. Plastic windows will completely block the flow of oxygen, lung diseases, depression, loss of appetite will begin. Immediately after installing heated floors, buy a humidifier. It is not a cheap thing, but your health is worth it.