Even more opportunities for recreation! Building a Russian stove on the street with your own hands: diagram and instructions
Since ancient times, the Russian stove has warmed, cooked food, and served as a warm place to sleep. Its design is a convenient multifunctional device: boiling, frying, simmering, smoking, etc.
That is why it is the brick Russian stove is in great demand for summer residents and owners of country cottages. It can easily include a cauldron, a grill, a barbecue, and a fireplace.
Content
Types of outdoor Russian stoves. Construction diagram
When choosing your project, think about what functions the design must perform: fry, steam, boil, smoke. Make your choice accordingly. street Russian stove:
- with barbecue;
- with barbecue;
- with space for a cauldron;
- with hob only;
- with a smokehouse;
- with a bed.
The furnace design can be either the simplest or the most complex, it can include traditional for Russian stove elements:
- place for drying firewood - under-oven;
- a place for storing dishes and other utensils - stove;
- place for hot pots taken out of the oven - sixth;
- the camera under the pole - cross-pipe;
- the surface in the cooking chamber where the cooking utensils are placed — under;
- the camera itself - crucible;
- covering the chimney to retain heat - damper;
- a window leading into the chimney - shower;
- traction regulator - damper.
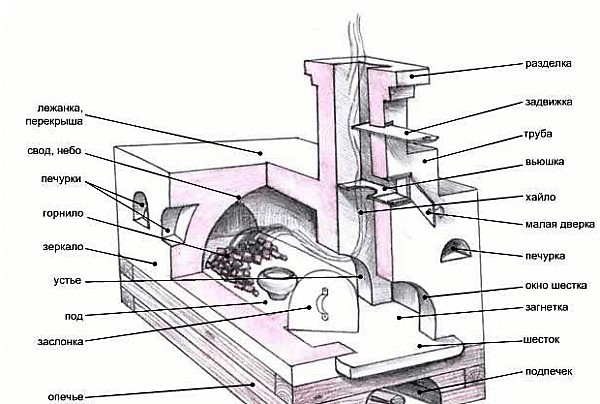
Photo 1. Diagram of the structure of a typical Russian wood-burning stove, all the main elements of the design are indicated.
A design with a bed is also possible, but in the outdoor version it is not very appropriate or serves other purposes.
Important! The diagram and drawings of the furnace must include allwhat you plan to build.
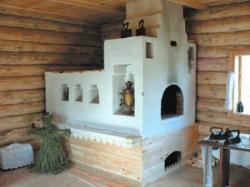
A typical Russian stove for the street
The simplest outdoor oven consists of a frame, one- or two-burner stoves, tunnel furnaces, which is divided by a smoke tooth into a flame and smoke chamber. The scheme of such masonry relatively simple and does not require special knowledge and application of technologies. It is suitable for the street version, because:
- thanks to the smoke tooth no dependence on wind strength and direction;
- cooking becomes possible at any temperature;
- you can even cook on the lowest quality fuel.
Hob may vary from one to two square meters and more, depending on the chosen scheme. Furnace height according to the standard version it can be 70 cm.
Mini oven in Russian style has dimensions 100 cm by 130 cm. But she multifunctional and allows you to cook any dishes, bake bread and has a number of advantages:
- low cost financially;
- convenient and simple in operation;
- is being built quickly;
- cooks quickly dishes;
- does not require a lot of fuel;
- environmentally friendly.
It is possible to build an outdoor mini-oven in one day.
Advice. Don't start building a mini oven if you don't have drawing, project, developed design. Get qualified advice from specialists.
Outdoor device with barbecue
The structure of a barbecue made with your own hands includes: fuel tray and grate with meat at a height of 10-15 cm.
The role of open flame will be played by the hot air after the stove is heated. The food is not cooked over an open fire, but inside the furnace. The firebox can be located either to the side of the inserted grills for cooking meat, or underneath them. Different designs of the oven with a barbecue imply various construction optionsWhen choosing a project, focus on your culinary preferences.
Please note! Meat cooked in an outdoor Russian oven has more useful properties.
In the oven, cooking takes place in a niche enclosed by partitions. Due to the lower draft and the absence of wind and temperature differences the meat is cooked in its own juice.
Russian stove in a gazebo under a canopy
Such a project implies development of a specific design, which should harmoniously fit into the overall interior of the site and blend well with the architecture of the house.
When choosing a design for such an outdoor Russian stove, a gazebo is immediately thought out, in which the new structure will be located. The project must comply with:
- sizes area allocated for construction;
- non-combustible materials, from which it is planned to build both a gazebo and a stove;
- other characteristics gazebos, allowing you to place a structure with a firebox and flames under its arches.
The gazebo should be spacious and beautifulIf desired, it can be designed with closing windows or lowering blinds.
Important! Before building a gazebo check them all out interesting and modern projects.
Selecting a project
If you like fried meat, then you should enter the oven BBQ elements and a barbecue. For smoked meats, you can install smokehouse. The outdoor Russian stove provides hob, which will provide the owners with healthy boiled, steamed or stewed dishes. And the availability of space for cauldron — exquisite oriental ones: pilaf, shulem, shurpa, etc. Each type of stove has its own schemes and subtleties of laying.
In addition to functionality, we need to think about general appearance, which will harmoniously blend with the entire site and the house.
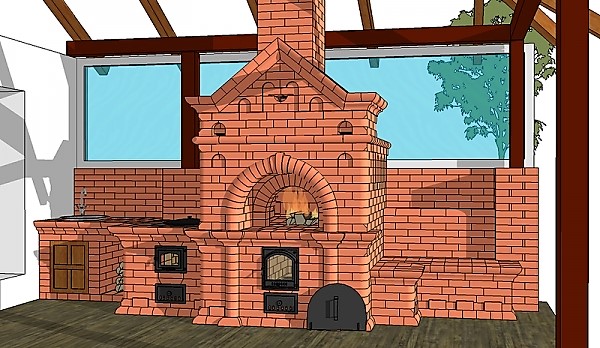
Photo 2. Example of a brick structure project with a Russian stove, sink and cauldron. On the side is a comfortable warm place to sit.
Materials and tools
First, prepare Necessary tools:
- shovel;
- bucket for solution;
- vertical and horizontal level;
- pliers;
- trowel;
- pickaxe;
- hammer, including a rubber one.
We are preparing reinforcement and formwork, if we will do the concreting of the foundation ourselves.
We purchase sufficient quantity refractory, fireclay bricks, so that it would be enough for the entire structure. Construction materials must:
- be resistant to temperature changes;
- not subject to corrosion and other external influences;
- be whole;
- be certified.
Then we check the availability of the necessary metal inventory:
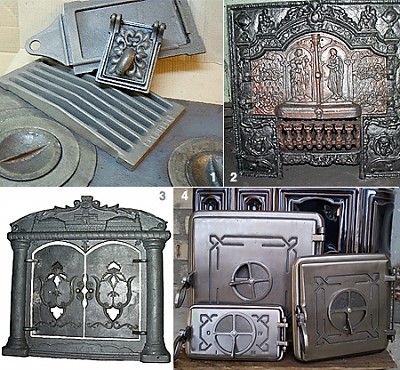
- pipes;
- gratings;
- staples;
- valves;
- doors;
- corners.
Their the quantity must correspond to the project ovens.
Let's cook mortar, which will include:
- clay;
- sand;
- alabaster;
- cement, etc.
Preliminary consult with builders and choose the most suitable solution option. Experts advise cement-sand grade M250 and above.
Making an outdoor Russian stove with your own hands
Once you have decided on the design of the outdoor Russian stove, found a place and purchased materials, tools and everything necessary for construction, you can start construction foundation. When the base for the stove is ready, start laying it - strictly in accordance with the diagrams and drawings. At first, the bricks are laid dry - without mortar. This will help determine the correctness of the structure and take into account all the nuances before the final construction of the stove.
Important! Using horizontal and vertical levels and plumb lines when laying dry check the correctness of the laid out orders.
If the dry masonry corresponds to all the diagrams and drawings, then prepare the solution and start laying the bricks in order, without missing the necessary openings for the chimney and other technological spaces corresponding to the diagram.
Preparing a place at the dacha
There must be a place sufficient in area and preferably levelIf necessary, the area should be leveled using a shovel and rake.
For the oven it is better to choose maximum comfort for you place:
- With sunny side;
- With distance from wooden buildings and the fence;
- without shading plantings on the site;
- desirable in the gazebo.
It is advisable build the stove together with the gazebo, in the same color scheme, from homogeneous materials. It is advisable to reflect this in the diagram and project.
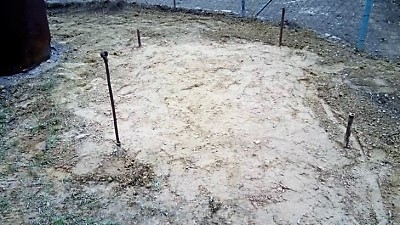
How to make a foundation
After choosing a location on your property, begin building the foundation. Its main criteria should be:
- evenness;
- smoothness;
- a certain area;
- reliability;
- durability.
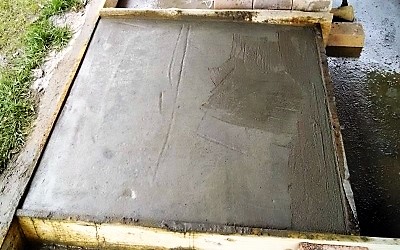
For the foundation:
- dig hole corresponding to the width and length diagram to a depth of 30-50 cm;
- pour sand - do it sand cushion 20 cm;
- sprinkle on top crushed stone to ground level;
- select base - monolithic concrete slab of the appropriate size or concreting by hand;
- for concreting, we put formwork, we install reinforcement, fill with solution.
If the stove is built in a ready-made wooden gazebo, all the requirements must be met. fire safety rules. For this purpose, the boards are laid basalt cardboard or asbestos cardboard And roofing iron sheet, clay layer and again a layer of basalt cardboard. The laying begins after the solution has dried.
Important! Don't allow it distortions or unexpected voids in the masonryThis will lead to deformation of the entire structure.
Stove ordering
We are conducting dry masonry furnace project. If everything is built correctly, taking into account the sizes, shapes and components, you can start building the furnace with a solution.
In accordance with the photos, diagrams and drawings, they begin laying the stove in rows. The standard project implies 13-20 rows.
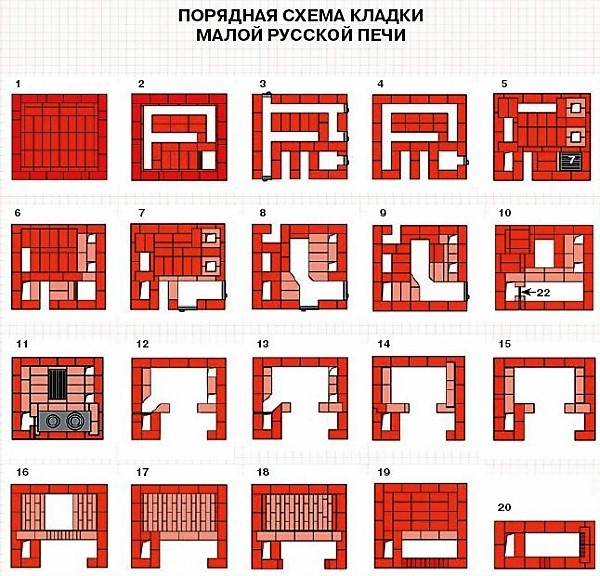
Photo 3. Scheme of the row-by-row laying of a regular small Russian stove with a hob, without additional elements.
From the second to the third row We lay the masonry taking into account the space for fuel: coal and firewood. Then we take into account the chimney and ash pan. On the back wall of the furnace approximately on the eighth row, we mount brackets and pins for grates and nets for barbecue preparation or installation of a grill (according to the project). You can make more brackets to rearrange the grates depending on the heating of the oven and the method of cooking.
Important! When laying, it is necessary to remove all excess mortar with a trowel. In no case can not be applied clay solution on the inner surface, this will worsen thermal conductivity and lead to increased soot deposition on the walls.
When laying in rows don't forget the holes for a damper, a vent, a flap. We install according to the door dimensions.
Photos of finished structures
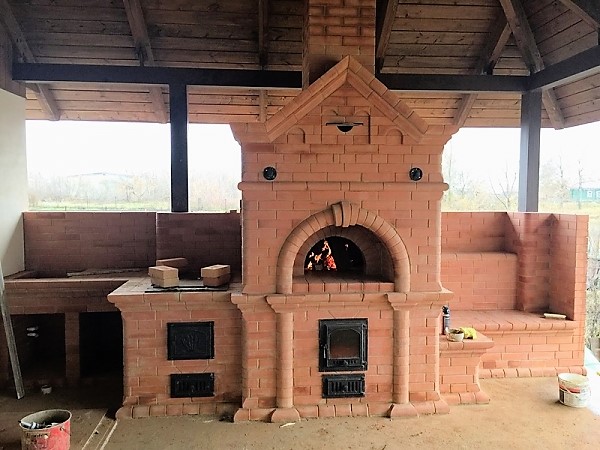
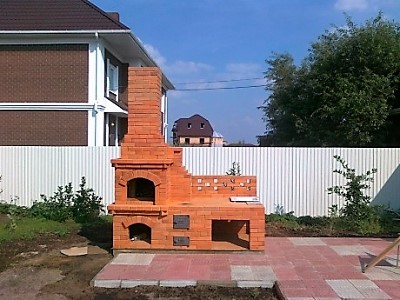
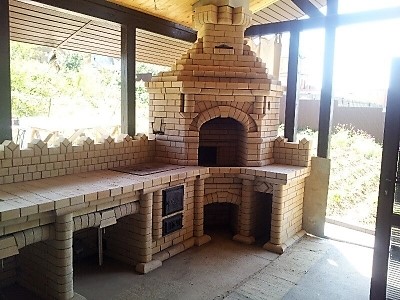
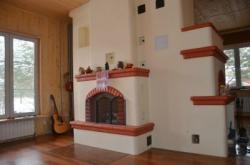
Photo 4. Brick construction for a summerhouse with a Russian stove and space for a cauldron.
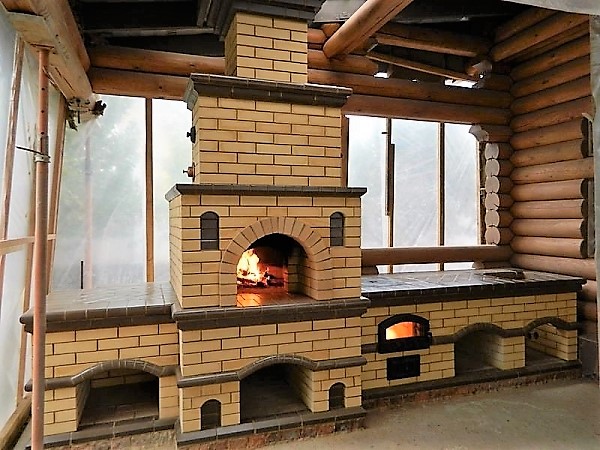
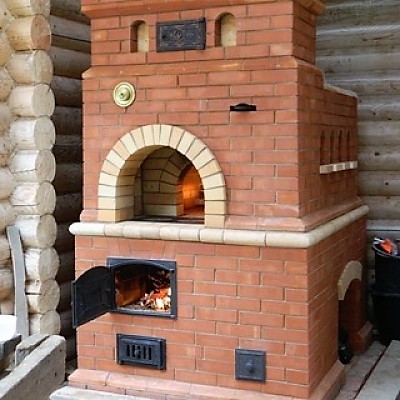
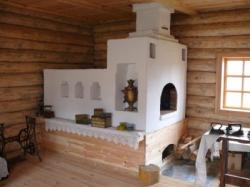
Photo 5. Russian stove with a kazannitsa in the gazebo. There is a lot of free space on the side for cooking.
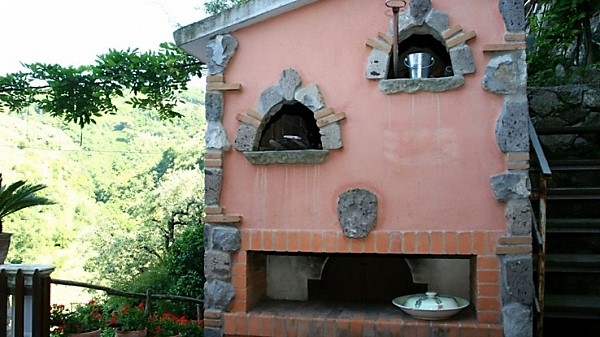
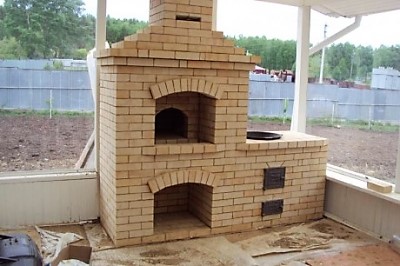
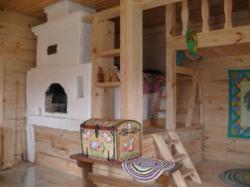
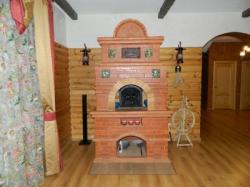
Photo 6. Outdoor Russian stove with two stoves. Decorated with decorative trim with artificial stone.
Possible difficulties and how to avoid them
Often arise problems with waterproofing and, consequently, the humidity of the raw material for the furnace firebox. Therefore, when building the foundation, do not forget to put 2-3 layers of roofing feltto prevent moisture from penetrating into the firewood storage area.
During the construction of the hearth it is important to take it into account slope to the base and level the surface. If this is not done, unnecessary problems will arise with rearranging and moving heavy pots, cast iron pans.
Any distortions or cracks, which appear over time, are the result incorrect laying of the first rowTherefore, during construction, always use a level and plumb line to avoid further problems.
Start of operation — an important stage for the correct use of the structure. Therefore, after the completion of construction dry it country stove during the week in the sun in weather conditions temperature +20 °C without precipitation.
If the forecast promises rain, then in the absence of a gazebo cover your new structure with film, so that moisture does not get on the stove. Then do test firing without productsAnd when you see that everything is functioning without interruptions, you can start preparing your favorite dishes.
Useful video
Check out the video, which shows a diagram and photos of different stages of construction of a Russian stove with a barbecue and a place for a cauldron on the street.
Choose your stove design
Use stylish grilles, corners, frames. You can decorate the structure natural stone or plaster.
It is better if the construction is carried out according to a complete project, which includes: a gazebo, a table, benches, an additional brick cabinet with drawers, cutting tables and a sink.
Comments
They destroy everything quickly, then take it away. I had to crawl around these ruins for three days. It was the weekend and they hadn't had time to rake everything into a vacant lot yet.
In short, these ancient houses had one value - the brickwork of the stove. They rake them with a ladle, and they stand! These are the kind of bricks I collected from this dump for the stove.
I spent three days choosing, then a week cleaning. My friend and I built the stove. It took two weeks in total. So everything was free.
A brick made from this material will stand for another 200 years even on the street!
Now a lot of people gather at the tables around the stove. And we also changed the menu. We switched to Russian dishes that are cooked in the stove. Russian shchi, potatoes from the stove, etc. There is enough space for cooking, the cooking surface was made two meters.
The name of the restaurant was not changed - it is called "Razgulyay". But the people themselves began to call our public catering on the street - Pechka. So they say - let's go to Pechka, we'll meet at Pechka, a wedding at Pechka.