Warm and feed: Russian stove with a stove bench and a hob. Construction instructions and photos of finished devices
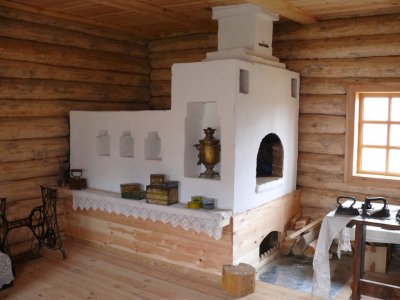
The classic Russian stove is known for its impressive dimensions. Thanks to its design, our ancestors were able to heat the hut, cook food, even wash and do laundry.
A sleeping place was always built on the stove - during the harsh winter the entire hut would cool down overnight, but the brick stove heated in the evening retained heat until the morning.
Today, traditional ovens are in demand again. thanks to the development of private construction And popularity of country houses.
Content
Elements of the device, drawings
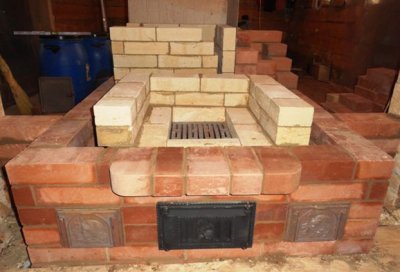
- Mouth - opening in front of the combustion chamber.
- The Crucible — a chamber where fuel (wood) burns.
- Under — the base of the furnace, where fuel is placed, and where some dishes are prepared.
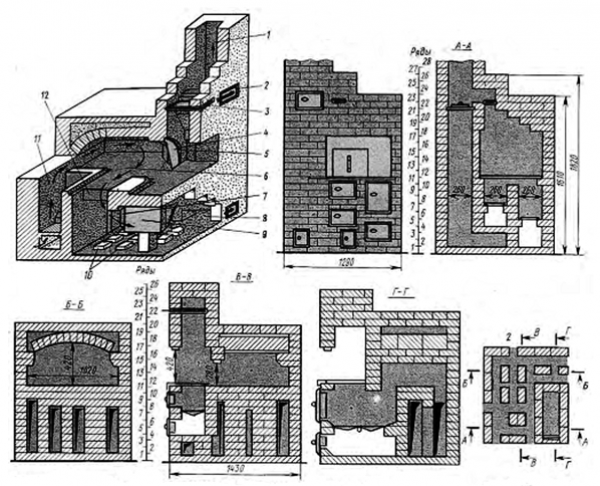
Photo 1. Drawing of a Russian stove with a stove bench and a hob. The stove structure is clearly shown from different sides.
- Damper — a mandatory element that tightly closes the entrance to the furnace, blocking the air supply.
- Shestok - a platform in front of the mouth, convenient for placing heavy hot pots taken out of the oven.
- Bed — sleeping platforms, traditionally located at the height of human growth.
- Chimney - a vertical pipe that removes smoke and hot air outside.
- Gate valve - partially blocks the chimney if necessary, increasing draft.
- Shield — a smoke collector leading to the chimney. It is also used to further increase the heat capacity of the stove.
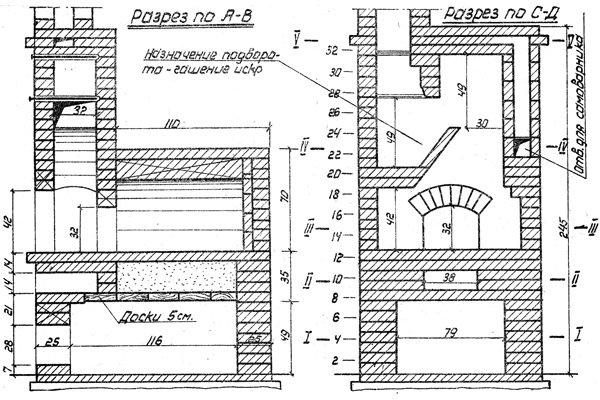
Photo 2. Drawing of a Russian stove with a stove bench made of bricks. The device is shown from the side and from the front, its dimensions are indicated.
To build a traditional version of the stove in compliance with all the rules, you will need help from a professional stove maker. Modern models are often built using simplified schemes, made smaller in size to make work easier - this option available for DIY construction.
Scheme of Russian stove with hob
In Rus', they cooked directly in the oven, leaving the dishes to languish in the cooling furnace, sometimes for many hours. In modern models, a wood stove, giving the opportunity cook over an open fire. It is located directly above the firebox doors.
The hob is most often made of cast iron — is a heat-intensive and durable metal that has the ability to not give off heat directly to the surrounding space, but to retain it in itself. This allows you to create comfortable conditions for cooking — there is no zone of overheated air around the stove.
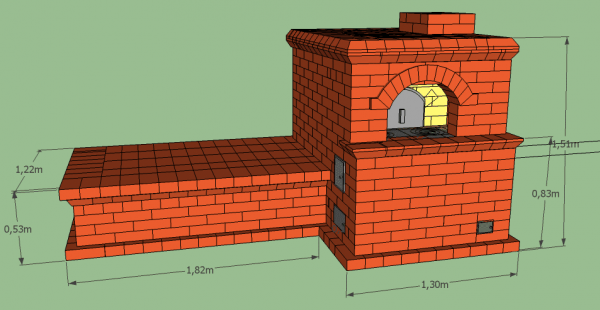
Photo 3. Diagram of a Russian stove with a stove bench and a cast iron plate. The dimensions of the finished device are also indicated.
Successful cooking will be ensured by special openings in the stove, giving the open flame direct access to the walls of the cookware. To increase or decrease the intensity of heating, aThere are removable cast iron circles that change the diameter of the burner.
Attention! Despite all its positive properties, cast iron is very fragile material. If you carelessly pour water on a hot hob, it will crack. Cast iron is also not repairable or weldable, so a damaged hob will require a complete replacement.
Stove with a hob and a stove bench, its dimensions
The main distinguishing feature of such a device is large dimensions of the ovenTo fit an adult on the sleeping platform, The length of the entire structure must exceed two meters, and the width one and a half meters. The stove itself is located above a long firebox, which ensures a constant flow of heat.
Previously, in traditional models, the sleeping platforms were located under the ceiling, at a height about 1.8 m, climbed onto them using a stepladder.
This ensured that the heat was retained for a longer period of time - when the hut cooled down in the morning, the temperature on the sleeping platforms, due to their distance from the floor, was still quite high.
These days the bed are placed at a convenient level of about one meter, because modern materials have better thermal insulation of the house.
Reference. In previous years, a high furnace was traditionally built - in addition to its heating functions, it used as a home mini-sauna, therefore it had to accommodate a person, which also influenced the height of the sleeping platforms.
The scheme, which includes both a hob and a stove bench, remains the most common. For the construction of such a structure, lightweight schemes have been developed, which even a not very experienced builder can handle. The disadvantage of such a stove will be reduced efficiency of heating the room compared to other models.
Russian stove with a hob and a heating shield
When building a simple chimney, much of the heat generated by the stove is wasted. Hot gases and smoke escape directly into the street., while they could be used to heat the house. In case of installation of a stove the situation improves, because some of the heat goes to its heating and remains in the room.
To increase heating efficiency heating shields are being built. In terms of design, this is a brick wall located above the hearth and the cooktop.
Its peculiarity is - internally laid channels for smoke to escape. Due to their length, the hot gases on the way to the chimney transfer most of their heat to the walls of the shield and continue to warm the air in the house for a long time.
Important! Shield channels are a must are equipped with dampers And provide for direct smoke exit to the outside. This is of great importance in the summer, when additional heating of the house is not required and creates uncomfortable conditions when using the stove for cooking.
Step-by-step description of construction with your own hands
The construction of a structure with a hob and a stove bench is quite a complicated task for an inexperienced craftsman, therefore It is advisable to consult a specialist first. It is not recommended to arbitrarily change the selected project - careful adherence to the construction scheme will help to avoid serious errors.
Selecting a project, ordering
The choice of the design scheme largely depends on the existing conditions. When deciding to build a stove with a bench in a small room, the dimensions of the furnace and the device itself are calculated so that there is no overheating during operation. If the stove is installed in a large house, it is advisable to build a heating shield, and place the structure itself closer to the center of the building. The best option would be installation of a stove in the middle of a large combined area, where the kitchen and living room are located at the same time.
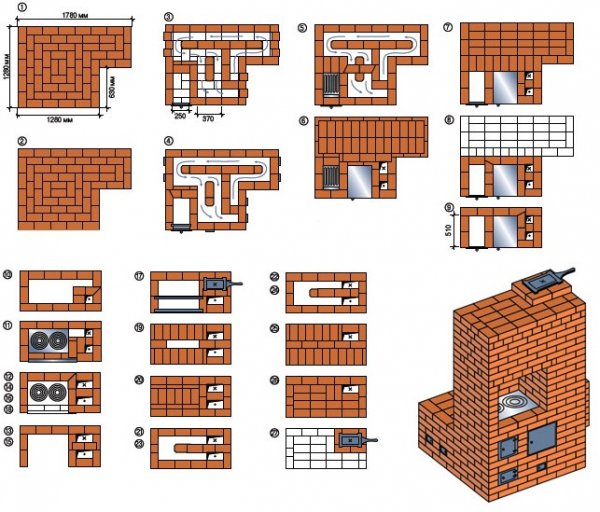
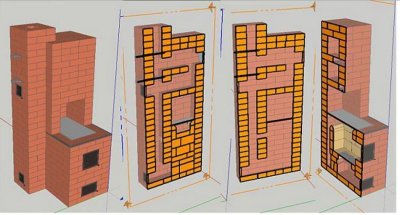
Photo 4. The row layout of a Russian stove with a stove bench and a slab. It contains 27 rows in total.
Materials
For DIY construction The following materials and elements will be needed:
- Fireproof tempered brick — mainly used for lining the furnace and chimney channels, most often fireclay bricks are used.
- Ceramic brick — used for laying the external walls of the furnace, as well as elements that are not exposed to heating.
- High-fat clay and fine sand — these are components for preparing mortar for masonry. You can buy ready-made fire-resistant mixture in construction stores.
- Doors, latches, grilles, hinges for them — metal elements are sold in specialized stores.
- Cooktop with removable rings - purchased or cast to order according to the required size.
Before starting work on the project scheme the amount of materials is carefully calculated, which will be needed. Due to the fact that the device requires uniform drying, it is better to carry out the laying in a short time (1-2 days) without interruption due to unforeseen circumstances, such as the purchase of missing materials.
Preparing the tools
Bricklaying does not require expensive tools,The following set is usually used:
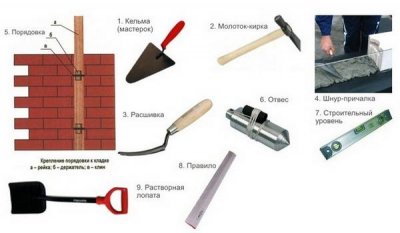
- shovel and container for preparing the solution;
- furnace hammer;
- a hammer-pick for splitting bricks;
- hacksaw blade;
- Bulgarian;
- trowel for applying mortar;
- rule for leveling the mixture;
- plumb lines, cords, building level.
To make the work effective, It is also recommended to prepare all tools in advance.
Selecting a location
The main feature of any brick oven is its large size And significant weight. Therefore, before construction, it is necessary to lay a separate foundation. It is best to place the stove in the center of the room to ensure uniform heat distribution. If this is not possible, the device is installed in such a way that there is space left to the nearest walls and partitions. not less than 30-40 cm.
Necessarily the location of the floors and the roof ridge is taken into account, which is an important point for the correct installation of the chimney. The place for the structure is prepared by covering the walls and ceiling non-flammable material.
To arrange the foundation, a pit is dug to a depth of not less than half a meter (depends on the density of the soil, the lower it is, the deeper the hole is made).
Drainage is placed at the bottom of the pit - first sand (about 15 cm), which is filled with water and compacted, then a layer of material of a larger fraction - broken brick or crushed stone will do.
A formwork made of boards or reinforcement is installed on the drainage, which is then filled with concrete mixture. The foundation is given a few days to dry, after which they are covered with waterproofing (roofing felt).
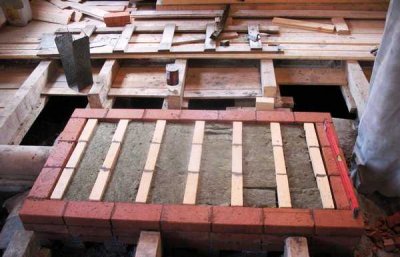
Masonry
Before starting work the brick is soaked for several hours - this ensures better adhesion to the solution and uniform drying of the entire structure.
Next, perform the following steps:
- They lay out the bottom of the oven — bricks are laid on the foundation waterproofing without mortar, the ordering scheme is carefully followed.
- They lay out rows of ovens - this part will not be exposed to heat, so ceramic brick is used.
- It is laid out under the furnace, the mouth, The firebox doors are installed.
- It is being installed hob.
- The bed is laid out over the furnace.
- The chimney is being installed, if necessary, a heating shield is laid out.
After all work is completed, the structure is left to dry. at least a month. After the first two weeks of drying, they begin to gradually stoke up. They start with a small amount of fuel, gradually increasing it to the full volume. In a month The oven is ready for use.
Possible complications
If you build it yourself and lack experience It's easy to make some mistakes:
- Use of poor quality materials - cheap bricks often have defects or crack when heated to high temperatures.
- If you don't soak the bricks before building, it will draw moisture from the solution, which will lead to uneven drying and deterioration of the strength and tightness of the masonry.
- The joints between the bricks are filled unevenly And not tight enough - this subsequently leads to a breach of the seal.
To avoid these and other mistakes before starting work It is better to seek advice from an experienced specialist.
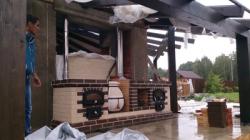
Photos of finished devices
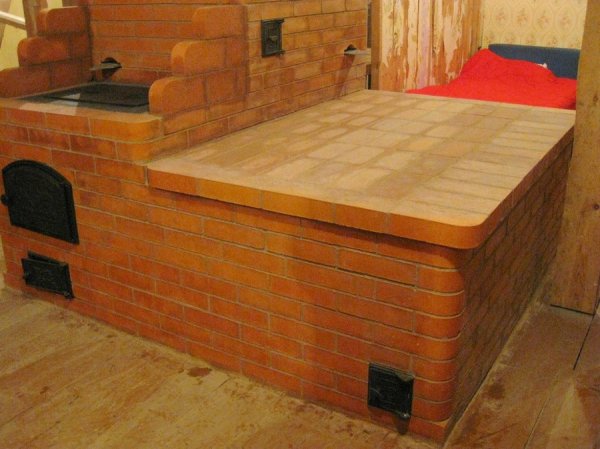
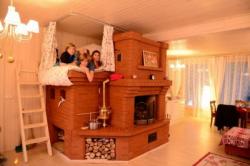
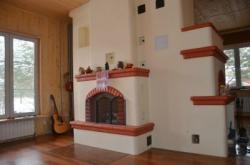
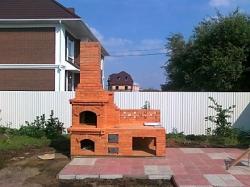
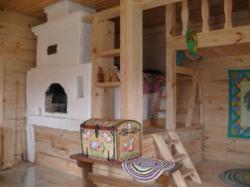
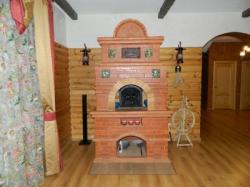
Photo 5. Russian brick stove with a stove. The stove bench is located on the side and is quite large.
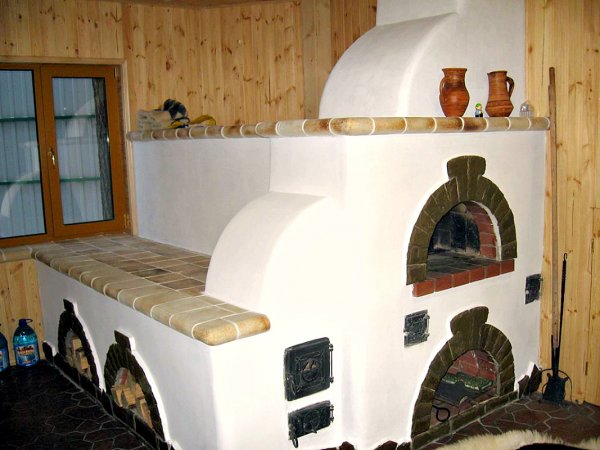
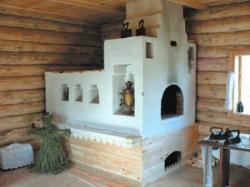
Photo 6. A stove with a bench and a place for cooking. The device is lined with plaster and decorative stone.
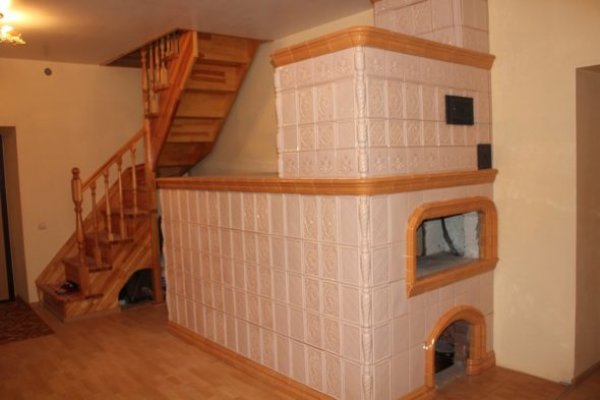
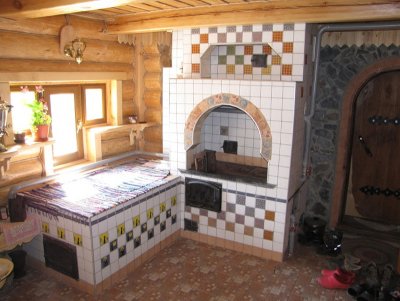
Photo 7. Russian stove with a stove bench. The stove is lined with decorative ceramic tiles, which decorate and protect the device from external influences.
Useful video
Watch the video, which demonstrates the process of designing a stove with a bench, and describes the order of the device.
Correct operation
For correct and safe use of the device, The following rules must be observed:
- Watch closely for the condition of the chimney, clean it from ash in time.
- Before each kindling check the quality of the traction - this will help prevent smoke from entering the room.
- If the oven has not been used for a long time, it is carried out careful inspection for damage and cracks.
- You can't light the stove in a state of alcoholic intoxication or in case of severe fatigue, it is not recommended to leave small children alone near a burning stove.
Precise construction and compliance with all operating rules will ensure high-quality operation of the stove, efficient heating of the house, and preparation of delicious traditional dishes.
Comments
- main central valve (close when ALL coals have burned out)
- direct flow plug (fireplace mode)
On the right we have a straight damper for the stove bench. The flue gases go through the channels, passing a circle, return back, rise along the vertical channel, get into the upper cap, and then go straight into the chimney. If there is a desire to turn the stove into a fireplace and admire the fire with the door open, then we simply open the straight damper. The chimney is made of ceramic sections and lined with brick (solid brick, ceramic concrete block, non-combustible insulation, ceramic pipes). Brown brick was used on the cornice (this design gives a certain capacity).