Heats both water and air! A sauna stove with a water tank is everything you need for a steam room
Sauna stove with water tank is a complex structure.
It comes to the rescue in cases where it is necessary to ensure the use of warm water, but there is no possibility to install a boiler to heat it, or its installation will require a lot of financial and labor costs.
Content
Existing types of sauna stoves
Currently there is a large number of varieties of furnaces with heat exchangers and water tanks.
Their diversity is due to the fact that there are factory-made ovens and homemade devices.
Among factory devices, there are two types:
- with built-in heat exchanger;
- with an external tank for heating water (usually installed on the chimney pipe).
In various designs of stoves with a heat exchanger there are water system connection optionsto provide hot water for the shower, or heating systemsso that she would work in the bathhouse all the time.
Reference. Homemade devices most often have installed on a flue pipe water heating tank.
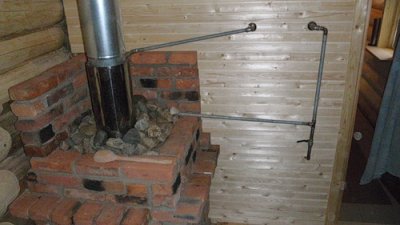
With a pipe water tank
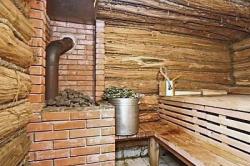
This design is the simplest version of the unit, since the installation of a water tank occurs directly on the chimney pipe, which requires virtually no additional labor costs.
Water heating is achieved by the hot walls of the water tank body.
General scheme such a stove looks like this:
- ash pit;
- firebox;
- smoke exhaust;
- a water tank installed on the chimney.
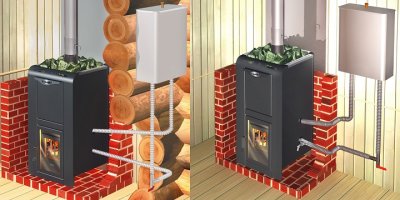
The main feature of this design is that there is no direct contact with the heat source in this stove - heating of water used as a heat carrier in devices of this kind is carried out from the walls of the tank itself, located on the chimney.
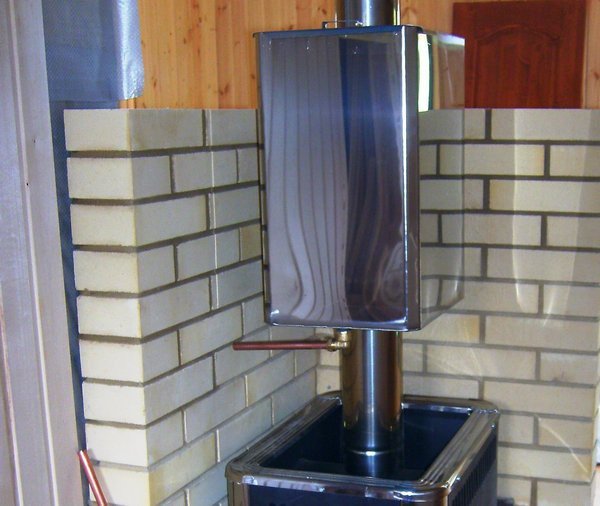
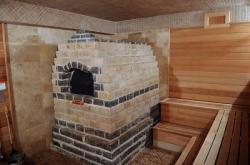
Photo 1. A sauna stove with a pipe water tank. The liquid is heated by the walls of the tank itself.
The dimensions of the structure may vary from 80 to 150 cm in height, and also from 30 to 60 cm in width depending on the total volume of the steam room, with the installed water tank the size of the structure can reach 200 cm in height (excluding the size of the chimney).
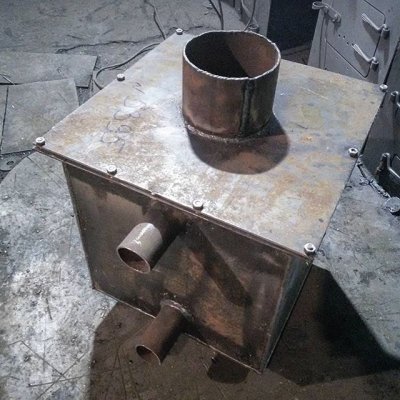
With a heat exchanger, how does it work?
A device with a heat exchanger is a more complex design in which the coolant (water) circulates through the system due to the temperature difference and the resulting difference in pressure.
The diagram looks like this:
- ash pit;
- firebox;
- chimney.
Important! In such a furnace, the heat exchanger is installed in the firebox body, but in a special way, to avoid its direct contact with an open flame.
The heat exchanger is connected to the water tank. using two fittings, which ensure water circulation and uniform heating of the coolant.
Since the heat exchanger is installed in the furnace itself, its height, as a rule, does not exceed 120-150 cm, the width fluctuates from 30 to 60 cmThe height of the flue is not included in the overall height of the structure.
Main stages of construction
If we are talking about the independent construction of a stove with a water tank and a heat exchanger located in a bathhouse, the general process of creating such a structure will look like this:
- selection of the most optimal project for construction;
- selection of the location of the device inside the bathhouse (including taking into account the possibility of installing the firebox outside the steam room);
- selection of appropriate tools and materials;
- construction of the foundation;
- construction and connection of a heat exchanger (if available);
- primary heating.
Project selection
This is the first stage., where the study of the available spatial and financial possibilities for the construction of one or another option is carried out.
Attention! The project selection is carried out, based on the parameters of the bathhouse, in which a specific unit will be located, as well as how much space is required for servicing the stove, including cleaning it and ensuring maximum safe operation.
In addition, the choice of one project or another is influenced by the fact that is it possible to place the firebox outside the steam room, to ensure maximum safety for those using the steam room.
Also, the choice of a specific project for the construction of a furnace is carried out based on the fact that is there a need to connect an additional heat exchanger or you can get by with a regular water tank located on the chimney.
Selecting a location
This stage is the second in the process of preparation to the direct construction of the bath stove.
The choice of the location where the structure is planned to be installed should be approached, based on the dimensions defined in the selected project.
In addition, the choice of location should be as optimal as possible if the selected project is planned to be connected heating systems or running water supply (additional space will be required to perform such an operation).
Tools and materials
For the construction of a sauna stove The following tools will be required:
- shovel;
- bucket;
- hammer;
- grinder with petal and cutting wheels;
- welding machine and electrodes (for mounting metal elements);
- level, ruler and magnetic square;
- personal protective equipment (glasses, welding mask, protective gloves).
Attention! When working with power tools, it is essential to use personal protective equipment.
The materials you will need are:
- cement, sand and crushed stone for pouring the foundation;
- fireclay and fireclay for the construction of the structure itself;
- metal pipe for chimney installation;
- fireproof sheet to separate the stove itself from the surrounding elements to prevent it from heating up;
- metal sheets for the production of a water tank, as well as for the creation of a heat exchanger;
- hoses with fittings for connecting the heat exchanger;
- If we are talking about building a furnace from metal, thick metal sheets will be required to create the body of the structure itself.
Construction of the foundation
The foundation for a sauna stove built with a tank and heat exchanger must be built taking into account the fairly large weight of the final structure.
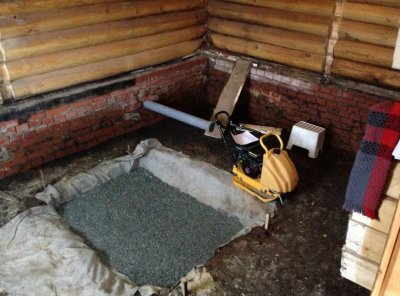
The foundation is constructed as follows:
- to the depths about 40 cm a pit is dug, the size of which should be ten centimeters larger on each side than the length of each side of the stove;
- a sand cushion is placed at the bottom of the pit about 15 cm;
- crushed stone is laid on top with the same layer height about 15 cm;
- cement mortar is poured on top (its consistency should resemble sour cream); pouring cement mortar It is better to carry out this in several stagesto ensure maximum drying of each layer.
After the foundation is completely dry, begin to build the stove structure itself.
Construction of a wood-burning stove with a water tank in a bathhouse
A sauna stove with a water tank can be built made of brick with a metal firebox and chimney or made entirely of metal.
If we are talking about a metal structure, then it is installed on a dry foundation with a brick base lining to provide additional stability to the structure.
The installation of the stove must be carried out in such a way that: to minimize the risk of injury to those persons who plan to use the stove in the steam roomFor this reason, it is necessary to either provide for the removal of the firebox and chimney pipe into the dressing room, or to fence the structure itself with fireproof sheets or to create a low wall separating the device from the steam room so that open access is only to the heater.
Myself construction process stoves with metal water tank looks like this:
- in accordance with the selected project rmark parts of the components on metal sheets future stove;
- using a grinder cut out all the necessary parts;

- in the blank of the front part of the pmake holes for the blower and the firebox itself;
- assemble the structure using magnetic squares, align with a level to ensure that all lines strictly correspond to the vertical and horizontal planes;
- make primary welds ("tacks") for securing the main directions of the structure;
- check the geometric correctness of the assembly;
- weld all seams in the final version;
- on the front side fasten the hinges for ashpit and firebox doors;
- hang the doors to the ash pit and firebox;
- insert the grate;
- weld the legs or a base for the structure, with the help of which it will be fixed to the foundation;
- install a stove in her place;
- secure the chimney pipe in a pre-prepared position;
- put a water tank on the chimney and connect it to the water system using hoses with fittings;
- fit at the tank inlet (on the feed hose) circulation pump to create pressure, which will allow water to move through the system for uniform heating;
- around the stove (in places where the body may come into contact with the walls of the bathhouse) install fireproof shields factory-made or homemade (for example, from sheets of metal and asbestos).
If we are talking about building a brick oven, then it will be built according to the selected scheme. with mandatory observance of the rules of orderly laying out, which will create the necessary draft in the unit and achieve the highest possible efficiency in this furnace. Particular attention in such a design should be paid to the installation of the flue gas duct, since the water tank is mounted on it.
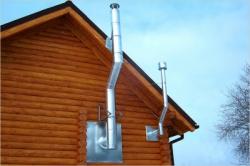
The chimney is installed on top of the brick structure. taking into account the connection of all the smoke channels. When constructing it, it should be taken into account that it is impossible to cement the pipe into a brick foundation, as this may make it impossible to service the stove during its operation.
Also the flue must not be installed in a free position, since as a result all combustion products will go out into the steam room or changing room and can cause severe poisoning from the substances released, while the pipe itself will not heat up, which will not allow the water tank to heat up.
Furnaces with heat exchanger for heating: how to connect pipes
If we are talking about a furnace in which water is heated by its constant presence as a heat carrier in a heat exchanger, then such a structure has its own manufacturing aspects.
These features are associated with the mechanism of water circulation in the system.
Creation of a metal furnace with a heat exchanger inside it looks like this:
- marking in accordance with the selected project all parts of the furnace on metal sheets (when marking the body parts, careful attention should be paid to preparing the heat exchanger tank for water, since this tank is installed inside the body and significantly narrows the size of the firebox);
- Primary assembly using magnetic squares to check the correctness of the markings;
- welding using tack welds for initial assembly and testing of the entire structure;
- if the drawings are executed correctly, it is carried out welding of main elements;
- in the front part of the future oven hinges are welded for the firebox door and the ash pit and these elements are fixed;
- inside the structure a heat exchanger tank is installed to check the correctness of its dimensions (when carrying out this operation, it should be taken into account that the heat exchanger tank should not come into contact with an open flame, which can only be ensured by creating a tank of a special “flat” design);
- installation of legs or base of the device, with the help of which the stove is fixed to the foundation;
- laying out the stove in a pre-prepared place and fixing it in the right place;
- chimney installation with the pipe being led out onto the roof of the bathhouse through pre-prepared holes;
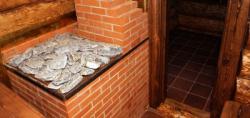
- installation of thermal insulation sheets and the formation of a brick partition to separate the stove from the general steam room.
If we are talking about a brick oven, then its construction is carried out in the same way as the construction of a unit with a water tank - according to the selected scheme. The main difference in the construction of such an oven using bricks will be the need to expand the combustion chamber for the correct installation of the heat exchanger tank and installation of this tank before the completion of the construction of the entire furnace.
Connection heat exchanger is carried out using metal pipes and fittings to the water system as follows:
- pipes from the heat exchanger are led out into the outside room;
- when taking pipes out of the steam room into the outside room, you should make a small “asbestos” corridor for them, which will allow the pipes to “move” when the temperature changes;
- The connection to the water system of the pipes coming from the heat exchanger must be carried out either using flexible hoses or using plastic pipes.
This connection mechanism is typical for both brick and metal devices.
Possible complications
When constructing furnaces with a water tank and heat exchanger certain difficulties may arise:
- lack of proper water movement in the system (can be corrected by installing a circulation pump);
- weak heating of water in the tank located on the chimney (can be corrected by installing a tank with walls thinner than they were before);
- insufficient heating of the heat exchanger due to a reduced volume of the firebox (can be corrected by using more energy-intensive fuel in the furnace).
Photos of finished projects
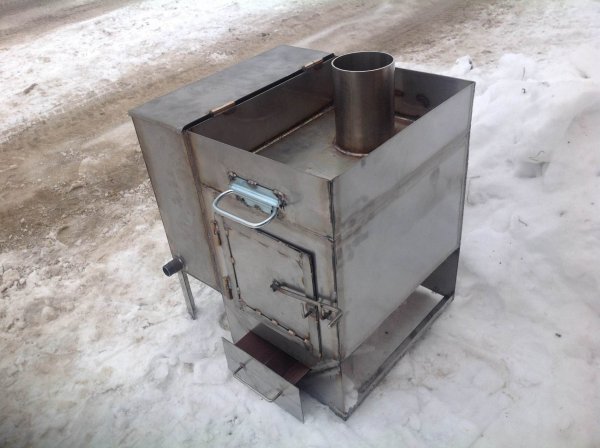
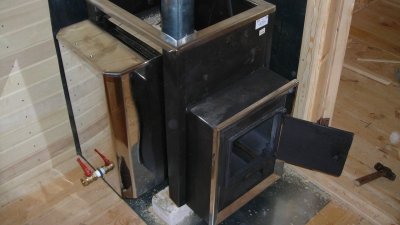
Photo 2. A homemade sauna stove with a water tank located on the side of the device.
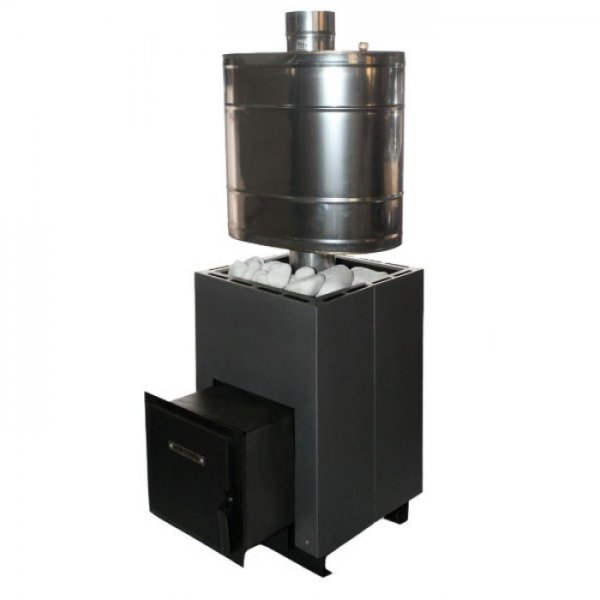
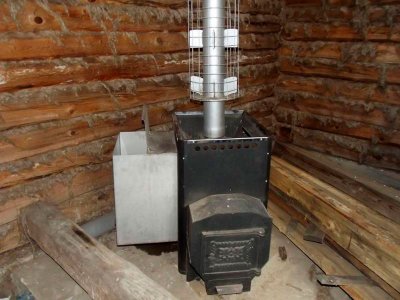
Photo 3. A sauna stove with a pipe water tank. Such devices can hold a relatively small amount of liquid.
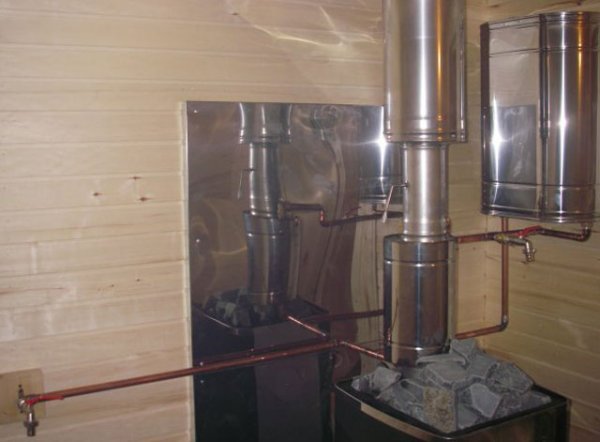
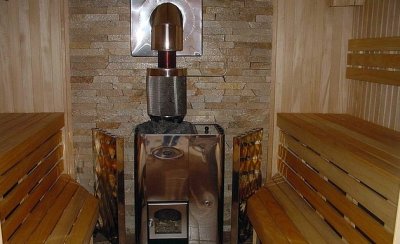
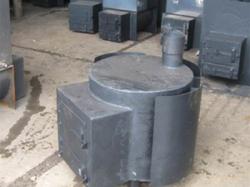
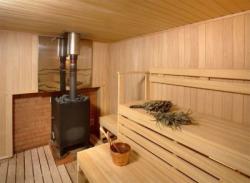
Photo 4. A sauna stove with a heat exchanger, which heats the water and performs the heating function.
Useful video
Watch the video, which demonstrates the process of making a metal sauna stove with a removable water tank.
In conclusion
Sauna stoves with installed water tanks and heat exchangers are quite dangerous devices, since the additional load in them is created by the installed water tanks. In order to make their operation as safe as possible, you should minimize the possibility of direct human contact with constantly heating elements structures by installing heat-insulating screens or brick partitions.
Comments
1. Here we have a tank with a heat exchanger built into the stove. Winter has come, frosts are under 25-30 degrees. The stove will have to be heated every day so that the tank does not burst. And if we drain it - all the water or a little will remain - what remains can burst the tank.
2. My water is hard. That is, there is a lot of scale in the kettle! Accordingly, there will be a couple of liters of scale in the stove in a couple of years.
3. Where do we pour the water? How? Into a wall-mounted tank with a neck somewhere under the ceiling? It's good in the summer - you stick the hose in and pour, but in the winter it will be difficult.
The conclusion from all this is that in a sauna that you heat once a week, it is best to place the tank either on the stove itself or put it on the pipe. It is easy to clean and easy to drain the water and fill it up without any problems.
I attached a hot water tank to the homemade stove made from a pipe, only leaned it on the side. And it turned out that the water is heated by a small contact of the tank with the stove and from the stones on the heater, as a result the water heats up when the bathhouse is completely warmed up, the water in the tank makes a little noise but does not boil.