The stove is the soul of any sauna! Installing the device yourself
The main element of any bathhouse is the stove. It is its operation that mainly determines how well and comfortably you can relax and steam.
Correct installation of a sauna stove – difficult task and to deal with it, you need to know all the nuances and features of installation.
Compliance with the rules for installing a stove in a bathhouse will allow catch up quickly And maintain an optimal temperature in the steam room, get high-quality steam.
In addition, the installation of the stove also affects safety in the bathhouse, so this process must be approached very responsibly. If you take into account the accepted rules for installing sauna stoves and the recommendations of specialists, then any home craftsman can cope with this task on his own.
Content
General rules for installing a sauna stove
First, they decide on location of the stove. Then you need to install the device in accordance with fire safety regulations. The installation nuances will depend on the type of stove, its size and the material from which the room is made.
General installation rules:
Creating a foundation. The base for any stove must be reliable, level and non-flammable; it is usually made of concrete or brick.
Before installing the structure on the floor, it must be covered with a sheet of asbestos of thickness 12 mm or use a sheet of metal thicker than 1 mm. The sheet should cover the dimensions of the stove no less than 3 cm, and more from the firebox side 50 cm.
Location. The structure is placed so that the firebox door is directed towards the entrance. The distance from the firebox door to the wooden opposite wall is not less than 150 cm. The sides and back of the stove should be at a distance 50 cm from combustible surfaces. Combustible walls are protected by a screen, the size of which is 30% more oven.
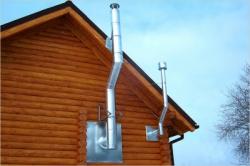
Installing the pipe. It can be made of either brick or metal. In any case, it is insulated from the roof. To prevent condensation from forming in the metal pipe, it is insulated from the outside.
Ceiling. Above the stove it should be made of non-combustible materials, the size of which is larger than the area of the stove by 30%.
Safety. If there is an electric heating element, grounding must be done and an RCD must be installed.
Protection against burns. For this purpose, a convection screen is made from brick or metal. It not only protects against burns, but also promotes uniform heat distribution. A wooden fence can be made no closer than 50 cm from hot surfaces.
Attention! The installation of the stove in the bathhouse must be carried out in accordance with fire safety requirements, this is especially true for wooden buildings.
The process of correctly installing a stove in a bathhouse with your own hands
You can buy a ready-made sauna stove, but you need to carefully study it instructions for its installation and strictly follow it. If you build a sauna stove yourself, you must adhere to the rules for performing the work so that the structure is safe and effective.
It is best to plan a place for the stove at the stage of construction of the premises, taking into account its dimensions. It is possible to make adjustments in an already built bathhouse, but it is longer and more difficult.
What tools will come in handy?
So that you can get the job done, you need to have the following tools:
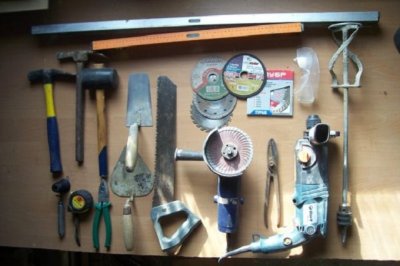
- Bulgarian;
- welding machine;
- electrodes;
- measuring instruments;
- building level;
- bucket;
- spatula and trowel;
- protective mask, special clothing, gloves.
All tools prepared in advance, this will not only simplify, but also speed up the installation process. To create and install a stove in a bathhouse, it is better to use new metal rather than used metal. It will be easier if you choose square or rectangular structures.
Selecting a location
The location for the stove in the bathhouse is chosen during its design. If an existing room is being converted into a bathhouse, the position of the stove must be determined correctly.
The metal stove should not be located closer than 1.5 m to flammable structures. To protect them, special screens are installed.
It is especially important to carefully select the location of the stove in a wooden building. In order to conveniently add firewood and remove ashes, there should be a space in front of the firebox door. 1.2-1.5 meters of free space.
Important! When designing a stove, the optimal placement option would be one where both sides are heated at the same time. steam room, dressing room And recreation room.
Usually the option is chosen when the stove with a heater is located in the steam room, and her the firebox is in the rest room. This allows you to heat both rooms, the heating process is carried out outside the steam room, so smoke will not get there. This option is suitable for both brick and metal structures.
An electric stove is installed in the steam room, and in the rest room and dressing room, a heater is used for heating. warm floor.
Preparing the site
The preparation process consists of creating a base for the stove. If possible, it is better to do high-quality and reliable concrete foundation:
- next to the changing room they make a hole that is larger than the stove 10-15 cm;
- the bottom is tamped and covered with sand, and then with crushed stone;
- lay a layer of film, which serves as waterproofing;
- lay a frame made of reinforcement or mesh;
- pouring concrete.
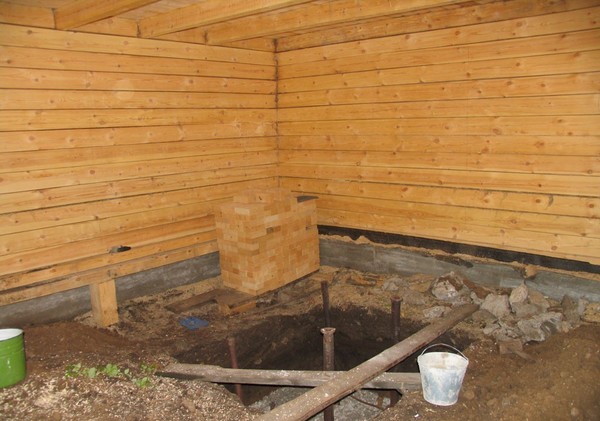
Photo 1. The process of creating a foundation for a sauna stove: a hole has been dug for the device, piles have been installed that will serve as a support for the stove.
The foundation needs to strengthen, so further work is carried out in 3-4 daysRoofing felt is used as a heat-insulating material.
Reference. The foundation is made either flush with the floor or on 10 cm above it, which improves the aesthetic appearance of the stove.
If the stove is metal, then the foundation can be omitted, and a base of non-combustible material is created at the place of its installation. If the floor is covered with tiles, then it does not require additional arrangement. A sheet of metal is placed on the wooden surface, its size 2 times the area of the stove. Ceramic tiles or asbestos cement boards are laid on top. The foundation can be made of firebricks, which are laid on clay.
How to install a brick oven correctly
Once the location for the stove has been selected and the foundation has been prepared and has gained sufficient strength, you can proceed to installation:
Preparation of masonry mortar. It must be made of clay.
Experienced craftsmen know the necessary proportions, and if you are a beginner stove maker, it is better to buy a ready-made dry mixture. The brick used for laying must withstand high temperatures.
Masonry. According to the developed or selected stove project, they begin to lay it. They observe the location of the smoke shafts, and they must control the installation process using a level and plumb line. Different stove models have their own differences, but they all have a ash pit, a firebox, a heater, and a chimney.
Fire safety. Since the walls of the stove are thick, they do not heat up very much, but in order not to cause a fire, the area in front of the firebox is protected with a metal sheet.
Chimney. When creating a chimney, the pipe must be well insulated.
Finishing. After laying the stove, its walls are treated with sandpaper, after which ceramic tiles can be laid.
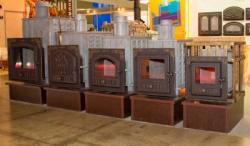
How to install a metal stove
Keep in mind that a metal stove has a much higher fire hazard class than a brick one. You can buy a ready-made stove or make one yourself, there are many different designs for this. The installation process consists of the following stages:
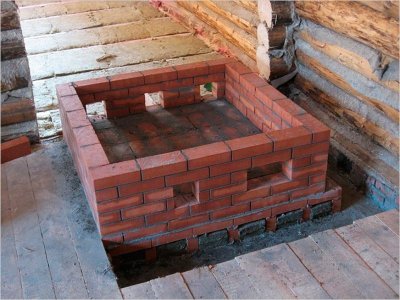
- Surface preparation. Since the weight of the device is small, a base made of brickwork of a height of 10-20 cm or a metal sheet covered with asbestos board.
- Wall protection. The metal surface heats up a lot, so the walls located nearby need to be protected. For this purpose, brickwork and porcelain stoneware are used, which are covered with heat-insulating material. Heat-reflecting screens are necessarily installed.
- Installation of the stove. It is carried out on a prepared base, the heater is filled with stones.
- Safety. The floor around the firebox is covered with a sheet of metal, which is laid on heat-insulating material.
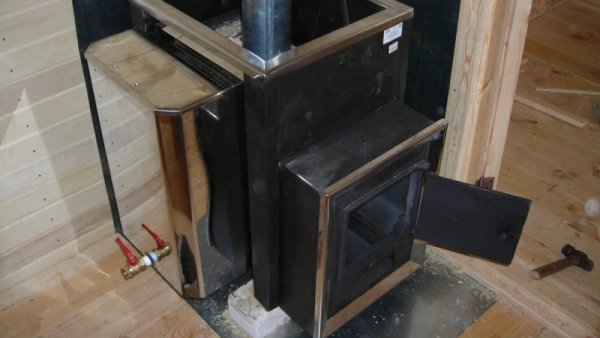
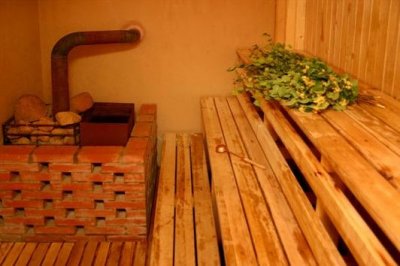
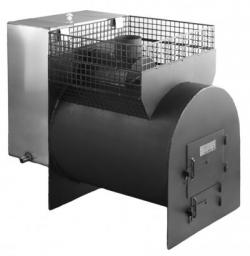
Photo 2. The process of installing a metal stove in a bathhouse. For fire safety purposes, the area around the device is covered with metal sheets.
- Installation of a chimney. There are also requirements here: the pipe must protrude above the roof no less than 50 cm, from the skate - 1.5 m, not lower than the height of the gable roof. The part that is indoors is made of metal with a thickness 5 mm, and the one that goes through the attic and outside is thermally insulated. The places where the chimney meets the wooden ceiling and roof are also reliably thermally insulated.
Attention! When choosing a metal stove for a bathhouse, you need to pay attention to its power, which must correspond to the area of the room.
Possible difficulties and errors
The installation of the stove is done independently only after studying the technology and recommendations of specialists, otherwise you can do something serious errors:
- Creating a weak foundation for a brick structure. Therefore, it begins to sag, the masonry cracks and smoke enters the room.
- Using thin metal When creating a firebox yourself, it leads to its rapid burnout.
- Incorrect calculation of furnace power leads to the fact that it does not heat the room well or overheats it. Both of these things do not allow you to comfortably steam yourself and relax.
- Failure to comply with fire safety regulations may cause a fire.
- If the bathhouse is located next to other buildings, then A spark arrestor must be installed on the chimney.
Before starting work, study the existing technologies and recommendations, then soberly assess your strengths and decide whether you can install the stove in the bathhouse yourself.
Photos of installed stoves: iron and brick
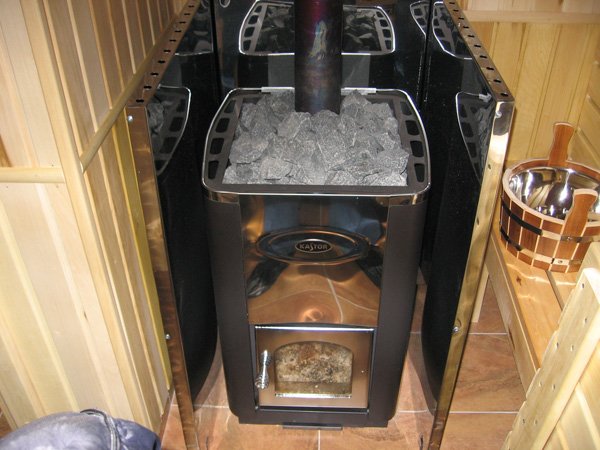
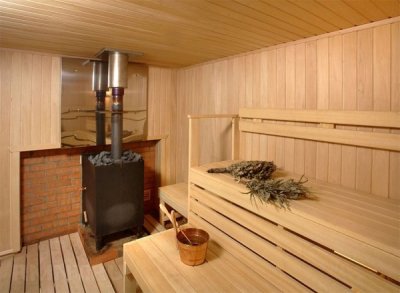
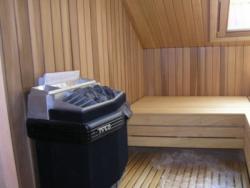
Photo 3. The finished installed iron bath stove. The stove is enclosed with metal sheets to prevent the surrounding wooden surfaces from catching fire.
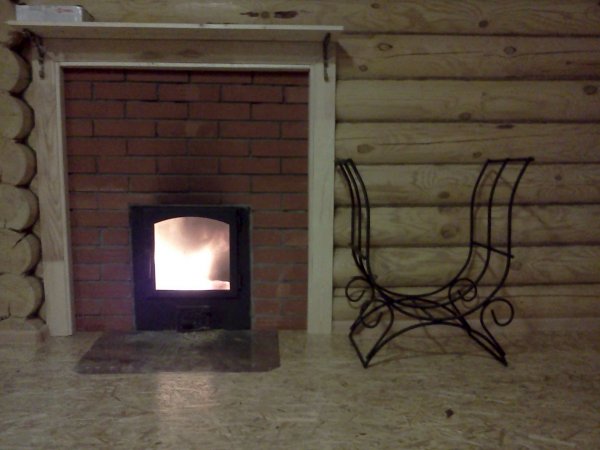
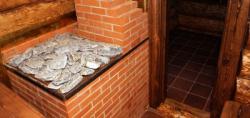
Photo 4. Bath stove with a remote firebox. One part of the device is located in the dressing room, the other - in the steam room.
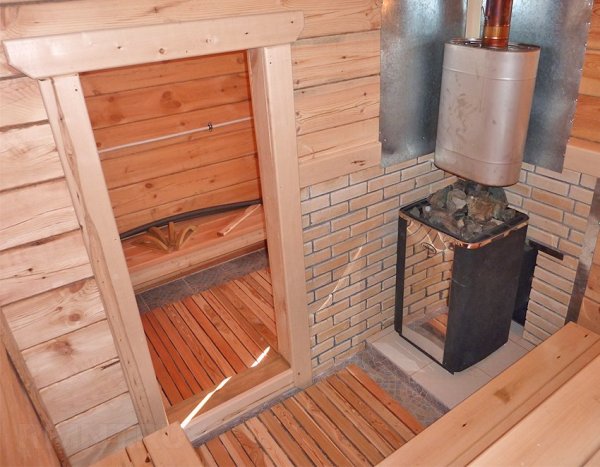
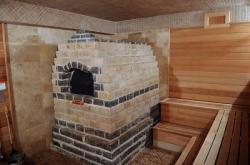
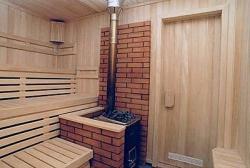
Photo 5. The stove installed in the bathhouse. The device is located on a special platform made of ceramic tiles, the walls around the stove are lined with brick.
Useful video
Watch an interesting video that demonstrates the process of correct installation of a bath stove from the Ermak company.
Summing up
Installation of a stove in a bathhouse is a responsible task and how correctly you do it depends not only on the comfort of staying in this room, but also on safety. Installation of this equipment requires precise implementation of developed technologies And fire safety rules.
It is better to put basalt on the ceiling, and stainless steel on top of it.