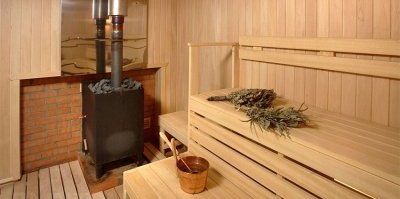
Takes up very little space and heats perfectly! Do-it-yourself mini-oven for a bathhouse
The oven is the main thing in the bath. At low temperatures the required volume of water will not heat up, there will be nothing to steam with. After bathing the room will not dry properly.
Because of this, the wood will rot and mold will appear. It will become impossible to visit the bathhouse. A wood-burning mini-stove can heat rooms with dimensions from 25 to 50 sq. m.
Content
The advantages of using small ovens, their sizes
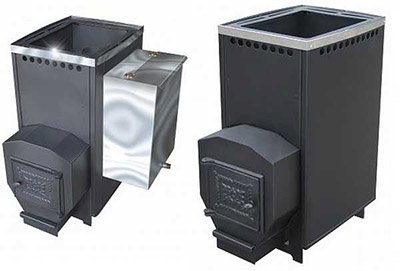
- The oven fits even in a small area—width ~50 cm, depth ~80, height ~100 cm.
- The heat released by the burning wood warms the sauna from the walls to the center. This way, less fuel is consumed and the temperature is maintained longer.
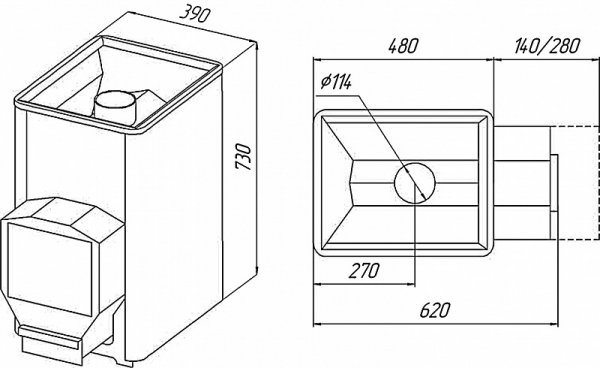
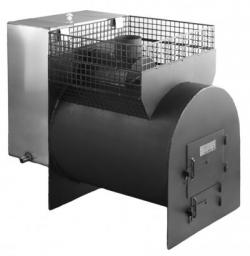
Photo 1. Drawing of a metal mini-oven for a bathhouse with the dimensions of the device indicated.
Comparison of metal and brick structure
| Properties | Metal | Brick |
| Heat capacity | Cools down quickly. | Keeps warm for a long time. |
| Warm-up | Uneven. Takes an hour if the area 25 sq. mThere is not enough power for more. | Evenly. Takes 3-5 hours. The power is sufficient for heating. 50 sq. m. |
| Weight | 40-50 kg, does not require foundation reinforcement. | 100-150 kg, the foundation without reinforcement will not withstand such a load. |
| Fire hazard | There is a risk of fire. | Safe. |
A brick oven is a common choice. The structure is more difficult to build, but she has more advantages, the main one of which is safety.
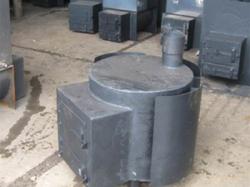
Making a mini wood-burning stove for a bathhouse with your own hands
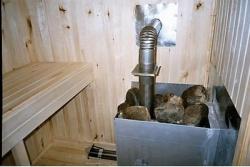
- Bottom of the stove: Here, above the ash pit, there is a firebox. Doors are built into both sections.
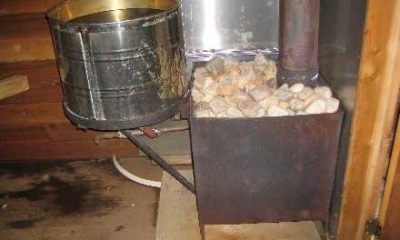
- Middle: the beginning of the heater, where the smoke circulation is located. It is half filled with stones. To increase the heat capacity, they are mixed with metal. The total volume of the middle part is over 100 liters.
- Top: chimney.
- There is a water tank on the side. It is located separately, so the oven is compact: height - 102 cm, width - 63 cm. The volume of the tank depends on the number of people: for one - 9 liters hot water.
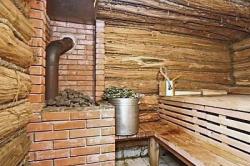
Warm air in the stove goes up, gets into the smoke circulation, and goes down. Then, rising again, the streams heat the water in the pipe connected to the tank.
So the structure is heated evenlyThe cooled air is discharged through the chimney.
The stones, placed on a cast iron tray, are heated by the fire.
Important! Install tank at such a height that hot water flows into the taps of the bath tubs and shower by itself.
Steel pipe at the bottom The stove produces additional steam, which, passing over the floor, affects the coldest layers of air.
Selection of materials
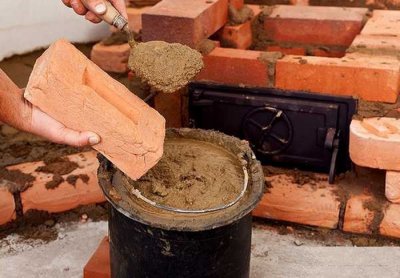
If your budget is limited, red clay bricks are a good choice. Their standard size is 12.5×25×6.5 cm, but manufacturers sometimes neglect this. Because of this, the seams of a square, three bricks on a side, may not converge up to 10 mm. This is unacceptable for a sauna stove. To fix this, the middle element in the square is shortened in length.
If funds allow, use fireclay to build the stove. brick Ш-5: it is fireproof and can withstand direct exposure to fire, does not lose strength when heated up to 1600 degrees.
When choosing a material, please consider: the brick for laying the stove must be well-burned. The surface must be smooth, without chips or cracks.
Reference. The quality of the material is easy to determine; a well-fired brick does not crumble when struck, and splits into several large pieces.
The mortar for laying the stove is a mixture of clay and sand in a ratio of 1:5. Sand choose quartz: river or quarry.
The second grains are oblong grains. They lie close to each other, making the solution thick and, when hardened, strong. Clay Career is also taken.
It is easy to check the quality of clay. Place a small piece (300 g) in water for 24 hours, then roll into a ball and leave to dry. In two days throw it on a hard surface.
If it breaks into large pieces, the material is suitable for mortar. Make sure that there are no cracks in the dried clay or their depth did not exceed 2 mm.
Materials and tools for laying the stove:
- bricks and mortar;
- building level;
- plumb line;
- builder's square;
- styling spatula;
- small pickaxe;
- galvanized wire;
- Bulgarian;
- fittings: tank; hinges; grilles; dampers.

Foundation
A brick oven needs its own solid foundation slab, not connected to the elements of the rest of the bathhouse.
Attention! Calculate the perimeter of the oven before laying.
Procedure:
- Remove vegetation from the foundation site.
- Dig a square hole with a depth of 40 cm.
- Install wooden formwork and reinforcement (suitable D-10 mm)
- Cover the bottom with a layer of crushed stone 10 cm.
- Cover the crushed stone with sand - 10-20 cm. Compact and level the surface. Check with a building level.
- Fill the prepared area with concrete solution so that its border is below the floor of the bathhouse. by 8 cm.
- In two weeks, when the concrete dries, you can remove the formwork and start working.
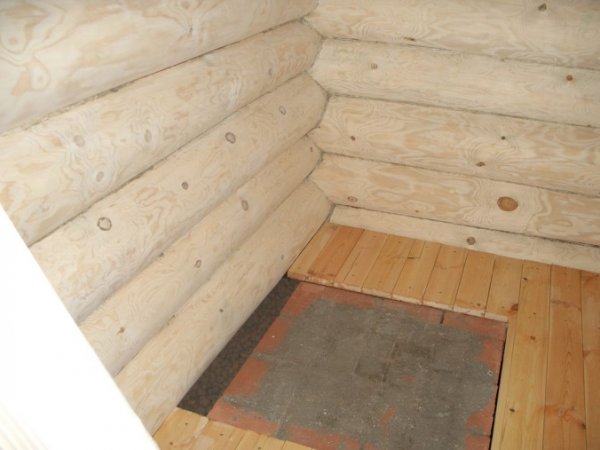
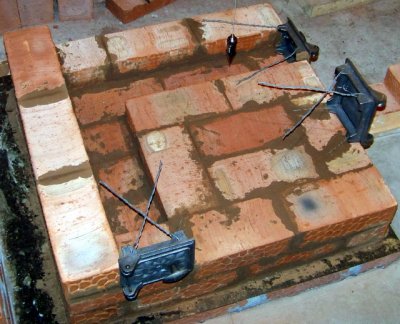
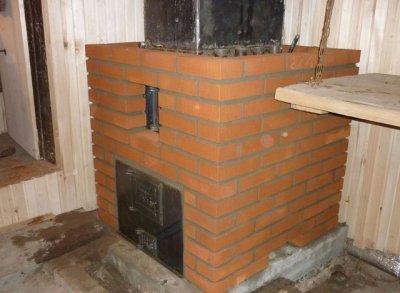
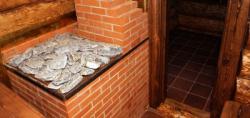
Photo 2. The finished foundation for installing a mini-oven in a bathhouse, additionally reinforced with brickwork.
Preparation
Before you start, the foundation must be protected from moisture. For this, roofing felt is used, which is used to cover the base in two layers. It is cut into strips, with a margin of 5 centimeters along the edges. Each prepared section is laid with an overlap of 10 cm. The second layer is laid in a similar manner, but perpendicularly. There is no need to fix the material: the brick will firmly press it to the foundation.
Make a plan of the stove and draw a row diagram of the stove on squared paper (dimensions are taken into account at the stage of foundation creation).
Laying the stove
First, the stove's "pillow" is laid out - first two rows bricks should be a continuous layer. The main thing is the seams between the blocks. Width - 3 mm for fireclay bricks, 5 mm - for regular. Make sure the seams are tight: there should be no cracks or gaps. Next row laid only after the first one is finished. To avoid mistakes, "try on" the bricks without the mixture, and then lay them. Strictly adhere to the chosen dressing.
Accessories
Doors, flaps and other things are fastened from the third row of bricks. Wrap the door frames with asbestos cord, then the stove will not collapse when the iron expands.
The fittings are attached with galvanized wire. The ends are hidden in special recesses. Make them in the blocks in advance. On the sixth row the top of the door is fixed.
On the seventh — the firebox door and grate are built in. To prevent it from interfering with the laying, make recesses in the brick and install the grate in them. At this stage, the steel pipe from the water tank is laid. Wrap it with asbestos cord as well.
Smoke circulation and chimney
On the eighth row a partition is put in place. Here is the beginning of the flue gas duct. Extend the masonry to the end of the firebox, then lay the chimney.
Possible complications
Identical seams - a difficult task for a beginner. Solution: make guides from metal rods. Diameter - 3 or 5 mm. Before laying a row of stoves, place them on the edges of the brick and press the next block. Remove the rods. The remaining notches will disappear on their own after the row is completed.
If solution for styling does not "grab" bricks, wet them with water. This will ensure reliable coupling.
During construction errors invisible, but in the end you can see them all. Solution: Check each row of the stove horizontally and vertically with a building level.
At failure to comply with safety precautions When laying the stove, you can damage your hands. Put on gloves with rubber pads and wrap your knuckles with electrical tape.
Useful video
Watch the video, which demonstrates the process of making a metal mini-stove for a bathhouse.
Even though the stove is small, it heats wonderfully!
Building a brick oven for a bathhouse is a labor-intensive job, but it is worth it. Main - this is the choice of quality material and compliance with instructions.
Adviсe on using the oven:
- Suitable for the stove heater chopped and dry firewoodWet logs take energy to evaporate moisture, which means more fuel will be used.
- Light the wood in the stove only when when the chimney is fully open, and the ash pan is by 5 cm.
- Once a month Clean the stove and water tank from the inside.
- If the stove gets red hot when adding wood, stop adding logs and pull out the excess. Stove chimney open halfway.
- To heat water instantly, throw it into it hot stones. Use metal tongs.
With the help of these recommendations you can safely heat up the sauna.
Comments