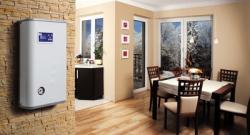
To keep the fire in the firebox from going out: building a brick chimney for a metal stove
The wood burning stove is working thanks to the principle of traction. Hot gases released during combustion rush up the chimney, giving off heat to the heat exchangers along the way.
To create a draft, a properly calculated chimney is needed. Ceramic bricks have long been used for this purpose, thanks to their properties baked clay.
When designing a heating system It is very important to check the compliance pipes and stoves - brick is not suitable for all systems.
Types of chimneys
To build, you need to decide with pipe typeDepending on the location, there are:
- Indigenous pipes. They have their own base - they rest directly on the foundation. They can be both inside and outside the house. Advantages - the ability to connect several heating devices, as well as construction "in reserve", with subsequent connection of heating equipment that has not yet been purchased. The option is perfect for metal furnaces of any type.
- Mounted pipes. They rest directly on the stove itself, which stands on the foundation.
It is better not to use a chimney attachment for metal stoves - too much weight leads to deformations.
- Suspended pipes. They rest on a special bracket attached to the wall or ceiling.
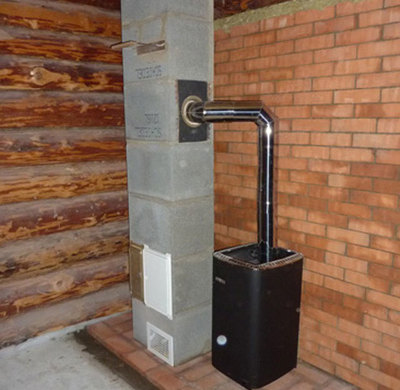
It is not possible to build such a chimney from bricks; it is better to use light metal pipes, heat-insulated and sewn into the casing. (sandwich chimneys).
- Wall pipes. If the outer wall or partition is made of brick, a smoke duct can be designed in it. This technique has been used in the construction of stone buildings since the time of the Roman Empire.
This saves material and does not steal free space, the pipe can be made several storeys without loss of strength. Cons - when soot ignites, the wall turns into a red-hot column, which leads to a fire, and with constant soaking from condensation, the pipe can collapse.
If the only material available for the iron stove chimney is brick, it is worth choosing the option of a root or wall pipe. It does not put pressure on the stove itself, it can be connected at various levels and is not difficult.
What is a brick chimney made of?
Brick chimneys come in various designs. But any chimney must have the following elements:
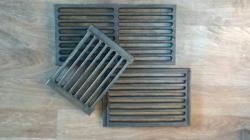
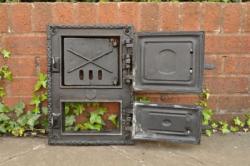
- Door or a knock-out brick for cleaning. Located at the bottom of the channel and in the turns of the flue, if there is one.
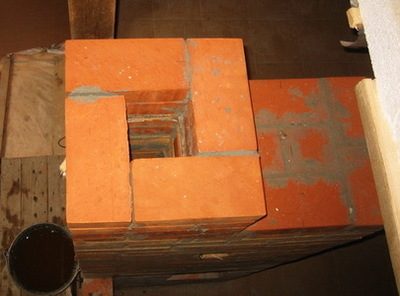
- Base with a damper or valve. The smoothest bricks without cracks are selected - the entire chimney will rest on them. If possible, the base should be wider than the pipe per brick and form a "heel" - a large support area.
- The pipe itself. Smooth, with smooth internal walls, seams without voids and cavities.
- Fire extinguisher when passing through ceilings - expansion of the pipe per 1 brick. It is needed to reduce the temperature of the edge in contact with the heat-insulating box.
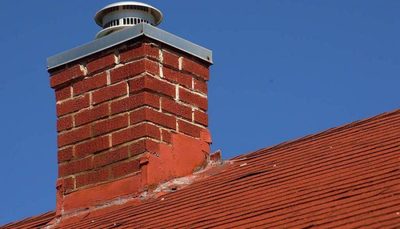
- Waterproofing "otter" — an optional element, expansion of the pipe when laying outside. It acts as a drip — raindrops do not flow along the root of the pipe, but flow down the walls of the thickening.
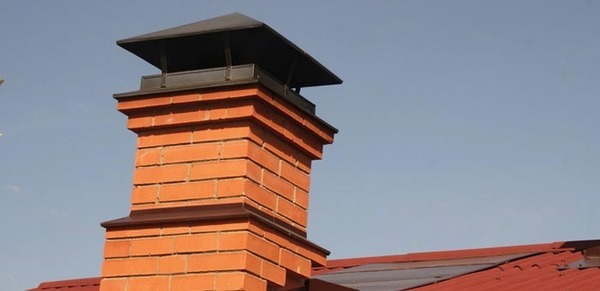
Photo 1. This is what a brick chimney looks like with a waterproofing "otter" and above it - a metal "umbrella" for protection from moisture.
- Upper protection against rain and snow. This could be a metal or concrete “umbrella”, or finishing the top row of bricks with a waterproofing fibre cement mortar.
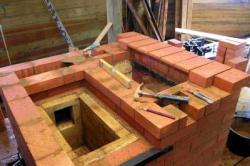
Building a chimney for a metal stove with your own hands
Its construction requires skills. mason. In the old days, the most experienced stove-maker was always invited to build a chimney. A person confident in his abilities will cope with this task if he stocks up on patience and lays each brick carefully.
The construction of a chimney consists of a number of important stages - design, preparation of the foundation, purchase of materials, pipe laying, finishing.
Attention! Neglecting technological nuances will lead to serious consequences! Poor draft will cause smoking inside the premises, carbon monoxide poisoning.
Poor quality materials or failure to comply with masonry technology leads to the destruction of the chimney.

Selecting a project
To avoid making a mistake, take into account the following factors:
- Boiler type and fuel combustion mode. The main enemy of brick stove pipes is condensate. It is formed when the gases coming out of the boiler cool below a certain level. In pyrolysis boilers and long-burning furnaces of the type "Stropuva" or "Buleryan" the temperature of the outgoing gases is low, condensation settles on the walls of the chimney, and the brick gradually gets wet and deteriorates.
-
Fuel type. Wet firewood, even when burning "hot" and quickly, releases a lot of moisture. It evaporates and penetrates the pores of the brick.
The condensate contains sulfuric acid, which has a detrimental effect on the masonry. You need to heat with well-dried firewood with moisture no more than 15%.
-
Brick sizes. The internal diameter depends on this. The smallest pipe, the quadrangle, is formed from four bricks and has a wall width of half a brick - 125 mm, six - 250 mm.
The more powerful the firebox, the wider the smoke outlet pipe should be.
- The shape of the chimney pipe. The thrust is assisted not only by the law of hydrodynamic pressure, but also by force Coriolis. Hot gases swirl in a vortex. A round chimney will be much more effective than an elongated narrow one.
- Brick material. Only special solid stove bricks should be used. Hollow ones are not suitable - over time, stress will accumulate near the voids, and the brick will crumble.
- Possibility of building a foundation. Each brick weighs approximately 3—4.5 kg. The entire chimney has a fair amount of weight, so it must rest on a strong foundation.
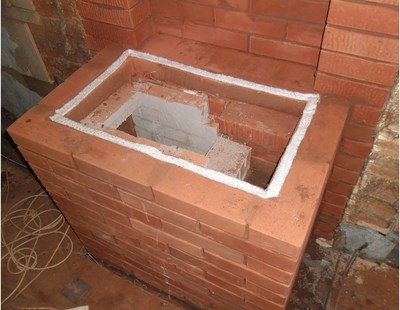
- Passages through ceilings. Fire and building regulations provide a number of rules that must be followed. Thermally insulated box and "flashing" made of brick for wooden floors, factory castings of openings for the chimney for reinforced concrete.
Attention! Failure to comply with these rules may result in a fire or collapse of the ceiling, which leads to financial losses and human casualties.
- Building height. To prevent the passing wind from overturning the draft, the pipe must be at a certain level relative to the ridge. For a building more 5-6 m. It is necessary to build chimneys with thickened walls to increase the load-bearing strength of the pipe.
Materials
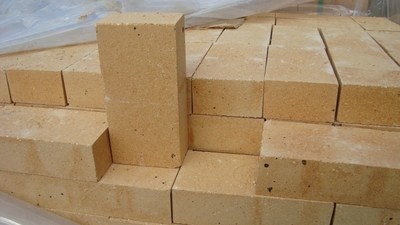
The chimney must withstand significant thermal loads and expansion. Ceramic bricks obtained by the method hyperpressing, silicate and hollow are not suitable for building a chimney.
The choice should be made either on an inexpensive but durable one ceramic plastic molding brick grade M250, or special ceramic chimney blocks. The option with solid ceramic brick is cheaper and better. When choosing it, you should pay attention to the presence foreign inclusions and cracks - this is a reason for rejection.
Mason's tools
Chimneys are built using simple hand tools.
- To process the brick you will need: hammer mason and angle grinder, grinder, diamond discs on stone for cutting and grinding bricks.
- To work with the solution - mixer with a whisk or a concrete mixer, as well as several trowels. Trowels differ in size and shape - a long and narrow one for spreading mortar, a small square one for cleaning corners and difficult places.
- Measuring instruments. Water level, plumb line and construction cord. There is a specific device for laying a chimney - sample. This is a wooden beam of the same size as the chimney with a crossbar. When laying, it helps to get the seams flush with the brick.
- Personal protective equipment - glasses, respirator, gloves and cotton mittens.
Procedure

The chimney is built in the following steps:
-
Construction of the foundation. The heavier the chimney is planned, the more reliable the support must be. The bottom of the slab or pile is below the level of soil freezing and rests on solid continental soil.
If the foundation tilts or settles, the pipe will also settle, and this is fraught with danger. fire or loss of draft, or even destruction. The foundation must be waterproofed from the pipe itself - the brick perfectly “pulls” moisture from the soil, gets wet and collapses.
- We define place, lay out the first row. We definitely need to design a cleaning door - it will be needed to remove soot.
Attention! The chimney should not rest against the wooden elements of the house - this will lead to fire or collapse of ceilings.
- "We drive" the masonry of the pipe body to the level of the proposed connection. We leave space for inserting the pipe, cover the hole with reinforcement diameter 6 mm.
- After connecting, we use it template or put "under the mitten" - we rub the seams with a wet mitten to get an ideal masonry with seams flush with the brick.
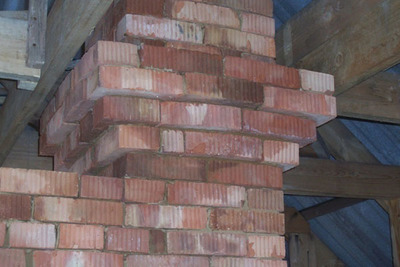
- We start the "fluff" three rows before the ceiling — using cutting and bandaging, we release it outward first by half a brick, and then by a brick. After passing the floors, we lay the masonry as before.
- After passing the roof slope we expand the clutch - we form an "otter"It is not needed if the pipe will be insulated and covered from the outside, for example, with metal.
- We fasten it at the end "umbrella" or deflector. It will prevent atmospheric moisture from getting inside the pipe.
Difficulties during construction
When building, a novice mason may encounter several problems:
- The solution constantly falls inside pipes. To avoid this, you need to carefully apply the solution in a measured dose. If you can't achieve this, plug the pipe with a large rag, which you constantly "lift". It will not allow the solution to remain in the chimney.
- "Falling Over" pipes. You shouldn't put them more than 10 rows in one day — the building can't withstand the load and sags. That's why we put in 3-5 doses, constantly monitoring the level.
- "Crooked" brick. Plastic molded bricks sometimes have insufficient dimensions up to 0.5 cm. Therefore, it is worth monitoring the horizontal level and the level inside the chimney. Protruding "teeth" and edges can lead to "ghosts" - air humming at high draft.
Useful video
Check out the video that shows the process of building a brick chimney.
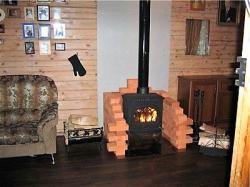
Finishing and design solutions
Children will always draw a pipe on the house. The appearance becomes “warmer” and more comfortable, the house looks lived in and neat. A crooked or collapsed chimney indicates a bad owner, so when laying a chimney, you should also think about the design.
The brick chimney for the stove is already a finished art object. Using artistic masonry techniques and contrasting facade paints, even cheap bricks can be turned into a real masterpiece. However, if such masonry does not fit into the overall design, it is worth thinking about finishing.
- Plaster. Clay bricks are perfectly plastered with weather-resistant cement plasters. The seams during laying should be expanded - this way the mortar will better adhere to the pipe.
The surface is primed and applied first, adhesive layer, corner beacons are installed. Then the main layer is pulled together with a rule and rubbed. The result is a smooth surface for processing with facade paints.
- Insulation hard basalt wool and device ventilated facadeThe ventilated facade material can be any, the main thing is that it is non-flammable. Plastic or wood are not suitable - even a random spark can cause a fire.
- Device umbrella and weather vane. The chimney is the highest point in the house. A lightweight weathervane will not harm a solid brick foundation, but can significantly improve the appearance of the entire house.