Made with soul! How to build a brick tandoor with your own hands?
Tandoor – convenient cooking deviceInitially, tandoors were made of earth, and a little later – above ground.
In both cases they were built from clay. New technologies make it possible to create portable “jugs” from fireclay mass.
Content
Materials for making a stove
For a brick tandoor Several types of material will do:
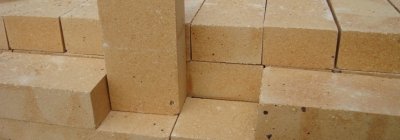
- white firebrick;
- ceramic clay brick;
- stone blocks.
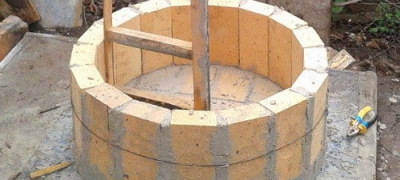
How to make a square tandoor from bricks with your own hands
This type of stove is quite easy to build, as it does not require any special skills. The vertical design reaches 1-1.5 meters in height.
Reference. With the right skills, the device can be laid out even without a template in half an hour or an hour.
Selecting a project
In this case, it is not necessary to look for a detailed construction scheme. The main thing is to choose the right one size designs, for example, 2.5 by 2.5 bricks. If you are planning to make a large-sized oven, the technology for its creation will not change.
List of tools and materials
For construction square tandoor you will need:
- brick;
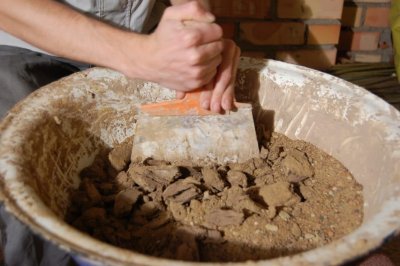
- mortar;
- spatulas;
- grate;
- clay;
- sand, crushed stone, cement, reinforcement and a form (pit) for the foundation.
Foundation arrangement
Select the dimensions of the stove, fill the base plate with the desired shape. To do this Dig a hole of suitable dimensions: the foundation should be slightly larger than the base of the structure. Place ten centimeters of sand on the bottom, pour concrete on top. Place reinforcement in the middle of the base for fastening.
Important! Remember that brick buildings heavyweight, so the foundation must support the entire structure.
Laying out the foundation
After the concrete has set, you can begin laying the bottom row. Bricks are laid on the concrete, a square base is built. If the size of the structure is selected 2.5x2.5 brickah, they put the bottom layer in a spiral inward.
Bricks of the next row cover the joints of the lower level. This principle is followed when laying out each new row.
Second level completely covers the first one.
Laying walls
When building stoves, the opening of the firebox door is usually taken into account. In a square tandoor, instead of a door only a small hole remains, that's why you need to lay bricks there too.
On the third level The walls are laid out with bricks, leaving the interior empty. The grate is installed on the same layer.
In the center of one of the walls of the third level, a space is left for blowing the size of half a brick.
Fourth level repeats the previous one, raise the hole for blowing. The next row closes the blowing.
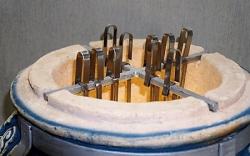
All subsequent rows should taper, creating a semblance of a chimney. When the size 2.5x2.5 bricks enough to raise the chimney five rows. The narrowest row reaches the size 20x20 centimeters. After it, a row or two should be wider than the previous ones. This is where the device for holding the skewers is installed. In this version, the skewers with meat will be located vertically.
After completion of the work clean the inner walls from the cement solution.
Insulation and external finishing
From the outside of the wall you can plaster or cover with clay mortar.
If you cover the tandoor with clay, you will need a few days to dry, before the device can be used.
In the square tandoor scheme, the chimney is open. In order for the heat to be better retained inside, it is necessary to create heat-resistant steel lid.
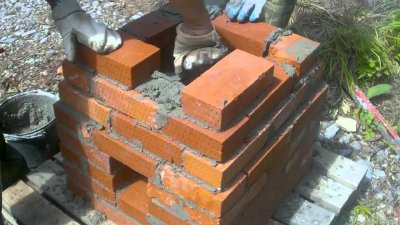
How to build a horizontal brick tandoor
The horizontal tandoor requires more costs for purchasing materials: During construction, more bricks are used, and, accordingly, more mortar, the foundation must also be larger in area.
But a horizontal tandoor is convenient to use and retains heat better.
The difference between the device and a standard oven - no top opening. Smoke comes out through the side opening. This structure is usually made of clay mixed with wool or straw, but the unit can also be built from brick.
List of tools and materials
Making a horizontal tandoor somewhat more complicated than the vertical one. Externally, the device is very similar to a regular stove and differs mainly in the chimney. Due to the complex structure here you will need a little more materials:
- a template made of boards or a circle;
- metal door;
- grate;
- clay;
- bricks, including wedge-shaped ones;
- solution and spatulas.
Template from boards
Template from boards you can build it yourself. It helps to build a tandoor, creates support for bricks, and allows you to neatly lay out the arch.
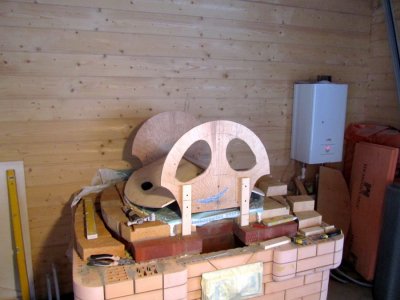
The template is two connected arches with the same width and height. The easiest way is to draw a circle of the required size, draw a horizontal diameter and lower it two straight lines from the intersection with the circle.
Project this figure onto plywood and cut it out. two identical parts.
Along the top edge connect with bars. The length of the slats is the same as the planned depth of the stove. The upper edge is covered with plywood, the sheet of which is bent along the contour of the arch to the bars.
Preparing the base
The base usually resembles a table. about a meter in height. It can be constructed from natural stone, brick or cinder block, will do steel construction with a metal tabletop. The main thing is to calculate that the foundation can support the entire brick tandoor.
Laying walls, arranging a blower channel, installing a grate
- A layer of bricks is laid on the base with clay mortar. The blowing channel is formed. The next row covers the channel, the hole in the center remains.
- A circle or wooden template is installed on bars of thickness three to five centimeters. They are aligned vertically and horizontally. Since the tandoor is laid out in the form of an arch, wedge-shaped bricks are best suited for such work.
- A row of bricks is laid out on either side of the template so that they fit tightly to the plywood arch. The bricks are shifted to bandage the seams and raised at the same angles to the right and left of the arch. Then only wedge-shaped or cut stones are used, closing the arch in the middle. A small hole should be left for the smoke to escape.
- The masonry is allowed to dry within five days.
- They knock the bars out from under the circleThey take out a wooden template and install a grate.
- The back of the tandoor completely filled with bricks. A flap is made on the front part. Doors can be installed.
- If the tandoor is built indoors, they take the chimney outside. If it is an external structure, a smoke exhaust is not needed.
Drying and initial firing
Before using the tandoor, Several steps need to be taken.
Wait until the mortar between the bricks is completely dry. This may take up to one week.
To dry, leave the device in a ventilated room. If the unit is outside, you can dry the stove in the sun. Then the process will take a little over a week.
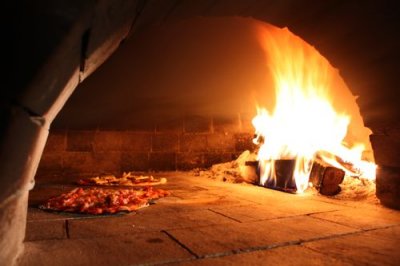
Next, you need to burn the device from the inside. To do this, make a fire from small chips and paper. The temperature of the tandoor should reach about 350 degrees.
After this, the flame is extinguished and the brick is allowed to cool. The fire is lit a second time and the oven is heated. up to 700 degrees, while the walls will become hot to the touch.
For the third time, the tandoor is heated to the standard operating temperature, up to 1500 degreesAfter this, you can start using the device.
Possible problems during manufacturing
When building a horizontal tandoor you need wedge-shaped bricks. If you don’t have this material at hand, regular bricks will do, but they will have to be cut to the desired shape.
Drying - an important process in building a tandoorIf it is not possible to expose the device to the sun or in a ventilated room, use incandescent lamps with ceramic sockets.
Attention! The clay solution is sensitive to temperature changes, so in winter the device using this material You need to light it gradually.
If cracks appear after drying or during use, this does not mean that the material is defective. They appear on almost any tandoor.
Photos of finished devices
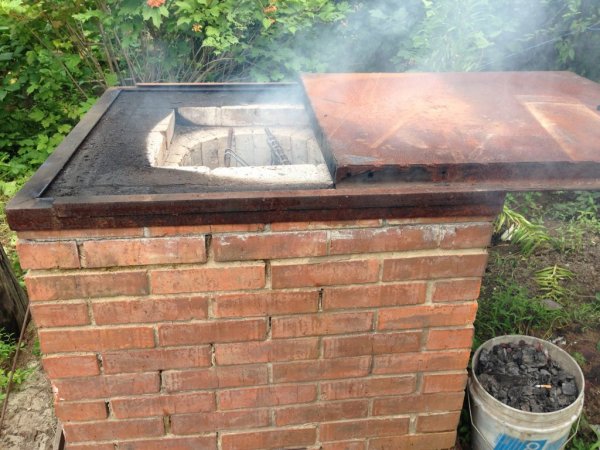
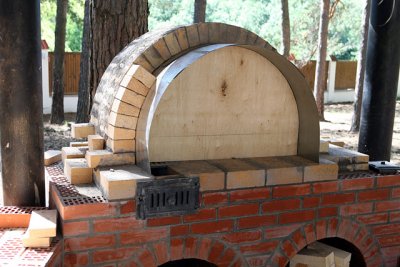
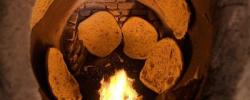
Photo 1. Homemade square tandoor oven made of brick. The device has a sliding lid.
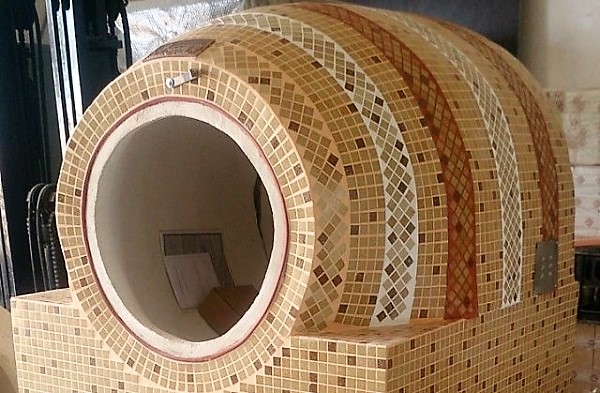
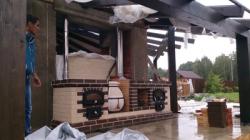
Photo 2. Horizontal type of tandoor. The device is lined with decorative ceramic tiles.
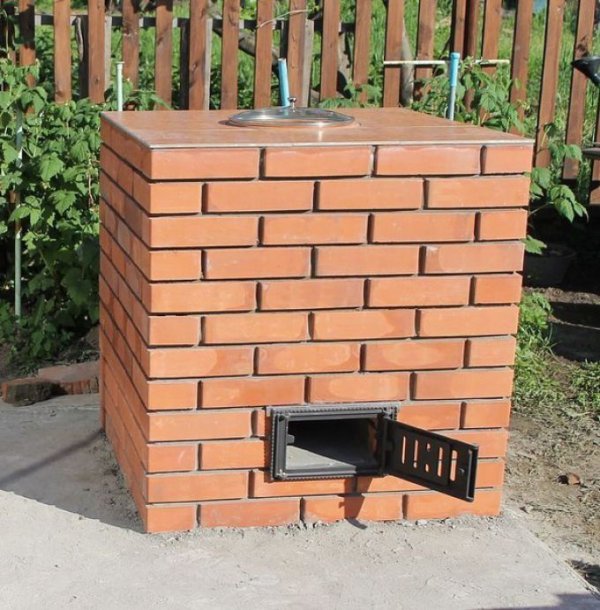
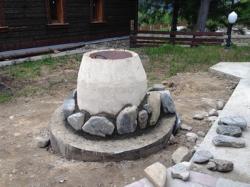
Photo 3. A square brick tandoor. There is a blower at the bottom of the device.
Useful video
Watch a video review of a square brick tandoor made by hand.
How to Safely Use a Tandoor Oven
Once the structure is ready, it is important to follow safety regulations when using the tandoor:
- Do not touch hot walls.
- Do not put stove next to wooden products.
- Children and animals do not allow to the stove without supervision.
- Don't bend down too low When lighting, use lighters with caution.
If you follow these simple rules, cooking in your new tandoor will be comfortable and safe.

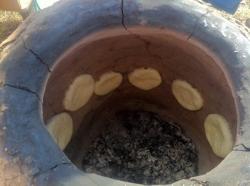
It is not possible to bake flatbreads in a square tandoor, since baking in a tandoor is done on the narrowing of the wall. And therefore, if you decide to build a square tandoor, then be prepared for the fact that not all dishes can be cooked there.
And in general, you can cook more different dishes here, everything will depend on your imagination and desire.