Homemade Asian Dishes Anytime: Step-by-Step Process of Creating a Tandoor at Your Dacha
Thanks to the tandoor for lovers of country picnics no need to spend money on ordering Asian dishes and shashlik.
All this can be prepared independently, by yourself, for free, and at any time, without worrying about the quality of the products. Build a stove within everyone's power, who has experience in working with bricks.
Content
Where to install a country tandoor: a gazebo or a veranda under a canopy
Only the following are suitable for installing the stove: open areas with stone foundations and it would be nice with additional elevation.
Cooking on a tandoor involves working with open fire that rises up to 1 m. In a radius of approximately fifteen meters There should be no vegetation, wooden structures, or other foreign objects.
Mobile or portable The tandoor can be brought into the gazebo or onto the veranda where the participants of the meal have gathered, in order to distribute portions to everyone there. But this is only allowed after the coals have burned out and died out.
How to make an outdoor brick tandoor at your dacha
Even after studying the instructions before starting work invite a stove maker at least as a consultant. Statistics show that most amateurs' attempts to make a tandoor are accompanied by many disappointments, alterations and burns. Finally, they manage to build something similar to an Asian oven, but it is just a semblance of the original.
Choosing a project for making a device with a chimney with your own hands
Tandoor made of bricks horizontal and vertical. The first It retains heat better, and food cooks easier and faster.
But its construction requires significant experience, and you will have to spend more on materials.
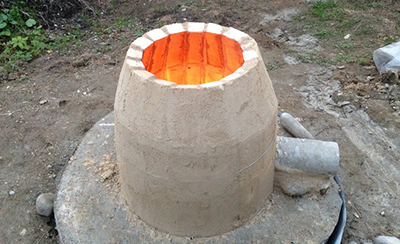
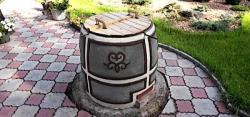
Externally horizontal country tandoor looks like a lying barrel, smoke comes out through the side hole.
One of the advantages of a horizontal tandoor is that it can be installed under a canopy, but then you will have to additionally install a chimney. For a traditional vertical constructions no chimney needed.
This is an option rarely made of bricks, usually kaolin clay mixed with wool is used for its production. Brick outdoor tandoor is less common due to the complexity of its execution.
Materials and tools
To make it you will need:
- kaolin clay;
- red brick;
- camel wool (can be replaced with sheep's milk);
- sand.
The following tools will be required:
- trowel;
- Bulgarian;
- drill;
- shovel;
- level;
- reinforcing mesh;
- grate for grates;
- wire.
You don't have to mix the solution yourself, but buy a building mixture in the store and use it to fasten the bricks together according to the instructions.
Foundation arrangement
The tandoor is built starting from the foundation. The foundation requires increased attention, because it largely depends on it whether the structure will crack due to seasonal soil movements or not. Most often, Asians fill a concrete platform, but if you don’t want to mess with it, you can make concrete slab ramp.
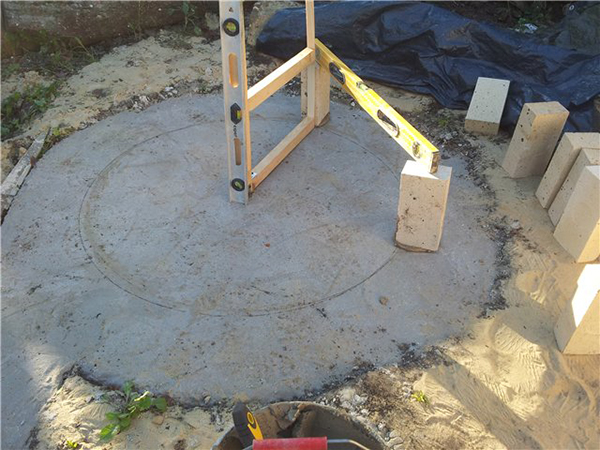
Photo 1. The foundation is the first thing that the construction of an outdoor tandoor begins with; for this, the formwork must be filled with concrete mixture.
The contours of the future tandoor are marked on the site, then the turf is removed. The soil is carefully leveled. If there is clay or loam, They remove another ten centimeters of soil. The resulting depression is filled with sand, then watered and compacted.
Reference! If the ground is dry, the foundation can be made at ground level. But it is better to raise it approximately by 15 cm.
A plank formwork is made around the perimeter. Then a lattice of reinforcement is laid (diameter about 1 cm) at a distance 15 cm from each other. The rods are fastened together using annealed wire.
After this, the formwork is filled with concrete mixture and leveled. A recess for the template must be made in the center. The structure is left to dry under a thick greenhouse film. for at least two weeks.
Only after this can you begin to build the walls of the furnace.

Working with the base
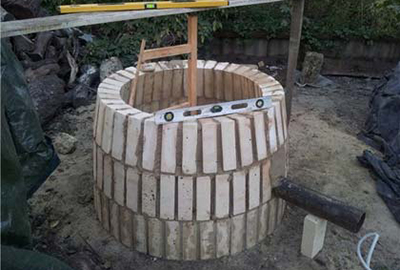
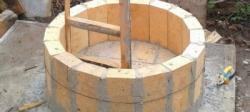
While the foundation dries, the stove-maker is busy calculating and producing the template, drawing out the diagrams. A bar or board is usually used for the stencil.
With virtually no preparatory work It is impossible to maintain the same radius everywhere.
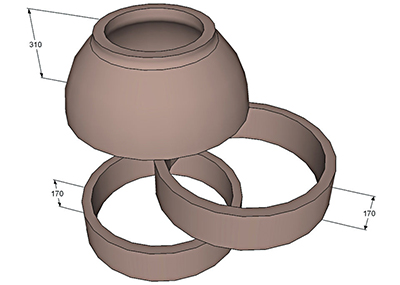
The template levels are spaced apart by the height of a brick row. When constructing a tandoor, bricks are placed not on the wide and long part, as usual, but on the short part. The height will be 26 cm, with a seam allowance. Based on this, the optimal height of the straight part of the stove will be two rows - 52 cmThen the narrowing towards the neck begins - this is still the same.
Attention! If you stick to it right angle from the bottom template, the walls of the tandoor will be smooth and without distortions.
Wall layout: photo
Before construction begins prepare two containers — under the working solution and under clean water. The tandoor has a rounded shape, so the brick is cut with a grinder with a stone wheel.
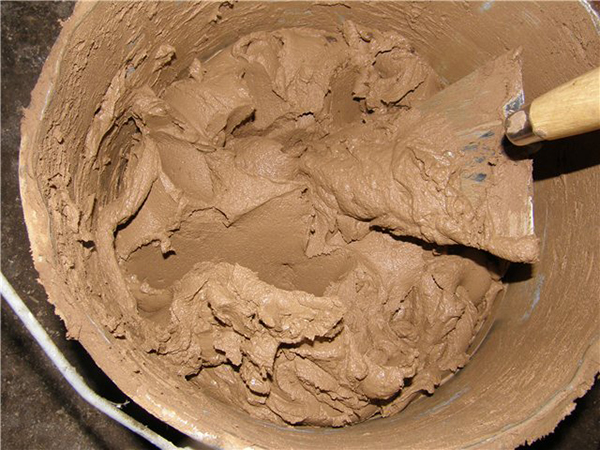
Photo 2. The solution of clay, water and sand must be mixed well and made slightly viscous so that it can be rolled into a ball.
For the solution take clay, water and sand, add a little salts. The finished mixture is viscous, tight, but not liquid. It should be easy to roll a ball out of it, not crumbling when dropped. If you are not sure that you can maintain the right proportions, It's better to buy a heat-resistant construction mixture in the store.
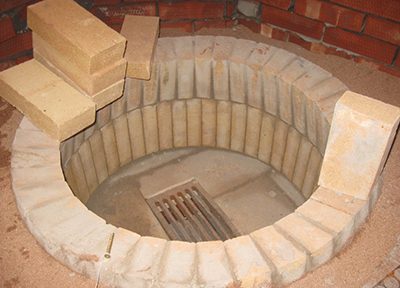
First row laid out according to a template without mortar. The bricks are placed on a narrow edge with the end facing the center. Next, in the third and fourth rows there will be a narrowing, fewer bricks will be needed. The shift in relation to the previous row is made no more than one third of a brick.
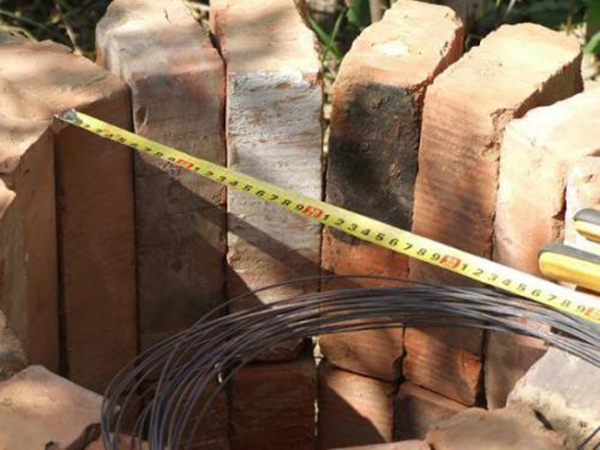
Photo 3. Fireproof red bricks must be laid on a narrow edge with the end towards the central part.
After drying each brick is removed from the masonry one by one, is dipped into a vessel with cold water. When the liquid stops bubbling, the bricks are coated with mortar on three sides and laid in their original places. Make sure that the masonry does not deviate from the template. On the outside, the seams are also filled with clay mortar or construction mixture.
Second row is made in the same way as the first one, while the blower, the grate are installed and also secured with the help of the working mixture. A section of pipe is suitable for the blower body. The cover for the blower is made from a part of a brick, it should fits true to size and not slip. The brick is cut using a grinder.
The vault of the furnace is formed from the third row, for which the bricks are sawed in a circle along the stone.

Photo 4. A section of narrow metal pipe can be used to create the blower body.
Insulation and external finishing
The space between the furnace body and the upper bricks thermally insulated with sand. From the outside the structure is coated with a mixture of water, clay and straw. After this, they put it on the walls. reinforcing mesh and again coated with a clay solution, this reduces the risk of cracks.
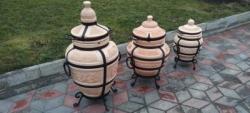
If you wish, you can follow the example of Asian stove makers and decorate the outside of the tandoor mosaic or tiles.
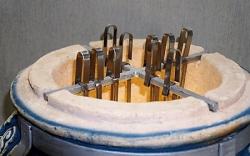
Making the lid
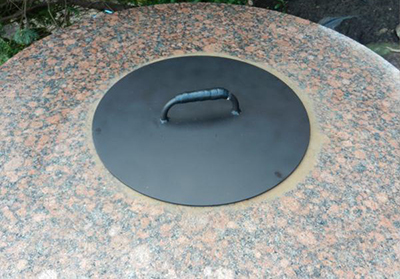
The lid is made of sheet metal, with handles made of non-heating material.
You also need to consider that you will be cooking in a tandoor.
Meat products are fried not horizontally, as many are accustomed to, but vertically.
Respectively, slits are made in the lid. You can also drill an additional hole in the center for the cauldron.
Drying and initial firing
The finished tandoor is dried until completely dryThis requires about two weeks, sometimes more. For the first kindling use paper and small wood chips.
Important! For firing it is required hardwoodIt is better if these are fruit trees, which, when burned, produce a lot of coal, and not ash.
First laying of firewood (about a quarter of the tandoor) is set on fire and burns until coals appear, then more logs are added until the oven is full about two thirdsAfter all the coals have burned out completely and crumbled, the ash is removed and the internal surfaces are cleaned with a brush.
Possible problems
Brick tandoor is the most difficult to make. Only a person with experience in building ovens can make it on their own. If you don’t have one, it’s better entrust the work to Asian stove-makers.
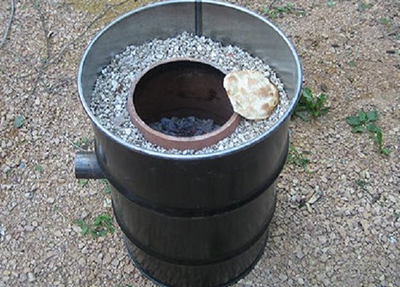
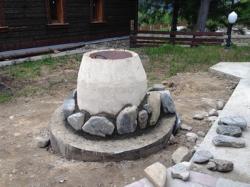
A dacha tandoor is made somewhat more simply. based on the existing framework, for example, an iron barrel.
But there too it is required keep up with technology, to avoid cracking of the stove, especially when it comes to mortar.
Useful video
The video tells you what program you can use to design a brick tandoor and how to make it at your dacha.
How to use a stove outdoors
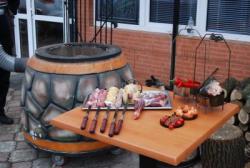
On the ready tandoor you can heat up food, bake flatbreads, samsa, fry shashlik and kebabs. In this case, the cook must wear gloves. Working with the oven cannot be called 100% safe, the inner walls of the body are heated by several hundred degrees and even experienced cooks often get burnt due to carelessness.
Remember that the flame height is sometimes more than a meter and do not allow others, especially children and animals, near the working tandoor.
Comments