Want to treat yourself and your friends to Eastern cuisine? Making a tandoor from a barrel is not difficult at all

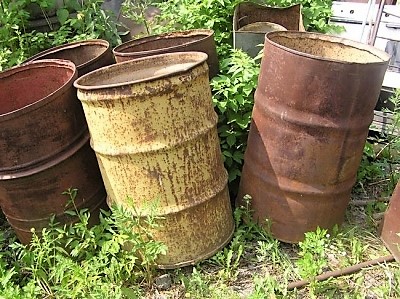
Suitable for making tandoor any barrel, as long as it is intact: without thinning, corrosion, rotten or leaky areas.
New barrels are best made of iron or another alloy, in the worst case wooden, but not plastic.
Making a tandoor from a 200-liter barrel with your own hands
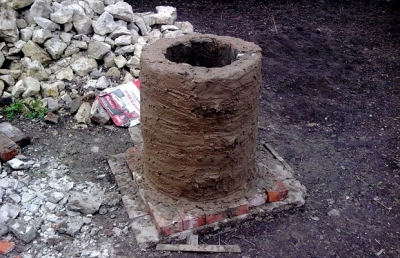
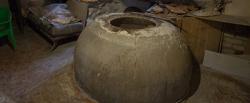
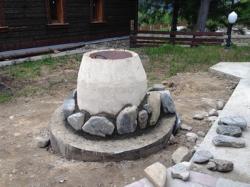
Tandoor is jug-shaped stove, turned upside down. The barrel will act as a template, which is then coated with clay and finished with bricks on the inside.
A wooden container requires a special approachIts preparation takes place in two stages:
- into a barrel pour water and leave for three to four days, to let it swell;
- capacity dries (this requires day), then soaked in oil.
The hoops are loosened or removed altogether.
Tools and materials
To make a tandoor from a barrel need to collect materials:
- barrel of volume 200 l;
- sand and clay;
- fireproof brick;
- reinforcement;
- grease tray;
- wooden handle;
- board.
You will also need a number of tools:
- metal cutting scissors;
- circular saw-grinder;
- trowel;
- electric drill;
- spatula;
- trowel.
No less careful approach is required than the barrel itself. ramp, on which the tandoor is planned to be installed. The quality of the work and the durability of the stove depend on the builder's attention to this point.
The construction of a tandoor based on a barrel is considered simplified. However, this word only refers to the observance of proportions: the barrel acts as a template, the builder does not need to take additional measurements.
Otherwise, the requirements for the Asian hearth are the same. One of the main points is proper mixing of clay. This process is never short. If you neglect it, cracks and rapid deterioration of the tandoor are guaranteed.
Best suited light yellow or ochre kaolin clay. If you don't have it, you'll have to work with what you have: it soak in a barrel and let it sit for seven days. Stones and impurities remain on the bottom. You don't need to add sand to such clay, but you can add a little baking soda. Significantly increases strength liquid glass.
Foundation requirements
The tandoor is being installed in the open, away from flammable materials and trees. On it, an elevation is made with an earthen base without clay and organic components. Next, a layer of crushed stone approximately fifteen centimeters thick is poured.
Foundation, depth about 40 cm, rises above the ground no less than by 10 cmAt the base and on top it is covered with waterproofing sheets.
Carefully! The oven is located no closer than 10-15 m to the residential building and buildings! Height tongues of flame sometimes it happens more than a meter.
Filling the bottom and laying out the interior with bricks
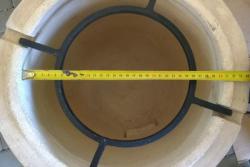
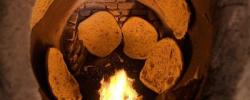
Filler hole barrels is cut out using a circular saw. From the side at the bottom blowing is done. From inside the barrel is lined with bricks, the gaps between which should be as small as possible. Then the bricks are bonded together using fireclay or kaolin clay.
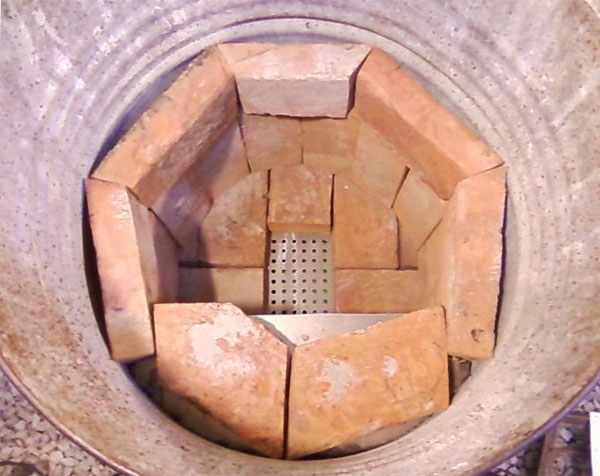
Photo 1. The inside of the barrel is lined with bricks, having previously laid a grate and made an ash pit. The remaining gaps are later sealed with clay.
The last one too the entire inner surface is coated future stove, the layer should be quite thick - about three centimeters. Externally the barrel lined with clay or mortar. Between the mixture and the bricks on the walls and bottom they put a layer of cotton wool and sheets of foil insulationSometimes a sand cushion is arranged.
Blower hole It is lined with a trapezoidal brick frame, the narrow part of which faces inward and the wide part faces outward. Blower cover also brick. Make sure that it it tightly closed the hole and did not come offThe brick is cut to the required size using a diamond grinder wheel.
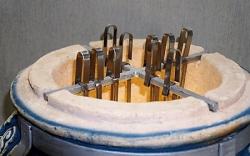
For cooking in tandoor need skewers for shashlik, brackets for skewers, tongs, ash scoop.
Tandoor lid
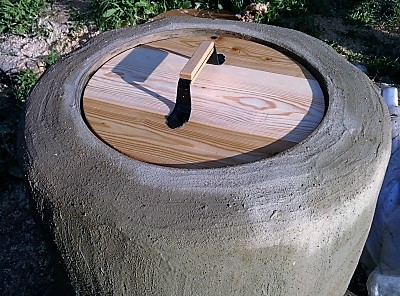
For the best operation of the stove, a round lid is required to cover the large opening. It is recommended to take three-millimeter steel sheetA handle made of non-heating material is attached to the top.
Some masters insist on the advantages wooden lids. Any wood will do, but oak is betterIt is durable, stable and retains heat well.
On top of her covered with a layer of thermal insulation, then attach the handle at a sufficient height so that the cook's hand does not come into contact with the surface. Thanks to such a thermal cover, there is no need to throw a blanket over the tandoor to preserve the heat after the firewood has completely burned out.
Important! The lid should close completely a large hole and at the same time don't slip.
Drying and primary burning
Don't rush to try the stove in action right away, first the design let it dryThe duration depends on the method used to make the device, whether the bottom of the barrel was cut out or not.
Advice. To completely dry the tandoor, it takes about a month, and if the bottom of the barrel is preserved, then one and a half.
Many builders insist on full removing the bottom, then a firebox made of heat-resistant brick is laid in its place. But there is an opinion that the quality of the stove is better, where the bottom of the barrel was not cut out.
Firing the hearth
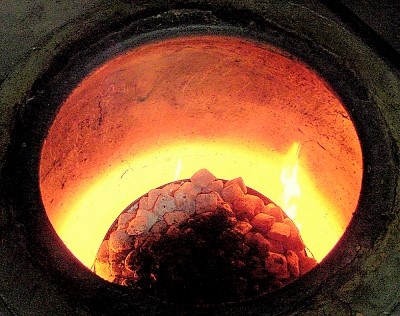
Once the stove is dry, it needs to be calcine three times for about four hours. For the first ignition you need small firewood and chipsFor subsequent ones, the tandoor is heated to maximum.
Before ignition, the inner walls of the working chamber are well grease with vegetable oil (you can use sunflower or mixed oil, but cotton is preferable).
Place in the firebox a sheet of paper or a handful of coal and light it. Gradually add fuel until the temperature reaches thousands of degrees.
After the wood has completely burned out, there are six to seven hours left for cooking. The temperature is increased or, conversely, decreased with the help of a blower.
Possible problems
If this is your first attempt at construction, it is better entrust the work to an experienced stove maker or at least invite him as a consultant. From the diagrams and descriptions it seems that everything is clear, but in practice difficulties often arise:
- Mix the clay well.If this is neglected, the tandoor will crack during the first firing.
- Don't overdo it with thermal insulation of walls. The brick starts to "walk": it wobbles, it lies crookedly. You can not put insulation under the brick at all, this will not affect the operation of the stove.
- There are many tips on the Internet for the best selection. building mixture. However, experienced stove-makers claim that It is better to plant bricks on clay. Otherwise, the masonry almost always cracks along all the seams. This is due to the different degrees of expansion of the mixtures and bricks. Good Terracotta glue increases the strength of the masonry.
Useful video
A video demonstrating the making of a tandoor: the basis is a metal barrel lined with bricks on the inside.
Safety precautions
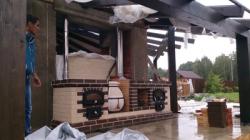
Safety requirements for a barrel-based tandoor the same as for the traditional ceramic appliance. It is forbidden arrange it in closed areas. It is allowed attach wheels to the structure in order to roll the "barrel" tandoor into the gazebo and distribute the finished shashlik or flatbreads. But this is done only after the firewood has completely burned out.

Comments