Minimum costs, maximum benefits: how to build a tandoor in the ground?
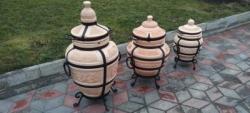
The first tandoors were earthen. They are also called pit: due to placement in an excavated pit.
A brick fireplace of this type is arranged only on elevated areas, in dense, stable soil, which does not allow moisture to pass through. Otherwise, dampness will quickly destroy the structure.
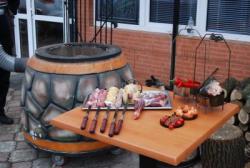
If you want to use an oriental stove like barbecue, remove the lid and put a grate instead. Meat, fish and vegetable dishes are cooked on it. It is not necessary to hire professionals to create an earthen tandoor. It is quite possible to build it yourself.
How to make a tandoor from bricks in the ground with your own hands
First, decide on construction option. In the first the above-ground part of the tandoor is about twenty centimeters; together with the neck - twenty-five.
The foundation is laid out of bricks, then a steel pipe is placed in the ditch - an air duct. After finishing the work, the trenches and gaps between the walls of the pit and the furnace are filled with soil.
The second way suitable for dense clay or rocky areas. In the soil, dig two wells: the first one corresponds to the dimensions of the tandoor, the second one serves to supply air to the firewood.
Earthen tandoors are one of the the most ancient of their simple systems, used for cooking and heating homes.
Necessary tools and materials
To build a tandoor in the ground with your own hands you will need:
- heat-resistant brick;
- fine sand, fireclay mortar, purified clay;
- metal grate;
- grinder with a diamond cutting wheel for ceramics;
- building level;
- cement;
- asbestos pipe;
- shovel;
- masonry mesh;
- spatula;
- a paint brush ten centimeters wide;
- buckets and basins for mixing building mixtures (cement and sand mortar, facing mixture);
- tiles for cladding.
Stages of work on making an earthen tandoor
Choose a sandy spot or dig a hole small pit, fill it up by ten centimeters sand and compact it. It will retain the heat.
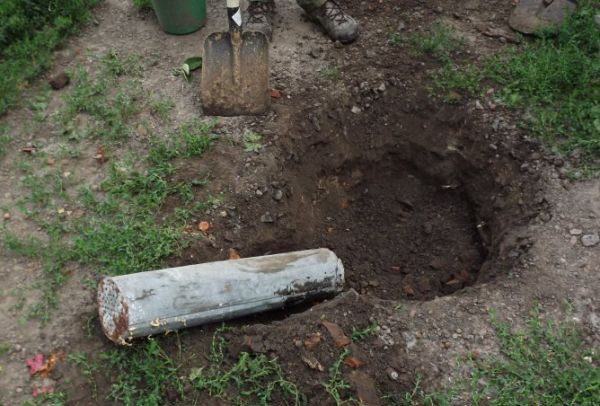
Photo 1. A small pit dug on a summer cottage plot must be filled with sand and compacted.
Now get to work foundation of earth oven: place a steel grid on top of the sand layer, fill it with concrete mortar. Level it and check with a building level. In a week base of tandoor will finally harden, then we can begin the main work.
Draw the correct line on the foundation circle. Lay it out with fireclay bricks and start filling the inside of the tandoor. When laying the first row of bricks, do not forget to leave a free area for air supply. Place the end of the asbestos-cement pipe there. at an angle of forty-five degrees.
It is necessary to make a hatch for it to block the air during the heating. The other end should be above the soil surface. The lower edge is five centimeters from the brickwork.
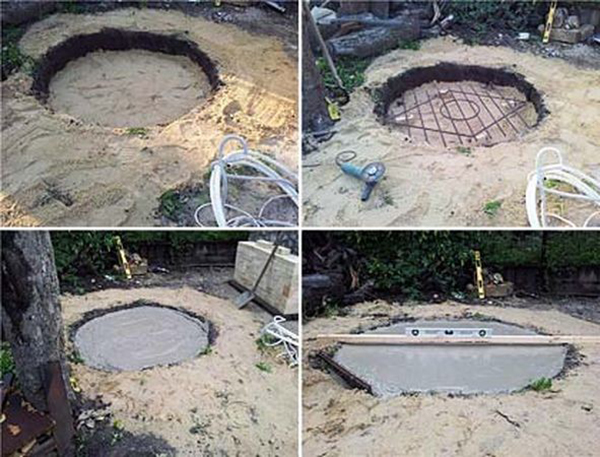
Photo 2. A metal grid is placed on the sand layer, it is filled with concrete, which is carefully leveled with a tool.
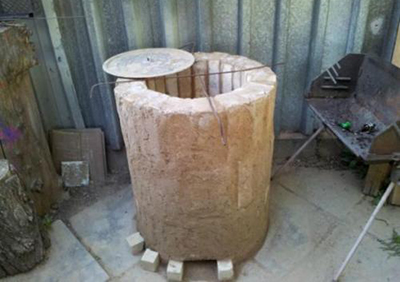
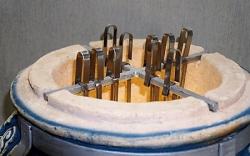
Second row of bricks Lay in a circle with a half shift (this will make the stove stronger), without gaps. Put the grates and return to vertical laying of bricks. From the eighth row start them move half a centimeter inward, to narrow it and achieve a dome shape. The "neck" of the hearth should ultimately have half a meter in diameter with a meter-long base.
Attention! Inner walls of an earth oven coat with clay, the consistency should resemble thick sour cream. Smooth with a spatula.
Construction of walls and external finishing
When the finished device dries, seal all the joints with white fireclay (kaolin). Moisten the bricks so that they do not extract moisture from the mortar. After the first layer has dried apply the following: straw mixed with clayIt will serve as a reinforcing and insulating wall.
You will need it in the end another cement-clay layer. If it starts raining during work, cover the materials and the place with film. It is advisable to make tandoors under a slate canopy.
Voids between the brick and the walls of the pit fill with heat accumulating materials: salt, sand, clay.
After completely dry - this usually takes three days - the device should to harden. Fill halfway with brushwood or dry hay and set it on fire. When the walls have cooled, lay bricks vertically around them from the outside.
All cracks in the masonry immediately seal with a solution of sand and cementWhen it hardens, fill the gap between the tandoor and the outer masonry with a dense mixture of cement, expanded clay, fine sand and water.
Reference! TO disadvantages earthen tandoor refers to the fact that during downtime it may become dampTherefore, when you are not using the oven, cover it with a protective film.
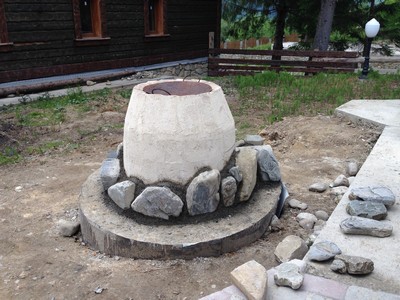
In conclusion clear the space on the sides braziers from earth and stones. Tamp down firmly. Fill the area around the neck a mixture of expanded clay and cement mortar. Or lay paving slabs.
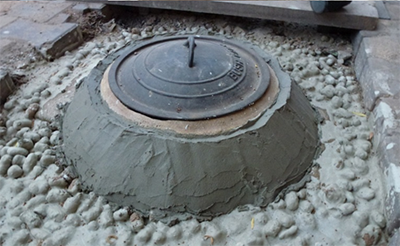
Place it on the finished tandoor iron sheet with welded handleIt will become a lid, thanks to which the heat is retained as much as possible.
When making an oriental earthen oven with your own hands difficulties may arise:
- Uneven shrinkage of the oven due to improper drying. To prevent this from happening, coat all the bricks with clay mortar of the same density, level the layers. And best of all, use fireclay clay and do not overdo it with adding water: strictly follow the instructions.
- Cracks during drying and firing. They are sealed with thick clay milk.
- Long drying time. To avoid this problem, lay the firebox on dry summer days.
Useful video
Video instructions showing how to build a square tandoor from bricks.
Safety precautions
- During the special regime established by the Ministry of Emergency Situations Using an earthen tandoor can be equated to lighting a fire. You may be fined.

- All buildings must be located at least five meters away from the stove. Make sure there is nothing flammable nearby, including oily rags, trash, dry grass and branches. Place the structure away from bushes and trees.
Important! Do not allow smoke from the tandoor to reach neighboring areas. Do not leave the oven unattended, especially if there are children or pets nearby. It is better not to use kindling fuel: it can cause burns.
- TYou can also get burned by touching the heated structure with bare hands. Use heat-resistant gloves when cooking.
- Do not cool the oven with water - cracks will appear. It will cool down little by little.
If all recommendations are followed, even a person without special construction skills can build an earthen tandoor. A stove created with your own hands can serve for many years, giving the family warmth and helping to prepare delicious dishes.

Comments
A neighbor made a tandoor from a plastic barrel - he coated it with fireclay mortar and then, when everything had hardened, he took the barrel out. It also holds heat well and is a very reliable design.
In general, I do not regret that I built it upstairs, but this is a matter that everyone must decide for themselves, taking into account all the pros and cons. Especially since the dishes they prepare are the same.