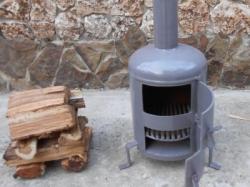
A solution for thrifty owners: a simple but reliable barrel stove for a bathhouse, summer house or greenhouse

The possibilities of a 200-liter barrel on a summer cottage plot are practically limitless.
It will heat the greenhouse and utility rooms, will be useful for burning garbage, and also in the process of fumigating trees during early frosts.
Homemade "potbelly stoves" made from barrels are also used as sauna stoves.
Stove "Bubafonya": principle of operation
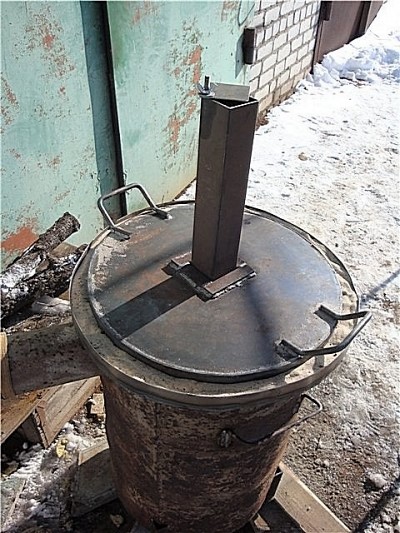
One of the most common designs of a stove made from a barrel, posted many years ago on the Internet by a user with the same nickname.
Peculiarity stoves - the ability to limit the air supply, due to which the firewood, which is not burning but smoldering, emits heat for a long time. The scheme is practically similar to the Stropuva boiler diagram.
In the making of "Bubafonya" very simple, but its design and operating principle are far from standard devices.
In conventional ovens combustion spreads upwards, here it is starts from the top when fully loaded with firewood. Gradually, as the upper layers of firewood burn out, combustion descends lower.
The fuel is ignited from above through a pipe that supplies air. Since the diameter of the pancake is smaller than the diameter of the barrel, the gaps leak pyrolysis gases and enter the chimney. As the wood burns, the pancake also descends. The air supply is regulated by a damper.
Making a stove from a barrel
It is advisable to take stainless barrel with high heat-resistant and heat-resistant properties. Such a product lasts longer without rust or mechanical damage.
Important! You cannot use a barrel that has previously been used for storing explosive and flammable materials.
For work materials will be needed:
- barrel;
- chimney block;
- purchased or made by hand, doors made of the same steel from which the barrel is made;
- water;
- chimney pipe: plastic is preferable, it is lighter in weight and easier to maintain;
- bolts, nuts;
- cutting disc.
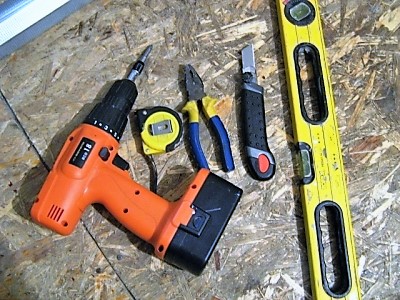
Tools for work:
- screwdrivers;
- pliers;
- screwdriver;
- drill.
To protect your eyes, skin and ears you will need special gloves, glasses and headphones.
Preparing the case
To avoid overheating of the steel, pour it into the barrel a bucket of cold water. Is being removed lid. Openings for the firebox, ash pan and heater are cut out on the side of the body.
The ash pan is at the very bottom, one brick above the bottom of the barrel, then there is a hole for the firebox. The heater can be on the other side of the body under the top cover.
Laying the foundation
For security purposes The stove from a barrel in the room is placed on the foundation. It is optimal to lay a layered structure of cement, roofing felt and brick.
Step-by-step construction of the foundation:
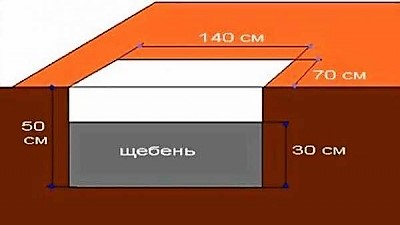
- Dismantling the floor.
- A pit is being dug depth 0.5 m, with a diameter at which the barrel will be separated from the walls of the pit on all sides 0.3 m.
- It is placed on the bottom crushed stone and is rammed.
- The resulting cushion is poured cement mortar.
- After the cement has dried, it is covered. two layers of roofing felt.
- Fits in brick in 2 layers: the bottom layer is on the edge, the top layer is horizontal.
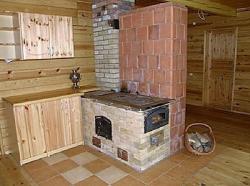
DIY installation procedure
- After installing the barrel with holes on the foundation, the lower part is laid out with bricks to a height of 0.6 m, in parallel, an ash pan and a firebox are formed, separated by grates.
- The doors are welded and the resulting gaps are sealed with mortar.
- A grate is installed to separate the firebox and the heater. A metal profile is used. with a gap of 5 to 8 mm.
- The walls are lined with fireproof bricks up to the top.
- The metal grate is laid out before the door begins. a few words of granite stone: large fractions at the bottom, small fractions at the top. Smoke should pass between the stones.
- The door is welded and the cracks are sealed.
- A hole is created in the initially removed cover for chimney.
- The drain pipe is welded.
- The lid with the pipe is placed on the barrel and hermetically welded.
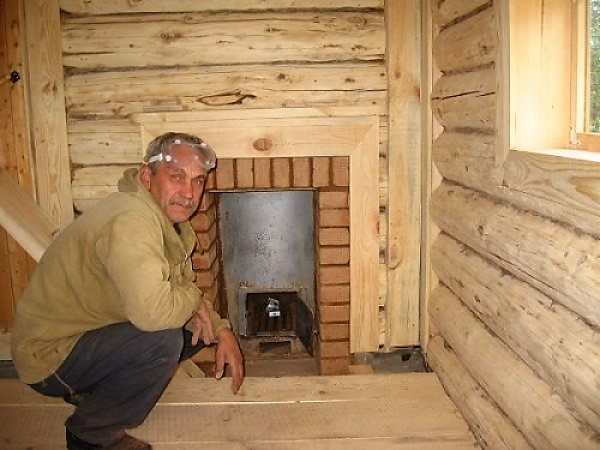
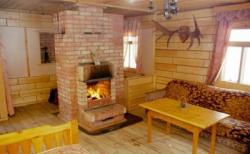
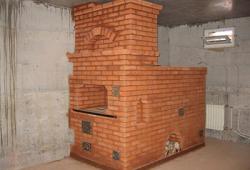
Photo 1. View from the dressing room onto the brick-lined barrel stove. The firebox door is located on this side.
In the bathhouse The stove door faces the dressing room, the heater is turned towards the steam room. Any solid fuel can be used for kindling.
Reference. For education pair The stones are sprinkled with warm water through the heater.
When making a stove for greenhouse a pipe is used along the entire length of the room, the chimney is located at the opposite end.
Possible complications
The main difficulty in the installation of the furnace - search for a place for it in utility rooms, which are usually small. In this case, it is necessary to install not only the barrel itself, but also to comply with the standards for its removal from the walls. This problem is solved by measuring and carefully planning the location of the stove. The chimney is made high to obtain sufficient draft.
Important! When performing work there is risk of damaging eyes and skin, so it is necessary to use protective accessories at all stages of construction.
During operation it is necessary to regularly clean the boiler, remove ash, control combustion to avoid backdraft. This "complexity" is related to the basic operation of the product, it should simply be accepted as a given.
Useful video
A video showing 3 different options for constructing a stove from a barrel: from the simplest to the most complex and creative.
Barrel stove - a universal design for a bathhouse and a summer house
Advantages the stoves from the barrel are obvious. First of all, it is accessible and budget friendly option for a summer cottage. The most complex product is a sauna stove. But for burning garbage in the open air or heating utility rooms, using a barrel will be optimal and simple solution.
If you strictly follow the step-by-step technology for installing the stove and choose a durable, high-quality material for this, you can get durable functionality design. An important point here is safety precautions and timely care behind the device.

Comments
1) rolling of the cylinder and welding of the seam on both sides;
2) I cut the top cover along the inner diameter;
3) chimney outlet from the 133rd pipe;
4) I weld the top cover to the top cylinder, recessing it inward by 7 cm;
5) I cut an opening in the cylinder for the loading shaft;
6) I attach the legs to the bottom cover;
7) sheet metal firebox divider and grate fasteners;
8) a grate for stones made of rods, and then on a roller to a cylindrical shape;
9) painted the stove with heat-resistant paint;
10) pressure regulation - mechanical blower;
11) ash box;
Since the stove is very tiny, it heats up quickly. This is a plus. But it also cools down quickly, which is its minus.
For example, to have a good steam bath in two shifts (men/women), you have to constantly "feed" the stove with firewood. You can't heat it once and have it for the whole evening. In addition, the size of the stove affects the size of the firebox accordingly - large firewood does not fit. You have to literally measure all the sticks - will it fit or not?
Therefore, I consider such a stove not the best choice for a bathhouse.