Heating a room without extra costs: how to build a brick oven for a summer house?
In the off-season and in winter, a country stove allows you to heat the house well and cook food.
The brick heats up slowly, but gives off heat for a long time, creating a comfortable temperature. for 6-7 hoursIf the stove has an oven, food prepared in the evening remains warm until the morning.
Metal stoves, unlike brick ones, heat up quickly, but also cool down quickly along with the house. Brick stoves emit soft, comfortable heat and heat the house evenly.
Content
Heating stove schemes for summer cottages
The choice of a brick oven depends on the availability of a gas cylinder and electricity.
If used for cooking gas or electricity, it is enough to build a stove intended only for heating.
If the electricity and gas are out in the summer cottage during the winter, you should choose a wood-burning stove with cooking deckWhen choosing a stove, consider in which part of the country house the heater will be located.
Drawing of a typical wood-fired brick oven
The heating stove is built in the middle of the house or against the wall. If there are several rooms in the dacha, the heating structure is built into openings, made in interior partitions. The main elements of the stove are:
- firebox;
- ash-pit (ash pan);
- smoke channels (vertical or horizontal);
- chimney.
Country heating stoves are laid out of red (ceramic) firebrick. Many craftsmen lay out the firebox with firebrick.
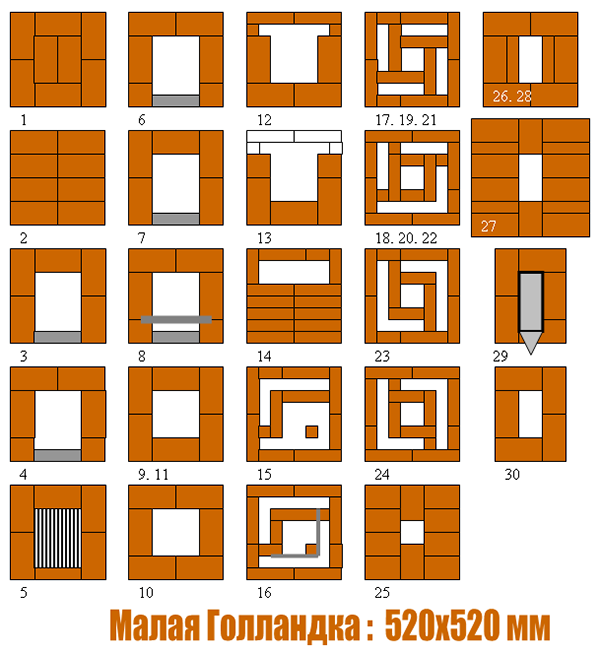
Photo 1. Approximate drawing of a Dutch heating stove, suitable for a small country house.
Ceramic bricks are laid on several types of mortar. Thus, a cement-sand mixture is suitable for laying the foundation, a clay-sand mixture for the body of the stove, and a lime-sand mortar for laying the chimney. A fireclay firebox is laid on a clay-fireclay mortar.
The size of the stove is of great importance for a small house. Compact heating stoves for a summer house include a Dutch stove (3 x 5, 2 x 4 bricks at the base), mini-oven (3 x 2 bricks) and similar structures.
As an example, we will provide a diagram of a small Dutch oven, quite suitable for heating a country house with a kitchen and a room, with a total area of 40-46 square meters.
The walls of the Dutch oven are straight, without niches or decorative masonry. Key design features:
- Inside the case there are three vertical smoke channels.
- Base width - 1010 x 510 mm (4 bricks on the long side, 2 on the short side).
- The height of the structure is 2 meters, but the oven can be made on 2-3 layers lower or higher.
The stove is built from solid red brick. For construction you will need:
- ceramic bricks - 390 pieces;
- clay-sand masonry mixture — 2-2.5 packages of 20 kg;
- steel firebox sheet (100 x 50 cm);
- cast iron or steel grate (25 x 25 cm);
- firebox door (25 x 21 cm);
- blower door (14 x 14 cm);
- valve (13 x 13 cm);
- asbestos sheet (100 x 50 cm).
When laying the bricks, it is recommended that the home craftsman use ready-made designs. Above is a layer-by-layer (row-by-row) diagram of the stove construction.
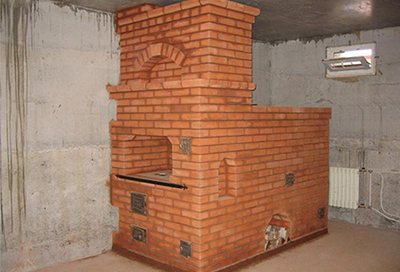
Heating and cooking structure

A small stove with a heating shield and a hob is ideal for a small country house. Key design features:
- Vertical heating shield for the stove (end), which is also the wall of the chimney.
- The stove is on extended columns of trenches, which increases heat transfer.
- The stove does not have a blower, and the air for burning wood is supplied through the openings in the firebox door.
- This is a building erected on a solid or columnar foundation.
- The bottom of the firebox is laid out at an angle, with a rise to the chimney.
Reference! The bottom row of masonry can be made solid, without trenches. The design of the stove allows for the installation of oven or hot water tank to the back of the firebox.
Making a brick stove with your own hands: step-by-step instructions
Building a simple country stove will take 1 or 2 days. Before starting work, select a heating structure project, purchase tools, materials, and metal parts for the stove.
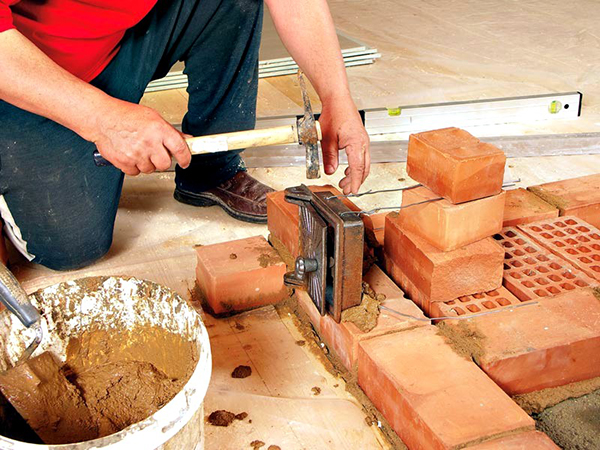
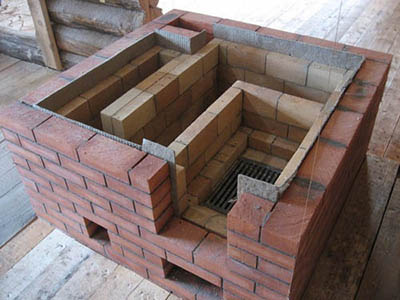
Photo 2. Laying the stove on a dried foundation using sand-clay mortar and red brick.
Selecting a project
When choosing a project, several factors are taken into account. When choosing a model, the following should be taken into account:
- region of residence;
- dimensions of a country house;
- stove location;
- costs of building a foundation;
- costs of building a furnace;
- experience working with bricks.
Reference! To heat a spacious dacha with high ceilings, large stoves are built. A small house is heated with a compact mini-stove.
If there is little or no experience, they choose simple project with easy to read drawings. Having the experience of a practical stove-maker allows you to choose a model of any complexity.
Let's take a detailed look at the choice of materials, the construction of the foundation and the laying of a simple country stove without a blower, with a cooking deck.

Selection of materials
To build this model, you don't need a lot of materials. For laying you will need:
- ceramic bricks - 220 pieces;
- 2 packages of ready-made clay-sand mixture for laying stoves (20 kg each);
- broken bricks, rubble and sand (these materials are used to make a cushion under the bottom of the firebox).
The height of the chimney depends on the height of the room. To bring the pipe to the roof, a brick chimney is made. To reduce the overall weight of the structure, a iron chimneys.
Solid red ceramic bricks are used for laying. Fireclay bricks are also suitable for the firebox, but experience is required to work with such material.
Ceramic bricks are laid on a clay-sand mortar. It is mixed from a ready-made mixture for laying stoves, bought in a hardware store. For a home craftsman, this option will be preferable.
If the master decides to prepare a solution from individual ingredients, clay, fine-grained quartz sand (or mixed sand) will be required. The size of the grains of sand is 2 mm and less. These materials are bought or taken locally from quarries. Clay and sand are cleaned of stones and plant impurities. Sand is washed with running water and sifted through a sieve. Clay is soaked, washed and also rubbed through a sieve.
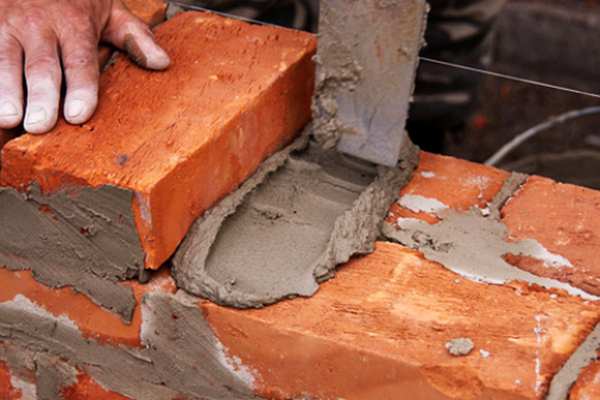
Photo 3. The bricks are bonded with a solution made from clay and quartz sand, cleaned of unnecessary impurities.
The ratio of clay and sand is selected empirically, taking into account the fat content of the clay. The solution prepared from the factory mixture and individual components should have a normal consistency. The quality of the paste is checked as follows: the solution is scooped up with a trowel (or spatula) and tilted at 45 degrees.
Attention! Normal solution holds firmly to the working surface of the instrumentIf the masonry paste falls off in chunks, add water or clay; if the mortar slides off, add sand (or a ready-made mixture).
To build the stove, you need factory-made parts. For this model, you will need:
- cast iron cooking surface (41 x 21 cm);
- door measuring 25 x 21 cm with holes;
- stove damper (13 x 13) cm.
How to lay a foundation
The average weight of a solid brick is 3, 45-3.5 kg. It takes time for construction 220 bricks, so the weight of the structure will be 760-770 kg (not counting the weight of the brick chimney). The weight of the mortar is added to the weight of the brick.
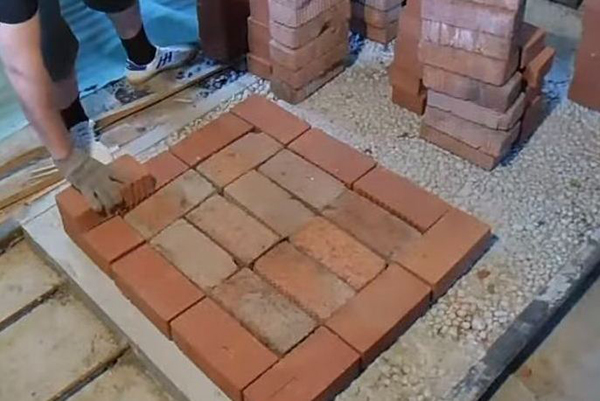
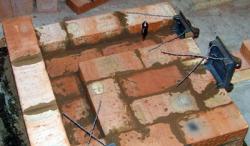
Photo 4. Bricks are laid in two layers on the roofing felt after the concrete poured into the pit has dried.
Since the weight of the structure exceeds 400 kg, it is necessary to build a foundation (solid or columnar). Without a foundation, on a solid floor, you can only lay small stoves. The following types of foundation are suitable for stoves:
- solid from pebbles, gravel and cinder concrete;
- solid from rubble stone and brick;
- solid on monolithic concrete base with iron reinforcement;
- columnar from pebbles, crushed stone and brickwork.
Reference! A concrete slab is placed into the columnar foundation for strength.
A solid reinforced concrete foundation is suitable for the selected model of the heating and cooking stove. The construction of the foundation includes the following steps:
- A pit is dug in the ground, extending beyond the base of the furnace along the perimeter by 15-20 cm. The pit is being deepened by 50-100 cm. Its bottom should be below the freezing level of the soil.
- The soil in the pit is compacted with the end of the post.
- A layer of crushed stone is poured onto the bottom of the pit (15 cm).
- Medium-grained or coarse-grained sand is poured on top (25 cm).
- The sand and crushed stone cushion are compacted with a wooden post and a roller.
- The bottom and walls of the pit are covered with roofing felt. The waterproofing seams are hermetically sealed with bitumen mastic or tar.
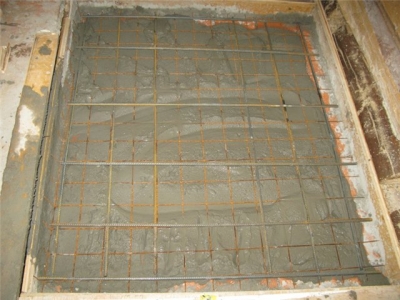
- A grid of ribbed steel reinforcement is installed in the pit. The thickness of the rod is not less than 8 mm. Cell size — 8x8 or 10x10 cm.
- The pit is filled with concrete. The concrete is compacted with a vibratory drill to remove air bubbles.
- The foundation is left until the concrete has completely set (according to the instructions for the specific brand of cement).
- The horizontality of the foundation is checked with a building level; if necessary, the surface is leveled with an additional portion of cement.
- Additional waterproofing is laid on the foundation - 2 layers of roofing felt, according to the size of the foundation.
- Two layers of ceramic bricks are placed on the roofing felt. After drying, the foundation is ready for the construction of the stove.
Important! If the project calls for the foundation to rise above ground level, concrete is laid into wooden formwork.
Construction at the dacha: step-by-step instructions
For laying you will need stove-maker's tools: spatulas (wide and narrow), trowel, trowel, jointers, building level, plumb line, aluminum rule. To prepare the solution you will need a tank, a wooden mixer (paddle), a construction mixer. Laying is carried out according to the scheme.
- 1st and 2nd rows. Laying trenches (pillars).
- 3, 4 rows. Solid masonry according to the diagrams.
- A clay-sand mortar with broken brick added (a cushion) is placed on the bottom of the furnace, with a slope towards the firebox. The thickness of the cushion in the depth of the firebox is equal to the thickness of the brick, in the furnace portal the thickness of the layer tends to zero.
- Installing the firebox door. Steel strips or wire are attached to the upper and lower parts of the door frame with bolts. The strips will be sealed in the seams with mortar. If the door is attached with wire, it is also laid in the masonry seams.

Photo 5. Before you start laying the stove, you need to draw up a diagram, taking into account the dimensions of the room, and stick to it.
- Row 5. Solid masonry of the firebox bottom.
- 6, 7, 8, 9 rows. Firebox laying. Final sealing of the firebox door fastenings (strips, wires) into the seams.
- Row 10. Completion of the firebox laying. Forming the chimney opening and the opening for the cooking grate.
- Rows 11-26. Laying the chimney, which in this model plays the role of an end screen.
- Row 27. Laying according to the scheme. Installing the valve.
- Rows 28-30. Laying according to the scheme.
- Row 31. Completion of the stove laying. Forming an opening for the chimney.
- Laying out the brewhouse.
- Laying a brick chimney or installing a metal chimney pipe.
- A firebox sheet is fixed at the furnace portal. Asbestos cardboard or a piece of felt soaked in clay is placed under the sheet. The sheet is screwed to the floor with screws. A steel corner is installed to eliminate the gap between the furnace and the sheet.
Photos of country stoves
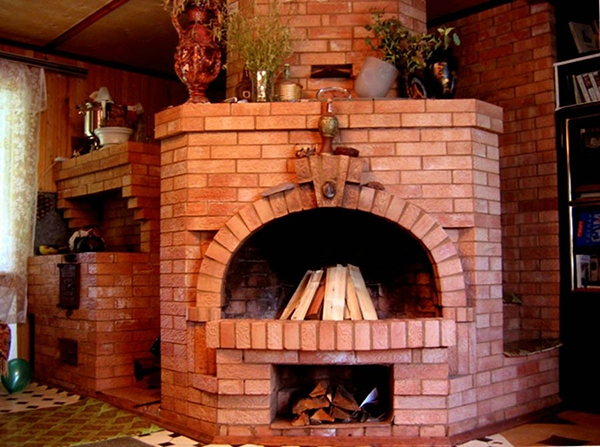
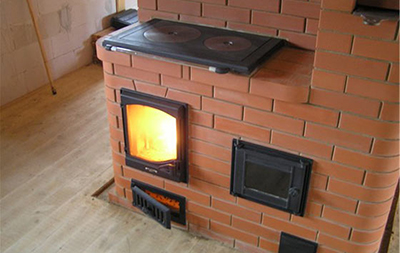
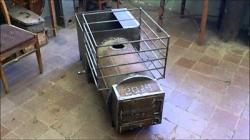
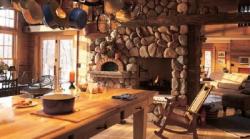
Photo 6. A typical country stove made of red firebrick, heated by wood, with a blower and a firebox.
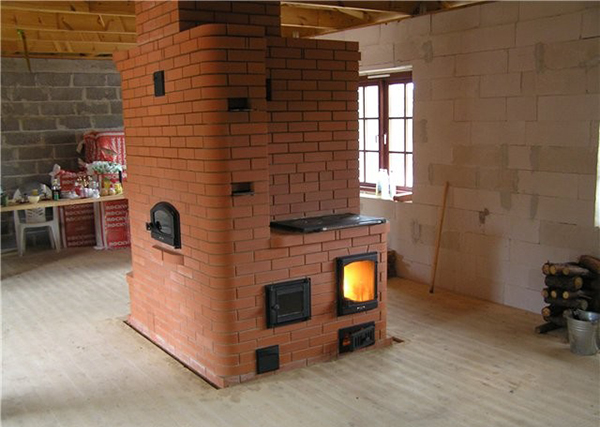
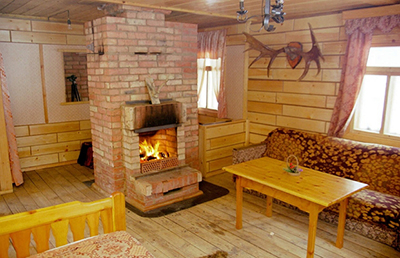
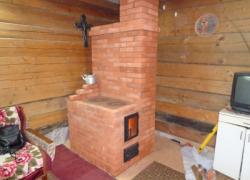
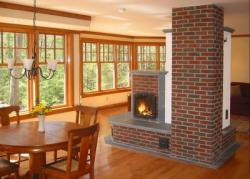
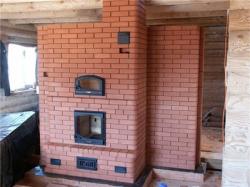
Photo 7. A brick oven indoors, which you can build yourself using a ready-made scheme.
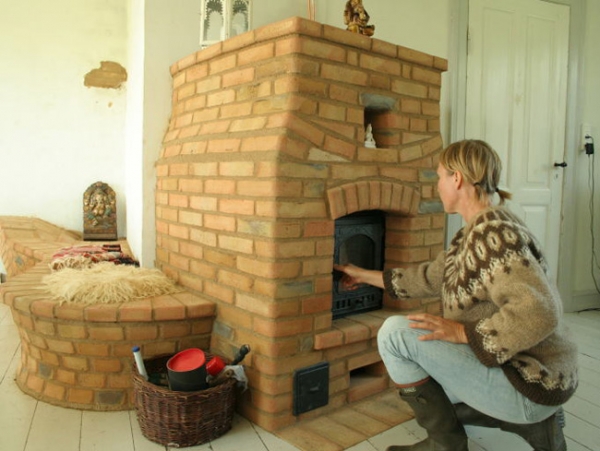
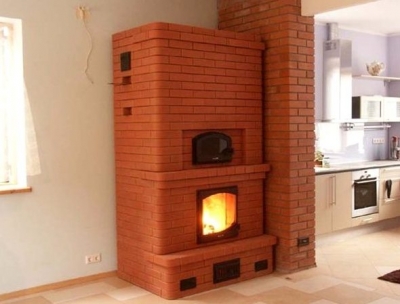
Photo 8. A compact heating stove with a bench for a summer house heats up quickly and retains heat for a long time.
What difficulties and problems may arise during laying
Inexperienced craftsmen are involved in the construction of stove walls do not use a plumb line, as a result, the wall deviates from the vertical position, which creates a threat of destruction.
In case of deviation from the vertical, the masonry is soaked with water and dismantled, then laid out again, using a plumb line.
The bottom of the firebox is inclined toward the stove door. The slope (cushion) is filled with clay mortar with crushed stone. If the brick is placed on a cushion that has not dried out, it may become deformed.
If this happens, the bottom of the firebox is dismantled, soaking the seams. Then the bricks are taken out, the slope is restored and it is allowed to dry. After this, the bottom of the firebox is put back.
The wrong consistency of the homemade solution leads to the appearance of cracks during operation.
If there are few cracks on the walls, they are sealed with a new, high-quality solution. If the cracks are deep and smoke comes out through them, the solution crumbles heavily, then the stove will most likely have to be rebuilt.
The stove of this model uses firewood as fuel. If coal is burned in the firebox, a lot of ash will appear, and the firebox will overheat, up to the formation of cracks due to uneven heating of the upper and lower parts of the heating structure. In this case, the cracks are sealed with mortar, and firewood is used instead of coal.
Useful video
The video shows an example of how you can assemble a heating and cooking stove from bricks yourself.
After what time can the device be used?
The stove is not fired immediately after laying. Natural drying of the masonry takes 5-8 days. The lower the air temperature, the longer the drying time. At negative temperatures, the masonry does not dry at all.

To speed up drying, a heat fan is directed into the firebox or a powerful electric incandescent lamp is turned on in it.
After natural drying, the stove is heated using small bundles of dry firewood. The forced drying period takes different amounts of time (from 10 days to 3 weeks).
Forced drying is considered complete when condensation (droplets of water) stops appearing on the walls of the firebox and on the inside of the cooled furnace. After the condensation has disappeared, the structure is ready for full-fledged firing (in 3-4 weeks in summer, in 1-1.5 months in winter).

Comments