A majestic structure: a stone oven for heating and decorating a house
The production of stoves from brick and natural stone is a long-established tradition. Stone stoves are universal and can be installed both in the house and in the bathhouse.
Their special advantage is faster heating of walls, compared to brick, while maintaining uniformity of heat distribution.
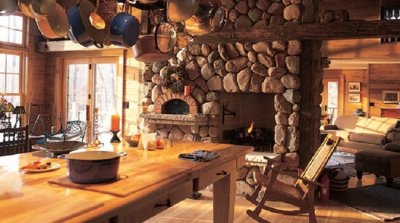
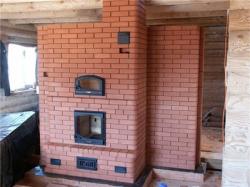
Wood burning stone oven for home
For the manufacture of furnaces, species that are resistant to high temperatures are selected, such as: granite or sandstone.
Laying stoves from flat, elongated or different in volume and shape stones is a rather effective design that can decorate the living room of a country house.
In addition to its unusual appearance, this The device has a number of advantages:
- gradual and uniform heating of the room;
- long-term maintenance of heat level;
- safety, no release of toxins or odors;
- availability of materials.
The disadvantages include: complexity of building a stove — the technique of laying a stove from stones of all sizes differs significantly from a regular brick one, so it can cause difficulties even for an experienced craftsman. The disadvantage will also be massiveness, the large weight of the resulting structure. Such furnaces necessarily require a separate foundation, so the construction is planned even before the construction of the house or bathhouse.
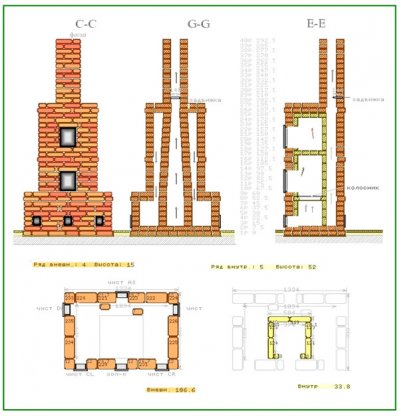
Selecting a project
The design of a stone oven is in many ways similar to similar devices made of brick and metal - the main thing will be the location of the chimney and the water heating tank, in the case of building for a bathhouse - the installation of a closed or open type heater.
Direct oven dimensions depend on its functions - a device used for heating a room, cooking food and heating water takes up a lot of space, about 2.5m x 1.5m, the bath equipment will be more compact 1m x 1.5m.
The stove can be fueled with traditional fuels such as: firewood, pieces of dry peat, coal, as well as modern options with a connection gas pipeline or electricity.
The firebox plays a decisive role in the design of any solid fuel device; laying it out from uneven layers of stone and mortar can have a negative effect on the quality of heating and its intensity.
Therefore, it is better to install a ready-made option. made of stainless steel, cast iron, or lay out the firebox of the stove made of fireclay bricks with a special solution based on heat-resistant cement.
DIY construction
Work on the manufacture of the furnace It is better to agree with an experienced craftsman. Such a construction is distinguished by a certain complexity, but with careful attention it can be done by yourself. The choice of materials for the manufacture of the stove must be approached responsibly, the quality of heating largely depends on this.
Materials
For the walls and firebox, the types of stone that are needed are resistant to heat and will not crack due to temperature changes — Volcanic rocks are usually used. Rubble stone, limestone, granite are widely used. Fireclay or ceramic bricks with subsequent decorative stone cladding are also used.
Reference. In addition to the usual materials, there are their little-known analogues - for example, talc chlorite, otherwise known as "soapstone".
The successful use of this rock for construction and furnace lining is due to its properties - talc chlorite heats up 10 times faster than a brick, easy to process, surprisingly durable.
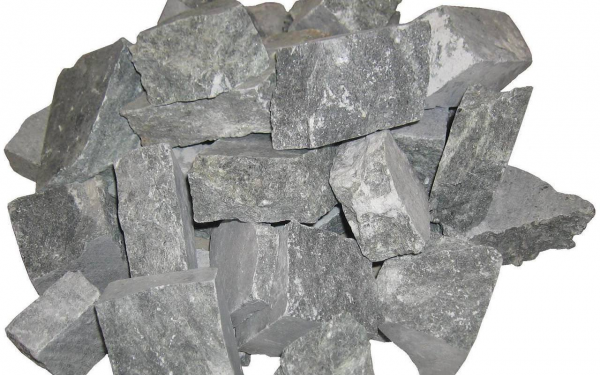
Photo 1. A small pile of talc chlorite. The material is grey and due to its properties is well suited for building stoves.
The mortar for laying the stove is traditional consists of a mixture of clay and fine-grained river sand as a filler. Refractory clays can withstand even high temperatures in the combustion chamber, but experts recommend using professional building compounds. For laying the foundation and those fragments that are not exposed to heating, ordinary a mixture based on cement or lime.

Tools
The set of tools required for laying the stove is standard:
- ruler, square;
- plumb lines, building level;
- furnace hammer;
- hammer-pick;
- Bulgarian;
- container for the mixture;
- trowel for laying mortar.
Convenient facilities will make the work easier fabric or rubber gloves, safety glasses for using a grinder.
Selecting a location
Stone devices have a spectacular appearance and are often placed to decorate a room or living room, but there are also simple placement rules that can improve the performance and safety of the device.
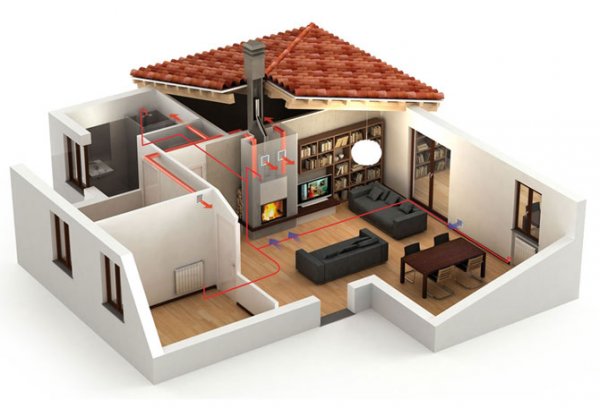
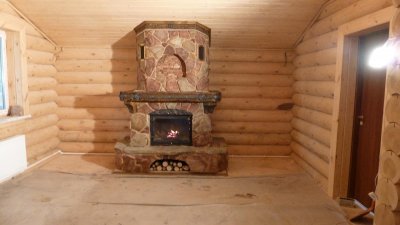
Photo 2. Schematic representation of the location of the stone stove in the house. The device is installed in the living room near the inner wall.
It is better to perform the installation of the stove in the center of the room, then the heat is distributed evenly in all directions. If this is not possible, it is recommended to choose a place for installation near an internal rather than an external wall - then the heat will not escape to the street.
Attention! When installing a stove near walls, they must be insulated to prevent fire, especially for solid fuel appliances. Distance to walls, ceiling not less than 25-30 cm. Thermal insulation of the chimney is also required.
Operating procedure
Construction of the furnace begins from pouring the concrete foundation — for this purpose a pit is dug to a depth not less than half a meter, and crushed stone is poured onto the bottom.

Formwork is installed on the compacted layer of crushed stone, which is filled with concrete. Waterproofing is necessarily laid on the surface of the dried foundation.
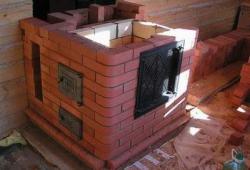
Next comes the work of laying the stove itself.
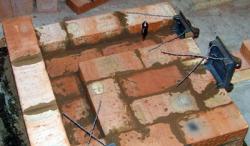
- Laying out the foundation from fire-resistant bricks — the first row is laid on the foundation without using mortar.
- When laying the first rows of the stove, it is recommended use level and plumb lines constantly — due to the particularly uneven shape of the stones, it is very difficult to track the correctness of the laying.
- An ash pan, a firebox, and a water heating tank are installed.
- When installing metal elements - firebox, doors, chimney, all the resulting the gaps are immediately filled with mortar.
- It is better to lay each new row on a dry surface first., and then use the solution.
- If necessary the bends of the smoke channels are laid out in the planned quantity.
- The chimney is laid out last., while insulation is installed for it, and the internal walls are not plastered so as not to reduce heat transfer.
When installing a stove chimney, its size is calculated in advance. location relative to the roof ridge — the pipe is either placed higher, not less than half a meter, or at the level of the ridge, but never lower - this may lead to the roofing materials catching fire.
Possible problems during operation
To ensure accurate construction and safe operation of the furnace, The following rules must be observed:
- Violation of the order may lead to fragility and cracking of the furnace walls.
- The top layer requires a thickness at least in three rowsto protect the ceiling from overheating.
- Failure to maintain a safe distance from walls, the ceiling can lead to their overheating and fire.
- If you do not fence off the area in front of the firebox, Falling embers may cause a fire. For insulation, a metal sheet attached to the floor is better suited.
An experienced craftsman will carry out all the work in 1-2 days, but if you do it yourself, the deadlines may increase. However, it is recommended to meet the deadline 2-3 daysto avoid uneven drying of the solution.
Useful video
Watch the video to find out where the best place to place a stove in your home is to heat all the rooms with minimal costs.
Start of operation
After all work is completed, the stonework needs to “settle” and dry completely - kindling a device that is not dry will lead to cracking of the seams.

The oven is kept for drying at least a week with the doors and latches open. After a week, you can gradually heat up the device - daily burning of fuel, starting with small chips in a layer of several centimeters up to 6-7 kg of firewood.
The entire drying process of the oven takes about 2-3 weeks. The quality of drying is checked by a simple method - the firebox door and dampers are kept closed. within 3 hours after the fuel has burned out, if there is no condensation on them, the equipment is ready for full use.
Comments