Inexpensive, fast and easy: 3 by 3 brick oven layout, how to build the device
The best option for heating a small summer house - 3x3 brick oven. Due to the size of the device, its cost is low, and construction will not take much time.
At the same time, the main features are preserved advantages of brick structures: high heat output, uniform and fast heating, reliability, durability.
If you exclude the elements that are difficult to perform, you can do the masonry yourself, without having any special skills.
Heating stove options 3 by 3 bricks
The simplest option is heating device with a channel gas distribution system:
- The ashpit communicates with the room in which the structure is installed.
- Firewood is loaded into the firebox, and it passes into the ashpit through the grate.
- Hot gases from fuel combustion rise through a system of channels to the chimney, heating the body of the stove.
- The valves are used to regulate the draft.
- Cleaning doors - for removing soot from the channels.
Appearance ovens can be improved, by installing a transparent fireplace door instead of a cast-iron firebox door, or by using bricks of different colors in the masonry.
An inexpensive and easy to implement option — a kitchen stove with a three-channel heating shield. Its operating principle is the same as that of the heating structure, the addition is a cast-iron plate installed directly above the firebox. The device operates in two modes — summer and winter.
Summer is activated when the lower damper is open - the heat goes directly into the pipe. This mode is necessary not only in the warm season, but also during long-term cooking (more than 2 hours). Dimensions of the oven at the base 3x3.5 bricks (760x880 mm), height 22-32 rows (1550—2500 mm).
A small 3x3 brick heater can also be built for a bathhouse with the area of a steam room. no more than 15 m2. The firebox is fired from the dressing room, which saves space in the steam room. Hot air from the firebox moves along the perimeter of the metal box for stones, and comes into direct contact with the stones through the slit arch.
Selecting a location
3x3 brick stoves are suitable for heating homes with an area of about 30 m2 (usually it is two rooms). It is important to position the device rationally so that all the walls of the stove give off heat to the rooms.
When choosing a location for the structure, the following requirements are taken into account:
- the possibility of constructing a separate foundation, although for some sauna stoves (without heavy equipment) a serious foundation is not required;
- compliance with fire safety measures: distance to the nearest wall — 150 mm, to furniture and interior items - not less than 40 cm;
- the ability to provide access to all sides of the oven;
- It is advisable to place the structure closer to the front door to avoid having to carry firewood through the house.
Materials
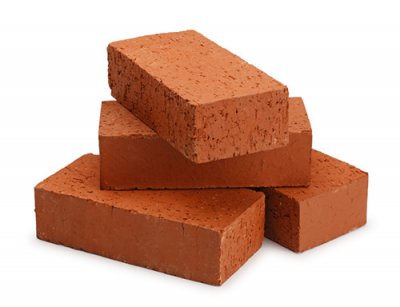
When laying out the body of the furnace, ordinary solid ceramic bricks of the brand are used. M-150, M-175. It should be free of cracks, have an even shape and be fired evenly.
Fireclay firebrick is used for laying the firebox. The size should be the same as that of the ceramic one.
There is no point in laying out the structure entirely from fireclay bricks. Firstly, it is expensive. Secondly, due to its high thermal conductivity, the body of the furnace will heat up quickly over 100 degrees, which is unsafe and will result in dust baking on the walls.
Reference. If it is not possible to purchase fireclay bricks, the firebox can be lined with regular ceramic bricks, but 1150 degrees it starts to melt. The quality and heat capacity of such a furnace will deteriorate.
An important component of reliable masonry is properly prepared clay solution: clay + sand + water. The proportions depend on the type of natural clay (fat, normal, lean) and are calculated empirically. If there is too much sand, the structure will not have the necessary strength - the seams will collapse. Excess clay will cause the furnace to settle and the seams to crack. Beginners are advised to buy a ready-made refractory mixture in order to save time and effort.
For construction you will need:
- doors, latches, grilles;
- kaolin wool, asbestos cord;
- sand, gravel, roofing felt and other materials for the foundation, depending on its type.
Tools
To build a stove you will need:
- trowel;
- expansion;
- hammer;
- plumb line, level;
- grinder with diamond wheel;
- abrasive;
- shovel;
- mixer (drill attachment).
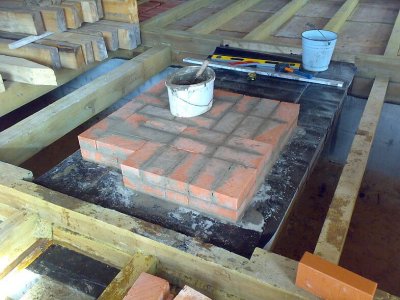
Preparing the foundation for a 3x3 oven
The brick weighs 4 kg, and a cubic meter of masonry, taking into account the solution - 1350 kg. Using this data, you can independently calculate the weight of your stove.
For structures weighing up to 750 kg a base constructed according to the following scheme is sufficient: clay mortar - asbestos sheet - roofing iron sheet.
For heavier structures, a separate foundation is constructed. The gap between the base of the stove and the existing foundation of the house should be not less than 5 cm.
The foundation for the stove is wider than the base itself 5-10 cm on each side, depth below the level of soil freezing. To protect against groundwater, a waterproofing material is laid: roofing felt.
Important! The resulting “foundation – stove – chimney” structure should not intersect with the load-bearing elements of the house: floor beams and floor joists.
Types of furnace foundations
- Brick
A pit is dug to a depth not less than 50 cm (depending on the level of freezing), is leveled.
A sand and gravel cushion is arranged at the bottom and compacted. Then a layer of broken bricks/crushed stone/gravel is poured and filled with cement mortar.
Several rows of solid brick or rubble stone are laid on top up to the mark approximately 30 cm below the floor level. The upper platform is leveled with cement mortar, waterproofed in 2-3 layers of roofing felt.
- Columnar
Requires less materials and excavation work. Optimal for clay and loamy soils. A slab is placed on four piles, which serves as a support for the furnace. Drills are drilled to the required depth 4 holes 200mm in diameter, they are poured into the bottom 150 mm crushed stone, rammed. Formwork made of roofing felt is inserted, the holes are filled with concrete. The piles dry out in 10 days. The slab can be used ready-made reinforced concrete of the required size. 2-3 layers roofing felt.
- Concrete
A pit is dug (the same as for a brick one), and a sand cushion is placed on the bottom 15 cm thick, poured with water, rammed. Then comes a layer of crushed stone of thickness 10 cm. Wooden formwork is installed around the perimeter of the pit, and waterproofing is laid in 2-3 layers and the reinforcing frame is installed.
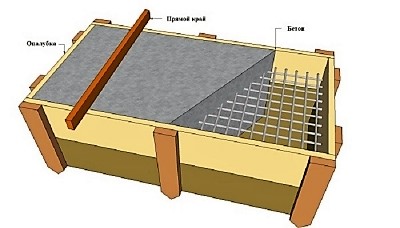
Reinforcement is performed crosswise with rods of diameter not less than 1 cm with a step 10-15 cm, the reinforcement is fastened with knitting wire. The formwork is filled with mortar up to the mark 15 cm below floor level.
The mixture is prepared in the ratio 1:3 (cement: sand). After the concrete foundation has "set", waterproofing is placed on it and more is done 2-4 rows heat-insulating brickwork to the zero mark of the finished floor.
Ordering, step-by-step laying of a brick stove
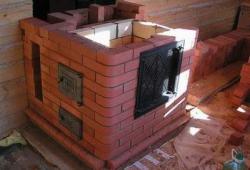
As an example, let's consider the order of a simple kitchen stove with a hob and a heating shield for three channels. The entire masonry is made of red ceramic brick of the brand M-175, but it is recommended to line the firebox with fireclay bricks.
Important! Fireclay bricks cannot be tied with ordinary ones; a layer of kaolin wool must be laid between them. Neglect of this rule will lead to the need to repair the stove every 2-3 years.
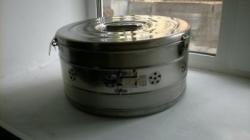
A cast iron plate is used for the cooking surface - 720x290 mm.
Bricks a few minutes soaked in water so that they do not “pull” moisture from the solution, so the seams will be thinner and stronger. The optimal thickness is no more than 3-5 mm. The size of the seam can be controlled using metal or wooden strips. The seam is processed from the outside using a jointer. There is no need to soak the fireclay brick.
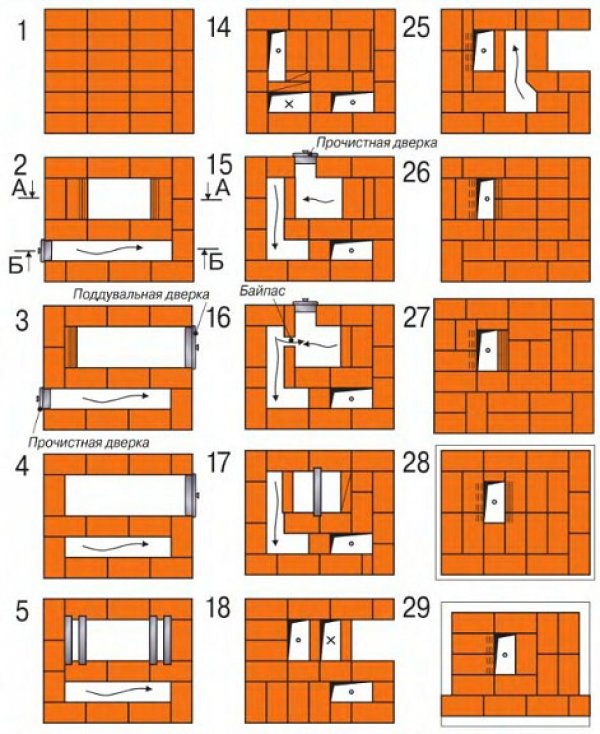
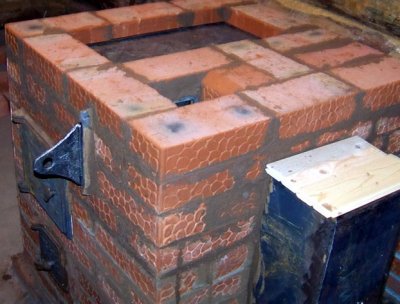
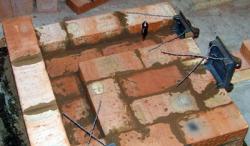
Photo 1. Option for arranging a 3 by 3 brick oven. The diagram includes 29 rows, the location of installation of additional elements is indicated.
1 row is laid out solidly.
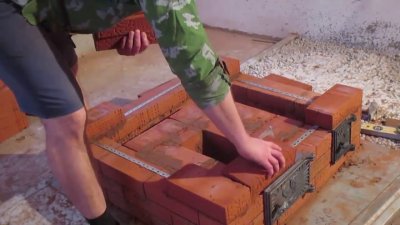
In the 2nd row horizontal channels are formed, two cast iron cleaning doors are installed, as well as a blower with a door 130x130 mm.
In the fourth — the first horizontal channel is blocked, thus forming the beginning of two vertical and one descending channel. A grate is installed size 240x250 mm. Each metal element must be mounted with gaps to allow for thermal expansion. 5 mm and wrapped with asbestos cord. Gaps are formed by cutting grooves in the brick with a grinder. The grate should be easily removed/put back into place without disassembling the stove.
In the sixth row the first smoke damper is installed, which, when open, ensures the stove operates in the “summer” mode (for long-term cooking), and the firebox door is mounted.
In the 8th row The first and second vertical channels are connected and another cleaning door is installed to remove soot from the channels.
In the 11th row a kitchen stove is installed. Grooves are cut into the bricks for thermal gaps so that the stove does not create a load on the brickwork when expanding.
From the 12th row The classic laying of a three-channel heating shield with vertical smoke vents is in progress.
In the 26th row the second and third vertical channels are connected, and at 28 overlap. In the 30th row The damper is installed and the formation of the chimney begins.
Possible problems and their solutions
Even an experienced craftsman can make mistakes when laying bricks on mortar. Therefore, first perform a dry laying test. This will allow you to carefully study the layout sequence once again and make sure that there are enough prepared materials.
If a mistake is made while working with the mortar, all incorrectly laid bricks should be removed, thoroughly cleaned and only then laid again. Clay mortar cannot be reused.
Failure to observe the dressing of bricks leads to cracks in the structure. Correct laying - each brick rests on two lower ones, the vertical seams in the rows do not match. A small error is permissible only when laying out the internal elements of the stove.
Correct application of the solution — a thin layer on the entire surface of the brick bed without empty spaces. The brick is placed on the chosen place, moved a little and pressed tightly. The next brick is laid according to a similar principle, but the solution is applied to the bed and the butt.
Useful video
Watch the video, which demonstrates the creation of a 3 by 3 brick oven project, and provides its ordering.
Operation of the device
After the structure is laid out, it is dried. In the summer, this will take 2 weeks. If the laying was carried out in the autumn-winter period, the stove is heated with small chips 30 minutes once or twice a day. For additional ventilation, all cleanout doors and latches are opened (if it is raining, they are not opened).
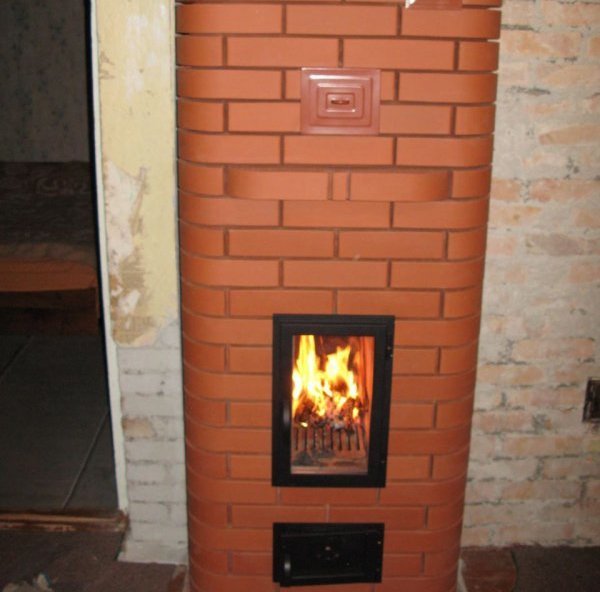
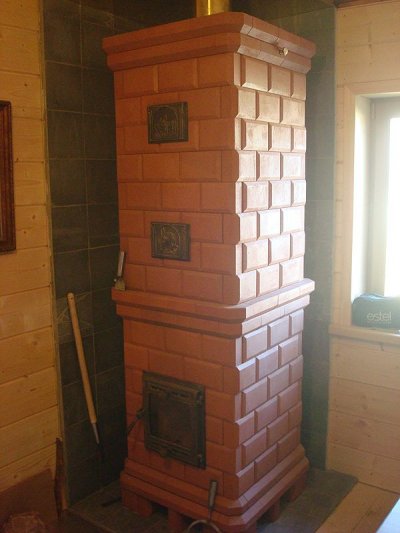
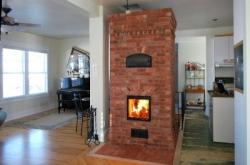
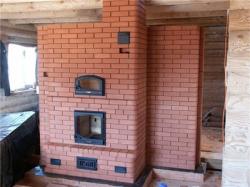
Photo 2. The finished 3 by 3 brick oven. The device is installed near the wall and has very compact dimensions.
When the damp spots disappear from the surface and condensation stops falling on the metal elements, the structure is dry. After this, a test firing is carried out - For several hours the stove is heated at full power with maximum draft. If there are no cracks in the masonry in the area of the firebox (small cobweb cracks are acceptable), then the stove is ready for use.
Attention! You can't heat the stove too much right away - this will cause cracking of masonry And will disable the structure even before the start of operation.
As a result, the entire construction phase will take on average 1 month:
- foundation preparation - 10 days;
- laying the stove and chimney — 1-2 days;
- drying of the structure - 14-21 days, depending on the time of year.
After this period, if no deficiencies have been identified, you can begin heat the stove at full blast.
Comments