Although it is small, it will heat the whole house! The most convenient mini-oven for a summer house
Summer cottages in remote areas from populated areas, have limited infrastructure. Apart from electricity, a well, and a borehole, there is nothing on the site.
Cooking takes place on electric stoves or gas appliances powered by cylinders.
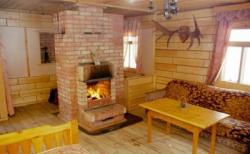
You can't do without heating in the off-season and in winter at your dacha. The solution is a mini-oven. This multifunctional device, used both for heating the room and for cooking. The purpose of the stove directly depends on the material, design and location.
Content
- Features of a mini-oven for a summer house
- Types of devices, specifics of using the smallest stoves
- How to make it yourself
- Metal and cast iron mini wood-burning stoves
- Design options
- What to heat with?
- Electric small country stove: features of use
- Useful video
- Summer house and comfort are compatible concepts
- Comments (5 opinions)
Features of a mini-oven for a summer house
For a summer house, a mini-oven is the optimal device for autonomous existence outside of urban civilization. This is due to a number of advantages of the device:
- compactness;
- ease of care;
- availability of fuel.
Types of devices, specifics of using the smallest stoves
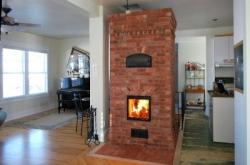
Mini ovens are small-sized devices made of metal, cast iron or brick:
- Metal stoves can be stationary and portable. Portable ones are used both in the house and in the yard at any time of the year, as an analogue of a barbecue or in addition to it. In spring and autumn, the structure can be used to heat a small house.
- Cast iron stoves.
- Mini brick ovens — stationary structures. In the yard they are built in a place designated for recreation, combined with a gazebo, pavilion, or in close proximity to them.
Stoves, both brick and cast iron There are 3 types:
- Heating, which are constructed to heat a separate room or the entire house.
- Cooking, used for cooking.
- Cooking and heating, in which a cast iron cooking surface is installed above the firebox. Some designs include an oven.
How to make it yourself
With the right placement, the stoves allow you to heat the entire area of the house. The brick, when heated, retains heat for a long time.
Materials and tools
Before you start building the stove, it is necessary to prepare the tools:
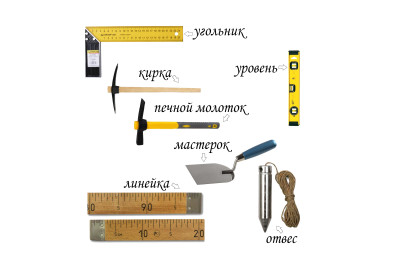
- Containers for mixing cement (special buckets with a capacity of from 15 l with graduations on the inner wall).
- A spatula for preparing the solution. Can be used mixer attachment for a drill or hammer drill, so the solution becomes homogeneous.
- Trowel.
- Spatula.
- Level.
- Mallet hammer.
- Pliers.
- Square.
- An angle grinder with a disc for working on stone.
- Rule or plumb line.
- Roulette.
- Leg-split.
Base
A brick mini oven requires a foundation. Its capacity depends on the size of the overall oven structure. For a simple device with dimensions 50*90 cm at the bottom a rubble base is sufficient. The minimum depth for the foundation is 50 cm, and its dimensions must exceed the area of the furnace at the base by 10-15 cm. The construction of a stone foundation does not require formwork.
Attention! If there are wooden partitions in the house, the stove should be located at a safe distance from them. The upper part of the mini stove and the chimney are located away from the floor beams and rafters. at a distance of 12-15 cm.
The rubble is tightly laid in the prepared "trough", fastened layer by layer with cement-sand mortar. At the floor level, a concrete screed is made, on which, after hardening and drying, a waterproofing material (roofing felt) is laid. The construction of the foundation is completed by laying two rows of bricks.
Masonry
The construction is carried out strictly according to the drawings of the selected model:
- First row is laid out "dry". After which control measurements are taken to ensure compliance with the parameters specified in the drawing.
- Second and following rows controlled relative to the first row. The internal structure must exactly correspond to the drawings, since errors will lead to disruption of the air flow. This is fraught with the penetration of smoke and carbon monoxide (a combustion product) into the room.
- If the dacha has 2 residential levels and it is assumed that they will be heated to the full extent, the masonry should be completed 15-20 cm above the 2nd floor ceilingThis will be the basis for the heating outlet into the room.
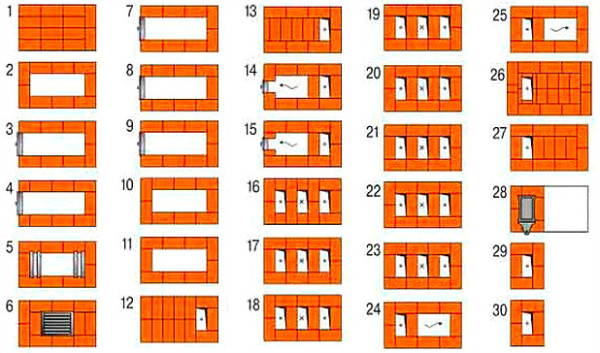
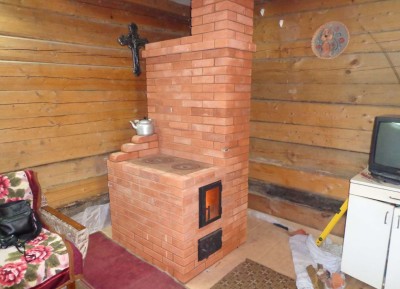
Photo 1. Option for laying out a brick heating stove. Contains 30 rows for laying.
- The chimney and flue with a damper are installed at the 2nd floor level. Installation requires caution and a reliable ladder. The opening for the structure is cut with a grinder. The chimney is either laid out of brick or a stainless steel pipe is installed.
Important! If the distance from the ridge to the pipe is three meters or more, then its upper part should be located along the line that runs from the ridge at an angle to the horizon. at 10 degreesOtherwise the oven will smoke.
Before heating the appliance, you need to check the draft. To do this, open all the doors and dampers and leave them in this position for 5-6 daysAfter this time, a small amount of firewood is loaded into the firebox so that it does not touch the walls, and it is heated. within 2-3 hours. Procedure repeat for a few more days, so that the stove dries out completely at low heat. Using it at full power at once can cause the masonry to crack.

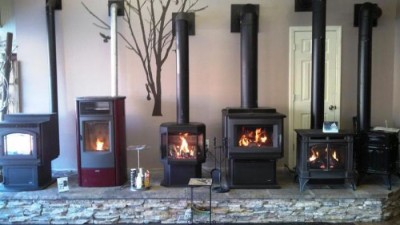
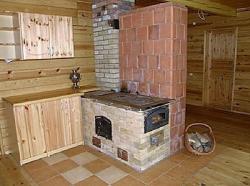
Basic designs and variants of wood burning devices
Optimal design - mini oven I.V. Kuznetsov OIK (modifications). A structure that has a foundation 2*2 or 2*3 bricks, consisting of a fuel compartment and an upper cap, can be installed without a foundation in any room.
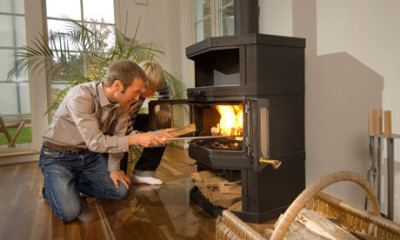
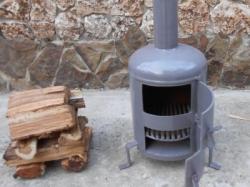
Metal and cast iron mini wood-burning stoves
Cast iron stoves are manufactured at the factory using the casting method. They are heavy and fragile.
It is advisable to install such structures if the dacha requires heating throughout the cold season.
Metal stoves are used as a temporary heating element and for cooking.
Different types of metals are used:
- Steel thickness from 4 mm and moreWhen using fuel with high heat output, the steel furnace burns out within 2-3 months. The device is easily assembled by welding according to selected sketches.
- Heat-resistant steel. Sheets of thickness are used from 1.5 to 3 mm. Mini ovens made of such material serve more than 20 years. Independent work with heat-resistant steel without special equipment is impossible, since under the influence of conventional welding the material loses its properties and becomes unstable to temperature effects.
Design options
They are used in summer cottages and differ in their design features:
- Chamber The type of furnace consists of two sections: a firebox and an afterburning chamber. In the first, fuel combustion occurs, the products of which, under the influence of natural circulation, enter the chamber, where they finally burn with the release of heat.
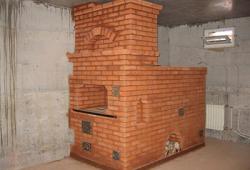
- Channel type of stove - a more complex design. Inside the main chamber, partitions are installed, forming channels through which combustion products, moving to the chimney, gradually transfer heat to the walls of the stove, heating the room.
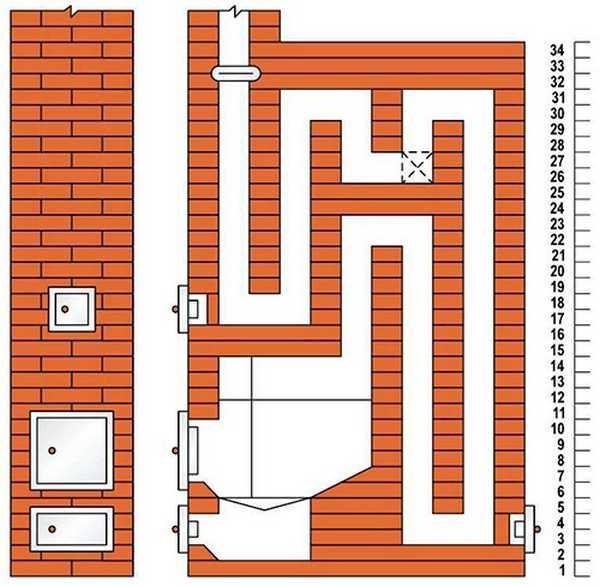
Photo 2. Diagram of a channel mini oven made of brick. Front and side views, the device has a system of channels through which combustion products move.
- Bake cap-shaped. It is designed in such a way that the gases rise to the vault and, when they burn out, they descend. It is possible to achieve 70% efficiency.
Reference. It is easy to make metal mini ovens with your own hands. For this, used cylinders, barrels and other products made of high-grade metal are used. But such materials have a significant drawback: they quickly release heat and cool down.
What to heat with?
The most accessible fuel is firewood. If you don’t have your own, you can buy some in a store or collect dry branches in nearby forest belts.
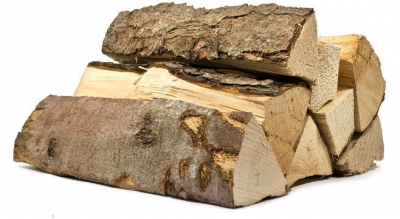
Heating a house with small quantities is not enough; a large purchase will be required. oak or birch firewood (its wood has the greatest heat output when burned slowly).
Coal gives a good heat, but it must be used with caution, taking into account the technical characteristics of the furnaceVery high combustion temperatures can melt cast iron, so coal is not recommended for metal or cast iron stoves.
Electric small country stove: features of use
Electric mini oven - a device with a built-in thermostat, hob and grill. Thanks to the presence of a fan, heat spreads quickly. They are used for heating small rooms.
Important! Electric mini ovens cannot be used in places where electricity is supplied is inconstant or absent altogether.
Useful video
Watch the video, which demonstrates the project of a heating mini-oven made of brick for a summer house, and describes its order in detail.
Summer house and comfort are compatible concepts
Regardless of the season, weather, distance from populated areas with developed infrastructure, comfortable conditions at the dacha are created with your own hands or using store-bought devices.
You can provide yourself with warmth by building brick or metal oven. For a short visit to the dacha in the cold season, it is advisable to use an electric mini-oven.
The type, model and power of the structure is determined based on the needs and resources of the owners of the country house.

Comments
And what Nikita writes about laying it in a day is somehow implausible. After all, the foundation still needs to be prepared so that it hardens, and this takes time. And it is not so easy to lay it correctly. Well, a stove-maker is still a specialist, but you can mess around for a week on your own.