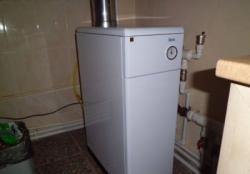
How to heat the furthest corners of the house? Installing a Kuznetsov stove with a water heating boiler
Among the variety of heating devices for the home, the most respected are economical furnaces, the design of which was developed back then in 1962 I. V. Kuznetsov.
Since then, the invention has only been improved and now there are about 150 different models, taking into account all possible needs of life in a private home.
Kuznetsov furnaces are distinguished by their special structure and operating principle, using natural movement of cold and heated air flowsA special cap prevents hot gases from escaping into the chimney and keeps them inside the stove.
The colder air moves to the lower firebox, where it heats up and rises upward, displacing the already cooled air. This heat circulation inside the furnace increases their Efficiency up to 80–95%, which significantly exceeds the heat output of conventional heating devices.
Features of Kuznetsov furnaces
In addition to high efficiency, these devices have the following advantages:

- Easy cleaning — due to the significant temperatures in the combustion chamber, even ash burns, reducing the number of necessary cleaning operations.
- Multifunctionality — blacksmith shops are often equipped with a stove, oven, and boiler for heating water.
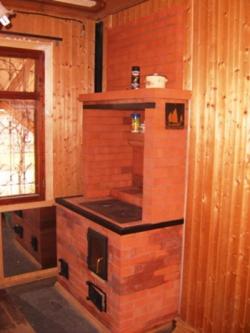
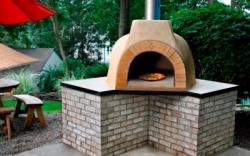
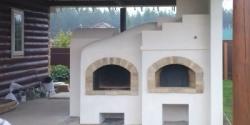
- The design allows for the construction of ovens of various shapes, sizes, this ensures their more convenient placement in the house, and also expands the choice of decorative design of the devices.
- Uniform heating The walls of the furnace have a positive effect on the strength of the masonry, so the forges are durable.
The construction of such a furnace will be quite possible for an experienced craftsman — if you lack experience, it is recommended to contact a specialist to calculate the drawing. When working independently on a ready-made scheme, you must carefully follow the recommendations, without changing the order of the selected project at your own discretion.
Scheme of a furnace with a water circuit
The device connected to the water circuit is even more increases its effectiveness, allowing you to heat a significantly larger area with the same power.
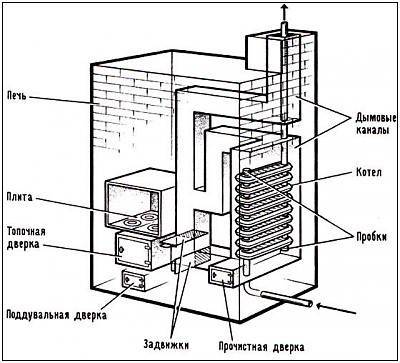
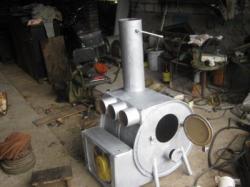
When constructing such a furnace, the boiler is installed above the firebox in the area of the first hood — the water is heated by hot gases enveloping the metal walls.
Hot water is sent through the upper pipeline to the radiator system, and through the lower one it enters cold water.
The cooled air after reheating is forced into the area of the second cap, thereby maintaining heat transfer main furnace.
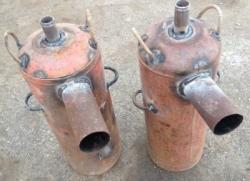
The heat exchanger installed in the furnace can be two varieties:
- single chamber - is a compartment for water, made either in a flat shape or in the form of a boiler;
- tubular - in such a heat exchanger, water constantly moves forward through pipes located one above the other.
More efficient counts second type — due to the smaller volume of pipes, the water heats up faster and spreads throughout the radiator system. Pipe diameter the minimum is selected 50 mm - otherwise the water in them may boil. Dimensions furnaces with any type of heat exchanger depend on the number of caps, a set of additional functions. If the stove is laid out only for heating, a compact vertical device with dimensions of 1m x 1.2m x 2m.
DIY Construction. Materials
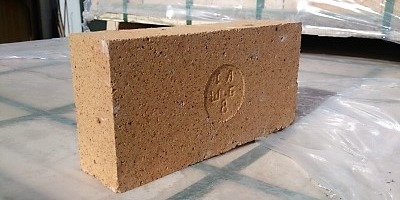
In order to successfully assemble a blacksmith's forge, special attention must be paid to the correct choice of materials - due to the fact that temperatures in the firebox significantly exceed average norms, a regular brick will not work for the device.
It is better to choose the most durable heat-resistant material. based on fireclay, as well as a special masonry mixture from a hardware store.
It is recommended to make mortar for masonry yourself only if you have sufficient experience - small violation of proportions in the future will lead to cracking and depressurization of the masonry.
Important! For the outer walls of the furnace it is not necessary to use highly fire-resistant bricks - this will only lead to a reduction in the service life of the structure. Without receiving good heating, such bricks and mortar will deteriorate quite quickly.
Heat exchanger you will have to buy it in a specialized store - most often, they are made using extra strong steel of sufficient thickness or cast iron. Various additional elements will be required for purchase - latches, doors, hinges, handles and all fasteners, allowing you to connect the heat exchanger to the pipeline.
Tools
When constructing such a structure, it will be necessary to carry out work such as with brick both masonry and with metal in parts. Therefore The appropriate set of tools will be required:
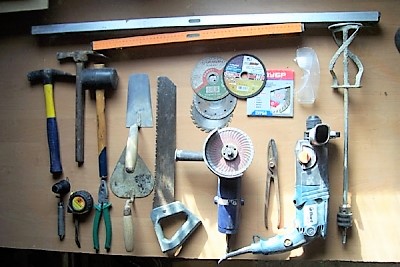
- measuring instruments;
- container for mixing the solution;
- trowel;
- stove hammer-pick;
- rule;
- grinder with cutting discs for metal and stone;
- welding machine.
To protect yourself while performing work, you will need protective equipment - glasses and a mask to protect the face from sparks, dust, special gloves.
Preparing the site
Correct placement of the stove will increase its heat transfer And will reduce the risk of fire hazards. The device is not installed near walls or partitions - the distance to them should be at least 30 cm, the same distance is left from the ceiling.
All surfaces near the device are covered non-flammable material. The location of the chimney is just as important as the possibility of its installation. proper insulation when passing through ceilings. When locating a stove with a water circuit, convenient connection to the heating system must be taken into account.
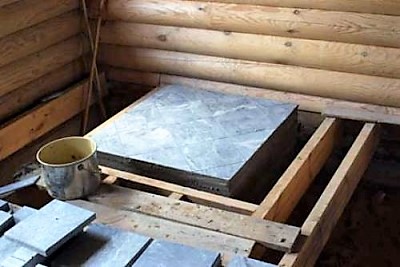
When constructing the device First of all, the foundation is prepared:
- A pit is dug that exceeds the dimensions of the sides of the future device by 15-20 cm.
- A special cushion of sand and crushed gravel of thickness is poured onto the bottom by 15 cm.
- A foundation made of wooden boards is installed on the compacted drainage layer. formwork, which is poured concrete mix.
- The foundation is left until completely hardened.
After the foundation has completely hardened, its surface protrudes 10 cm above the floor level, waterproofing is laid on it roofing felt two layers thick.
Stages of work. Order of construction
The construction of the stove begins with the masonry first row grounds dry, then perform the following steps:
- Under construction lower part ovens - height varies depending on the chosen project.
- It is being laid out bottom of the firebox made of fireclay bricks. No mortar is placed between the layer and the ceramic base.
- Even before the furnace walls were equipped pipes are installed and connected water circuit.
- The firebox and the outer walls of the furnace are erected - between the layer of brick and the heat exchanger there remains gap not less than 15 mm, gap 5-10 mm left between the walls of the firebox and a layer of ceramic brick.
- It is being created second cap also with a mandatory air gap.
- It is laid out and isolated. chimney.

Photo 1. The order of the Kuznetsov stove with a water boiler, consisting of 20 rows. Next comes the formation of the chimney.
For correct connection the heating system is usually used circulation pump. It significantly increases the efficiency of water movement through pipes, and accordingly, the efficiency of the entire system. When working follow a certain sequence:
- Taps are installed at the outlets of the pipes - the size of the diameters outlet pipes not less than 20 mm. When making connections, heat-resistant seals are used - usually asbestos cord.
- From the outlet pipe, branches are made to the radiator system. according to the selected scheme.
- Connects to the inlet pipe cold water outlet and pump to fill the heat exchanger.
- It is mandatory to install expansion tank - it allows you not to drain the heat exchanger when minor repairs need to be carried out.
It is recommended to install it on the outlet pipe thermostat to regulate the temperature and control the intensity of the device.
Possible complications
Lack of experience in performing work sometimes leads to common mistakes:
- Incorrectly mixed solution — the durability of the masonry is reduced.
- The heat exchanger touches the masonry — due to the expansion of the metal when heated, the seams crumble and crack.
- The places where the pipes exit are sealed with mortar - when heated, it will crack and destroy the seal; to solve the problem, a small gap is left where the sealant is placed.
- Lack of air space between the walls of the firebox and the stove — also leads to uneven expansion and destruction of the masonry (fireclay bricks have higher expansion values than ceramic bricks).
Build a device with a water circuit with your own hands quite difficult, therefore, it is better to consult with a knowledgeable specialist during the work process, this will help to avoid serious mistakes.
Useful video
A video that shows in slide show mode all stages of construction of a Kuznetsov furnace with a water circuit.
Rules for safe use of a water heating boiler
To ensure that the appliance with a water heating circuit operates with the highest efficiency, it is recommended monitor compliance with a number of rules:
- Never bake do not melt when the heat exchanger is drained - this leads to its irreversible damage.
- If you light the stove and feed cold water into the already heating heat exchanger, this will cause it to deformation and cracking of metal.

- In the absence of a circulation pump the speed of water movement will decrease through pipes and the corresponding quality of heat transfer.
- To avoid freezing of water in pipes located near external walls, in winter time the circuit uses special antifreezes.
- If you stop the water flowing through the pipes while the furnace is still running, there is risk of explosion of overheated heat exchanger.
If all operating rules are followed, the Kuznetsov stove with a water circuit will provide the highest quality heating premises and long service life all systems.
Comments