Warm your body and soul: a Swedish stove with an oven and a hob as the embodiment of coziness
The Swedish stove, although it was created by Swedish master designers, is now widespread throughout the world.
It is the main competitor of the Russian stove, although they have little in common: completely different sizes, design and heating capabilities.
The Swedish stove can only heat small rooms – from 20 to 35 square metersTherefore, it is not suitable for heating the entire house, unlike the Russian stove.
But the Swedish heating device melts faster, has a large efficiency, uses economically fuel. Most often, such a stove is installed in summer cottages and small private houses (for example, guest houses).
Content
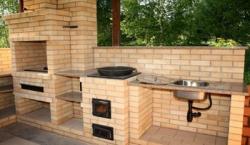
Modern Swedish brick oven
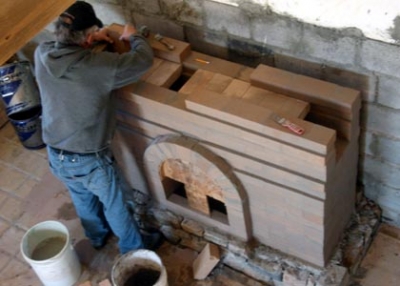
They fold the Swedish stove themselves, without resorting to the help of a professional.
It is important to decide on the layout, choose the location of the future stove, prepare the foundation, and the tools necessary for laying.
Particular attention is paid to quality of the material for making a stove - it must be the highest, designed for high temperatures.
Types of stoves with masonry schemes and ordering
There are 4 known types of Swedish stoves. All of them are equally popular, but have their own characteristics.
The Swedes divide them into the following types:
- on a regular stove with a hob;
- for a system with a stove and oven;
- on the structure with a fireplace;
- for installation with a bench.
All these ovens don't take up too much space (even the one with the lounger), they can be installed between the kitchen and the living room, then you can heat two rooms at the same time. It is important to do it correctly think over the chimney, so that the smoke leaves the room in time, without causing harm to the household. And all Swedish stoves are not too susceptible to the effects of soot and carbon. Dirt, of course, accumulates on the internal surfaces, but not in such large quantities as in a Russian stove.
Fast heating is another feature of any Swedish stove. Already in 15 minutes the room is comfortable. The heat distribution can be controlled. For this purpose, a mode - winter/summer. The stove has a special damper. In cold weather it is opened, the structure heats up entirely. In warm weather the damper is closed, so only the hob and oven heat up.
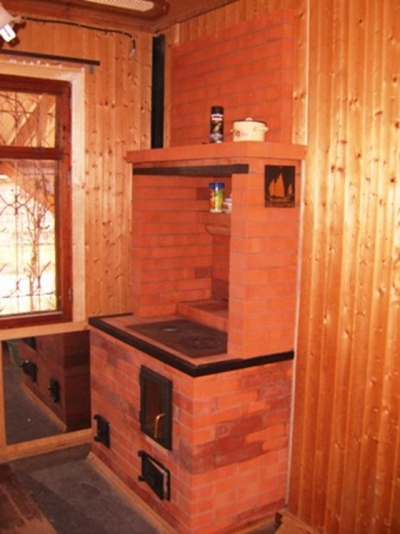
A regular Swedish stove with a hob
A regular stove with a hob is distinguished by its simplicity And compactness — a minimum of parts, nothing extra. This option will appeal to those who do not have a large number of free square meters at their disposal. The unit will take up about 80 centimeters in length and approximately 40 in widthThis is quite enough to heat two adjacent rooms entirely.
Attention! It makes sense to fold the stove dry, without using mortar to check the masonry. This will take much more time, but will allow avoid gross mistakes.
The instructions for laying a Swedish stove with a slab look like this:
- First two rows They are laid out “tightly”, without recesses or cavities.
- From 3rd to 11th row It is necessary to provide doors for the chambers (blowing and cleaning).
- 12th row must be integral.
- From 13th to 16th rows It is necessary to provide a recess for the heating and cooking surface.
- 17th and 18th rows - even.
- Next, it is executed chimney.
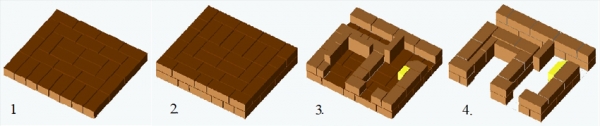
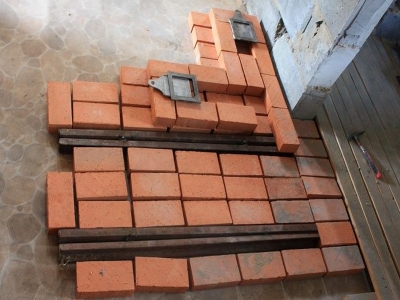
Photo 1. Volumetric scheme of masonry for the first rows, when they start making the blower and cleaning chambers.
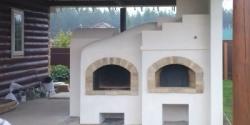
Stove with hob and oven
A Swedish stove with a stove and oven is considered a more complex unit than a system with only a stove. But in everyday life, the first option is much more practical. The hostess will be able to cook several dishes at once - boil something, bake something. If the family is large - you definitely can't do without an oven.
The stove with a hob and oven is equipped with: more rows, than a heating device without them.
The instructions for creating a Swedish stove with a stove and oven look like this:
- 1st and 2nd row make deaf.
- From 3 to 10 The rows provide space for the oven, where the kindling chamber and cleaning section are also located.
- From 11th to 16th The rows leave space for comfortable work with the hob.
- 17th the row is blind again.
- From 18th to 31st The stove is laid out in a way that allows it to function properly: it has an air exchange system and a chimney.
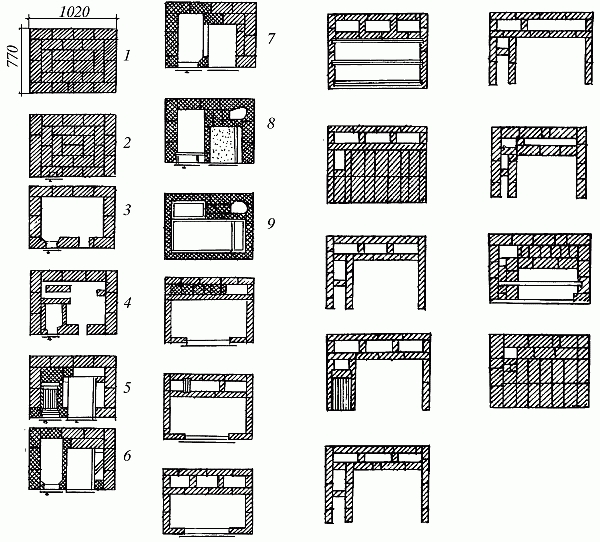
Photo 2. The masonry scheme for a stove with an oven is more complex: more rows, a chimney system appears.

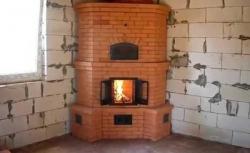
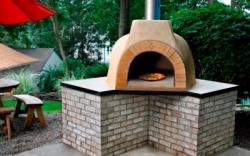
Swedish stove with fireplace
The unit with a fireplace will appeal to aesthetes who value cosiness in your own home or in the country. A fireplace is stylish and expensive. The household will gather around it to discuss the latest news or hold a family council. And how cozy it is by the fireplace on long winter evenings.
But a fireplace is also dangerousIt is not recommended to install it in a house where there are small children.
Attention! Cooking panel will be located in one room, and a fireplace in anotherIf you do them next to each other, it will be at least inconvenient - it will be impossible to cook food while the fireplace is burning.
There is nothing complicated in setting up a stove with a fireplace.
The installation instructions are somewhat similar to the installation of a system with a hob. Only in this case from 3 to 15 The fireplace part is laid out in a row. The lathing is mandatory, so the coals will not scatter.
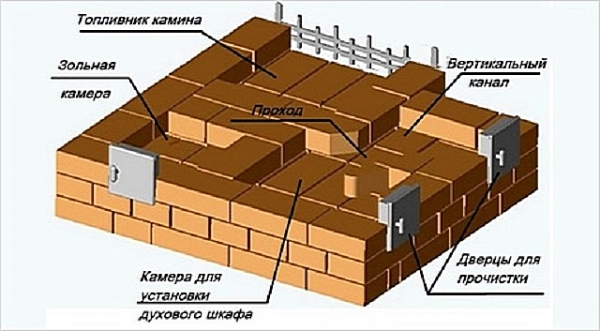
Photo 3. Volumetric diagram of the order, demonstrating the differences between the stove and the fireplace at the initial stage.
Stove with a bench
A stove with a bench is extra bed. It is especially relevant in winter, when the house is cool, but the stove is warm and comfortable. The Swedish bed is not designed for large sizes, so the bed is very compact - maximum 1 meter 80 centimeters in lengthOtherwise, the stove will not work properly - it will not heat the room and the hob properly.
The stove system has a hob and a bench. The latter has no protrusions or armrests. It is a straight surface on which you can put a soft mattress. It is convenient to dry things on the bench. They dry very quickly, do not wrinkle.
Total provided 27 rows. The first and second, as in all previous cases, are solid, without cavities and irregularities.
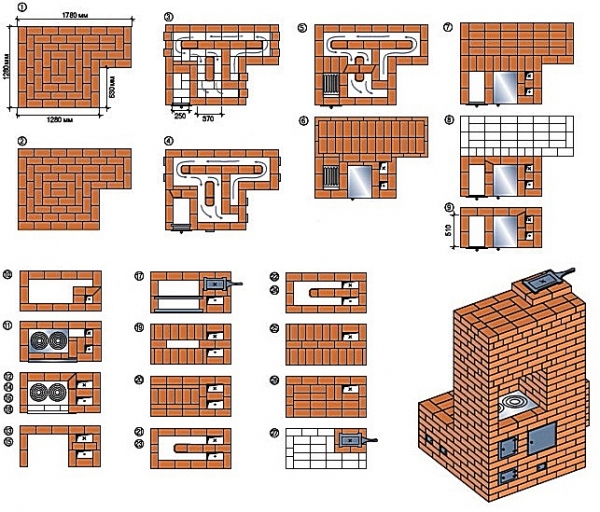
Photo 4. The order of the stove with a bench. The lower right corner shows what the finished structure looks like.
How to build a small stove with your own hands
To create a high-quality stove, you don’t have to be an experienced stove maker, it’s important to understand the intricacies of the schemes and act strictly according to them, without deviating from the plan. Check out the video on the Internet to understand the installation process in detail. The instructions look like this:
- Select place to install the unit - away from doors and windows.
- Create a strong and reliable foundation.
- Put it out waterproofing layer, so that liquid does not flow from the foundation into the stove. A regular one will do for such purposes. roofing felt. It is placed in 3-4 layers, fastened together with nails or a construction stapler.
- Let's get started installation of the stove. Each row must be level. You can't do without a building level here.
- Perform the installation chimney and pipe.
- Dry it oven. This will require about 2 weeks. They start with gradual short-term kindling, gradually increasing the time intervals.
Important! The 1st and 2nd rows must be made solid so that the stove stands firmly in its place.
Selecting a project
In order to choose a stove that will fully meet the needs of a particular family, it is necessary to clearly define which tasks She needs to do:
- If the unit is needed only for cooking, it is advisable to install a regular Swedish stove with a hob and oven, without spending money on unnecessary things - a fireplace, a stove bench.
- If there is not enough space in the room sleeping place, then a stove with a bench is a “must have” for a specific room or house.
- If the system also performs aesthetic function, then you can’t do without a fireplace.
Attention! When laying, follow the diagram. It is not permissible to make adjustments to it., if you have a superficial understanding of stove making. Even an additional third blind row from the bottom will affect the stove from the worst side, not to mention other parts of the system.
The least space will be taken up by a regular Swedish stove, the most by a design with a bench. It is more difficult to assemble a system with a fireplace, there is a rather labor-intensive smoke outlet and air part.
Photo
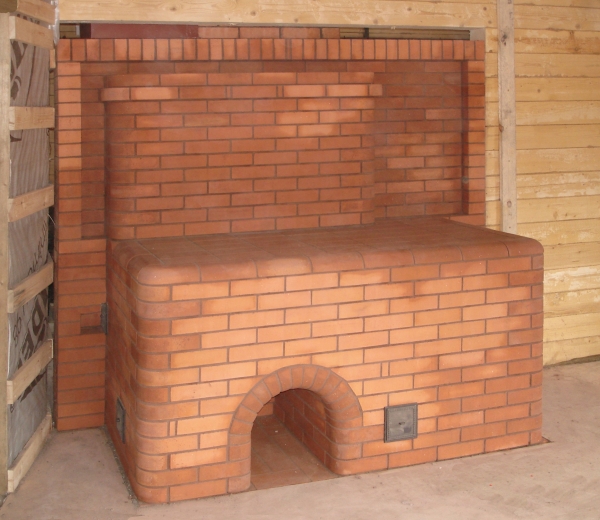
Photo 5. Possible version of a stove with a bench. The sleeping area is not too big, but enough for one person.
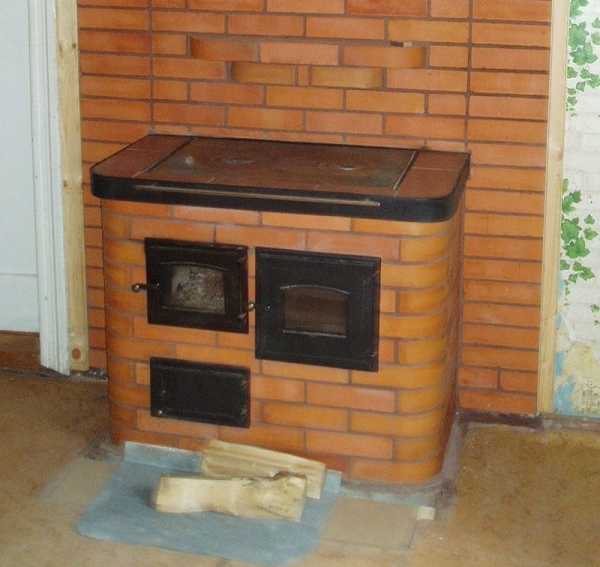
Photo 6. An example of a stove with an oven: compact, practical, easy to assemble and looks good.
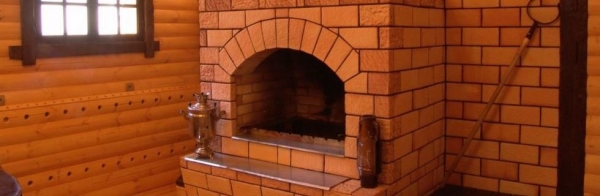
Photo 7. A large and impressive fireplace decorates the stove. But not everyone will find such a project convenient.
How to choose bricks and other materials
To build a good Swedish stove, you need to stock up on the following materials:
- Clay for laying out the stove - you need a special one, not the one you got from the river. The consistency of the solution is thick, reminiscent of thick sour cream, does not spread, and holds tightly in place.
- Fireclay bricks. It is considered fireproof, has no cavities. The product must comply with GOST, all bricks are of the same size, color and structure.
- With metal doors for blower and cleaning chambers.
- With wooden boards.
- With a lattice.
- Three valves.
- Oven.
- With metal corners.
- Hob.
- Red brick for cladding (you can do without it or use clay, special plaster).
Attention. The main thing in laying a stove is brick. Suitable only fireclay. Some experts advise using red as well. But fireclay is considered more durable and resistant to heat.
Preparing the tools
To build a quality stove, materials and skilled hands alone will not be enough. It is advisable to stock up on tools. In particular:

- with a spatula;
- construction mixer;
- bucket for producing solution;
- sieve;
- with a trowel;
- construction stapler;
- with a hammer (regular or rubber);
- with a building level;
- roulette.
It is good to have all the above tools at hand, then the process of laying the stove will be fast and not too time-consuming. It is not necessary to buy the most expensive ones, ordinary ones will suffice.

Pouring the foundation
The Swedish stove is built only on a foundation. The stove has significant weight, a regular floor will quickly deform and the furnace system will fail. The instructions look like this:
- If the floor is already ready, it needs to be dismantled. Cut out hole, which is around the perimeter 10 centimeters more proposed heating device.
- They dig in the ground a hole 70-100 deep centimeters.
- The hole is being filled in crushed stone approximately by 10 centimeters.
- Next is the layer sand in 5 centimeters.
- Again crushed stone (more 5-10 centimeters).
- Construction begins formwork for the foundation. It can be made from old wooden boards. The formwork should rise above the floor by 5-10 centimeters. And the boards will not be needed later.
- The hole is being filled concrete mortarCrushed stone is mixed into it for strength.
- They are installed on the layer reinforcing mesh.
- When concrete will freeze (this will take days 2-3) the final layer of concrete can be poured.
Important! It is necessary to allow the foundation to dry thoroughly before constructing the stove on it. If time permits, it is advisable to wait about a weekThen there will be no doubt about the strength of the foundation.
Making a Swedish stove: the exact order
The exact order of installation of the system is as follows:
- 1st and 2nd row - deaf.
- From the 3rd row The cleaning chamber begins there, and the blower part begins there. Ash and fuel particles accumulate in this place.
- Doors in the 3rd row must be installed as level as possible, it is important to use a level, otherwise they simply will not close and open properly.
- In the 5th row the combustion chamber appears.
- Then the oven is installed.
- From the 6th row The space for the hob is being formed.
- The formation of the air duct system begins.
- The hob is most often placed on the 11th row.
- Next comes the space required for the normal operation of the cooking part.
- Drying chambers are being formed. They begin from 19-20 row.
- From 29 A chimney is usually installed in a row and a pipe is installed.
Important! In each specific case, the masonry scheme differs. This is quite reasonable, because the systems have some differences in their designs. The unit with a lounger is heated somewhat differently than with a fireplace. That is why it is so important to follow the diagrams and make a test layout without mortar.
About the problems
Sometimes already after installation problems arise in the oven. For example:
- Construction "collapsed» sideways. This means that the foundation has not dried out enough. This is a big problem. The stove will have to be disassembled and reassembled.
- Bed does not heat up. This means that the air exchange system inside the stove is installed incorrectly. The stove will probably have to be dismantled and checked according to the diagram to see if everything is done in strict accordance with it.
- The stove or oven is not heating, which means it is open the fire is too far away from them because of the large number of rows. They need to be reduced, for this - disassemble the system.
- The smoke remains indoors — the chimney and pipe are not functioning. This issue needs to be resolved urgently to avoid an accident. The stove is disassembled and checked for compliance with the diagram. The chimney can be very narrow, sometimes it needs to be expanded.
- Bake heats up very quickly and fast is cooling down. It is possible that the wrong and low-quality brick was chosen, which does not meet the state standard. To solve the problem, the entire work will have to be redone.
Do not allow exploitation furnace structure, if the unit is not functioning properlyIt is better to spend time and redo it than to suffer from carbon monoxide or a weak firebox.
Where is the best place to place a Swedish stove?

A loyal friend and an excellent heater is a Swedish stove. It will become an irreplaceable assistant in the kitchen and the warmest item in the house. The unit should be located away from the door and windows, in the place where the kitchen connects with the room.
Before laying bricks it is advisable soak for two minutes — then the process will become more efficient. The brick will not absorb liquid from the solution and will not crack in the process.
Such a stove is not suitable for heating large rooms. Its maximum - 35 square metersBut the Swedish stove is multifunctional: it is used for cooking, sleeping and relaxing, drying clothes and shoes.
Useful video
Check out the video that shows all the stages of building a Swedish stove, from the foundation to the chimney.
Comments
Ideally, the pipe should be 15-20 cm higher than the roof ridge. The height of the pipe above the roof surface also depends on the distance of the pipe outlet from the ridge on pitched roofs.