Bad weather is no longer scary! DIY gazebo stove: diagram, drawing, photo
During the warm season, many people want to relax in the garden or at their dacha.
A summer garden gazebo with a stove will allow you to enjoy any weather get together with friends and before their eyes cook a fragrant shashlik, bake vegetables or, if the design has a fireplace, simply admire the dance of fire in the firebox.
Stoves for a gazebo: diagram and drawing
The furnace diagram should be think ahead, even at the stage of laying the gazebo itself. If the device is erected in an already finished gazebo, it must be taken into account that its base may simply not withstand the weight of the heating device.
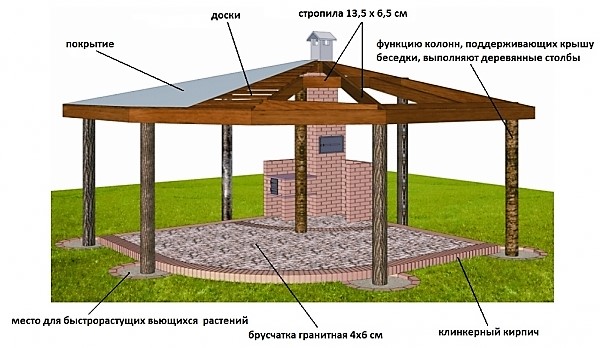
Photo 1. Scheme of an open wooden gazebo with a stove. All the main parts of the structure are indicated.
Since any oven and its components are objects of increased fire hazard, it is necessary to observe the following during their construction rules:
- The gazebo should match the size ovens and protect it from precipitation.
- Foundation the future furnace should rise above the water level during precipitation or spring floods.
- It is envisaged that around the stove, free of furniture and flammable materials, space.
- There must be a firebox around the firebox 3 meters of free space, around the side surfaces - not less than 1 meter.
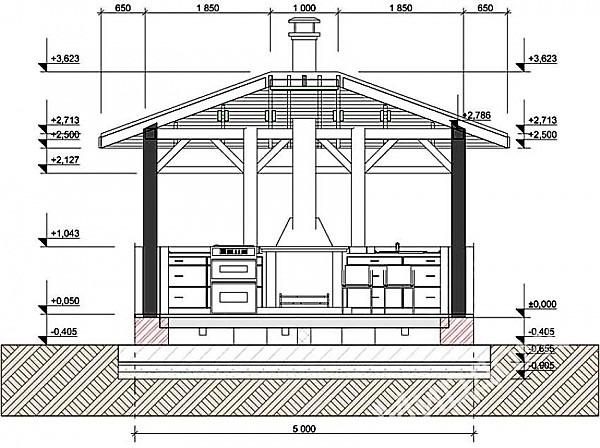
Photo 2. Drawing of a gazebo with a fireplace stove located in the middle of the building. Dimensions are given in millimeters.
- Size the oven depends from its functionality.
- The source of fire is located away from electrical wiring, gas pipes and wooden buildings.
Attention! For construction it is necessary to choose non-flammable materials.
Materials used in construction
- firebrick;
- clay for solution;
- iron sheets for the chimney;
- floor tiles or porcelain tiles to create a heat-resistant coating around the stove;
- heat-resistant sealant for processing the connection of the hood with the pipe;
- furnace elements made of cast iron or heat-resistant steel.
How to build a stove with your own hands
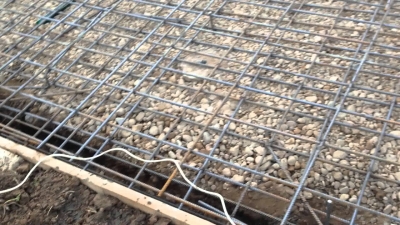
Step 1. Having decided on the location of the stove, they dig pit 1.5 m by 2 m and on half a meter deep. The bottom is covered with gravel or crushed stone to a thickness about 5 cm, leveled and compacted. A metal mesh or reinforcement is placed on top and the pit is filled with concrete. The edges of the pit are fixed with formwork. At first, the hardening concrete is moistened with water. The foundation hardens about 20 days.
Step 2. A cinder block base is laid on the hardened foundation. one or two layers, thereby raising the height of the oven.
Asbestos cement tiles are laid on the cinder block. Now they are building brick walls. They draw the outline of the future stove directly on the foundation.
First and second row brickwork determines the dimensions and appearance of the device. When laying bricks, be sure to check the width of the seams and the evenness of the row with a level or plumb line.
Step 3. When laying, the rows of bricks are bandaged. The bricks are fastened with a solution of clay, sand and cement in the ratio 2:3:1. They are posting 6 rows bricks. In the seventh row make a ceiling, for this they use corners. Their number depends on the size of the stove. On top of the ceiling they put 2 more rows of bricks.
From the ninth row erect an arch. To lay it correctly, use a plywood template. Start laying the template from the lower edges, converging in the center. After laying the last brick, remove the plywood. All that remains is to do chimney, for which a pipe is installed and cemented behind the stove.
Step 4. The finished stove needs to be checked, so it is fired up. Be sure to check the draft and make sure there are no cracks that let smoke through. If everything is OK, the stove is ready.

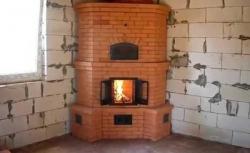
With a fireplace
The design combines both a stove and a fireplace, which makes it very popular. The firebox is quite large, which allows you to load a lot of firewood into it at once. The firebox door is equipped with a device for regulating the air supply, which allows you to regulate the intensity of burning firewood in the fireplace itself.
Size stove-fireplaces 3.5 by 4 bricksRed solid brick is used to construct the frame of the furnace, and fireclay brick is used to create the interior of the device.
- First and second The rows of the furnace have dimensions 5 by 3.5 bricks, they are laid continuously with mandatory bandaging.
- In the third The chamber and ash channels are filled, and the blower and cleaning doors are installed.
- Fourth bandages the third one.
- Fifth closes the doors of the chamber and ash channels. The outer bricks are sawn off from the outside at 45°, reducing size of the remaining tiers by 12 cm on each side. They begin to narrow the ash chamber by adding bricks by 2-3 cm.
- On the sixth they start laying the fireclay core, laying the grate and share every ash channel into 2 parts.
- In the seventh They start laying the fireplace door.
- Next 5 rows They are laid in the same way, with bandaging.
- In the 13th row On both sides, the stove mouth is made towards the smoke channels.
- In the 14th row The fireplace door is being laid out using a metal corner.
- In the 15th row they lay a fireplace mantel, for this they cut off a brick at an angle of 22 degrees.
- In the 16th row part of the firebox is blocked, 1 mouth And partially exit of the second. The brick above the fireplace door is rounded from 1 side and moves forward.
- In the 17th row the smoke channel on the right is completely closed.
- Continue laying with dressing.
- In the 25th row installed longitudinally 2 metal corners.
- Row 26 It is made entirely of red brick. It partially covers the cap and closes off the rest of the space.
- Row 27 are laid out in the same way as the previous one.
Left remove the chimney and the fireplace stove is ready.
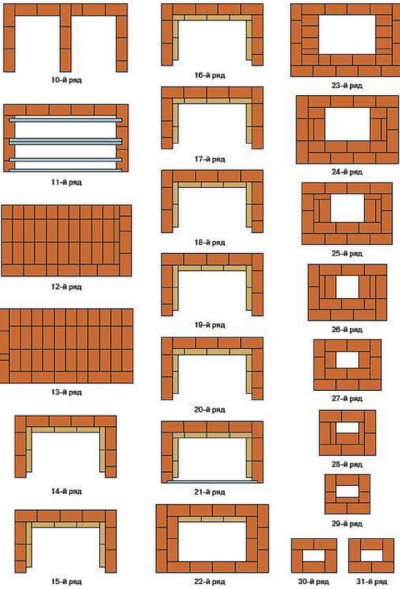
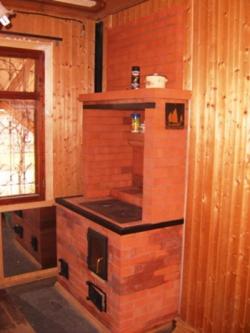
Russian mini oven
What distinguishes it from a regular oven is absence of complex internal chimneys. The bookmark focuses on the hob and oven. Design can be complemented with a barbecue grill, shashlik maker or smoker. Since the device is very heavy, its construction begins with the preparation of a solid foundation, which has the form of a monolithic slab.
Dimensions device - 100 cm by 130 cm. It consists of 30 rows, its construction will require approximately 100 kg of clay, 460 pcs. of red and 220 pcs. of firebricks.
- First The row determines the size and design of the oven.
- From the second to the fifth the fireboxes are formed, doors are installed, columns are laid out, and the entire space is closed with a partition half a brick thick.
- In the sixth grates are installed in the fireboxes.
- In the seventh and eighth The doors of both fuel chambers are installed and the masonry of the main firebox is expanded towards the partition.
- In the ninth They narrow the masonry of the channel leading from the main firebox and widen the partition.
- In the tenth and eleventh The firebox doors are overlapped in rows.
- In the twelfth A cast iron stove with burners is laid.
- It is being formed arch, for which a plywood template is used. The arch is laid out with half bricks, filling the cracks with mortar.
- They are posting ventilation duct and install its valve.
Then they post it themselves chimneyAnd that’s it – the oven is ready.
Photos of finished structures
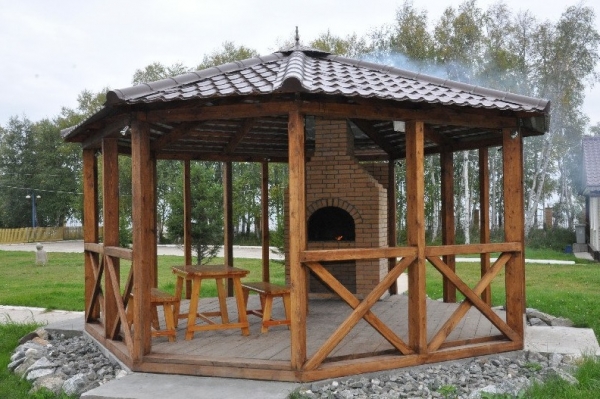
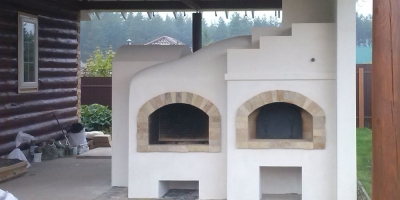
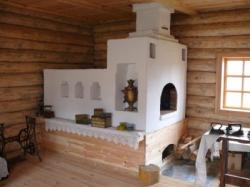
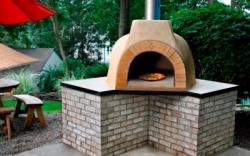
Photo 3. An example of an open wooden gazebo with a Russian mini-oven. Tables and chairs can be installed in the free space.

Photo 4. An example of a gazebo converted into a summer kitchen: a stove, tables for cooking, cabinets, a dining table with chairs.
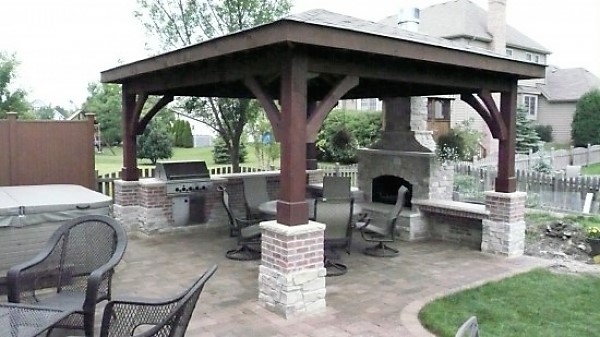
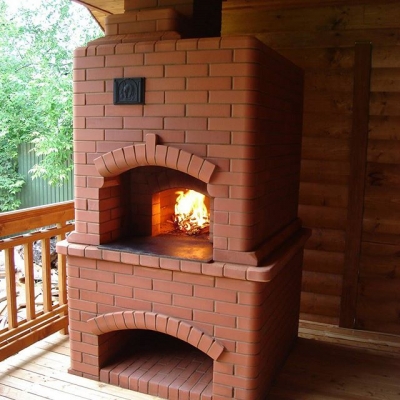
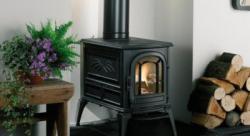
Photo 5. An open gazebo with a fireplace is a suitable place for a summer evening rest for a large company.
Useful video
Check out the video, which shows step-by-step, with photographs, the construction of an open wooden gazebo with a brick structure: a stove and a barbecue.
Construction period
The construction of the device will take approximately 20-25 daysA gazebo with a warm stove or fireplace will become a favorite place to relax and will give you and your guests many pleasant impressions.

Comments